In the previous article, we shared a self-developed WPS3 object storage plug-in, which is mainly based on the WordPress website platform combined with Amazon Cloud S3 object storage space to improve the speed of websites and static separation. In this article, we will introduce the specific operation process, how to combine the Amazon Cloud S3 storage space we applied for with the WordPress website to achieve static separation acceleration.
Registered account
First, we need to apply for an Amazon cloud account( Free registration application )。
Recommended reading
 Lao Zuo personally tested the process of applying for free Amazon Cloud AWS 12 month account qualification (verify and activate the complete tutorial)
Presumably, many of us have heard of Amazon ECS, database, cloud storage, and machine learning applications. However, because AWS Amazon ECS only provides English, we have some difficulties for many friends who need to buy it. We may have heard that Amazon AWS has the qualification to apply for free accounts, and it is generous in the industry [...]
Updated: 2022/7/18
read the whole passage
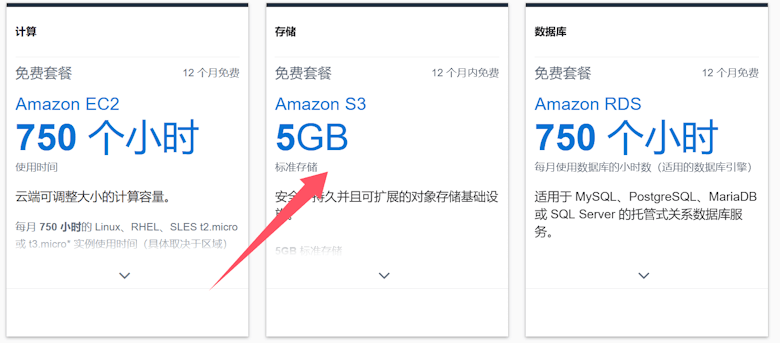
If we register as a new customer, we will give a free 5GB of storage space, as well as 12 months of EC2 specified plan package ECS, including 100+cloud service products such as lightweight servers.
Open bucket
After applying for the Amazon cloud account, we can open the bucket.
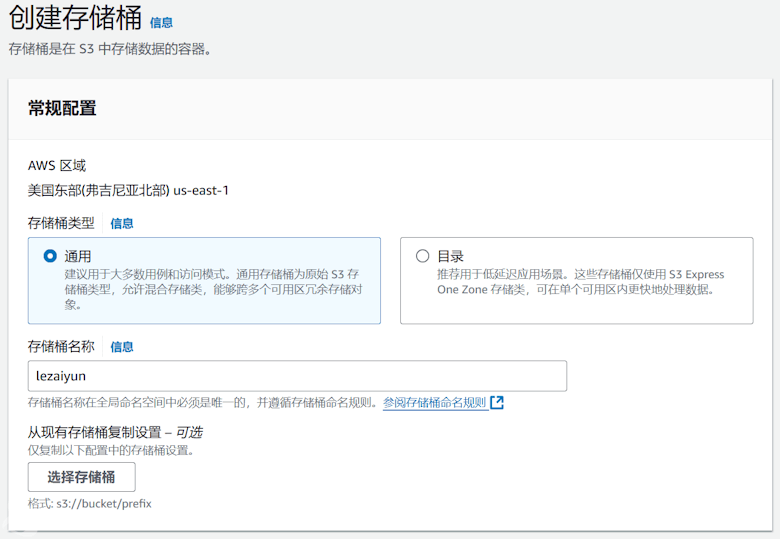
After logging into the Amazon Cloud background, we can switch the machine room in the upper right corner. If we are in the machine room, the S3 storage created is in the area. As shown in the figure above, we need to set a bucket name.
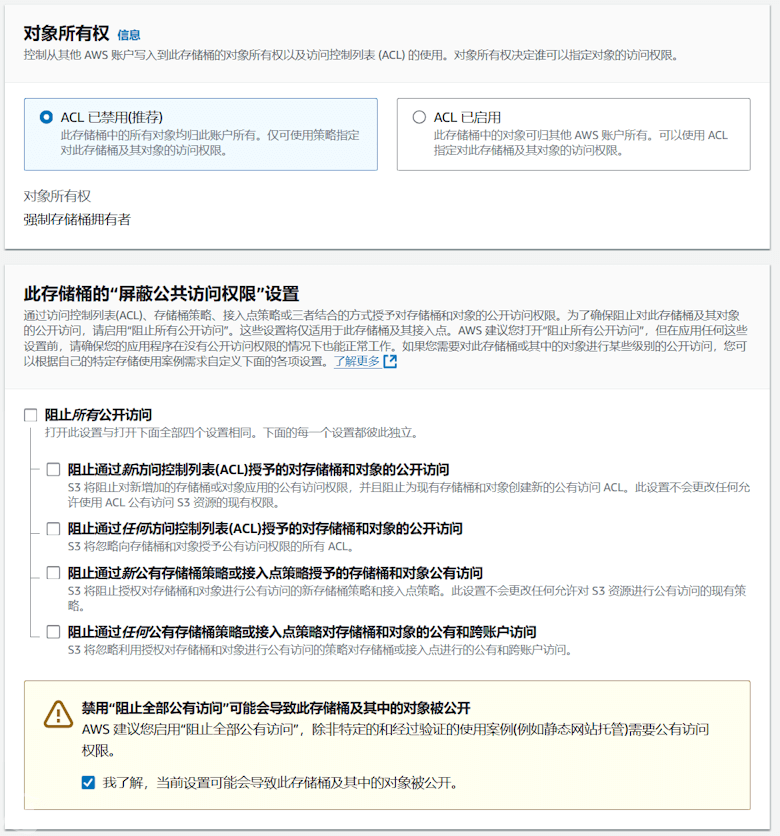
Then we set bucket permissions, and we do not limit them here.
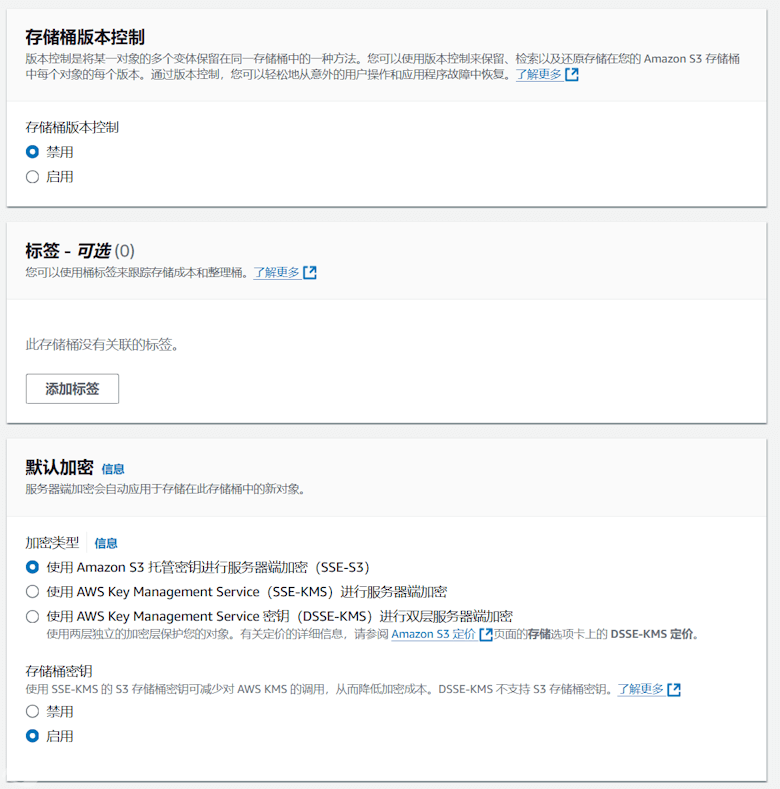
Other defaults are OK, and are not set.
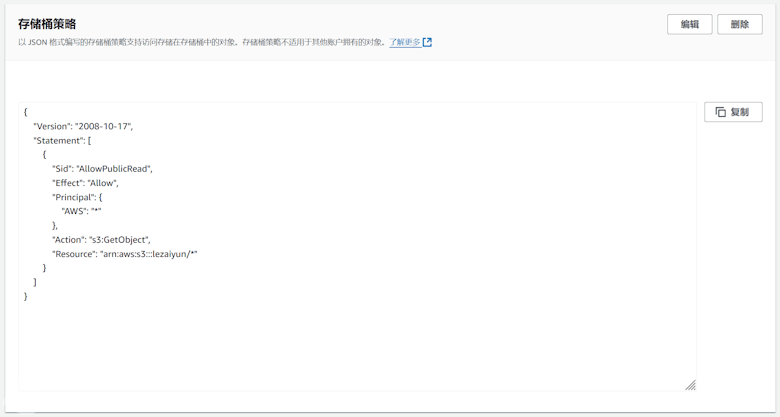
Our step is still critical, otherwise the static file you uploaded cannot be opened for viewing. You need to add settings in the bucket policy of permissions.
{ "Version": "2008-10-17", "Statement": [ { "Sid": "AllowPublicRead", "Effect": "Allow", "Principal": { "AWS": "*" }, "Action": "s3:GetObject", "Resource": "arn: aws: s3::: bucket name/*" } ] }
Notice to change the bucket name to our current bucket name.
Security Credential
We need to obtain the AK and SK of the current Amazon cloud account.
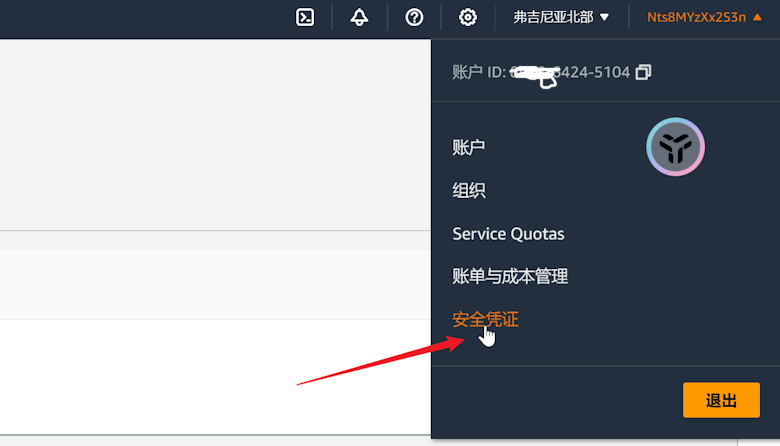
As shown in the figure above, in the security certificate.
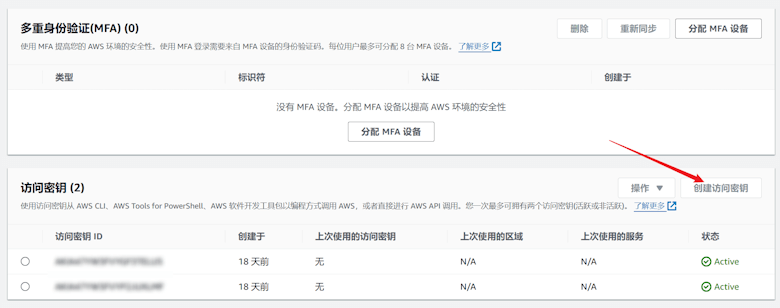
Create an access key, which we will use later.
Plug in configuration
Plug in download: Baidu online disk / Quark reticle
We can activate the plug-in in WordPress.
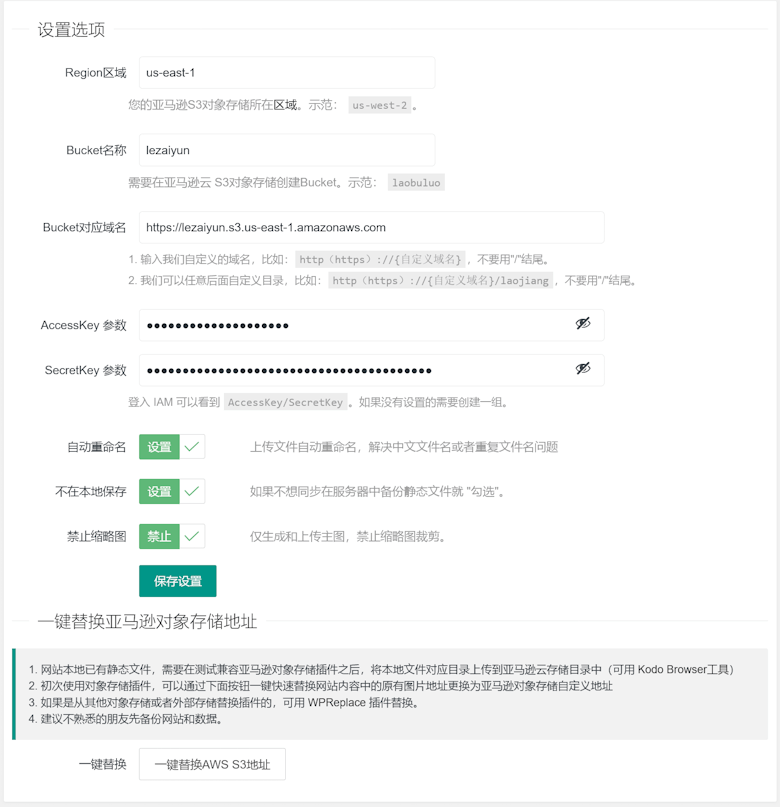
As shown in the figure above, fill in the corresponding text with the information about the S3 bucket we have opened. The domain name of the corresponding bucket is provided by Amazon by default.
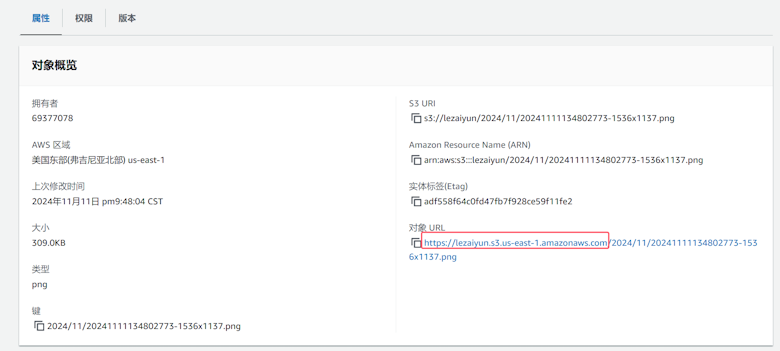
The object URL can be seen according to our bucket name and different regions. Here we can see the corresponding file by randomly transferring a file to the bucket. For example, what I have to fill in here is“ https://lezaiyun.s3.us-east-1.amazonaws.com ". Of course, we can also customize our own domain names.
After that, we can test whether the pictures or attachments uploaded when editing WordPress background articles can be uploaded to S3.
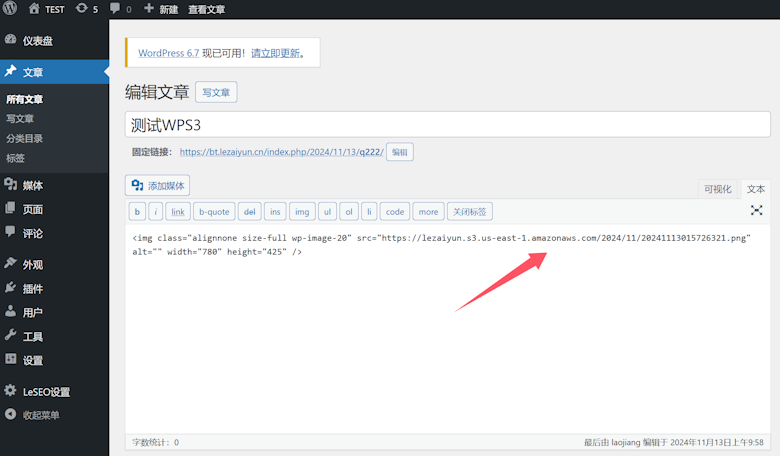
In this way, when editing WP articles, we can separate attachments or images from the website server into a separate S3 space. The free 5G storage of general websites is enough.
Finally, if our new website directly uses the WPS3 plug-in, there is no problem. If it is an old website and we want to move the previous static files to S3, we can move the local images to S3 through file management, and then we need to do a batch replacement to replace the local URL with the S3 URL. In this way, we can realize the static separation of WordPress.


