It should be several months ago that a netizen modified the password generated by the default system when installing the Windows system operation project with Vultr VPS host. It was his clever brain that memorized the password, and finally forgot and could not log in remotely. Although it didn't help to solve the problem at that time, I always remember and just learned from this experience“ Vultr VPS installation built-in Windows 2012/2016 system process and experience "I also tried to forget my password and find a way to recover and reset it.
In fact, the Vultr official also provides solutions( https://www.vultr.com/docs/reset-windows-server-administrator-password )In this article, Lao Zuo also solved and recorded the problem according to the methods provided in this article. The methods in the article refer to the official ones, but all the screenshots are recorded by their own operating experience.
First, preparations
The important thing is still to back up the data. Although I can solve this problem this time, it is inevitable that some netizens may refer to the problem. Therefore, it is recommended that we take a snapshot backup first and then back up the data. Of course, if we have better methods and solutions, we can try to solve them ourselves. According to the official documentation, the 2012 and 2018 systems are supported. It is also possible for me to solve the problem in the 2016 system.
Second, install Finnix
1. Finnix download address
Official download address: https://www.finnix.org/Download
Here I use Finnix 111 version, download address
Finnix 111: http://www.finnix.org/releases/110/finnix-110.iso
2. User defined upload
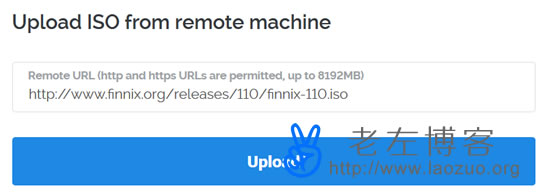
We need to customize the upload ISO. After uploading, we can use Finnix to start.
3. Start

Select finnix, and then click attach iso and reboot.
Third, set and reset the remote password
1. Connect to the server through the View Console for command operations.

Enter the system to see the upper interface, and then enter.

Check the disk condition through the fdisk - l command. The data we need to see here is in/dev/vda2.
2. Mount
mkdir /mnt/win
mount /dev/vda2 /mnt/win

But an error is reported. Let's solve it.
ntfsfix /dev/vda2
mount /dev/vda2 /mnt/win
Let's mount the ntfsfix disk first.

3. Clear Password
cd /mnt/win/Windows/System32/config/
chntpw SAM

Then I enter 1 Enter here to clear the password, and then enter y to write.
4. Clear mount
cd ~
umount /mnt/win
Clear the mount, and then go to the panel to remove the attached finnix.
Fourth, reset the password
After restarting, we can log in to the View Console without password. We can set a new password at this time.

Then we can reset the password.
To sum up, the setting process is relatively simple. After all, it can be set according to the official tutorials. However, we still need to take a snapshot backup of important data. Because there may be various uncertainties in any operation.