(1) Determine whether the broadband has an ipv6 address, and enable ipv6 address allocation on the istore
1. Confirm whether ipv6 is enabled
The simplest way is to ping 240c::6666 If it is connected, there is an ipv6 address
2. Configure ipv6 on iStore
① Set wan port
Click: network → Interface → Wan interface → edit → advanced setting
Get IPv6 address set to automatic ; IPv6 allocation length is set to disabled
② LAN port setting
Click: network → Interface → Lan interface → edit → advanced setting
IPv6 allocation length: select sixty-four
Then select: DHCP Server → IPv6 Settings
RA Service: Selection Server mode
DHCPv6 service: set to Server mode
NDP Proxy: Set to disabled
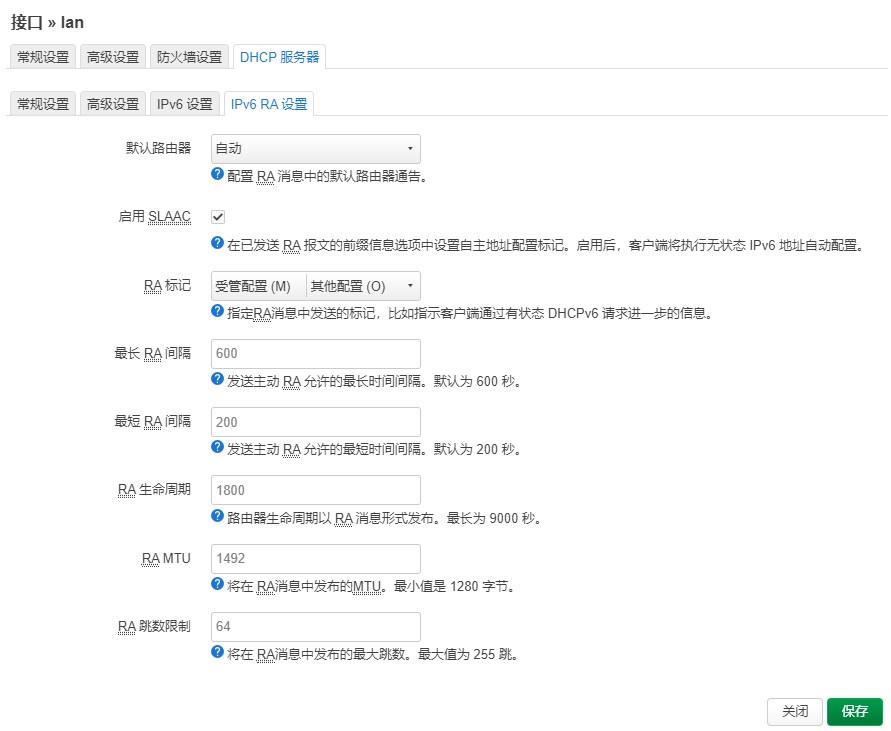
IPv6 RA settings are as follows

3. Test and unexpected solutions
By now, istore should have successfully enabled ipv6 dhcp. Visit this website on devices that support ipv6 in the home network: https://ipw.cn/
If the ipv6 address appears, it is successful
If the ipv6 address does not appear, try the following two methods:
First: Manually set the IPv6 DNS server address of the device to: 2400:3200::1 2400:3200:baba::1
The phone can also be set to 223.5.5.5 , this is a dual stack address, which can be parsed in v4 and v6
Second: istore → network → Global Network Options
Clear IPv6 ULA prefix
(2) Configure DDNS
1. Register the cloud resolution server
open https://dynv6.com/ , register an account yourself. Note that this account needs to be authenticated at your registered email address. During the authentication process, you may have to solve network problems yourself.
1. After successful registration, click My Zones , create a new address
2. Get it in instructions after completion token
3. Configure DDNS
Go back to the istore interface, find the dynamic DNS in the service, and select Add New Service
After filling, save and run it. Just remember to start DDNS
After a while (10 minutes at the latest), go to records on dynv6.com and see the ipv6 address corresponding to this domain name. That means DDNS resolution is successful
(3) Soca Set Port Forwarding
1. Download in the istore store Socat
Open Socat and check Enable
New port forwarding: newly added -- Enable --Agreement Port forwarding -- IPv6 -- TCP
Here we will first explain the listening window and the target port
Listening port , Yes Internet port
Either IPv4 or IPv6 can be selected as the target protocol. It is recommended that IPv4 be convenient
Target Port , Yes Intranet port
This is fixed. Generally, the default value for not displaying the IPv4 address is 80. What is displayed is what, for example, Qunhui is 5000, and jellyfin is 8090.
(4) Lucky port forwarding
1. Add forwarding rules
two Random name --Select tcp6 udp6 -- Listening port It is the Internet port -- the target address can be filled in directly IPv4 Address-- Target Port Is the intranet port
3. Firewall Automatic release open
4. If you cannot access after adding, you need to manually add custom rules, such as the release port is eight thousand You need to add ip6tables -A INPUT -p tcp --dport 8000 j ACCEPT
Original text: link modify

