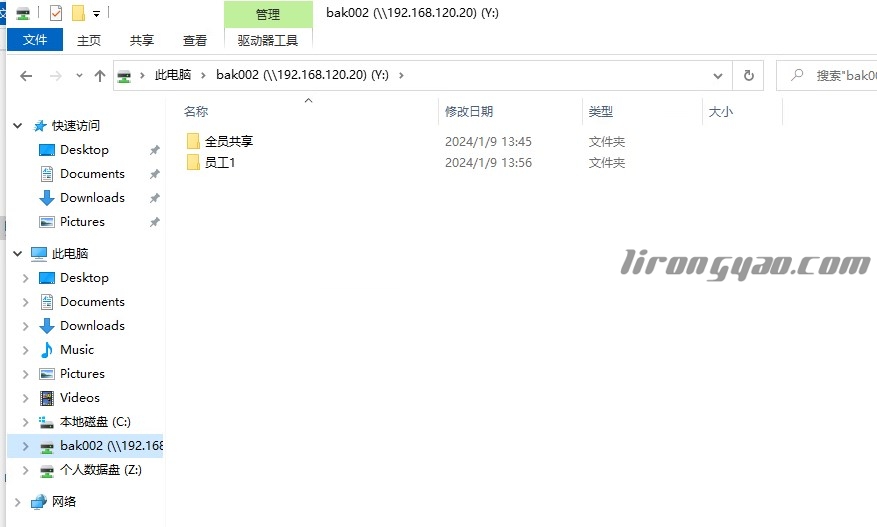
A new year, a new beginning, everyone, I am the glory, long time no see.
Next, after the NAS joins the domain, the PC will automatically allocate a network mapping disk in my computer after logging in to the system. The file permissions will be allocated and set by Qunhui Management.
Requirements:
1. NAS is required to join the domain environment,
2. Require domain users to access the network mapping disk,
3. NAS centrally manages directories and permission allocation,
4. The mapping disk automatically appears in my computer for domain users without manual operation,
5. Domain users can share directories.
preparation:
1. We have now built the domain environment.
Domain: dwyx.local
DNS:172.18.10.10
2. The NAS system is ready.
Address: 192.168.12.20
Step 1: Open the domain server
1.1 Create user organizations in the domain environment.
Right click dwyx.local - New - Org Unit - Name (enter the organization name, for example: Administration Department) - OK
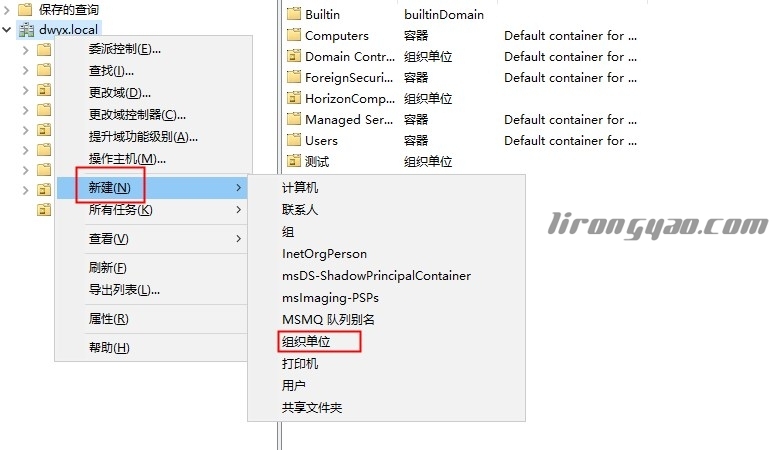
1.2 Create a new group in the Administration Department
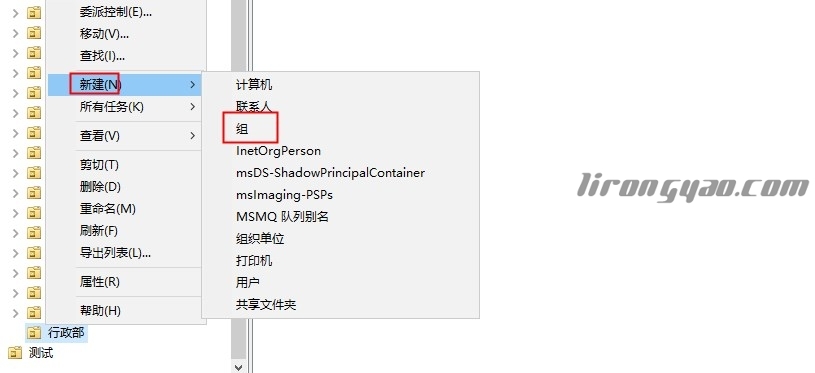
Right click Administration Department - New - New Object - Group (enter group name: Administration Department) - OK
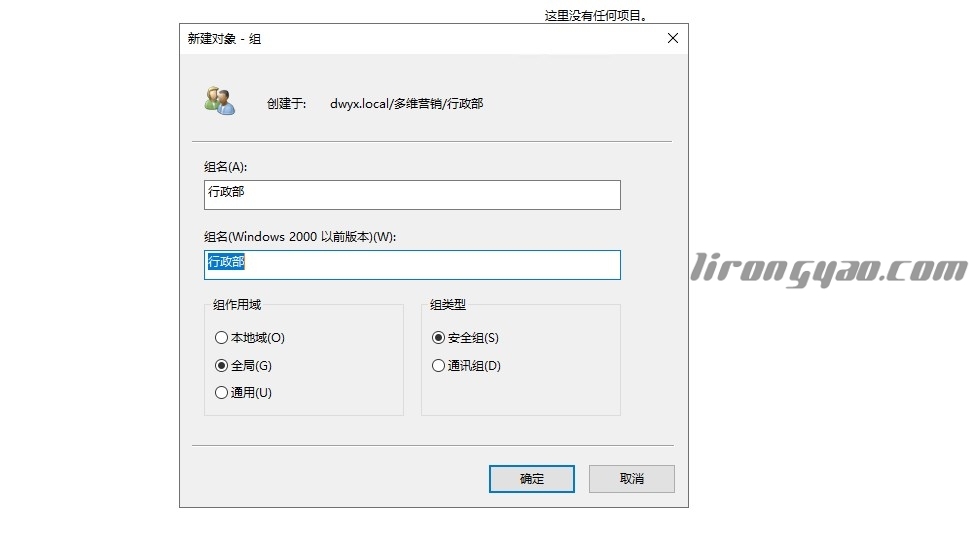
1.3 Default selection of group scope and group type as shown in the figure
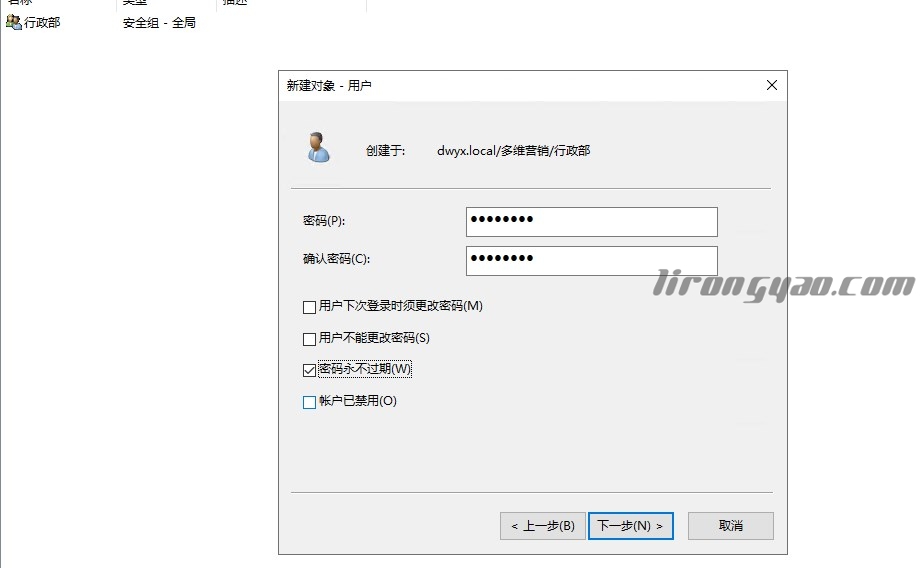
1.4 Right click Administration Department - New - New Object - User (enter user: test02) - Next - Enter Password - Next - Finish, and check others according to your needs.
1.5 Right click Administrative Department Group - Member - Add - Enter test02 - Check - OK (as shown in the figure)
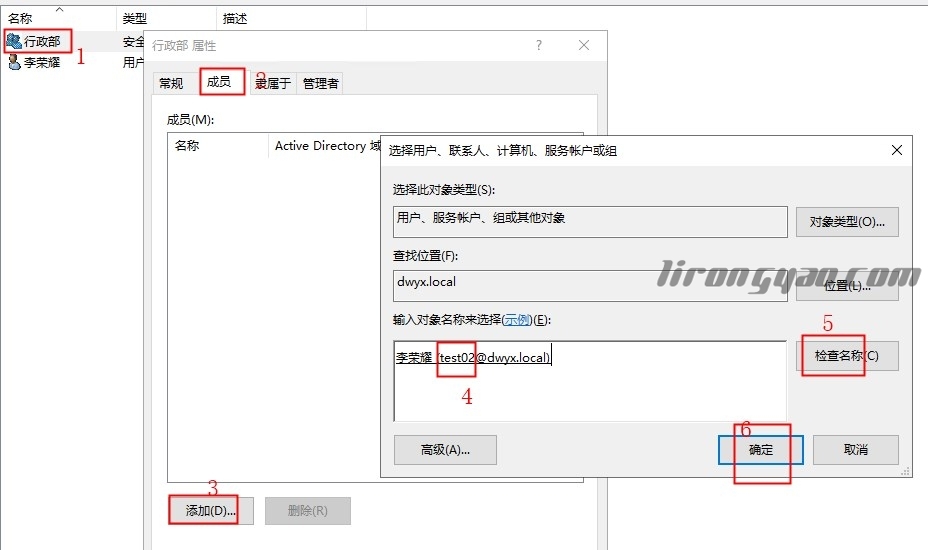
At this point, users and groups have been established.
Because I am in the cloud desktop system and need to add users to the desktop group.
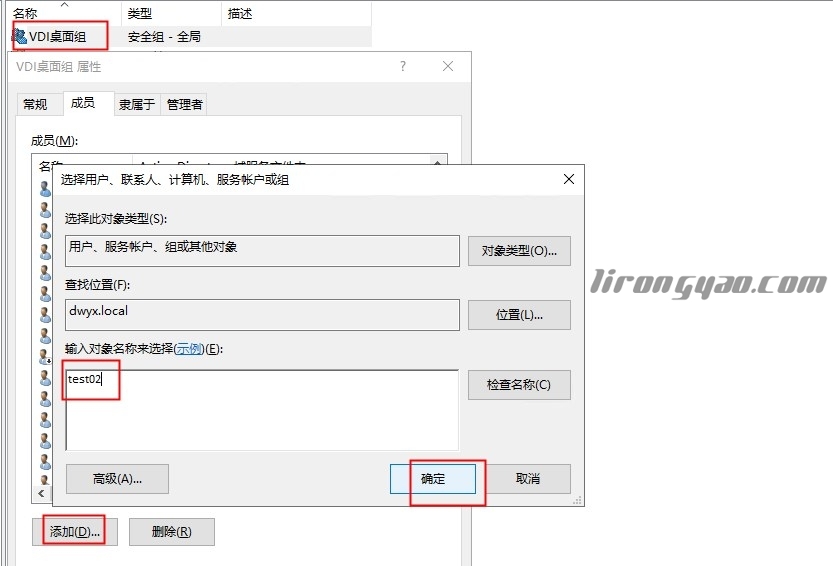
Step 2 Log in to Qunhui NAS server
2.1 Open Control Panel - Domain/LDAP - Click Join (Domain)
Server type: Automatic detection
Server address: 172.18.10.10
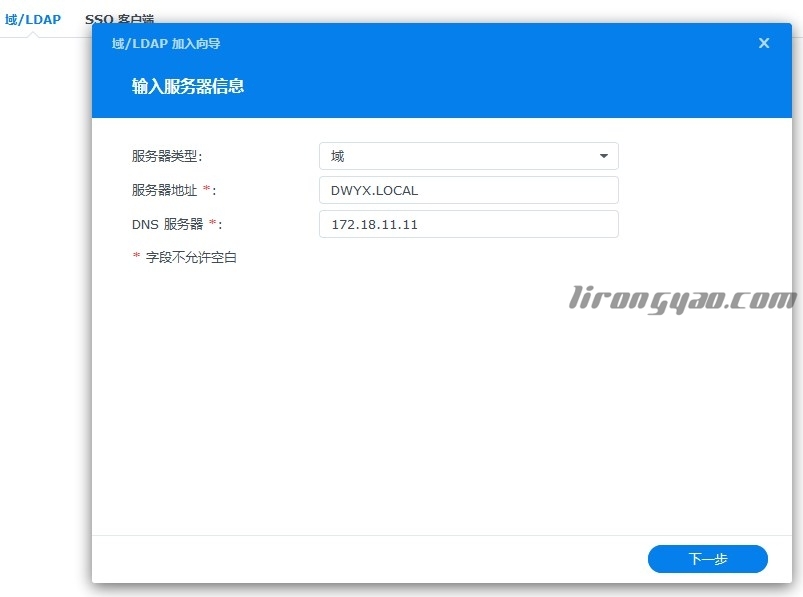
2.2 Enter the domain information and click Next to detect
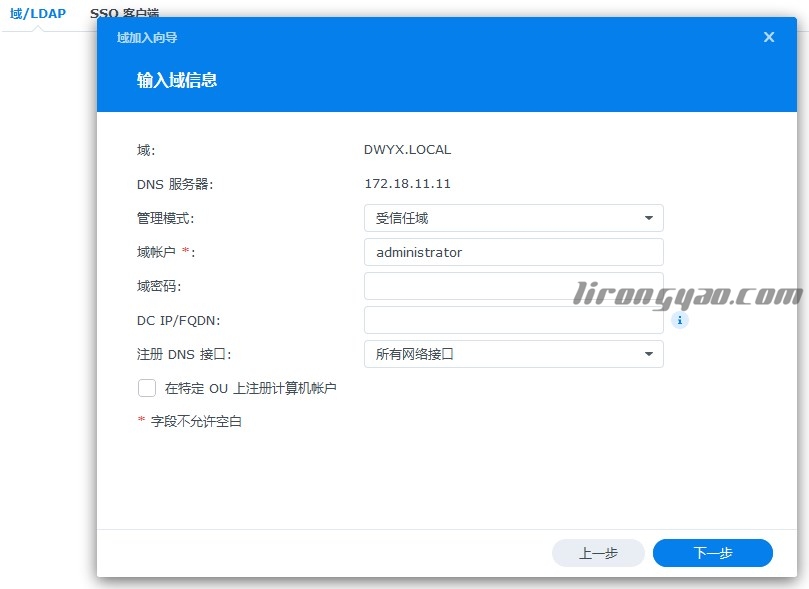
2.3 If the detection is successful, click Next and select Domain Application to enter the domain.
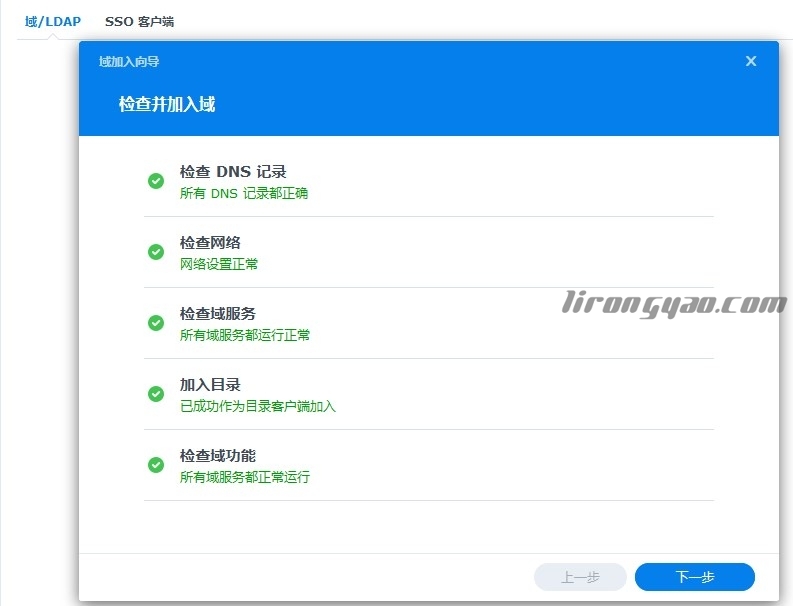
2.4 At this time, the domain user list has been changed.
Create a new shared folder: Control Panel – Shared Folder – New – File Name (fill in bak002), as shown in the figure
Bak002 can be used to share a directory for all employees or for departments. It can be set as a shared directory for all employees according to their own needs
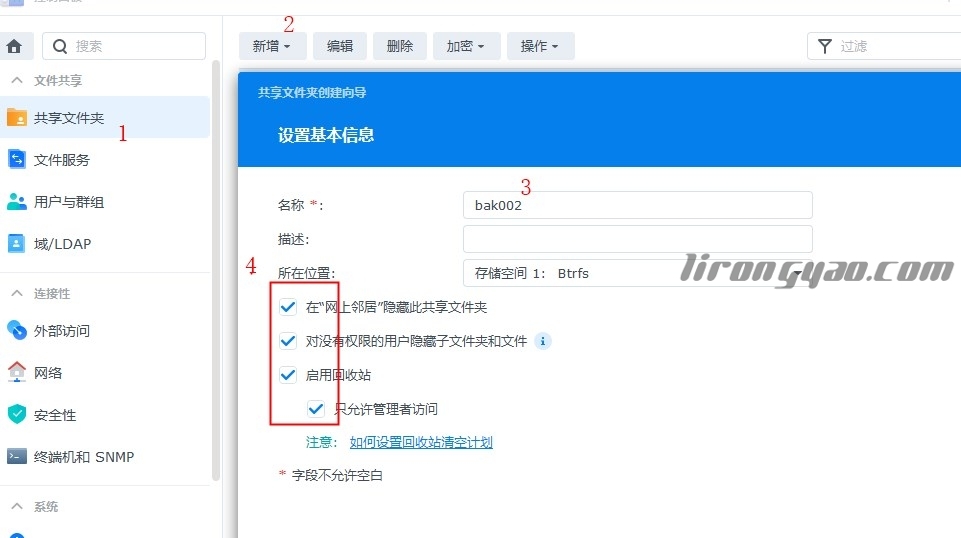
2.5 Encrypt the shared folder. Skip it directly. Next,
2.6 Advanced configuration can be set according to your own needs,
2.7 Confirm the settings and click Next,
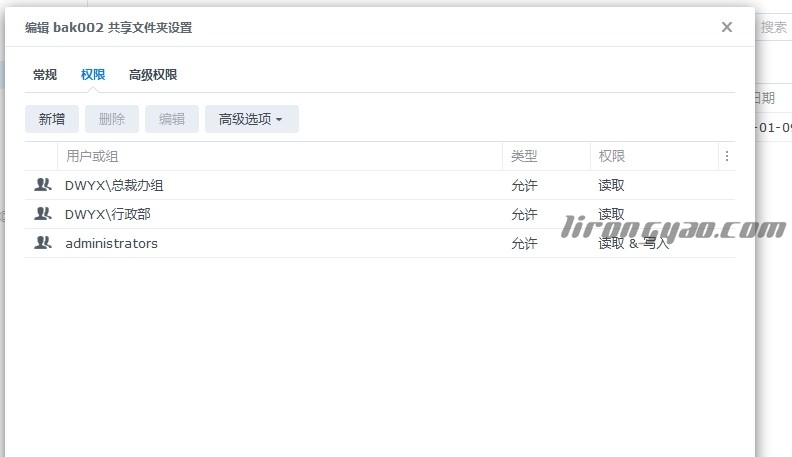
2.8 Configure user permissions. Select the domain group here,
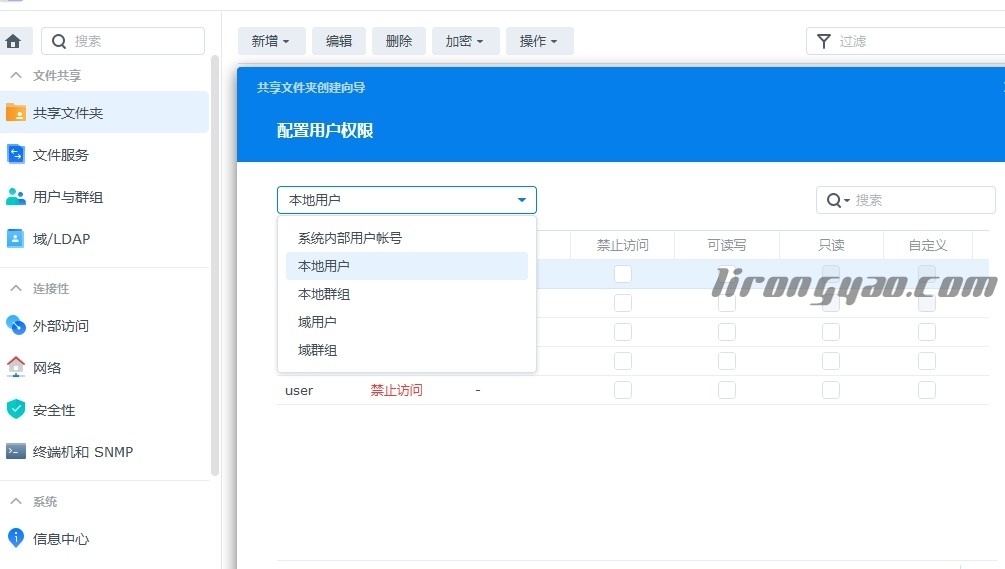
At this time, all department groups will be listed. We only select the groups that need to access the shared folder, such as the Administration Department, the President's Office, and so on. The permissions are only read-only, and then save.
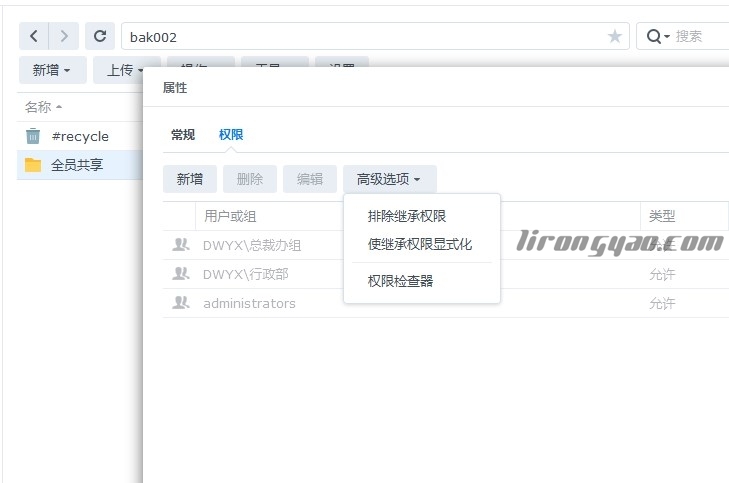
2.9 Go back to the groupware desktop, click file station, select bak002 shared folder - Add - New folder - Name as shared by all, right-click the shared folder by all - Properties - Permissions - Advanced Options - Display inherited permissions. Here, two departments access by default. If there are other departments, add them. By default, we give them the permission to read. This directory can be seen by all colleagues.
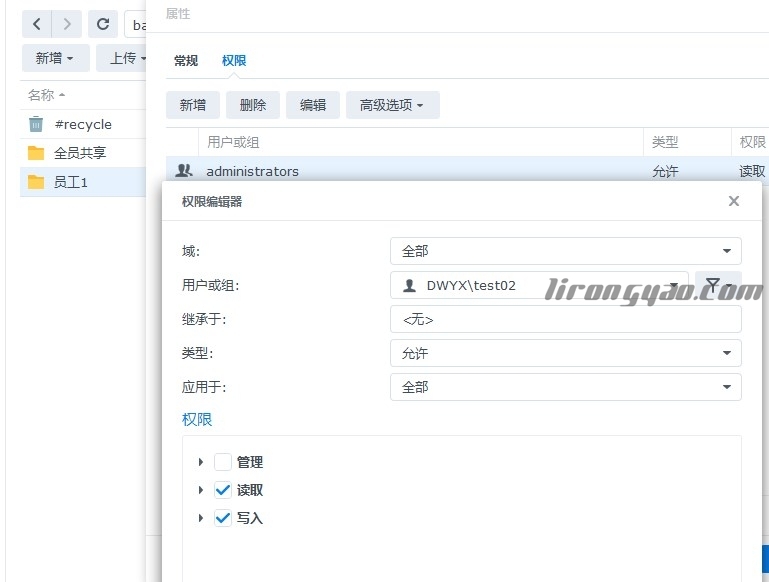
3.0 Then we create a folder under this bak002,<<Employee 1>>. By default, only<<test02>>can access and view the folder, but no one else can see it. The permissions of Employee 1 are all permissions.
3.1 Multiple employees establish directory assignment permissions by analogy.
Step 3: Open the SMB service
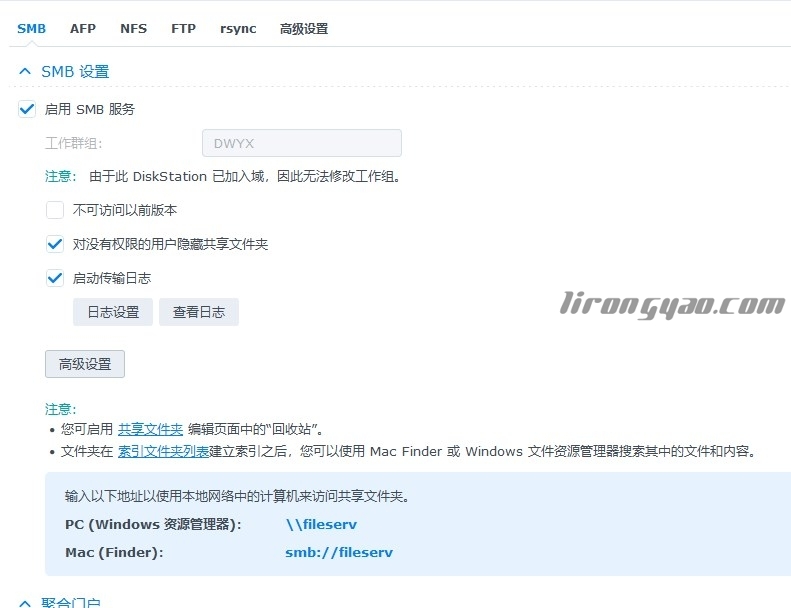
3.0 Enter the Qunhui NAS control panel - File Services - SMB-SMB Settings - Enable SMB services.
Step 4 Publish the mapping disk in the domain policy
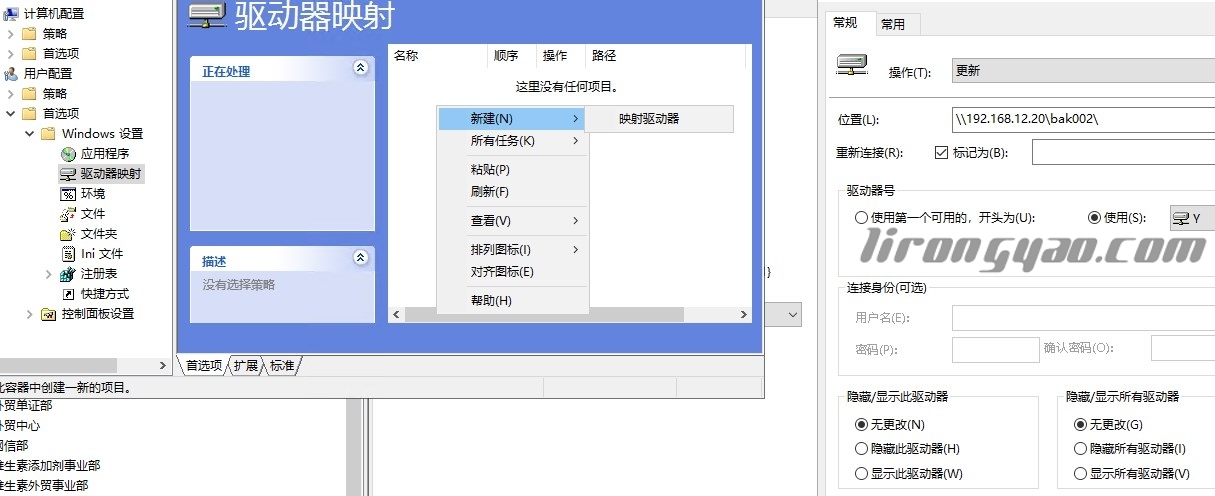
4.0 Our NAS address is 192.168.12.20, so when accessing the mapping disk of the network disk, it is 192.168.12.20 bak002 .
Here, take the Administration Department as an example. Enter the domain server, open Group Policy - Find the Administration Department - Right click - New - Create a GPO in this domain - Enter the name of the Group Policy (such as the Administration Department Policy) to confirm.
4.1 Right click Edit Policy - User Configuration - Preferences - Windows Configuration - Click Disk Mapping - Right click Blank - New - Map Drive as shown in the figure
Finalize.
Open CMD and update the policy
gpupdate /force
Finally, log in to the computer with domain user test02, and automatically mount the mapping disk on the secondary computer. If the mapping disk is not successfully mounted, the client updates the policy.
