When using the UNAS system, if there is no RAID, in some cases, when a hard disk has a bad track or needs to be replaced with a larger capacity hard disk, or needs to be replaced with a solid state, the hard disk needs to be replaced.
In addition, if there are some services running in NAS at this time, we must ensure that the path of the replaced hard disk cannot be changed.
This article is actually based on“ Replace the hard disk in the volume group when Linux uses the volume group ”However, many operations in the UNAS system can be directly completed on the web console, so a separate article has been published.
Don't talk nonsense. Here are the specific operations
1. Insert a new hard disk
First of all, of course, insert the new hard disk into the server.
After inserting the hard disk into the server, we can see the new hard disk in the "Disk Inspection" in the "Control Center" of UNAS.
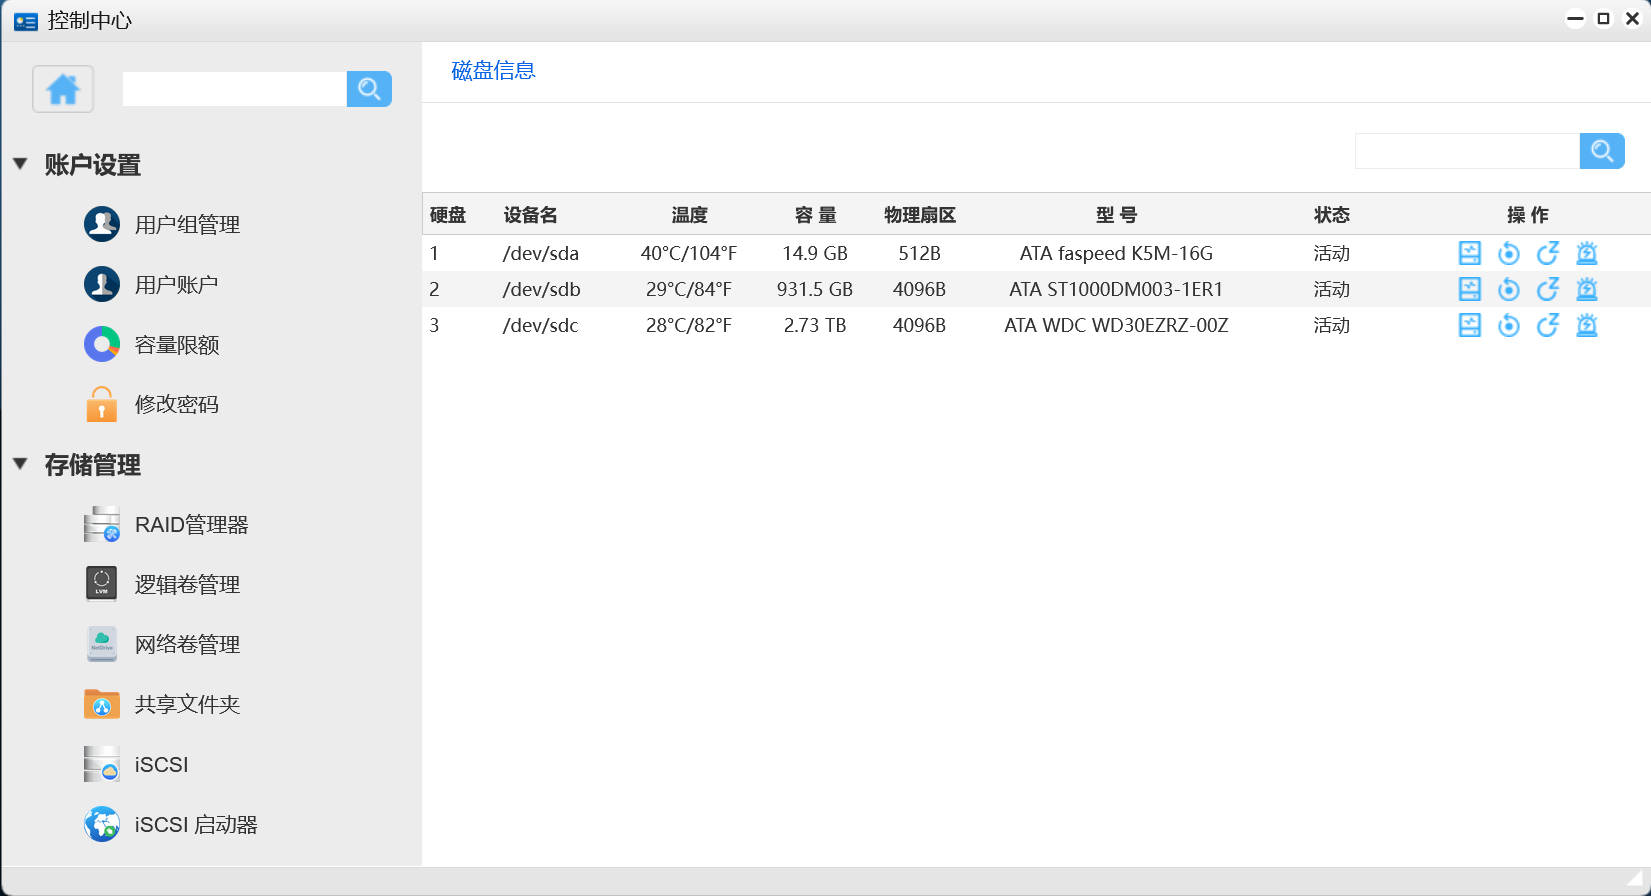
The "/dev/sdc" here is the new hard disk I inserted
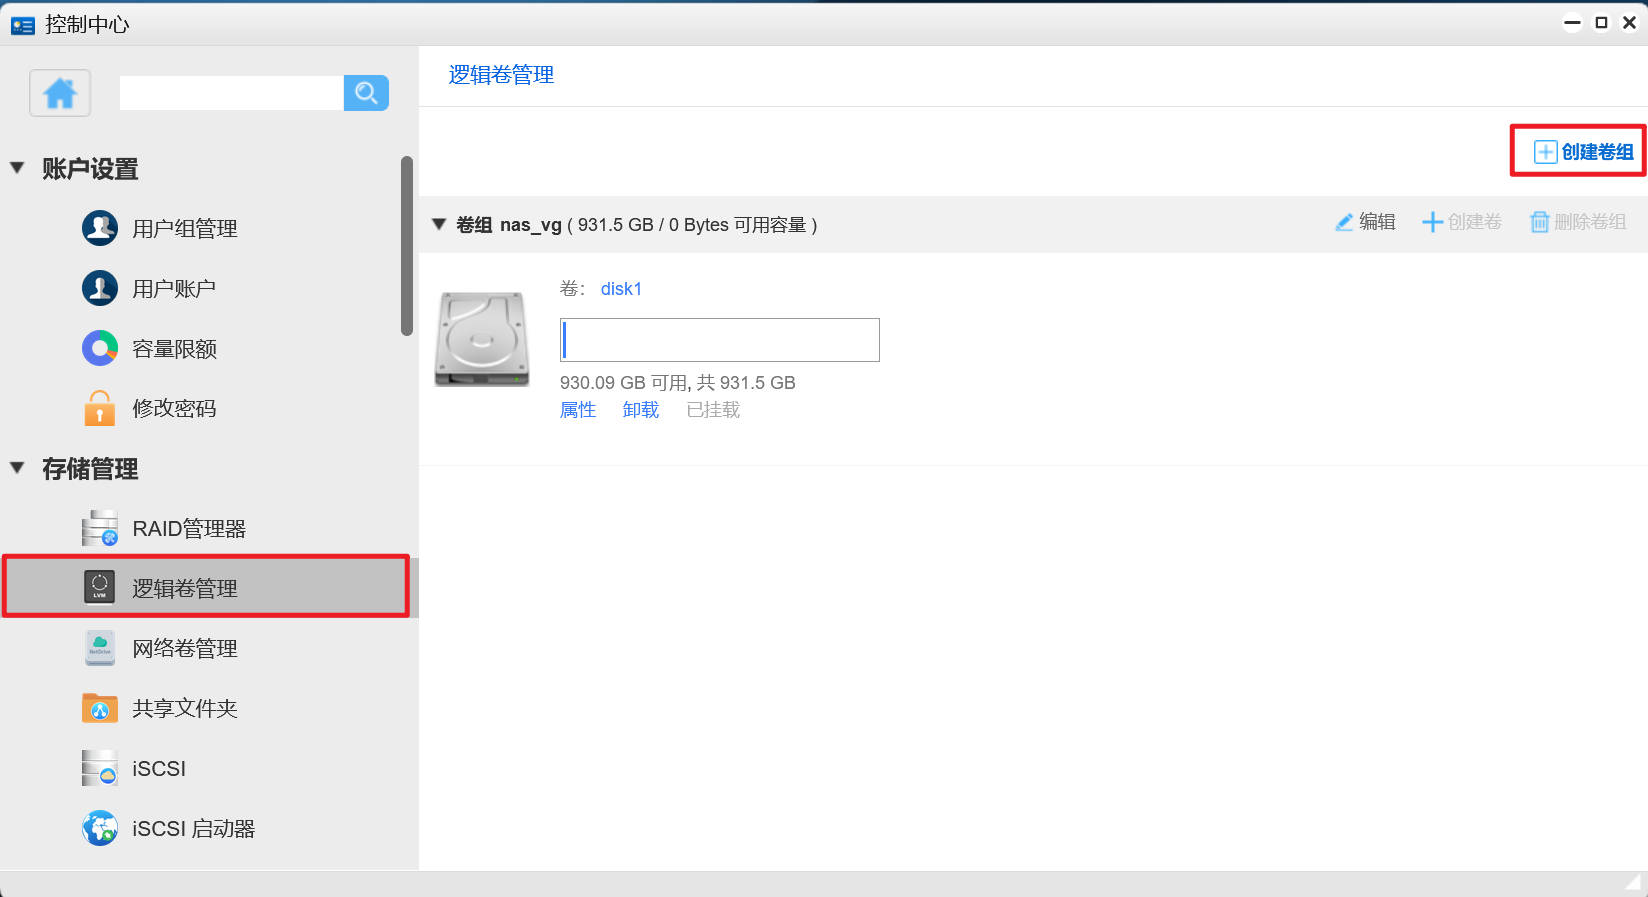
2. Create a temporary volume group
Create a new volume in Logical Volume Management in the Control Center of UNAS, and select the new hard disk.
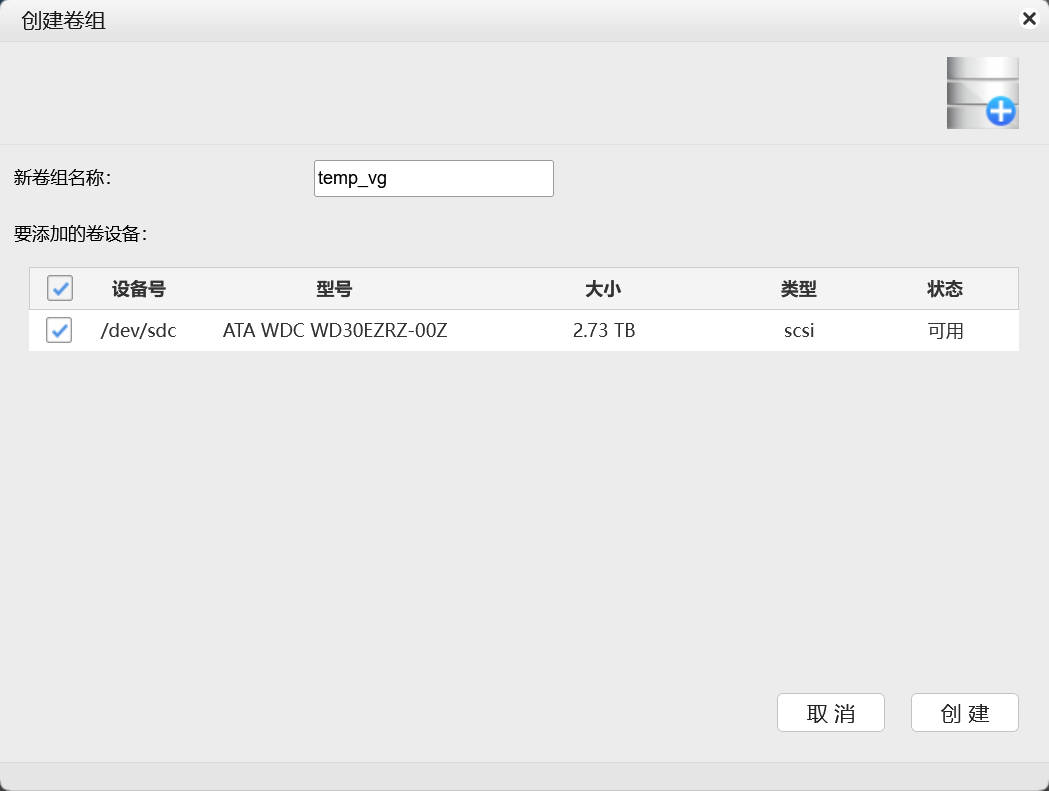
Here we create a volume group named "temp_vg".
3. Create a volume with the same name
Create a new volume in the newly created volume group, whose name is consistent with the original volume name in the volume group of the hard disk to be replaced. If there are multiple original volumes in the volume group of the hard disk to be replaced, create multiple volumes accordingly. The volume size can be arbitrary, as long as it is larger than the file size stored in the corresponding logical volume.
As shown in the screenshot in step 2, the volume group of the original hard disk we need to replace is called "disk1", and the volume name of our new volume group is also set to "disk1".
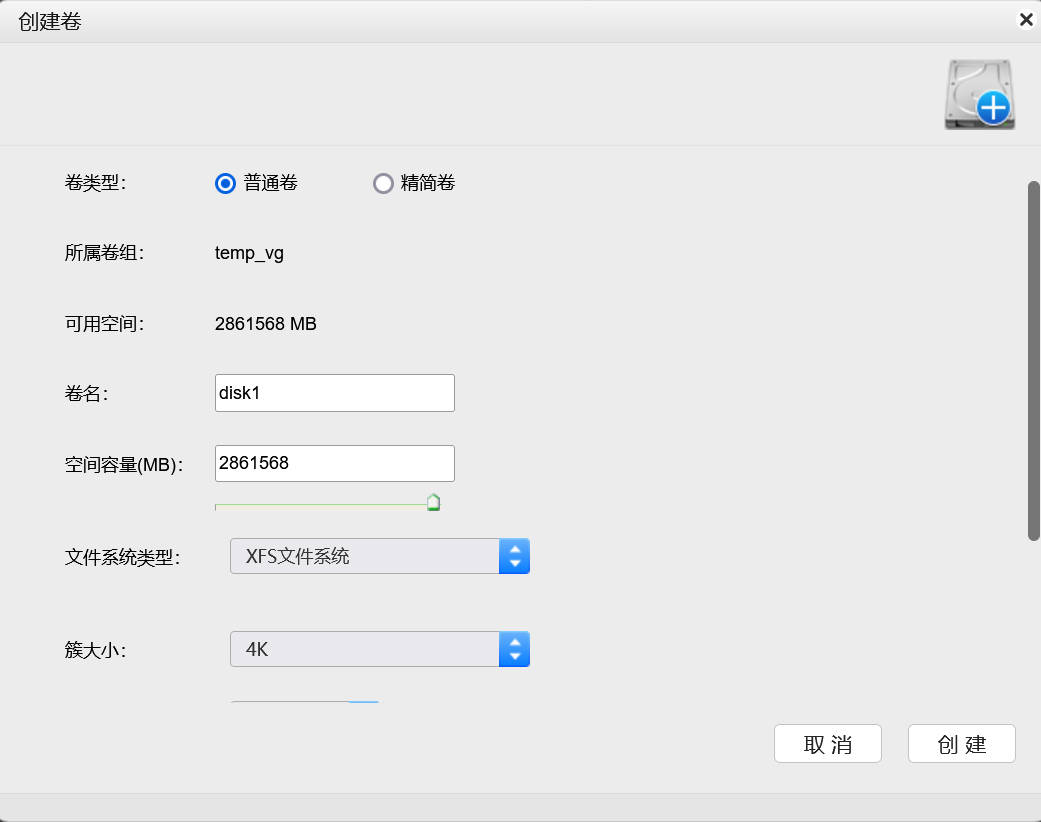
After the volume is created in the "Control Center" of UNAS, it will be automatically mounted. We do not need to do other operations.
4. Stop service
Before copying files, we need to stop services related to the old hard disk, including U-Driver cloud disk, Wanyou Cloud, Transmission download, etc. The specific services depend on your use.
5. Copy files
Ssh logs in to nas, and then uses the "cp" command to copy files from the original hard disk volume to the new hard disk volume.
Here we assume that the original volume group is named "nas_vg", the volume is "disk1", the newly created volume group is "temp_vg", the volume has the same name as the original volume, and the name is "disk1". Our operations are as follows:
root@UNAS-test :~# cp -r /mnt/nas_vg/disk1/ /mnt/temp_vg/disk1/
If there are multiple volumes, repeat the operation according to this step.
To log in to nas through ssh, you need to install the "ssh service" in the "APP Manager" of UNAS. This is just a matter of clicking the mouse. It's very simple.
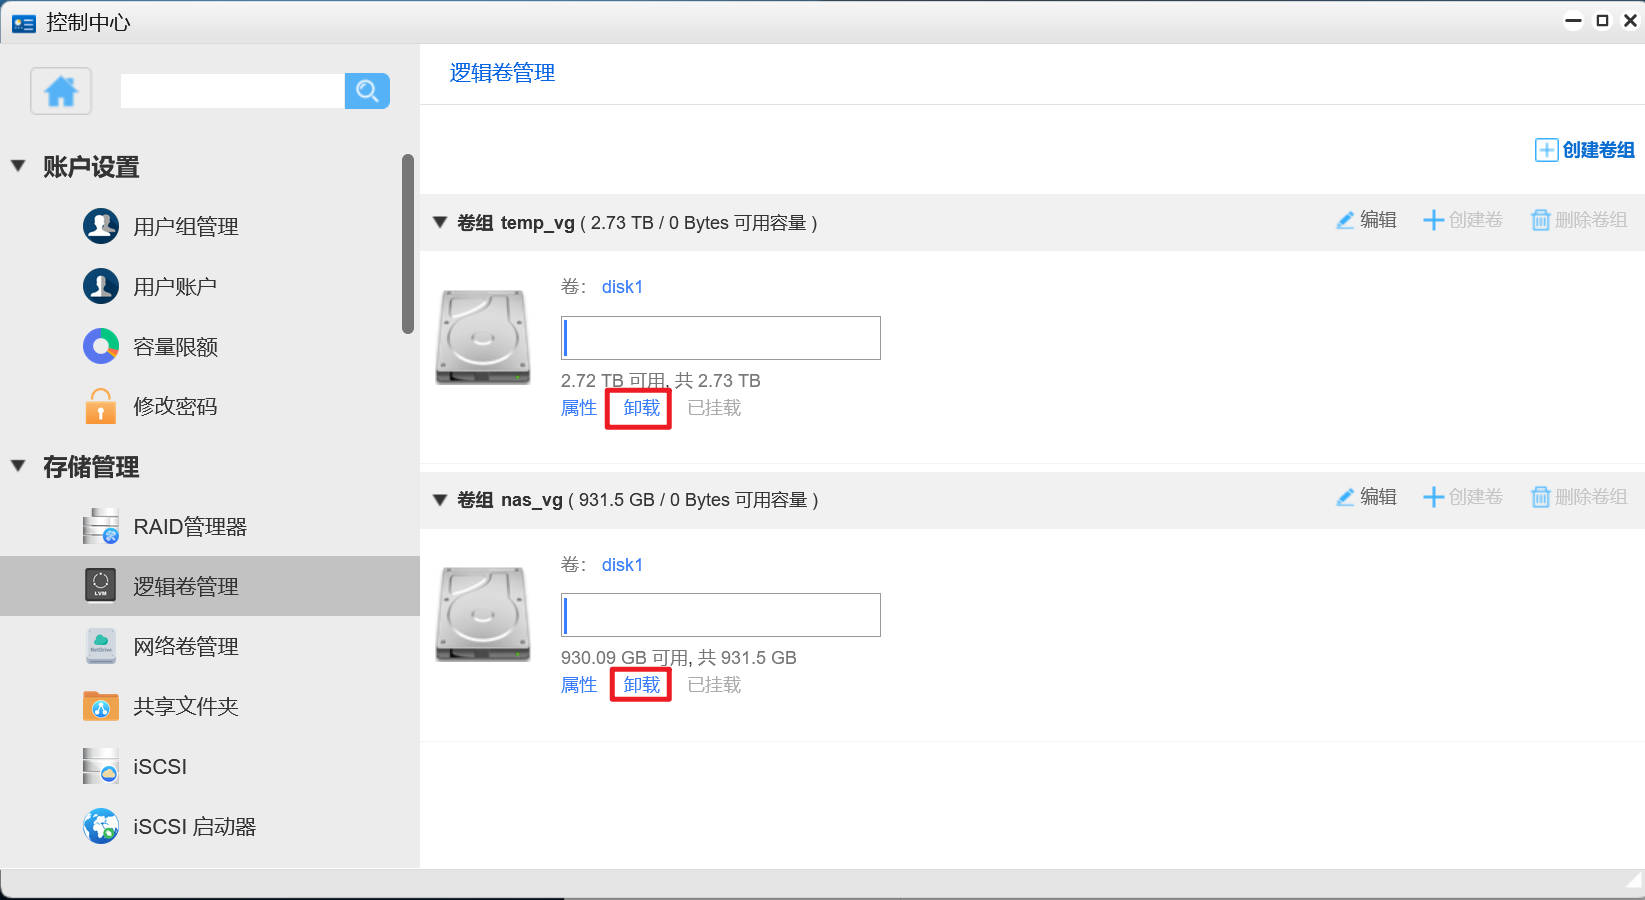
6. Unmount the volume
In Logical Volume Management in Control Center, unload the volume of the hard disk to be replaced and the volume of the new hard disk.
6. Modify the volume group name
Ssh logs in to nas, and then uses the "vgrename" command to modify the volume group name.
Here we still assume that the volume group name of the old hard disk is "nas_vg" and the volume group name of the new hard disk is "temp_vg". The operations are as follows
 root@UNAS - test :~ # vgrename nas_vg nas_vg_old
  Volume  group  "nas_vg" successfully renamed to "nas_vg_old" root@UNAS - test :~ # vgrename temp_vg nas_vg
  Volume  group  "temp_vg" successfully renamed to "nas_vg"
7. Re mount the volume
Now we return to the UNAS web console, refresh the following and reopen the "Logical Volume Management" page in the "Control Center". At this time, we will find that the "temp_vg" (the newly created volume group in step 2) we originally created has become "nas_vg" (the volume group of the original hard disk), and "nas_vg" (the volume group of the original hard disk) has become“ nas_vg_old ”
At this time, we mount the "disk1" volume under the new "nas_vg" volume group.
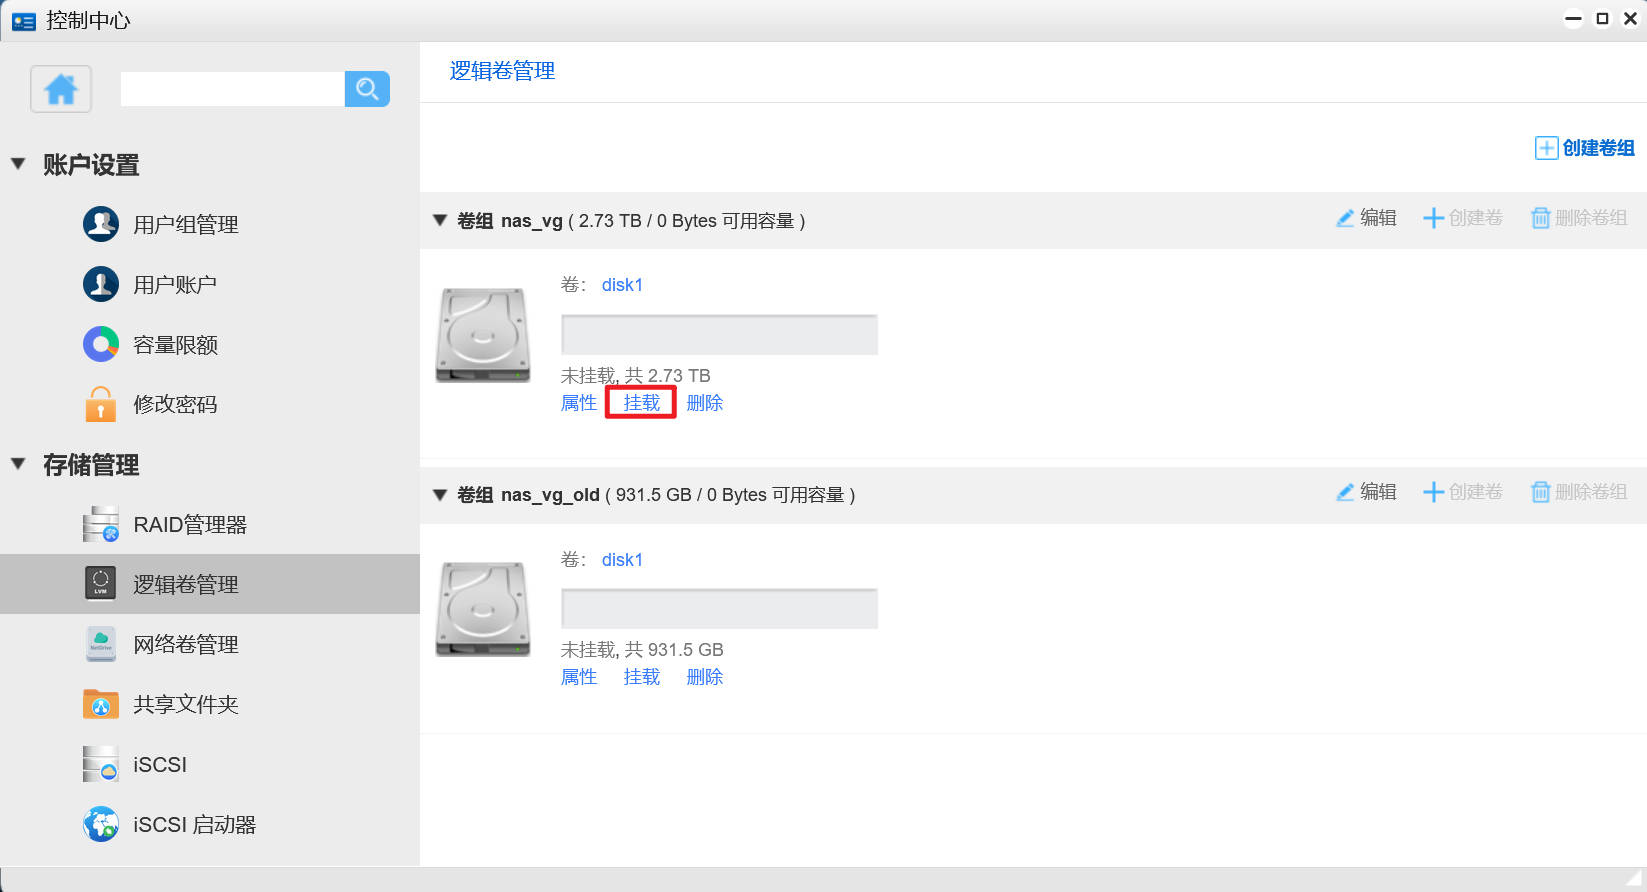
UNAS will automatically mount the volume under the "/mnt/volume group name/volume name" directory. According to the assumption here, the "disk1" volume will be mounted under "/mnt/nas_vg/disk1".
7. Inspection documents
After mounting, we can check whether the shared folders have been transferred.
It is also necessary to refresh, and then check whether the files have been transferred to the Shared Folder in the Control Center.

8. Start service
After ensuring that all files are transferred, you can start various services related to this volume group.
nine Remove the old hard disk
After ensuring that the service is normal, the old hard disk can be removed.
It is not recommended to format or destroy the old hard disk immediately. It is recommended to wait for the new hard disk to run for a period of time to ensure that there is no data processing before processing the old hard disk.
This article is published at: yingfeng Blog >> UNAS replaces the hard disk in the volume group, leaving the directory unchanged , please indicate the source for reprinting.