In daily work, it is inevitable to delete files by mistake or modify files without retaining historical versions. In order to avoid this situation, we studied the function of historical versions of files provided with Win10 today. After some trouble, sending out the process is also a backup.
After checking, this function depends on file history or restore point.

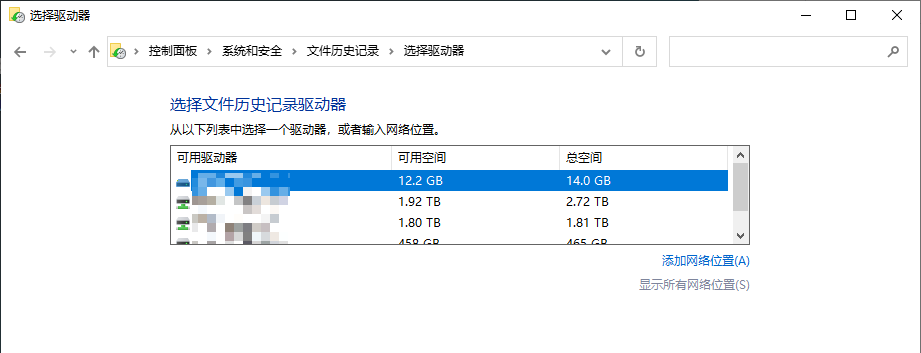
The file history depends on external drives or network shares, which is very unfriendly to the network workers who need to run around with laptops. Even if the machine is in fixed use, it must always move the hard disk or open a NAS to achieve this function. Moreover, this function does not seem to be incremental backup, and the file is copied to the backup hard disk or network share after being changed. If it is aimed at large files, it is extremely unfriendly. However, the advantage of using this method is that the file history is the most complete, and every modification has a history record. The backed up data is not on the same hard disk, which increases data security.
However, as a network worker who runs everywhere, using the file history function obviously does not meet my needs, so I can only study the implementation requirements of restore points in system protection. However, the system protection of Windows itself does not have the function of setting restore points regularly, which requires us to use the task plan of Windows to achieve regular "backup". After thinking about it, it seems that it is not appropriate to create a restore point on a regular basis. It is better to automatically create a restore point every time you start up.
Having said so much nonsense, the following is the official tutorial.
To use this function, first enable system restore, not only the system disk, but also the data disk you need to "backup".
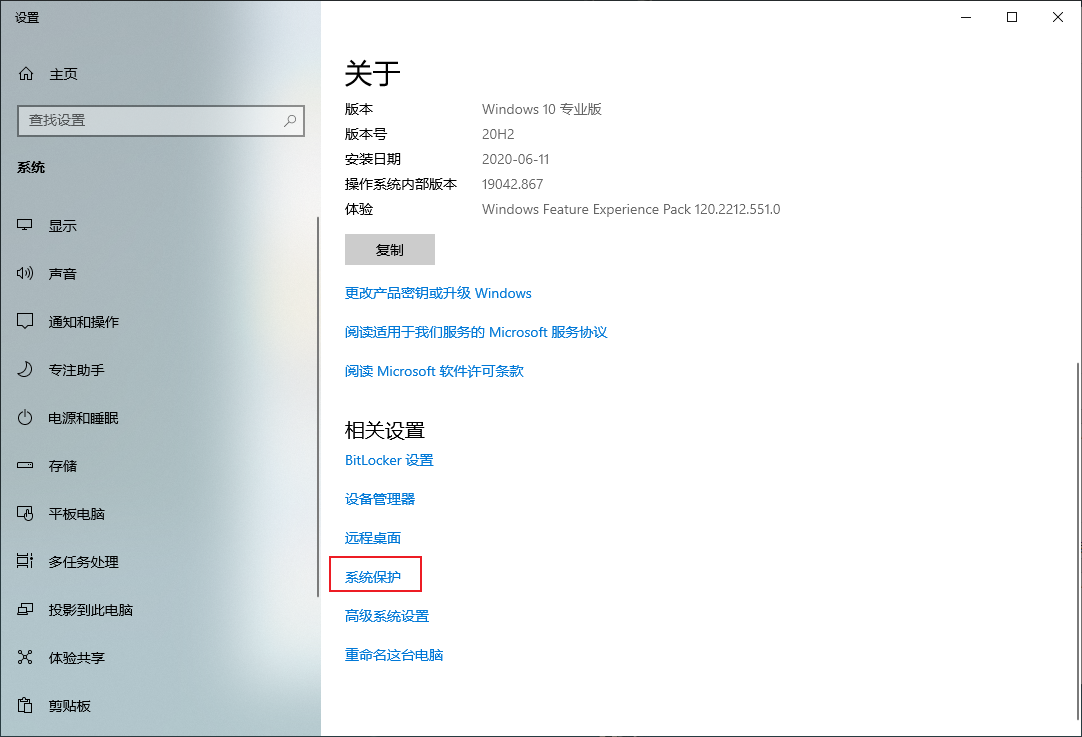
Click "System Protection" in Settings –>About (the old version is on the desktop: Computer –>Right click –>Properties)
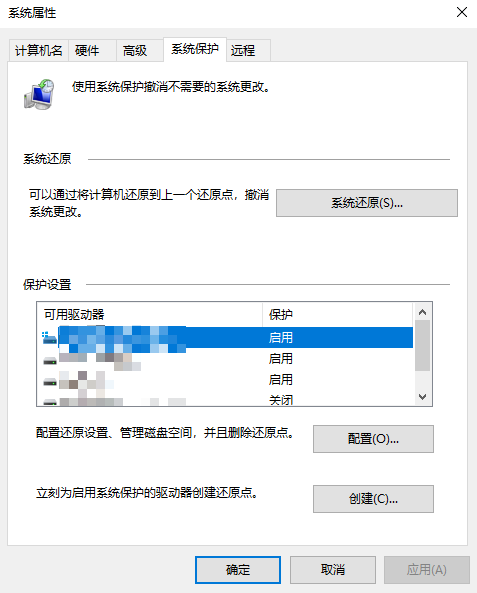
Select the partition to be "backed up", click Configuration to enter the system protection configuration page, select "Enable system protection" and set the "Maximum usage" below to about 10%
Click "Confirm" to submit the changes, select other partitions that need to be "backed up", and repeat this step until all partitions that need to be "backed up" have enabled the system protection function.

At this time, the "File History Version" function can already be used, but now the restore points need to be created manually here. Therefore, we have to set a task plan so that the system can automatically create restore points on a regular basis/after startup. Here, we take the automatic creation of the original point after startup as an example.
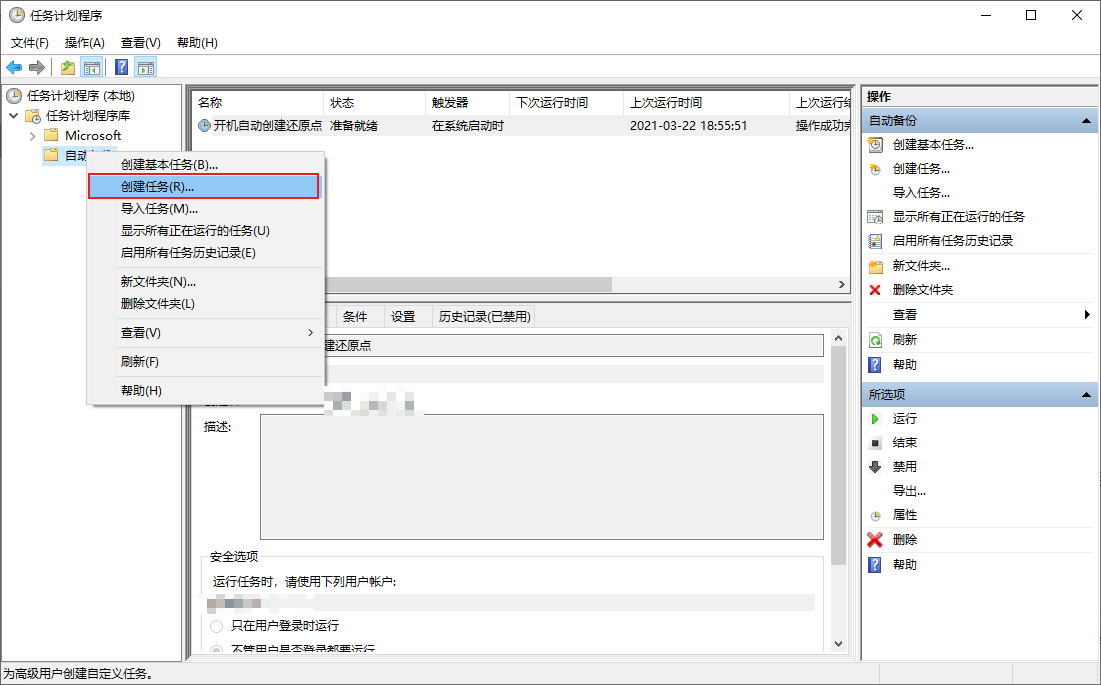
First open "Task Scheduler" and right-click to create a task
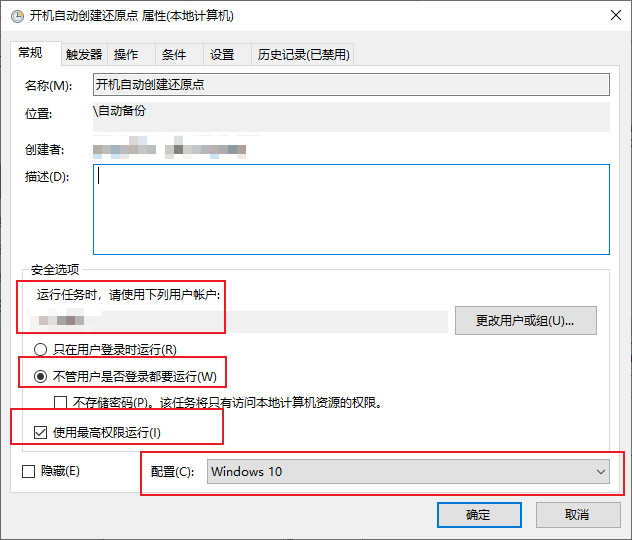
On the General tab, set the following
1. Select the current user (the default is, generally not selected)
2. Select: Run whether the user is logged in or not
3. Check: Run with the highest authority
4. Configuration: Windows10
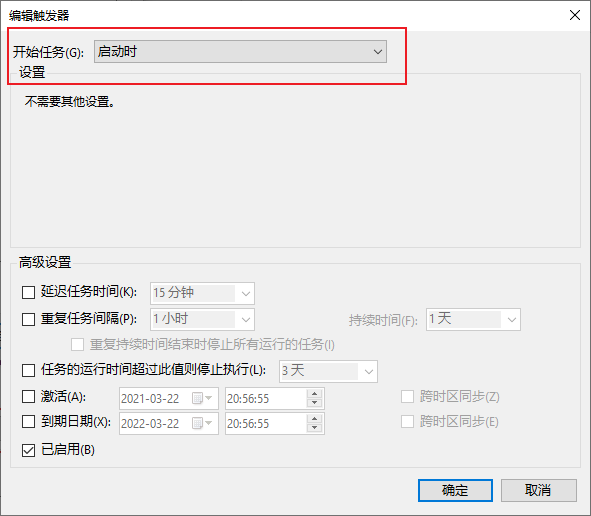
On the "Trigger" tab, click New in the lower left corner, and select "At startup" (if you want to set a regular creation of restore points, you can select timing here. Taking the creation of restore points on startup as an example, timing will not be expanded)
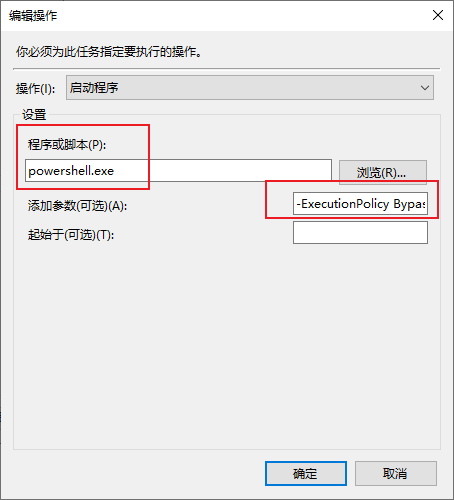
Click New in the "Operation" tab, and select "Start Program" for operation
Program or script: powershell.exe Add parameters: - ExecutionPolicy Bypass - Command "Checkpoint Computer Description " Startup RestorePoint "- RestorePoint Type " MODIFY_SETTINGS ""
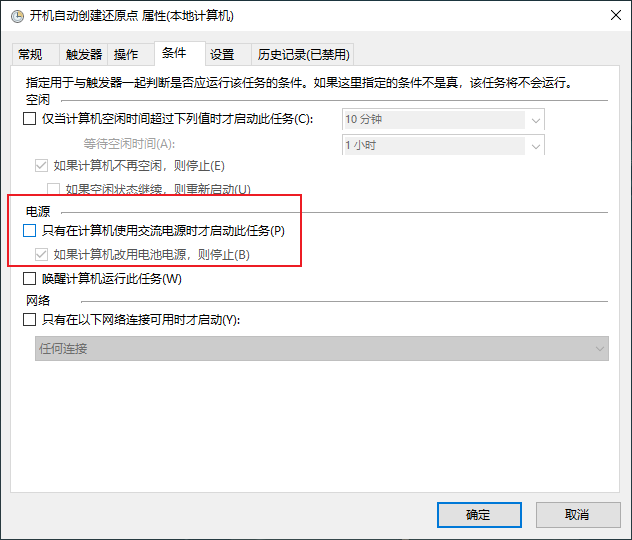
On the Condition tab, Uncheck "Only start the task when the computer uses AC power" (if not unchecked, the task will not be executed when the notebook is powered on with battery)
After completing the above settings, click OK and enter the password of the current account

At this time, the configuration of the task plan has been basically completed, but Windows has a time interval limit for using the command line to create a restore point (PowerShell is used to create a restore point in the task plan). The default is 24 hours, so we need to modify this limit.
It is also easy to modify this limit. Just add a value to the registry directly, open the registry editor, and navigate to
HKEY_LOCAL_MACHINE\SOFTWARE\Microsoft\Windows NT\CurrentVersion\SystemRestore
Create a new DWORD (32-bit) value named SystemRestorePointCreationFrequency
Edit the value and enter a time (in minutes). This time is the shortest time allowed to create restore points. If you enter 0, there is no limit. Here I set 30 minutes. It should be noted that there are decimal system and hexadecimal system. Select decimal system when setting. Otherwise, the value of hexadecimal system you set is not the number of minutes you want to set. Of course, you can convert it yourself.

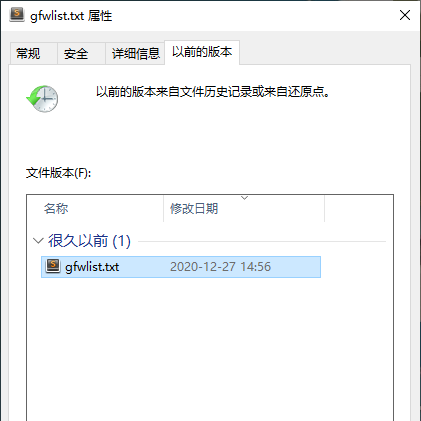
After these settings, the system will automatically create a restore point for the partition with system restore enabled after power on/restart. If the files in the partition are modified or deleted by mistake, you can restore the files by right clicking "Previous Version" in the attribute.
You can also double-click here to view historical versions of files. In addition, only files that have been modified can have file versions. The unmodified files are currently the oldest version, and this is naturally empty.
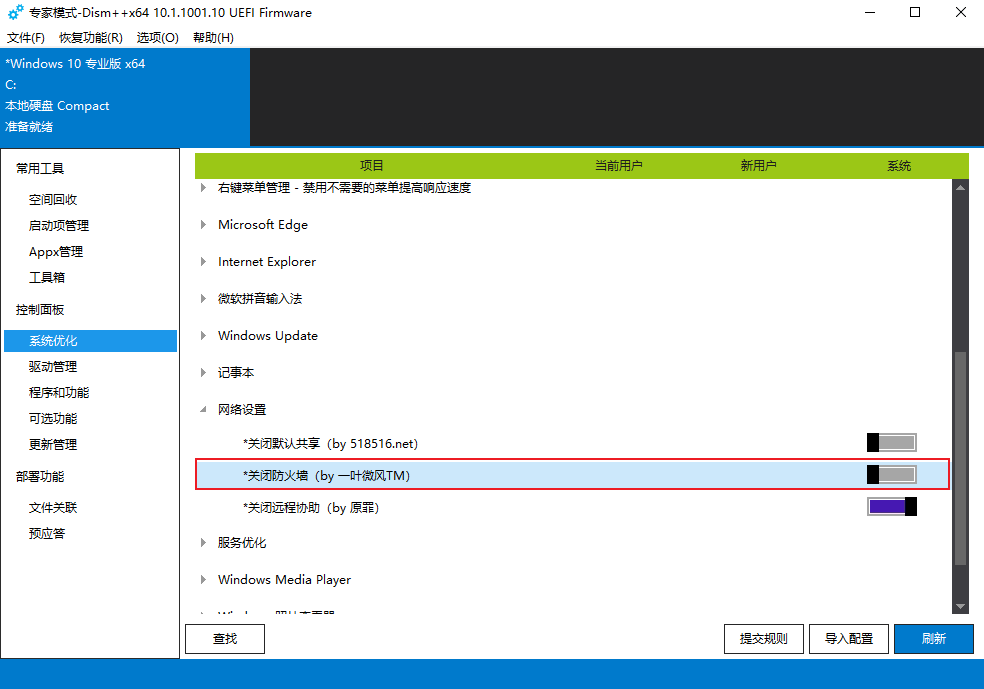
If the file history version of the modified file is still empty after following the above operations, it may be that the "default sharing" was accidentally turned off during "system optimization", which seems irrelevant, but the file history version does depend on it. You can restart the system after turning it on.
How to turn it on depends on how you "optimize" it and how you change it back. I turned it off with Dism++, so it's good to use Dism++to cancel the optimization.
Finally, let's say a few words: this tutorial is just a safety insurance. The restore point function data and the restore point are on the same hard disk. If the hard disk bursts, the data will cool down together. In addition, large capacity SSDs are becoming cheaper and cheaper, and people's data may be directly stored on SSDs. If SSDs delete files by mistake, the possibility of recovery is much lower than HDDs. In the final analysis, there is one sentence: “ Data is priceless, operate with caution! ”
This article is published at: yingfeng Blog >> Win10 Enable File History Version Function , please indicate the source for reprinting.