Cool TimelineIt's a responsiveWordPress Timeline Plug in, using pure HTML and CSS code.With just a few mouse movements, you can create a beautiful horizontal and vertical historical timeline, and you can easily display the timeline on any page of the website with simple code.The purpose of Cool Timeline is as follows:
Compatible with mainstream page editors such as Gutenberg, Elementor and WPBakery;
Create a timeline based on date or custom text;
Create an event/appointment schedule;
Work experience/achievement schedule;
Personal story schedule;
Install and enable the Cool Timeline plug-in
In WordPress background>Plug in>Install Plug in, search for "Cool Timeline" and install and enable it.
If it cannot be installed normally, search the plugin on the official WordPress website, and manually download and upload it to the server host.
Cool Timeline plug-in settings
Open WordPress background>Cool Timeline settings to start setting.
In general settings, Timeline Title is the name of the timeline, and H2 or H3 is selected as the title label;
Story order: generally, the reverse order is chosen, that is, the earlier the story occurs, the lower the story is, and the latest one is above;
Style settings: custom settings;
Layout settings: you can customize the timeline layout and layout seen in the foreground;
Cool Timeline plug-in settings
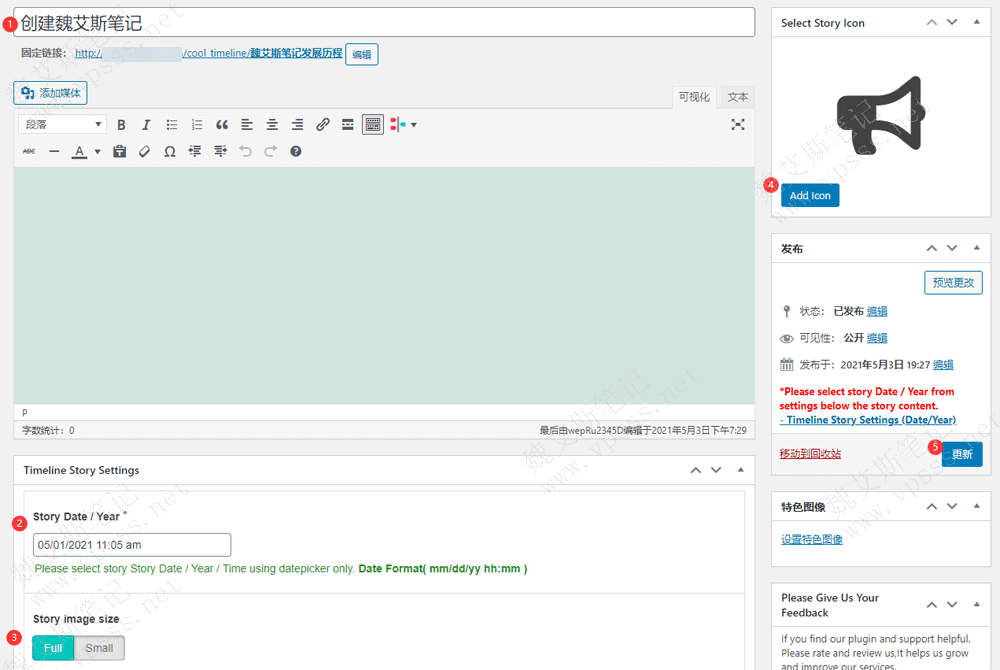
Click add new in Timeline Stories to start adding a timeline.
Each node on the imaginary timeline is a new timeline.As shown in the following figure, add several timelines to several nodes.
When creating the timeline, add the following key contents.
1. Title the timeline;
2. Time axis occurrence time;
3. Large or thumbnail;
4. Add icon icon;
5. Publish Timeline.
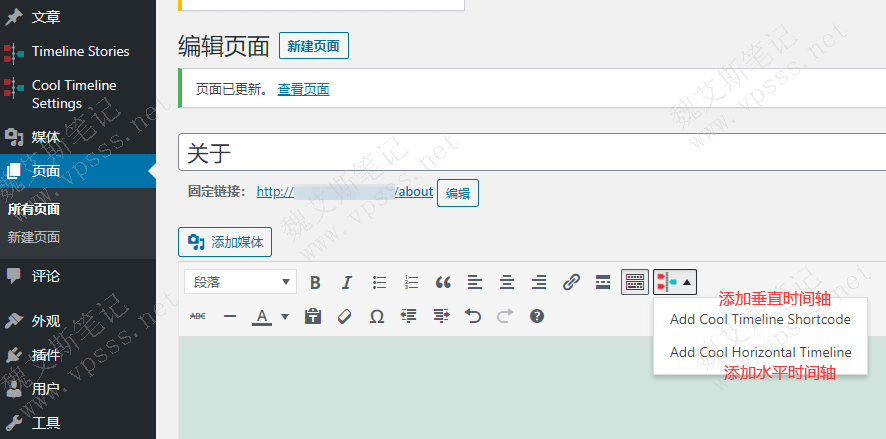
Add timeline to articles and pages
Create a new article, a new page, and find the Cool Timeline editing tool in the edit bar. There are two options below.
Add cool timeline shortcode: add a vertical timeline;
Add cool Horizontal timeline: add a horizontal timeline;
As for the settings of these two timelines, you can default or customize them to see the effect first.
Cool Timeline plug-in effect display
Add cool timeline shortcode The effect of adding a vertical timeline is as follows:
Add cool Horizontal timeline The effect of adding a horizontal timeline is as follows:
Cool Timeline plug-inAs aWordPress Timeline Plug inIt is beautiful and practical. The style, layout and functions provided by default are enough.If you want to use more practical effects, you can buy a paid version.If each node of the timeline is regarded as an article and added to the page with short code, the site content can be displayed in the timeline.There is a lot of room for imagination. You can play it freely. The effect is very good.
Article name: WordPress Responsive Pure HTML and CSS Timeline Plug in Cool Timeline Article link:https://www.vpsss.net/25112.html Copyright notice: The resources of this website are only for personal learning and exchange, and are not allowed to be reproduced and used for commercial purposes, otherwise, legal issues will be borne by yourself. The copyright of the pictures belongs to their respective creators, and the picture watermark is for the purpose of preventing unscrupulous people from stealing the fruits of labor.