One click website migration using Wordpress plug-in
Migrating wordpress websites is something that many friends need to do in the process of creating websites. Generally speaking, the traditional migration method is cumbersome, which is troublesome for those who do not know the technology. They need to separately package website files, export database data files, upload them to a new server, modify configuration documents It is tedious to modify the site address value of database data.
Here we introduce a plug-in, which can simply export all the themes, plug-ins, pictures, attachments and all the data of a WordPress website to a file, and then import it into another WordPress website to restore the exact same effect.
Before using, you need to master the basic knowledge of installing wordpress programs and uploading files using ftp, server management panel, etc.
The plug-in is all in one wp migration. The free version can be used for backup. If you need to import, you need the pro version.
Use all in one wp migration to export a complete copy of backup data and download it
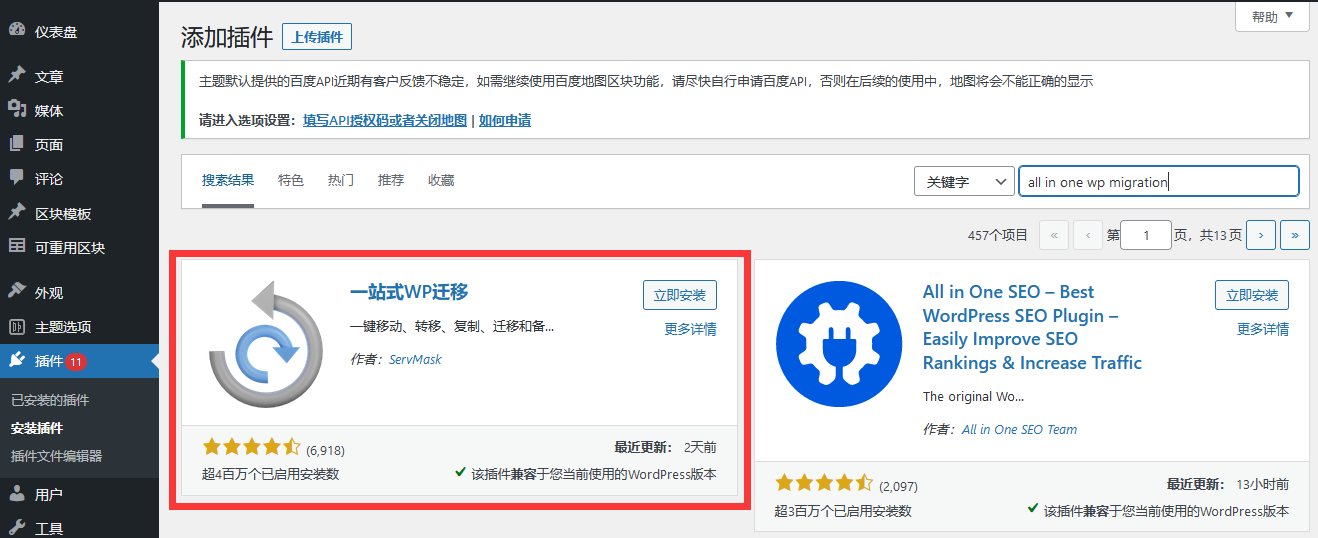
Log in to the WordPress background where the backup data needs to be exported, enter Appearance Plug in Install Plug in, search for all in one wp migration, install and enable it

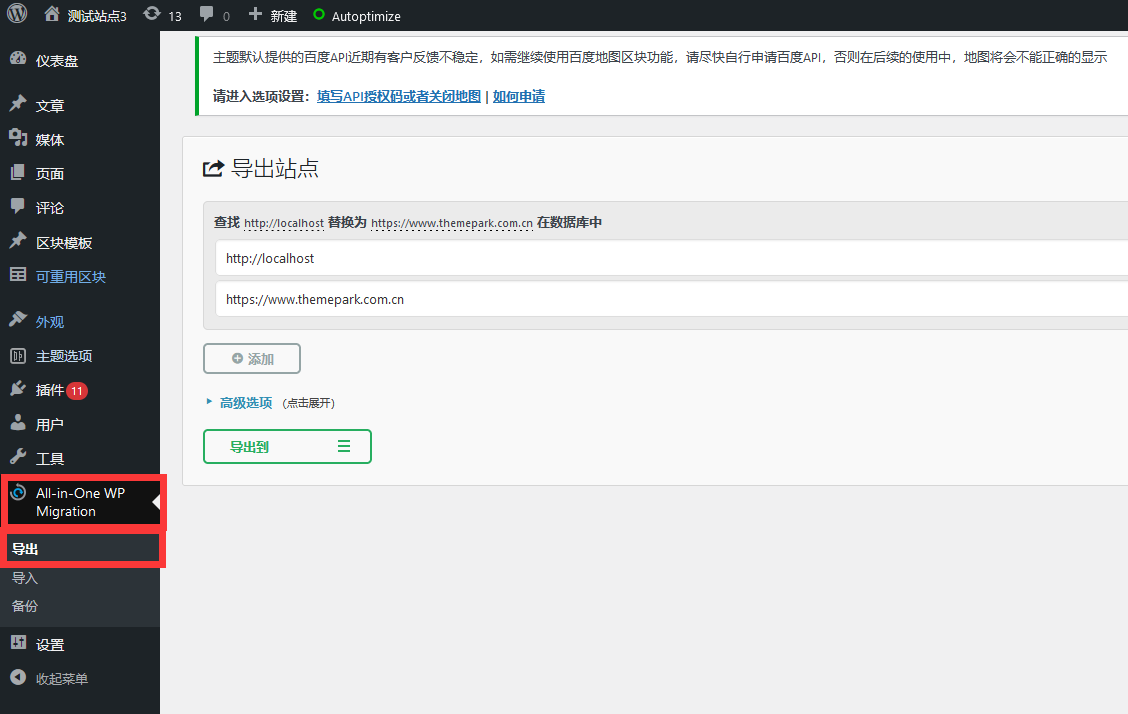
After the installation is enabled, the option interface of the plug-in will appear in the background. Enter the import in all in one wp migration option:

As shown in the figure above, pay attention to the figure above. If you want to export from a domain name and import it to another website domain name, you can set the above settings, replacing aaa with bbb
The example in the above figure is that all the addresses of the data exported by the local data localhost are converted to www.themepark.com.cn, so when we import the exported data, we do not need to modify the domain names in batches.
If the domain name of the website you are migrating has not changed, or you are only using this function to back up files, you do not need to set a replacement.

Now click Export to, select a file, and wait for the backup to complete. The backup time depends on the size of your website.

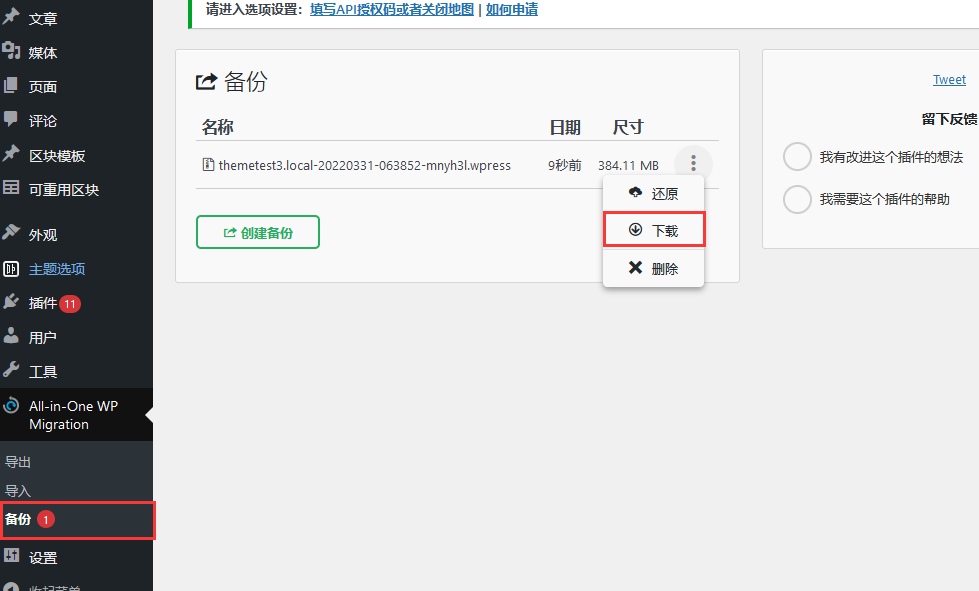
After the export is completed, you can directly click the button to download, or find the button in the backup options to download:

The downloaded file is a. wpress file, which contains all themes, plug-ins, attachments, images, and all data.
Import the backed up data into the new wordpress website
Similarly, after the creation of a new wordpress site, you should also go to the plug-in - install the plug-in, install the all in one wp migration plug-in, and note that the free version only supports data recovery within 50M, and those beyond 50M can be imported only by installing the pro version. Therefore, in addition to installing all in one wp migration, You also need to install the version of all in one wp migration pro to import and restore.
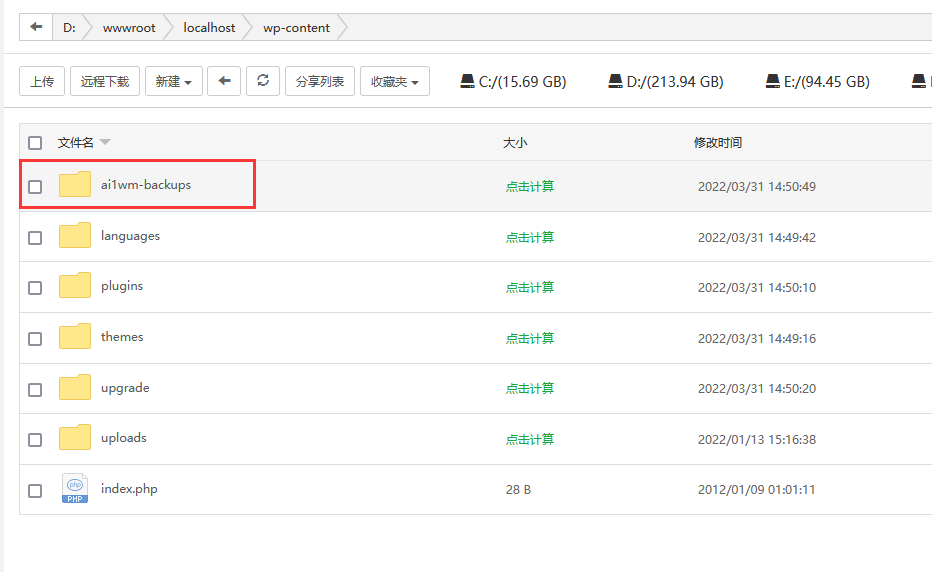
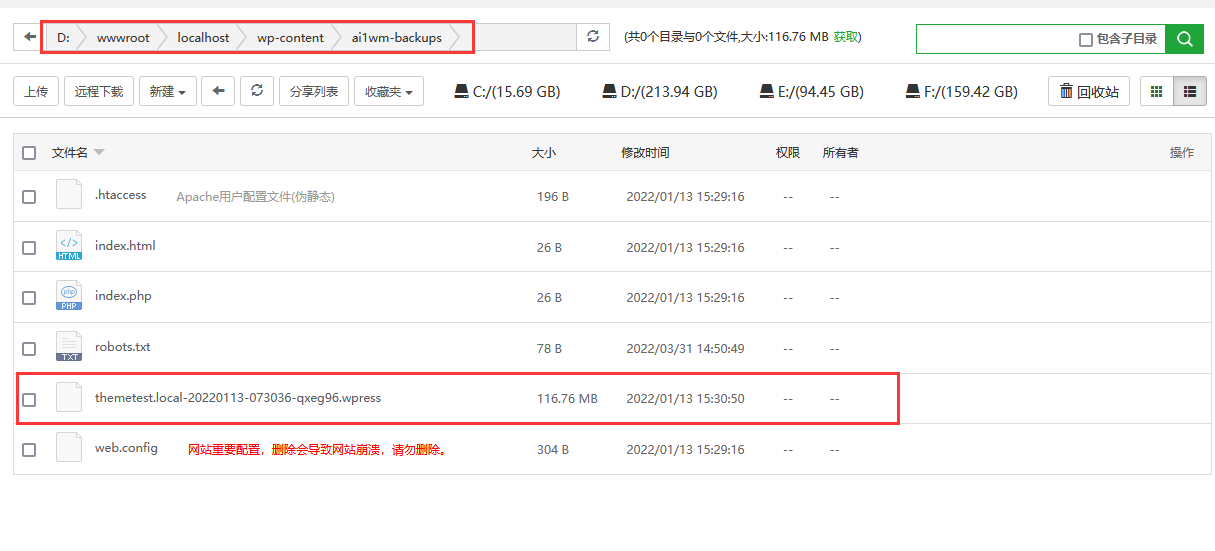
After installation, you need to enter your website file management, which can be ftp management or your server file management, and find the path website root directory/wp content/ai1wm backups folder. Here we take the pagoda as an example
The following levels:

Upload the. wpress file to this directory.

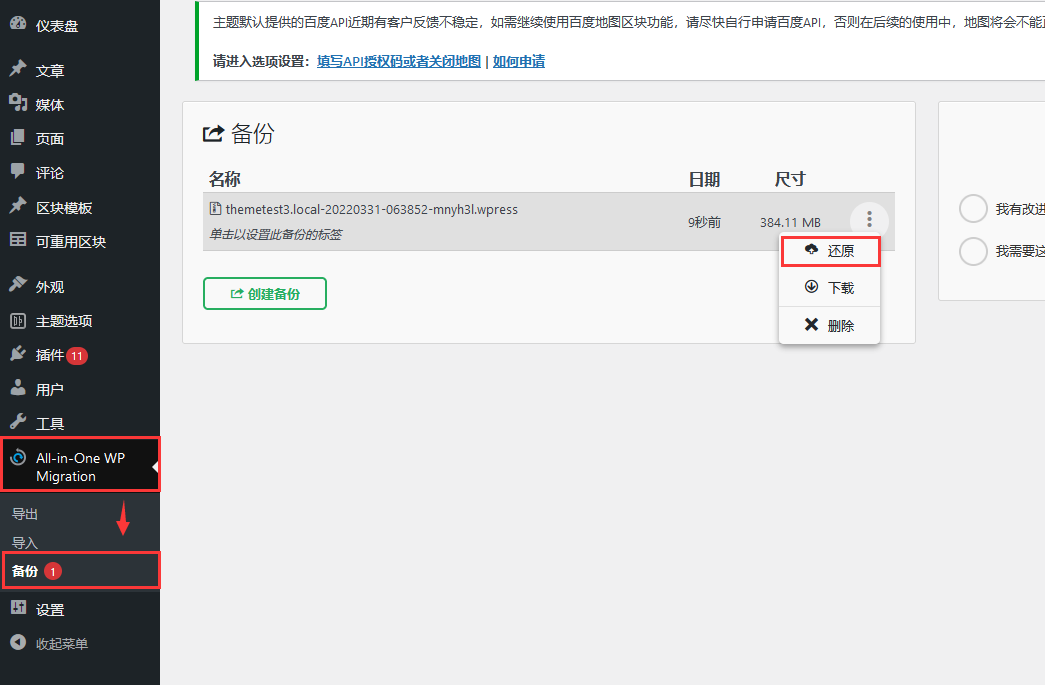
After the transfer is completed, enter the background of the website. Backup options:

Here we can see the file just uploaded. Click Restore to import all the website data.
At this point, the migration of the entire website is complete.
