Linux has gradually become the mainstream choice of servers and desktop systems due to its high efficiency, stability, security and open source characteristics.However, for users who are new to the Linux system, installation and configuration may be difficult.This article will introduce the installation process of Linux system in detail, including partition, boot, network configuration and other steps, to help you easily get started with Linux system.
preparation
Before installing the Linux system, you need to prepare an installation CD or installation USB disk for the Linux distribution.In addition, it is also necessary to ensure that the computer hardware meets the system requirements.
partition
Partitioning is one of the important steps for installing a Linux system.When partitioning, you need to allocate a certain amount of hard disk space for the system.It is recommended to use a disk partitioning tool (such as fdisk) for partitioning operations.The following is the approximate zoning scheme:
/Boot partition: about 100MB in size, used to store boot files and the kernel.
Swap partition: about twice the size of physical memory, used as virtual memory when the system memory is insufficient.
/Partition: about 20% of the hard disk capacity, used to store system and user files.
Installing Linux Systems
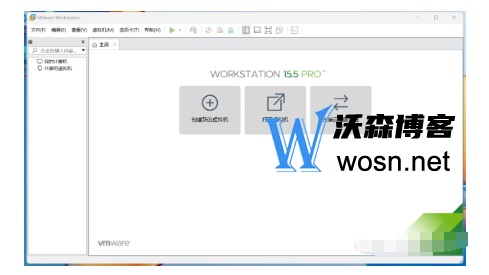
(1) VMware Workstation Installation
Double click the installation file VMware-workstation-full-15.5.7-17171714.exe, and complete the installation as prompted. After the installation, generate a VMware Workstation shortcut on the desktop.
(2) Create an Ubuntu virtual machine
Double click the VMware Workstation shortcut to open the home page.
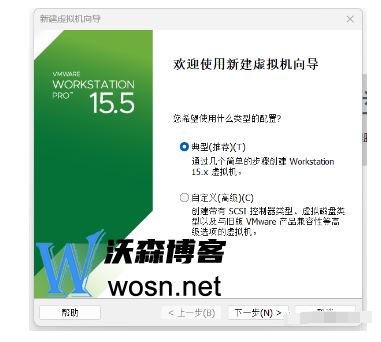
Click Create New Virtual Machine to enter the New Virtual Machine Wizard. Generally, select Typical as the configuration type.
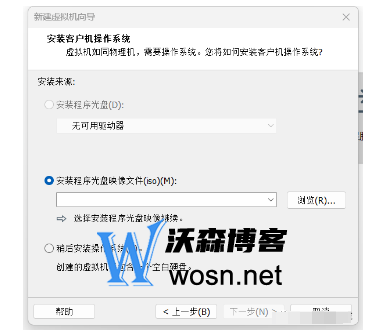
Select the ubuntu-18.04.6-desktop-amd64.iso file path at the image file (iso) (M) of the installer CD.
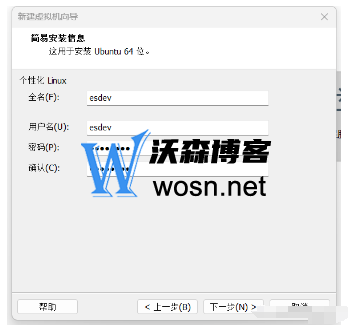
Set the user name and password for Ubuntu login:
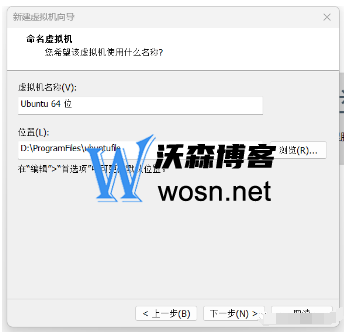
Set virtual machine name and installation location:
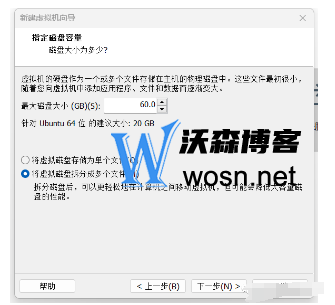
Set the virtual machine disk size, and select to split the virtual disk into multiple files.
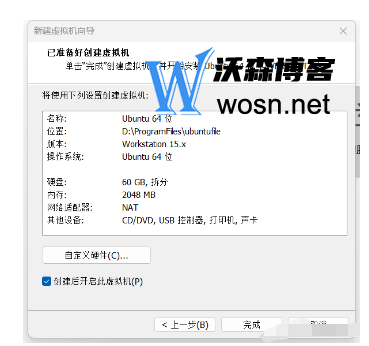
Click Custom Hardware on the last interface of the installation wizard to set the memory capacity and number of processors of the virtual machine.Finally, click Finish to start the installation of the Ubuntu virtual machine. After the installation is completed, you can log in as the esdev user set above.
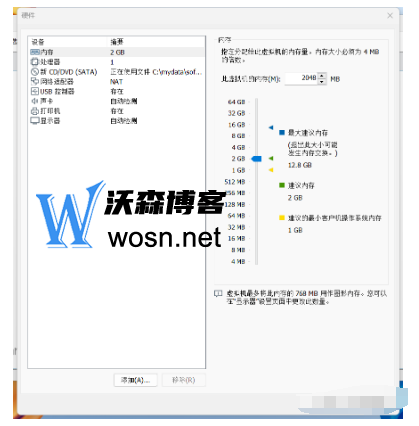
The customized hardware setting interface is as follows:
Configure Package Manager
After installation, you need to configure the package manager to install and manage the software.Different Linux distributions use different package managers. The following uses Ubuntu as an example to introduce the use of the apt get command:
Update package list: sudo apt get update
Upgrade the installed software package: sudo apt get upgrade
Install new software package: sudo apt get install
Delete software package: sudo apt get remove
Clear unnecessary dependencies: sudo apt get autoremove
Through the above steps, we successfully installed the Linux system and configured the basic package manager.This is just the beginning,Linux system has rich functions and applications waiting for you to explore.I hope this article can help you successfully take the first step in Linux system learning.
This article is written byxiaowanPublished on December 17, 202309:19:00
This article is collected and sorted by the website of Mutual Benefit, and the email address for problem feedback is:wosnnet@foxmail.com, please keep the link of this article for reprinting:https://wosn.net/25772.html