IPad User Manual
-
IPad User Manual -
New features of iPadOS -
Supported models -
-
Wake up and unlock -
Adjust volume -
Change or turn off sound -
Access functions from the lock screen -
Open the app on the home screen -
Screen capture or recording -
Change or lock screen orientation -
Change Wallpaper -
Zoom App to fill screen -
Drag and drop -
Search iPad -
Send items using "Space Delivery" -
Perform quick actions -
Using and customizing the Control Center -
View and organize Today view -
Charging and monitoring the battery -
Understand the meaning of the status icon -
Travel with iPad
-
-
-
-
View photos and videos -
Edit photos and videos -
Edit Live Photo -
Edit "Portrait" mode photo -
Organize photos through album -
Search in Photos -
Share photos and videos -
View Memories -
Find people in Photos -
Browse photos by location -
Using iCloud Photos -
Share photos with iCloud Share Album -
Use My Photo Stream -
Import photos and videos -
Print photos
-
-
Quick Instructions -
equity market -
Tips
-
-
-
Getting Started with Accessibility -
-
-
Open and practice Narration -
Change Narration settings -
Learn the "narration" gesture -
Use the voice over gesture to operate the iPad -
Use rotor to control "narration" -
Using the on-screen keyboard -
Writing with fingers -
Use "narration" with Apple external keyboard -
Use narration to type Braille on the screen -
Using the Braille Display -
Custom gestures and keyboard shortcuts -
Use narration with pointer device -
Use narration in App
-
-
zoom -
amplifier -
Display and text size -
action -
Read aloud -
audio description
-
-
-
-
Important safety information -
Important operating information -
Get information about iPad -
View or change cellular network settings -
Find more software and service resources -
FCC Compliance Statement -
Canadian ISED Compliance Statement -
Statement of China's micro power short-range equipment -
Class 1 laser information -
Apple and the environment -
Processing and recycling information -
ENERGY STAR Compliance Statement
-
-
copyright
Use step-by-step navigation in Maps on iPad
![]()
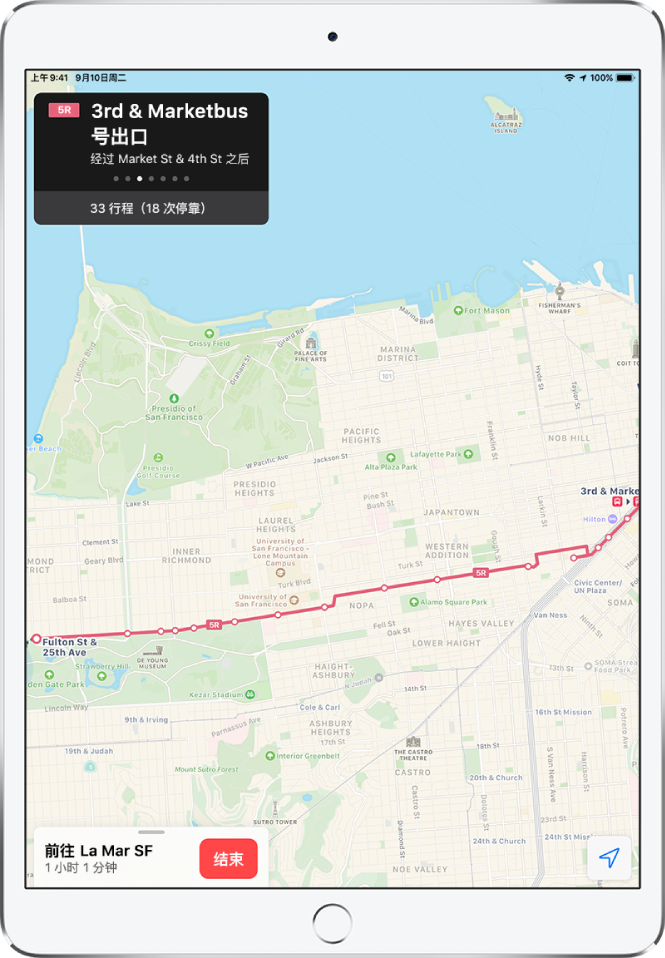
View step-by-step navigation or station by station navigation
End navigation at any time: Tap "End" or say the following to Siri: Stop navigation 。 View next indication: Swipe left at the top of the screen for instructions. To view routes in a list: Tap the route card, then tap Details. View route overview: Tap the route card, then tap Overview. To see more details, tap the route card, then tap Zoom In. To add a bus stop to a "frequently used location": see also Add bus stops to frequently used locations 。
Listen to the step-by-step navigation driving route (WLAN+cellular network models)
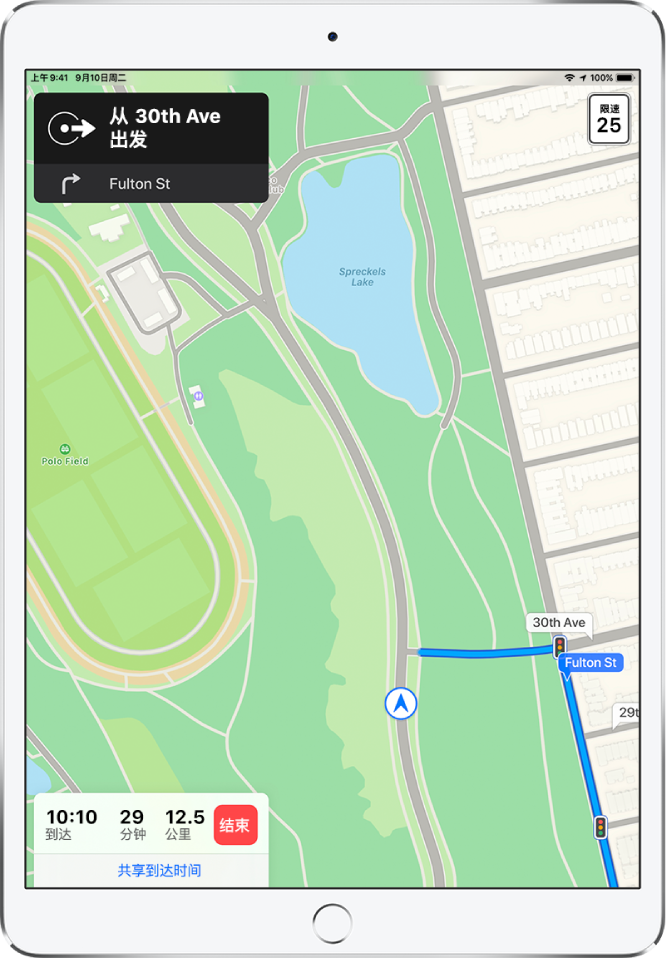
View driving route overview
Display the destination at the top of the screen instead of facing north: Tap the map, then tap 
。 North facing instead of destination is displayed at the top of the screen. Tap the map, then tap 
。 Back to step-by-step navigation: Tap the steering indicator at the top of the screen.
View the step-by-step driving instruction list
Mark stops on driving routes
Tap the route card. Tap a suggested service (such as "gas station"), then tap "departure".
Share arrival time
After the step-by-step instructions are displayed, tap the route card, and then tap "Share arrival time". Select one or more suggested contacts, or tap Contacts to find contacts. You can perform the following operations during travel: Cancel sending arrival time information: Tap "Share arrival time" at the bottom of the screen, and then select a contact. Replace the "Shared Time of Arrival" card with a route card: Tap on the Shared Time of Arrival card 
。