
Typical practice of CCE: building guest book
overview
Operation steps

-
Baidu Smart Cloud Account Registration and Real Name Authentication -
Create CCE container cluster -
Create a CCR image warehouse -
Configuring the Kubectl command line tool -
(Optional) Configure Kubernetes Dashboard -
Create a GuestBook through kubernetes kubectl -
Bind the domain name to provide services
1. Baidu Smart Cloud Account Registration and Real Name Authentication
2. Create a CCE container cluster
-
Log in to Baidu Smart Cloud Official website 。 -
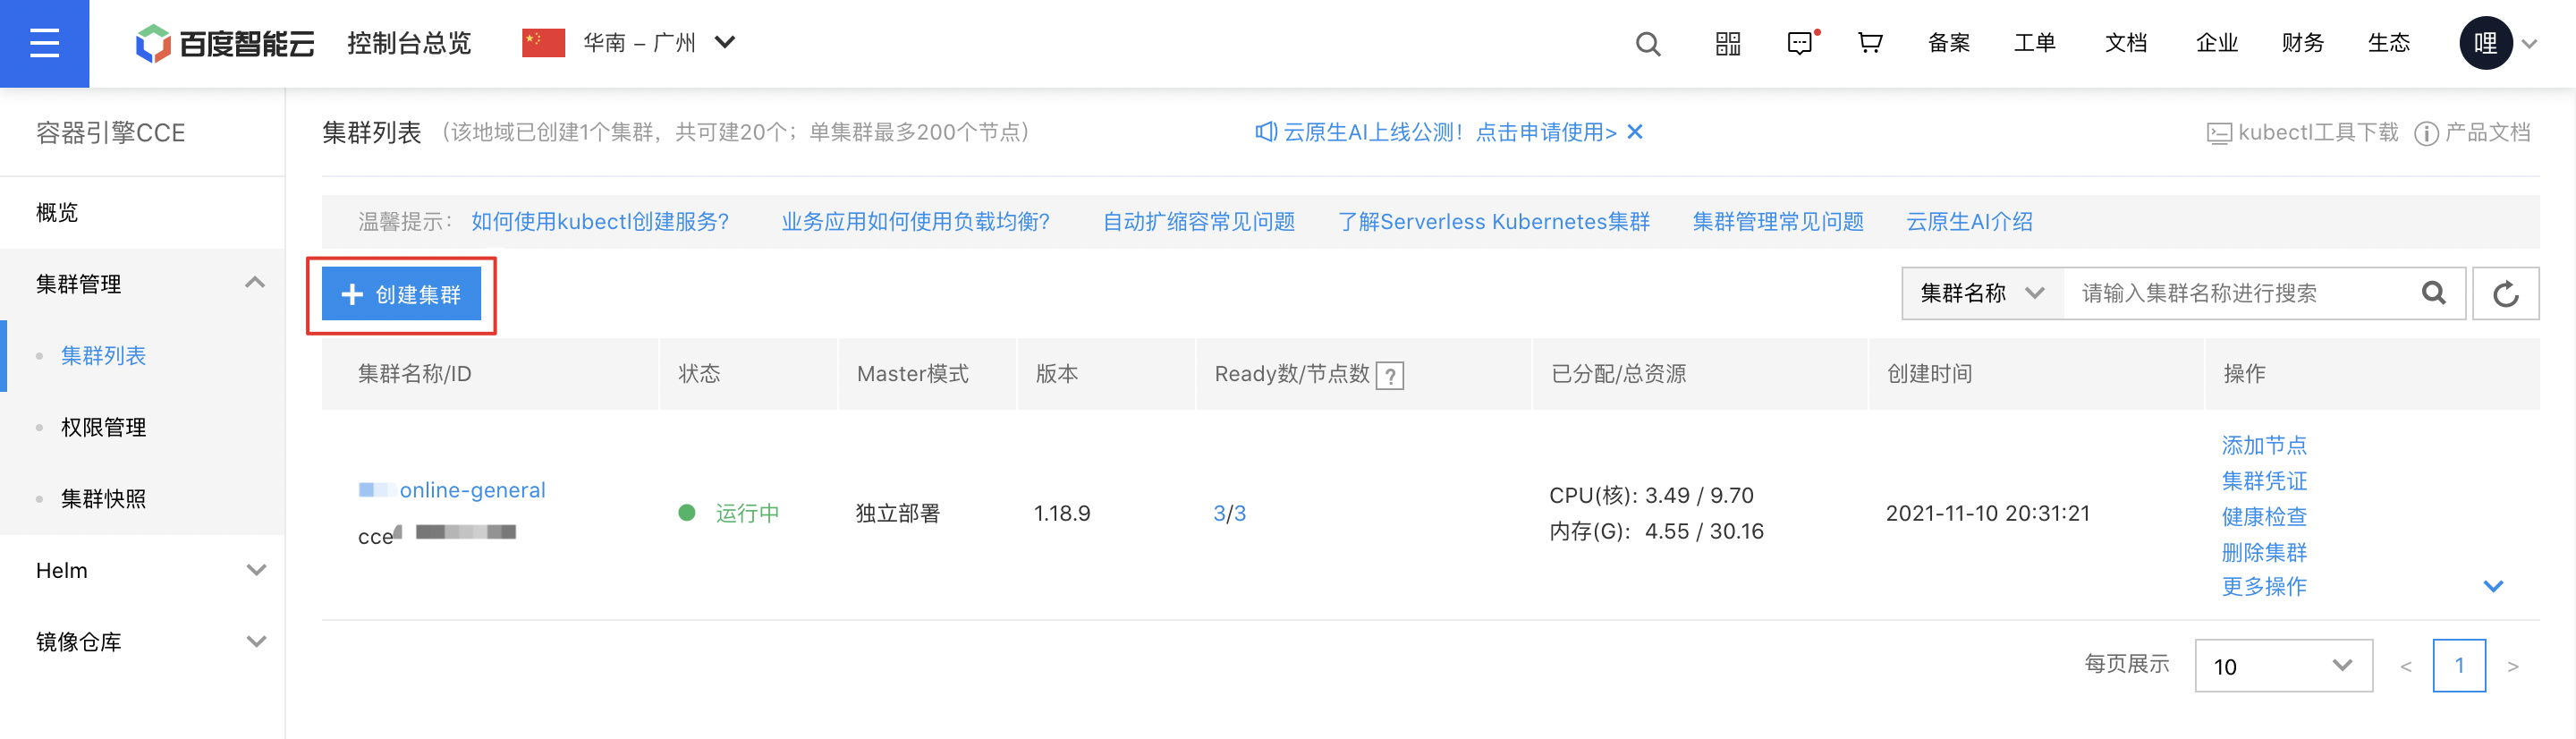
After successful login, select "Product Services>Cloud Container Engine CCE" to enter the "Cluster List" page. -
(Optional) The "Cluster List" page will display the name/ID, status, region and other information of all created CCE clusters, and users can search for clusters by cluster name. -
(Optional) Select an area. Please switch according to the actual needs. -
Clustering is a global operation. Users can select different regions according to their needs. If you need to create clusters in multiple regions, please refer to Description of area selection 。 -
Clusters created in different regions are independent of each other.
-
-
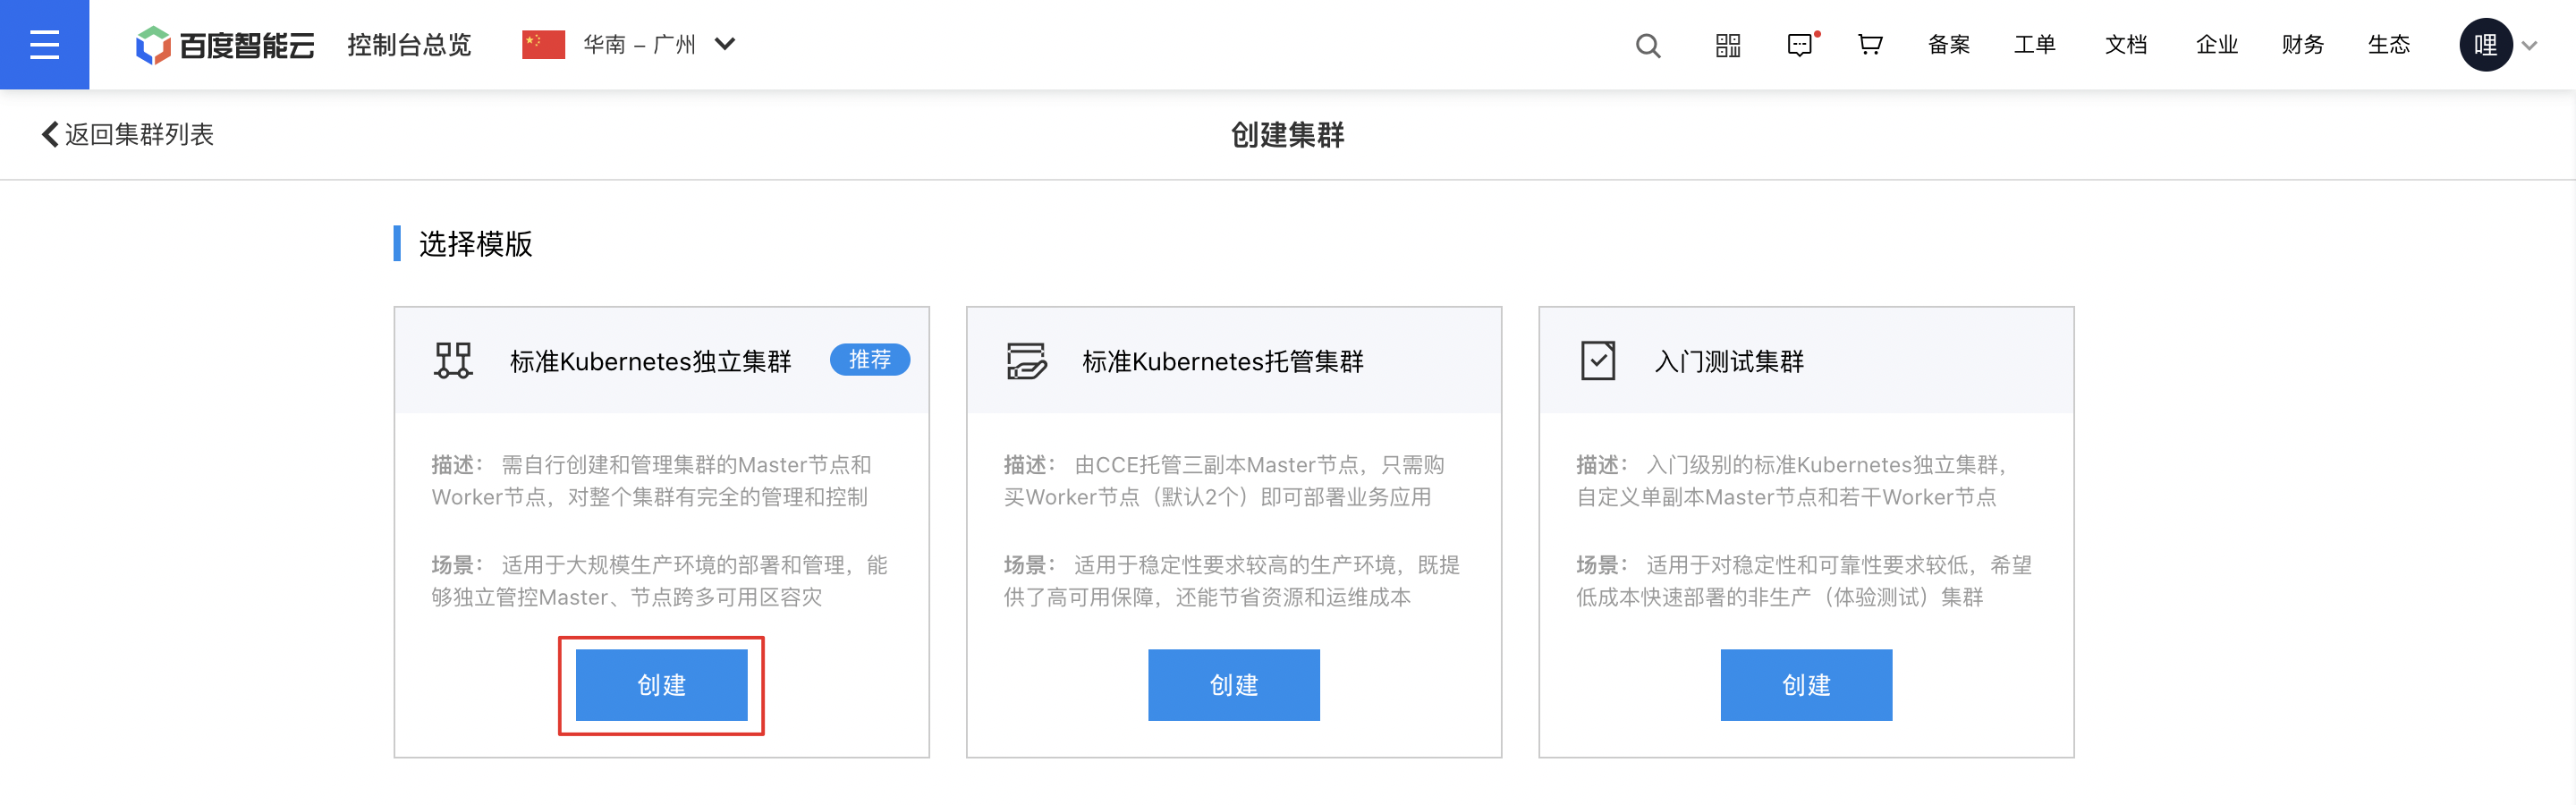
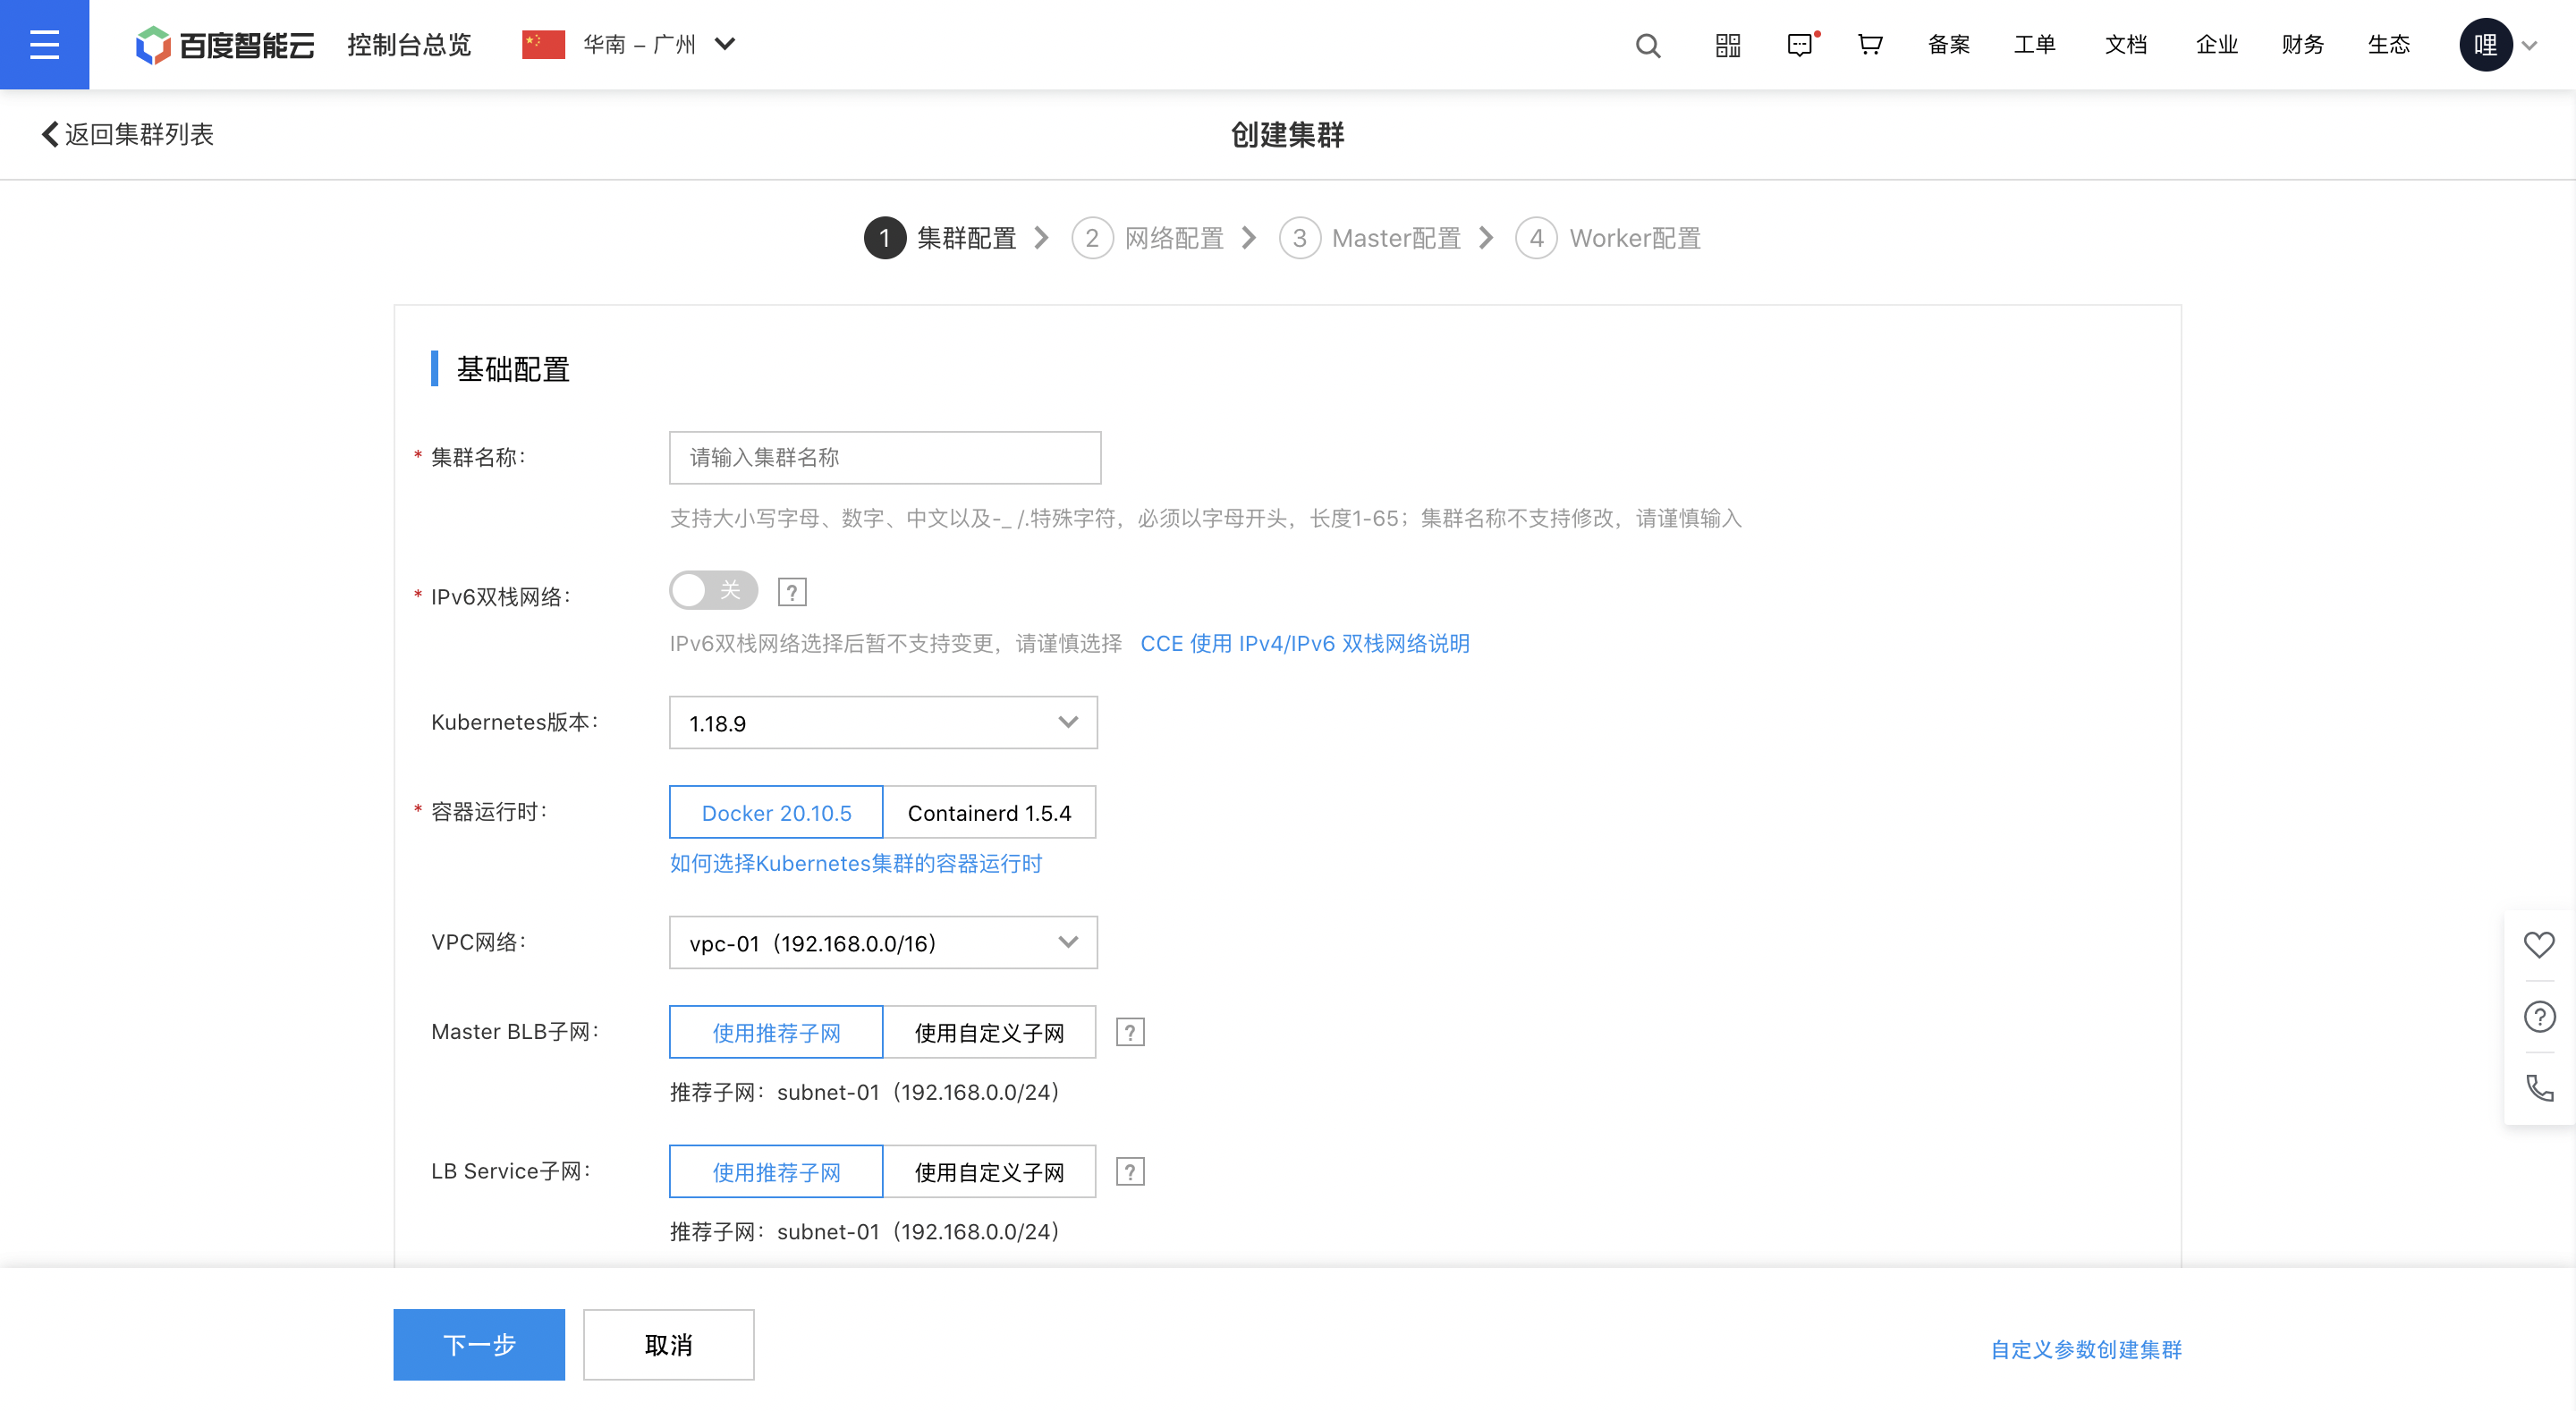
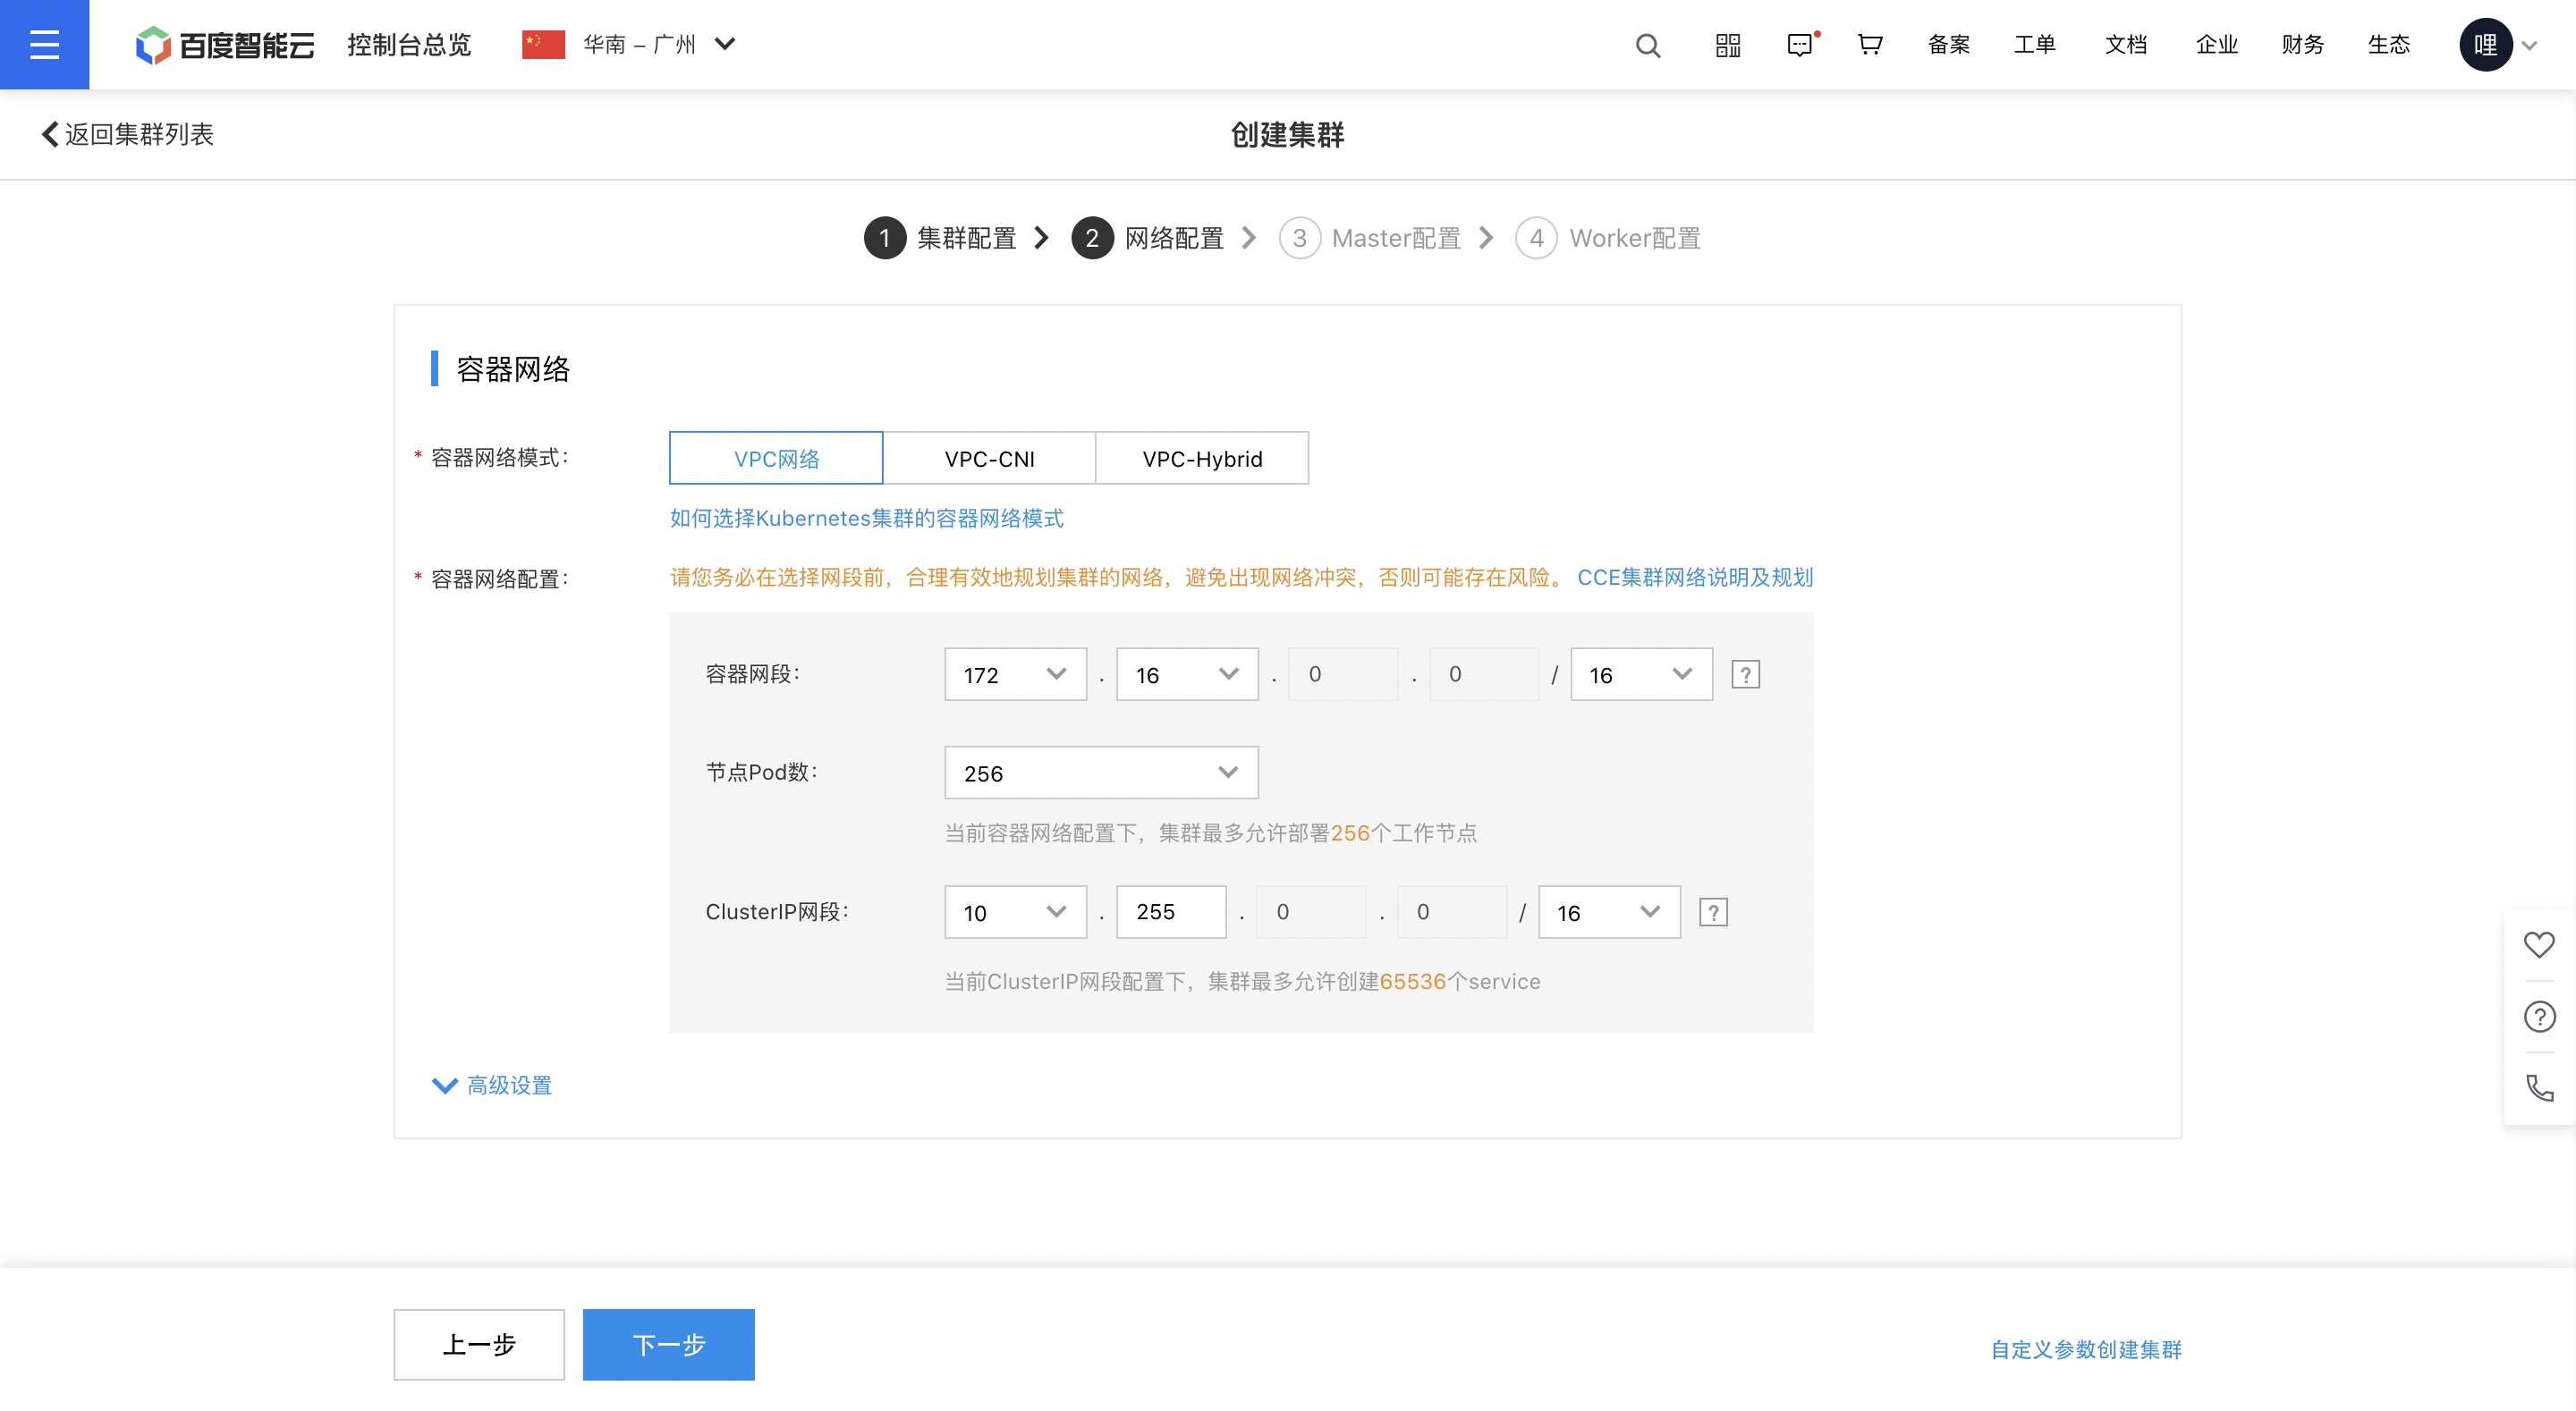
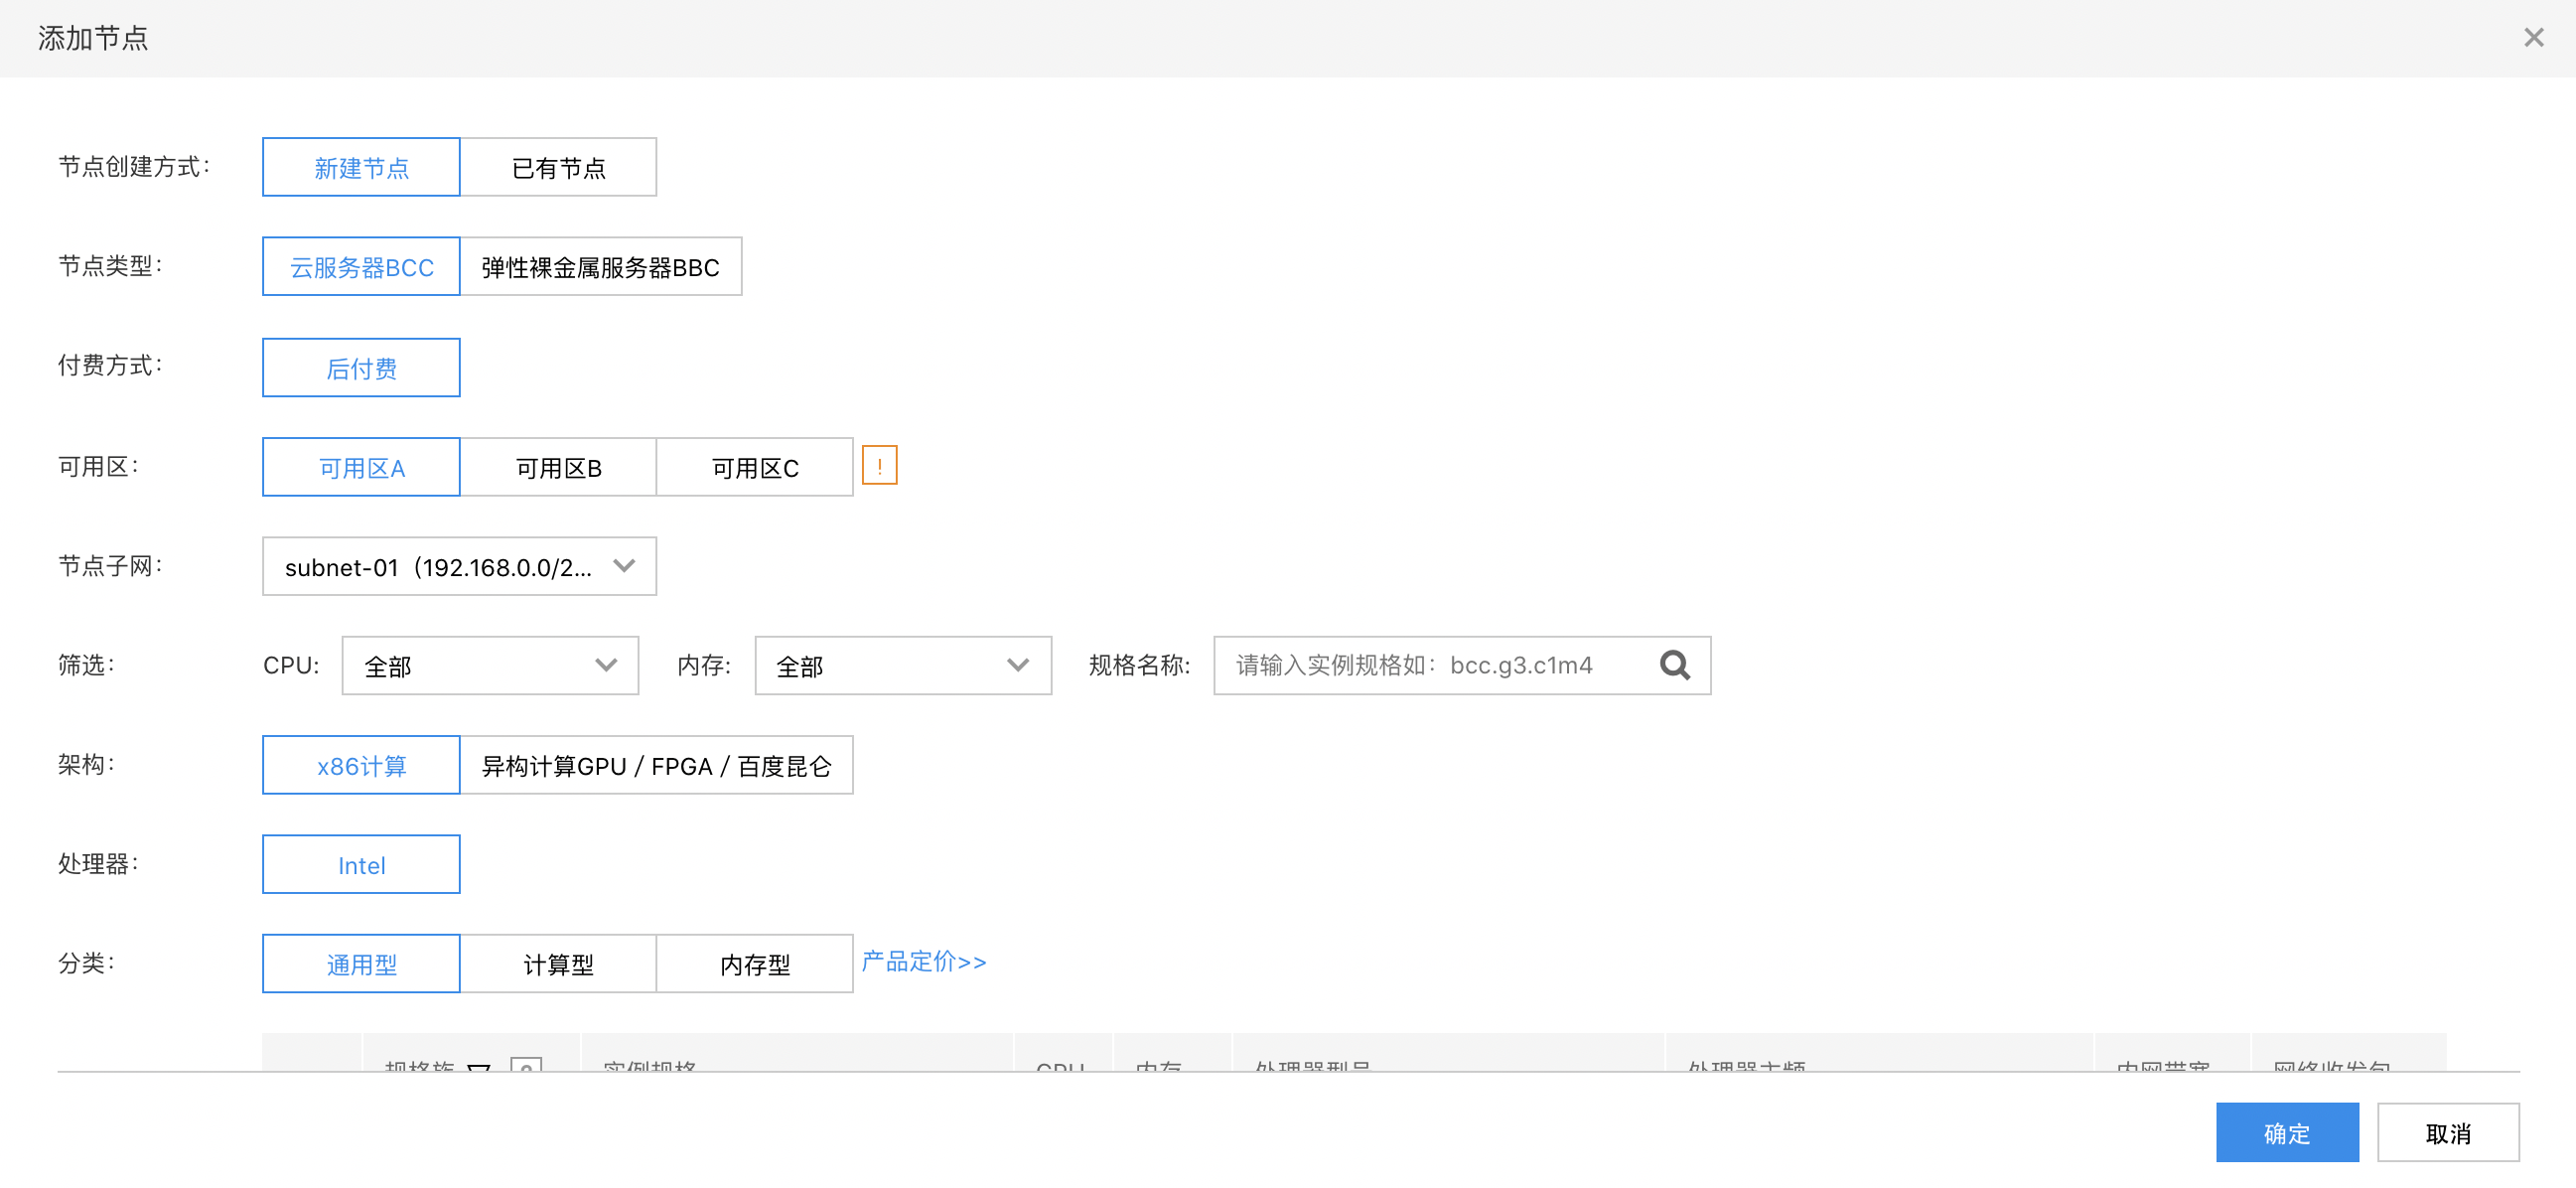
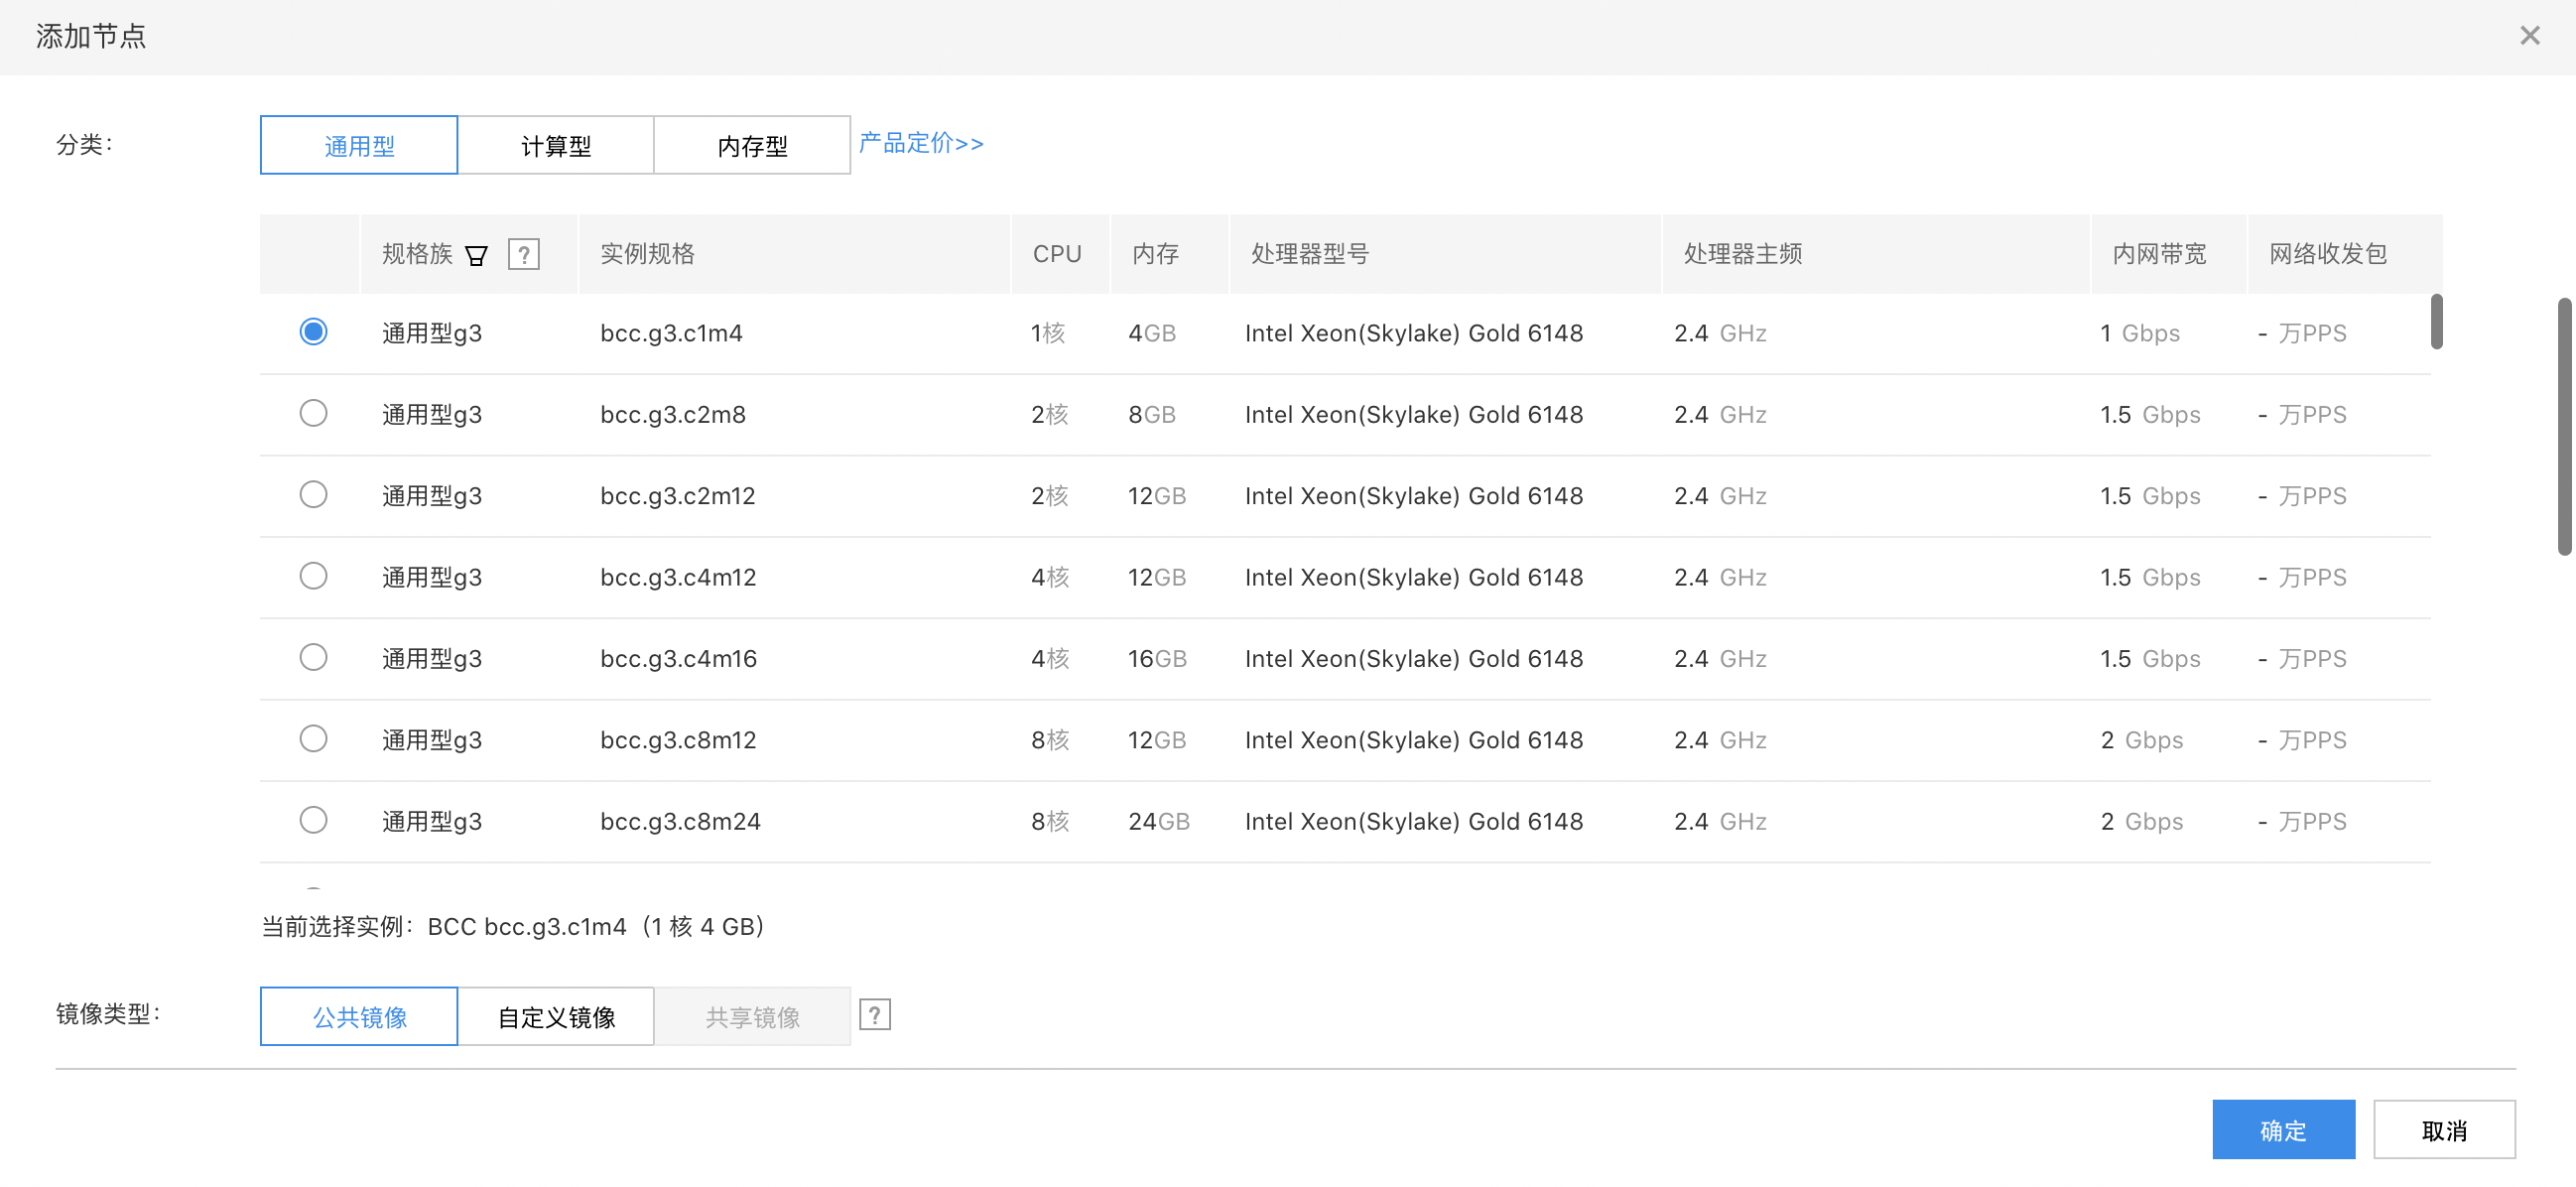
Click "Create Cluster" to enter the "Create Cluster" interface, and fill in cluster related configuration information as required.
Configuration description:
The default quota for each region is 20 clusters, and the default quota for each cluster is 200 nodes. If you need a larger quota, you can submit a work order. The cluster name does not support modification. Please enter it carefully. The user can customize the cluster name. The user-defined name must follow the rule of "letters, numbers, - _/. and other special characters, beginning with a letter, and 1-64 in length".
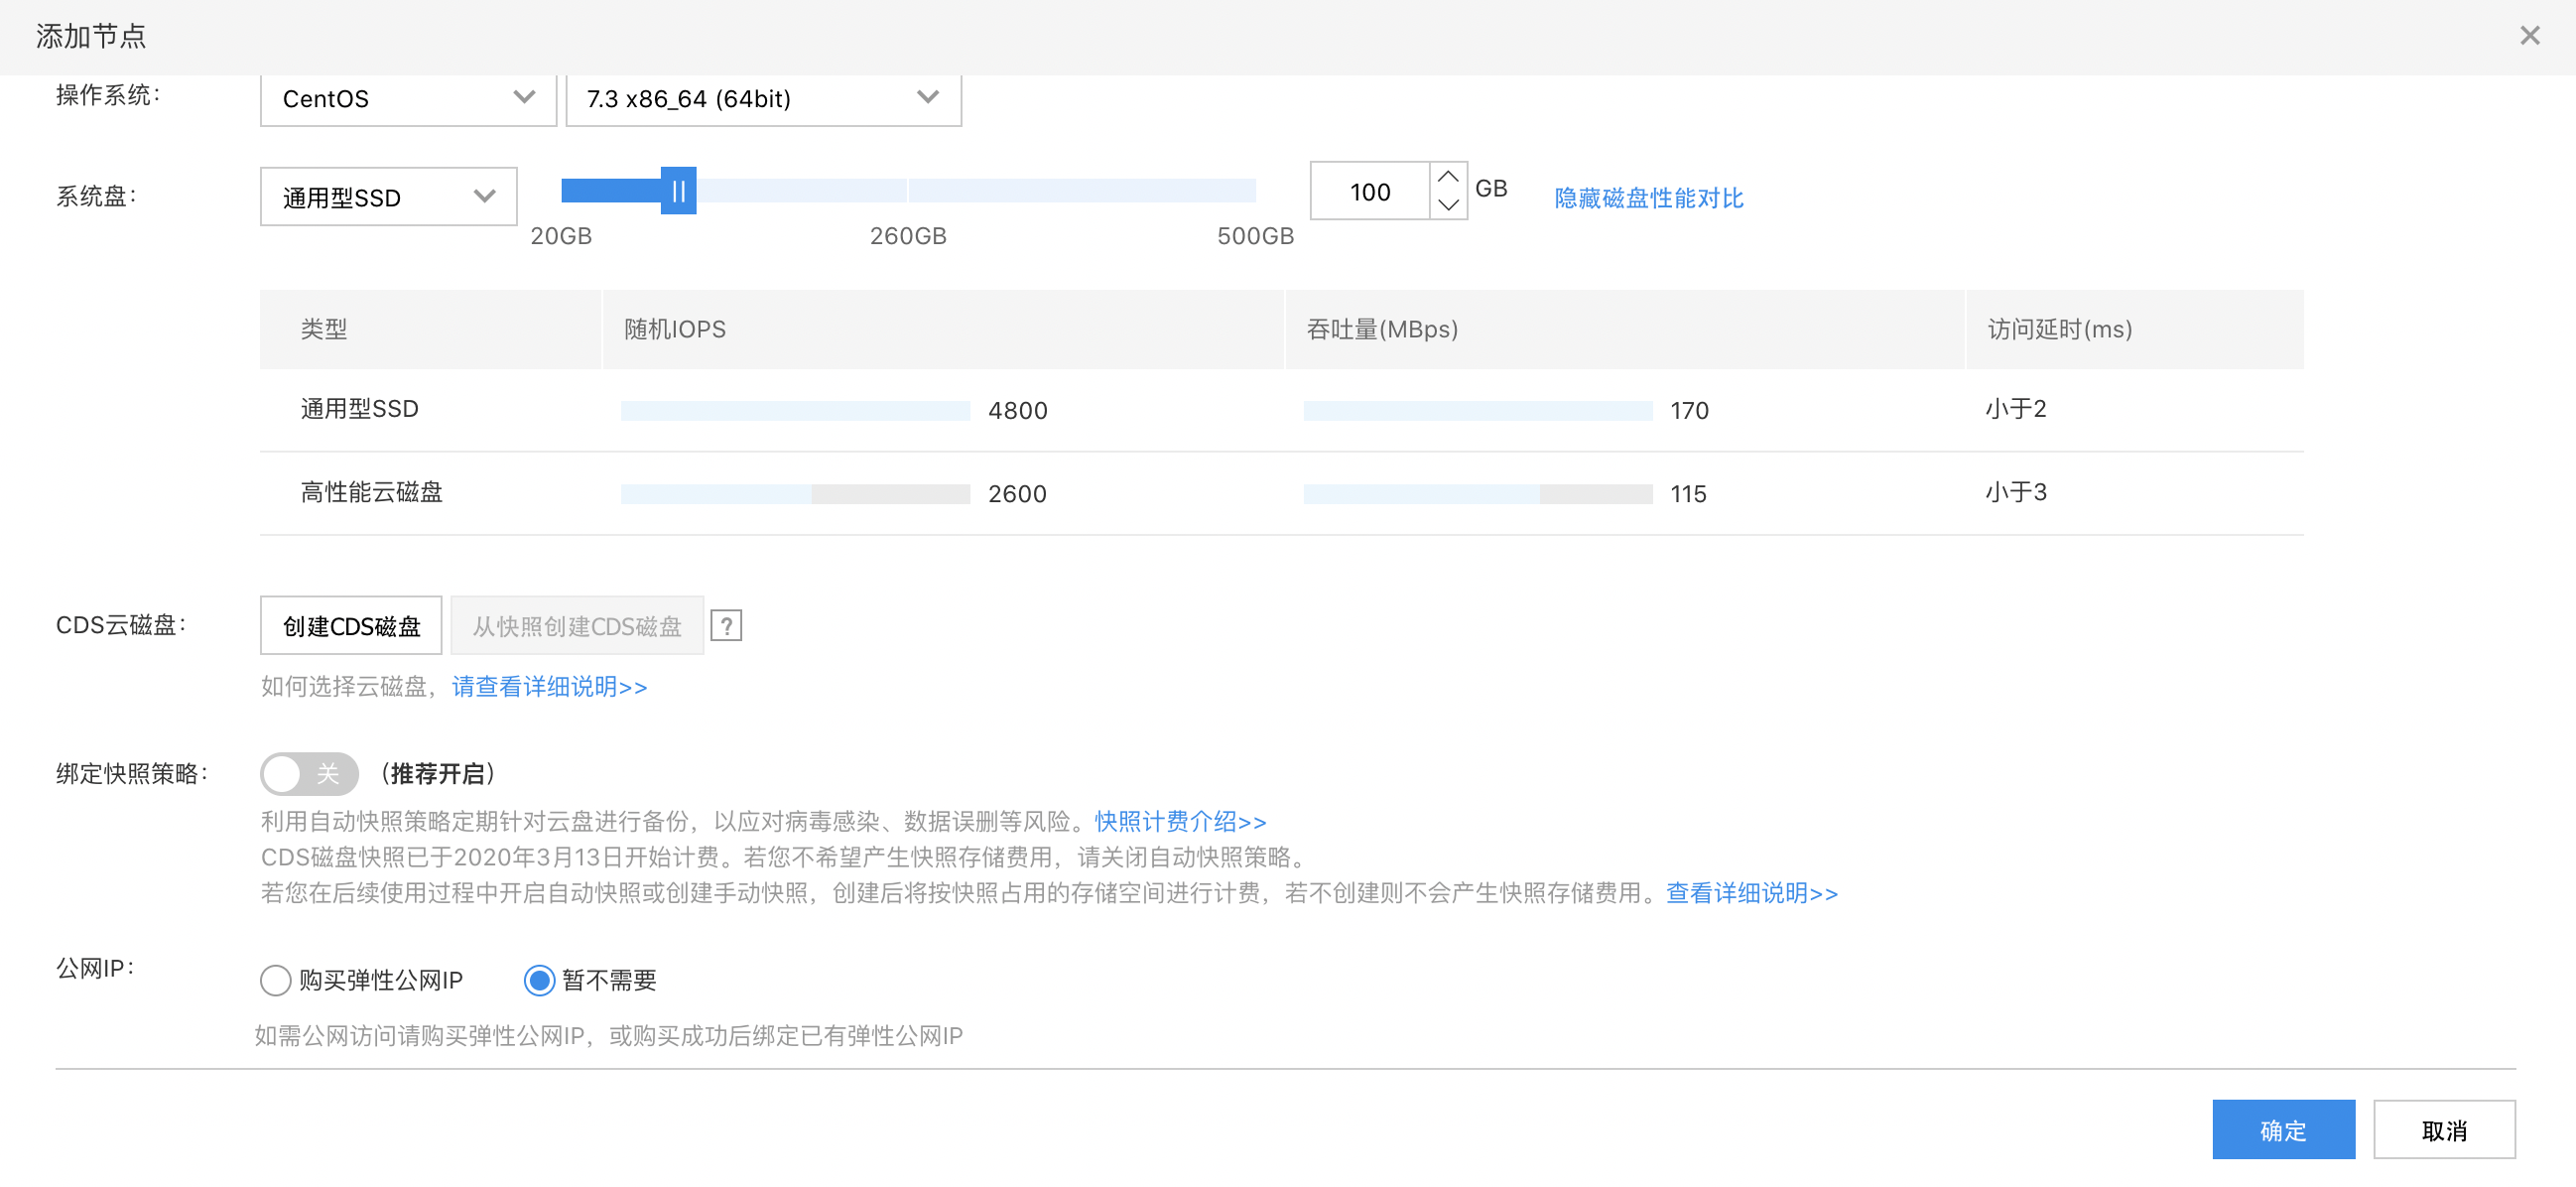
Configuration description: The operating system supports the integrated GPU driver system configured by Baidu Smart Cloud. If the user creates a GPU custom image in his BCC, the image supports GPU custom image. If the user uses a custom image Manually set the integrated GPU driver 。
3. Create a CCR image warehouse
3.1 Opening Image Warehouse
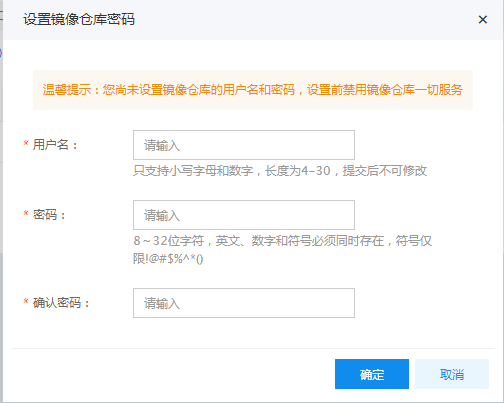
be careful:
user name : The naming rule of image warehouse user name is: the user name is composed of 4-30 English lowercase letters and numbers. password : is the user's credential to log in to the docker image warehouse.
3.2 Create namespace
-
Select a namespace under the image warehouse category, and then click New Namespace in the namespace list. -
Fill in the name of the new space and select the space type. Click OK to complete the creation of the namespace. 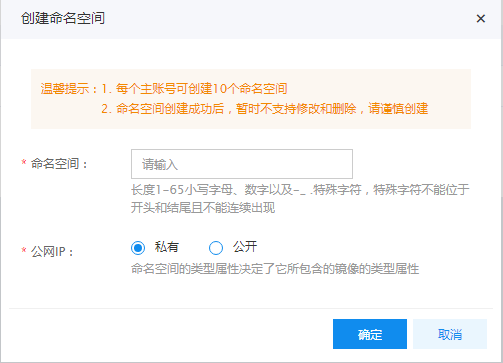
be careful:
The naming rules of the namespace are: lowercase letters, numbers and. _- Composition. The beginning and end must be lowercase letters and numbers. Length: 1-65.
3.3 (Optional) Create a new image
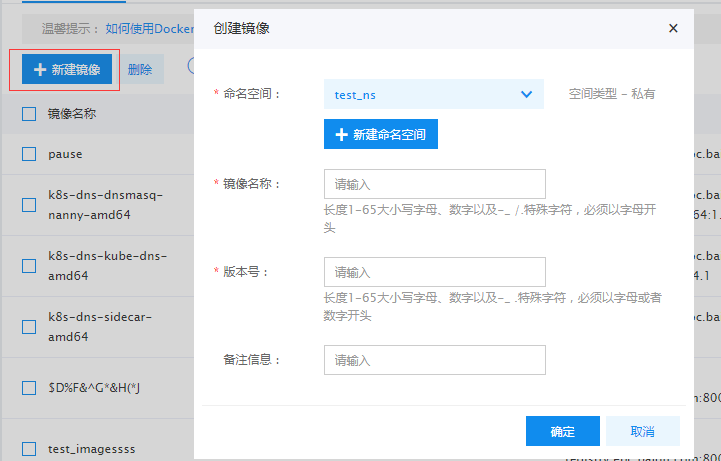
be careful:
1. The naming of image name and version number shall comply with the rule of "lower case letters, numbers and. _ -, beginning and end must be lower case letters and numbers, length: 1-65", and Chinese is not supported. The names of namespace, image name and version number cannot be duplicated. 2. If the user does not choose to create a new image, the above basic information will be automatically generated after the image is pushed to the corresponding namespace.
3.4 Push Image to Image Warehouse
>$ sudo docker login --username=[username] hub.baidubce.com
$sudo docker tag [ImageId] hub. baidice. com/[namespace]/[ImageName]: [image version number] $sudo docker push hub.baidubce.com/[namespace]/[ImageName]: [image version number] -
ImageId and image version number are supplemented according to image information -
Namespace is the namespace filled in when the image warehouse is opened -
ImageName is the image name created on the console
4. Configure Kubectl command line tool
-
Container based application deployment, maintenance and rolling upgrade -
Load balancing and service discovery -
Cluster scheduling across machines and regions -
Automatic expansion -
Stateless service and stateful service -
Extensive Volume Support -
Plug in mechanism guarantees extensibility
be careful: Before downloading kubectl, users need to log in to their own server to use the command kubectl version View the version number of the cluster you created, and then select the corresponding kubectl version to download. For example, if the cluster version number of the user is 1.8, the kubectl to be downloaded is 1.8.
4.1 Operating steps under Windows environment
-
After creating a cluster, download the kubectl tool of the Windows version, such as the 64 bit tool as follows: 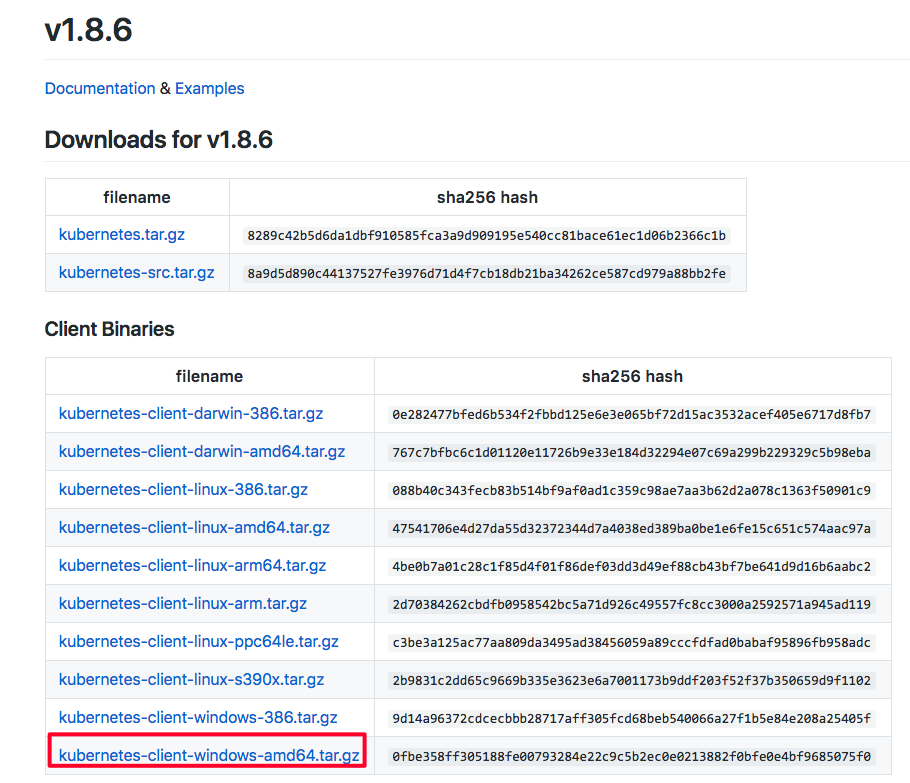
be careful: Before downloading kubectl, users need to log in to their own server to use the command kubectl version View the version number of the cluster you created, and then select the corresponding kubectl version to download. For example, if the cluster version number of the user is 1.8, the kubectl to be downloaded is 1.8. Download link is https://github.com/kubernetes/kubernetes/blob/master/CHANGELOG.md?spm=5176.app53755.3.2.2uYdIN&file=CHANGELOG.md#client -binaries-17 , users can download the corresponding version of the tool according to their cluster version number. -
After downloading, unzip it to any directory, such as disk D 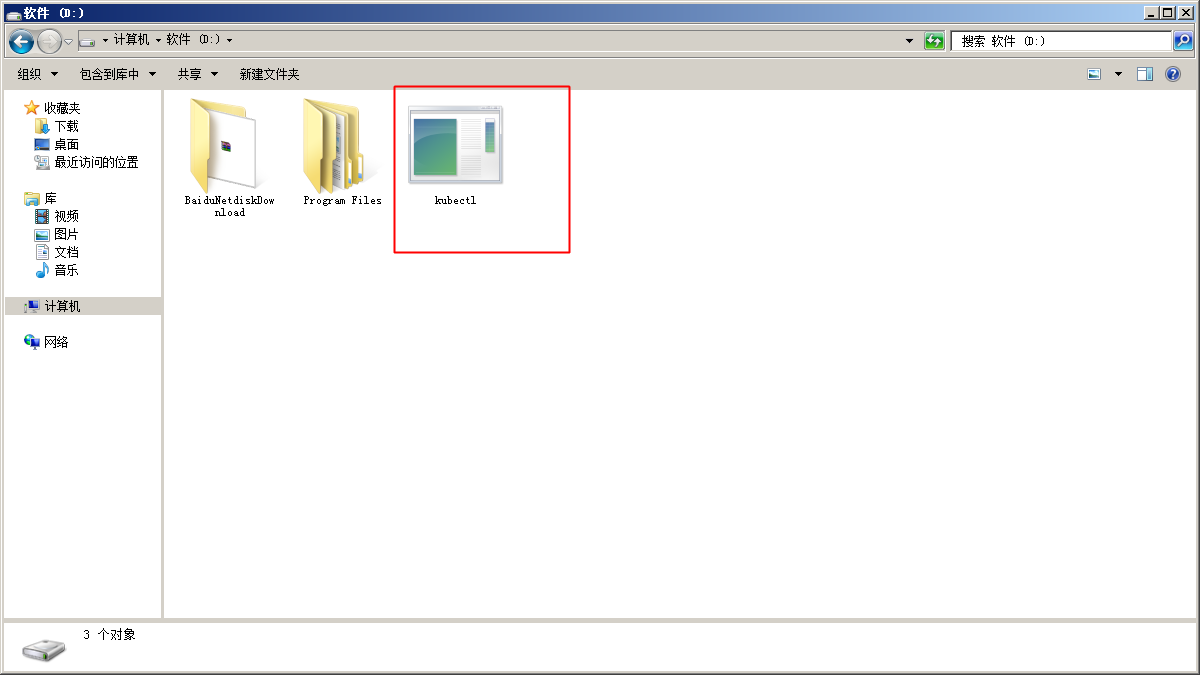
-
In the directory C:\users\ Enter the user's folder under. For example, if the user name is foo, the folder should be C:\users\foo , enter this directory at the same time, and create a folder .kube 
-
On the cluster list page, download the cluster configuration file and place it in the .kube Folder and renamed to config 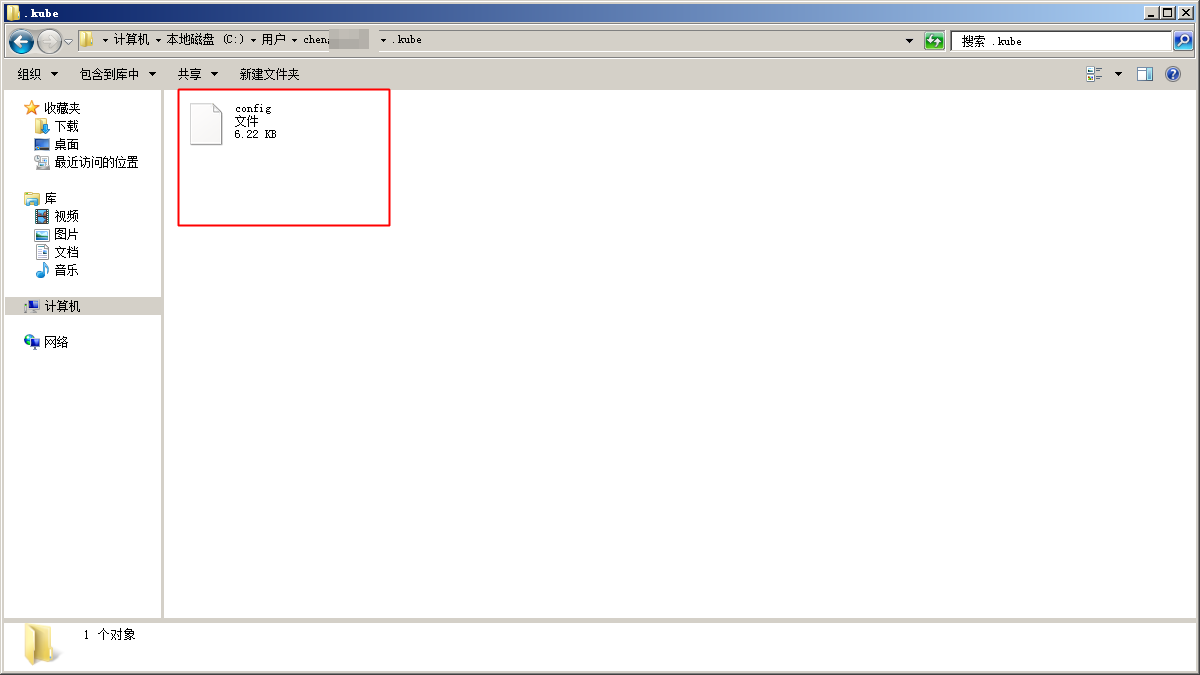
-
Open windows command line prompt 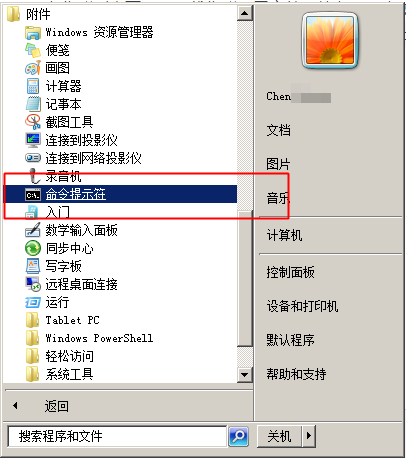
-
Enter the directory where the kubectl file is stored and run kubectl.exe get node You can view the nodes of the cluster. 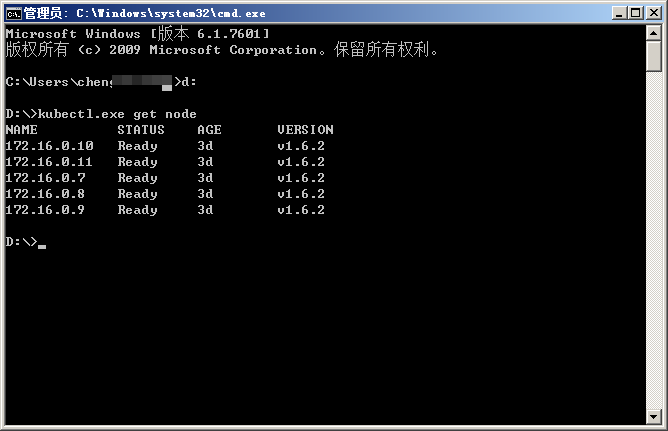
4.2 Operating steps under Linux environment
chmod +x ./kubectl sudo mv ./kubectl /usr/local/bin/kubectl
mv kubectl.conf ~/.kube/config
kubectl get node 5. (Optional) Configure Kubernetes Dashboard
5.1 Prerequisites
5.2 Creating Dashboard Service in Windows Environment
-
First, create the dashboard.yaml file in the same directory where the unzipped kubectl.exe is stored. For example, you can create it with Notepad: 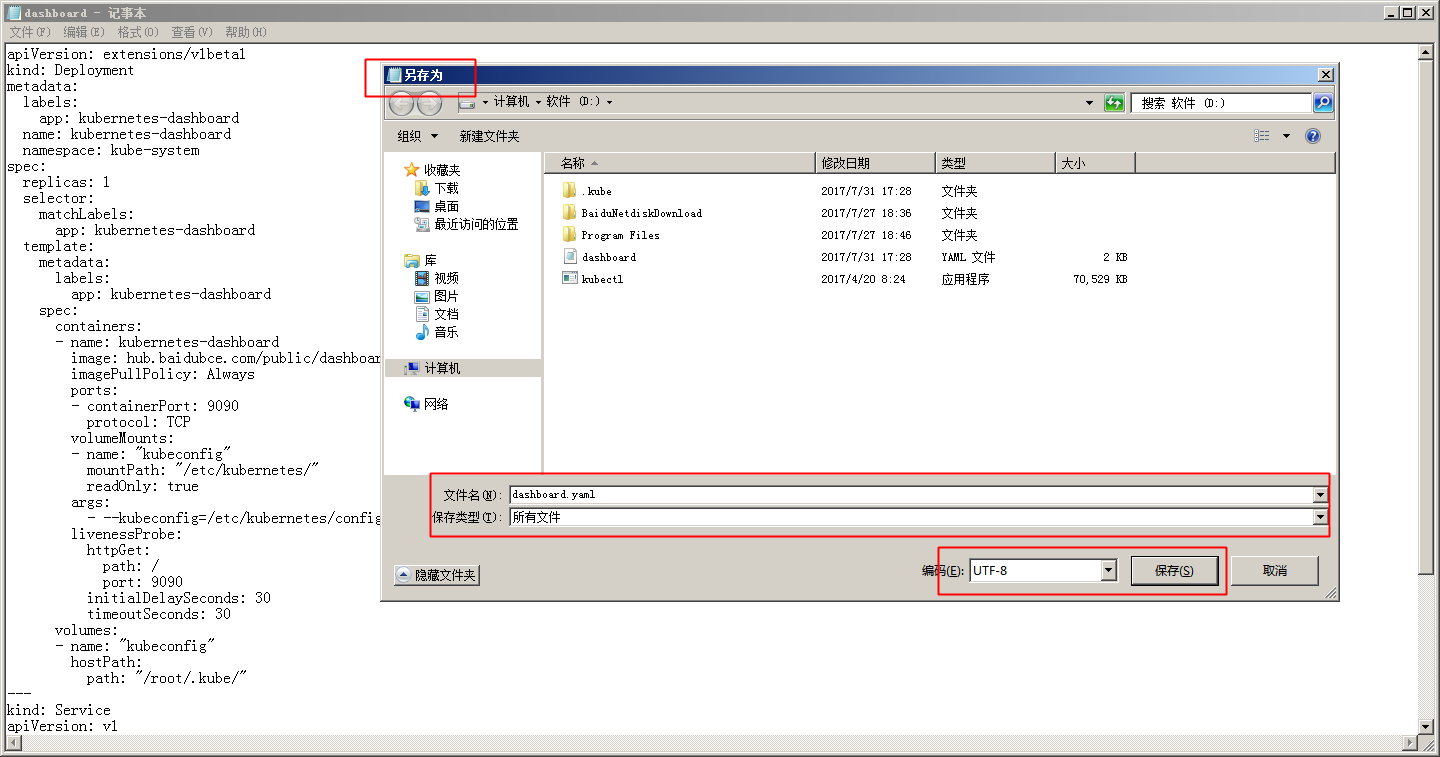
Corresponding dashboard.yaml The file is: apiVersion: apps/v1 kind: Deployment metadata: labels: app: kubernetes-dashboard name: kubernetes-dashboard namespace: kube-system spec: replicas: 1 selector: matchLabels: app: kubernetes-dashboard template: metadata: labels: app: kubernetes-dashboard spec: containers: - name: kubernetes-dashboard image: hub.baidubce.com/public/dashboard:v1.5.0-caas imagePullPolicy: Always ports: - containerPort: 9090 protocol: TCP volumeMounts: - name: "kubeconfig" mountPath: "/etc/kubernetes/" readOnly: true args: - --kubeconfig=/etc/kubernetes/config livenessProbe: httpGet: path: / port: 9090 initialDelaySeconds: 30 timeoutSeconds: 30 volumes: - name: "kubeconfig" hostPath: path: "/root/.kube/" --- kind: Service apiVersion: v1 metadata: labels: app: kubernetes-dashboard name: kubernetes-dashboard namespace: kube-system spec: type: NodePort ports: - port: 80 targetPort: 9090 selector: app: kubernetes-dashboard -
Then enter kubectl.exe create -f dashboard.yaml Create Dashboard 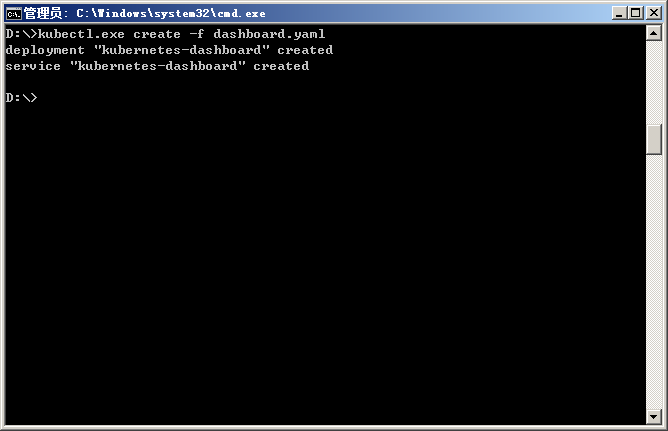
-
adopt kubectl.exe get pod --all-namespaces Command to check whether the creation is successful 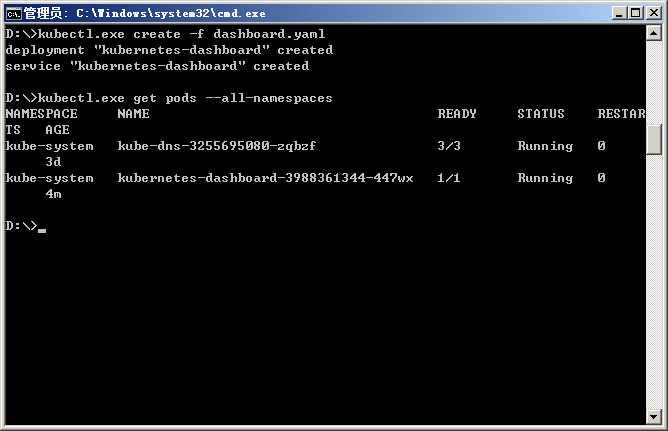
-
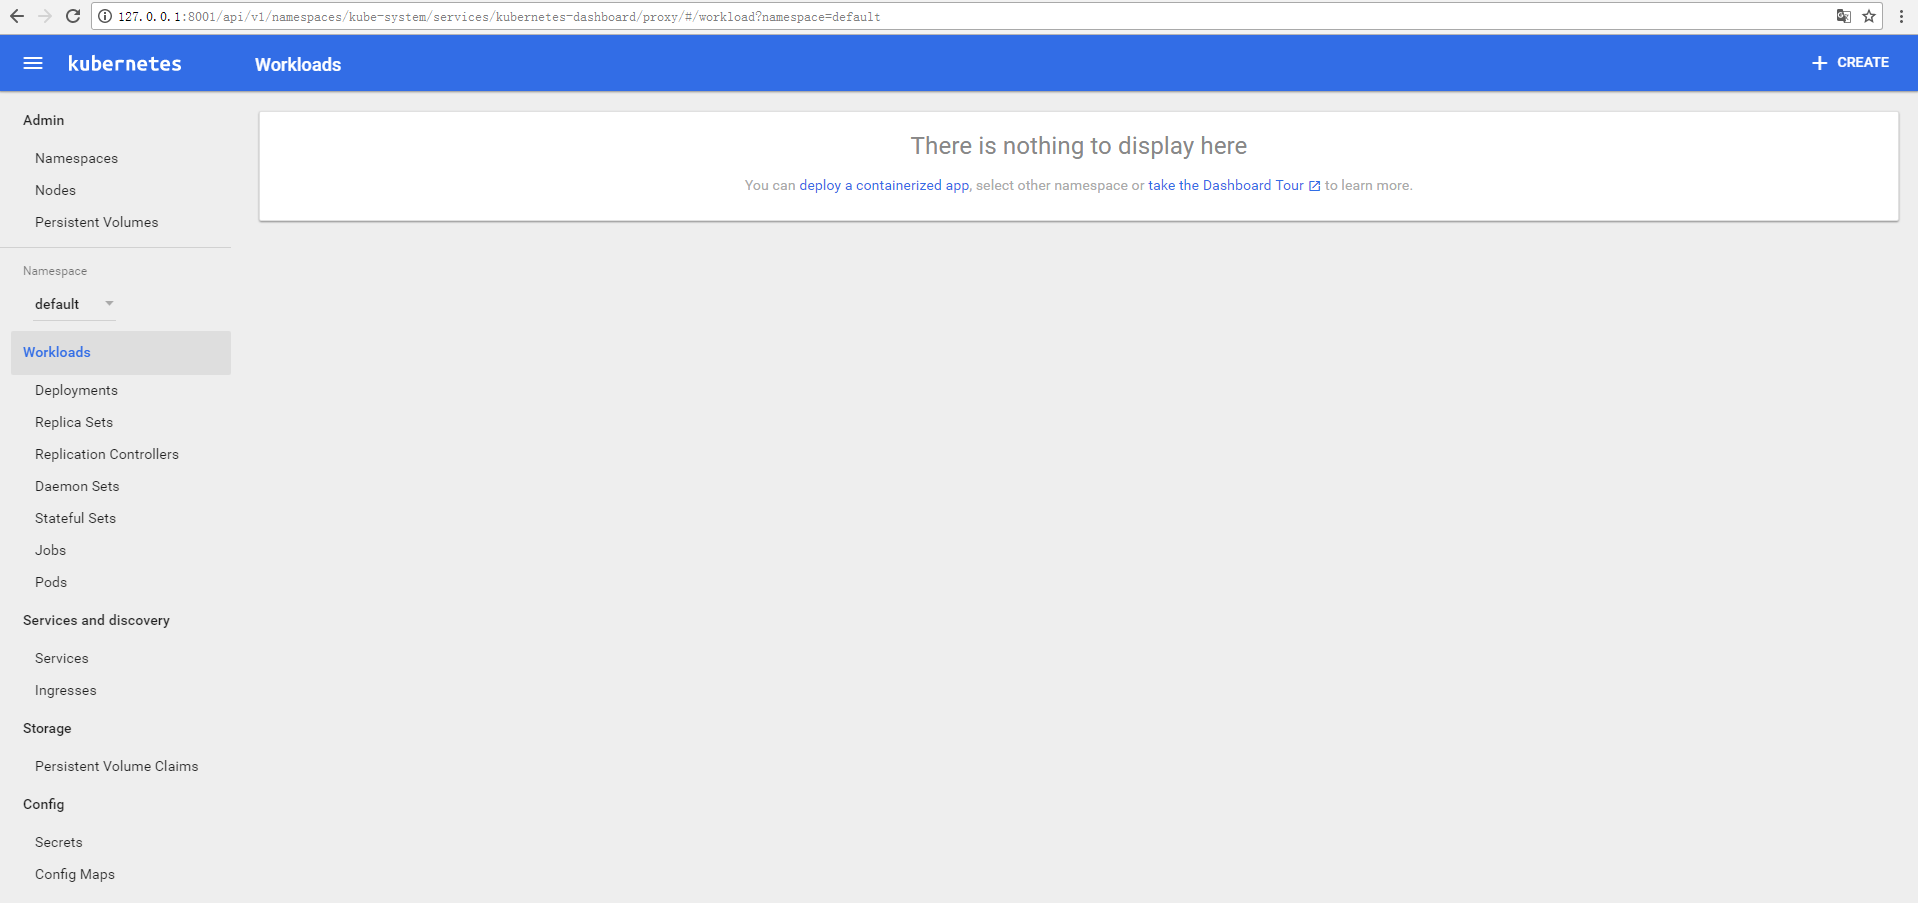
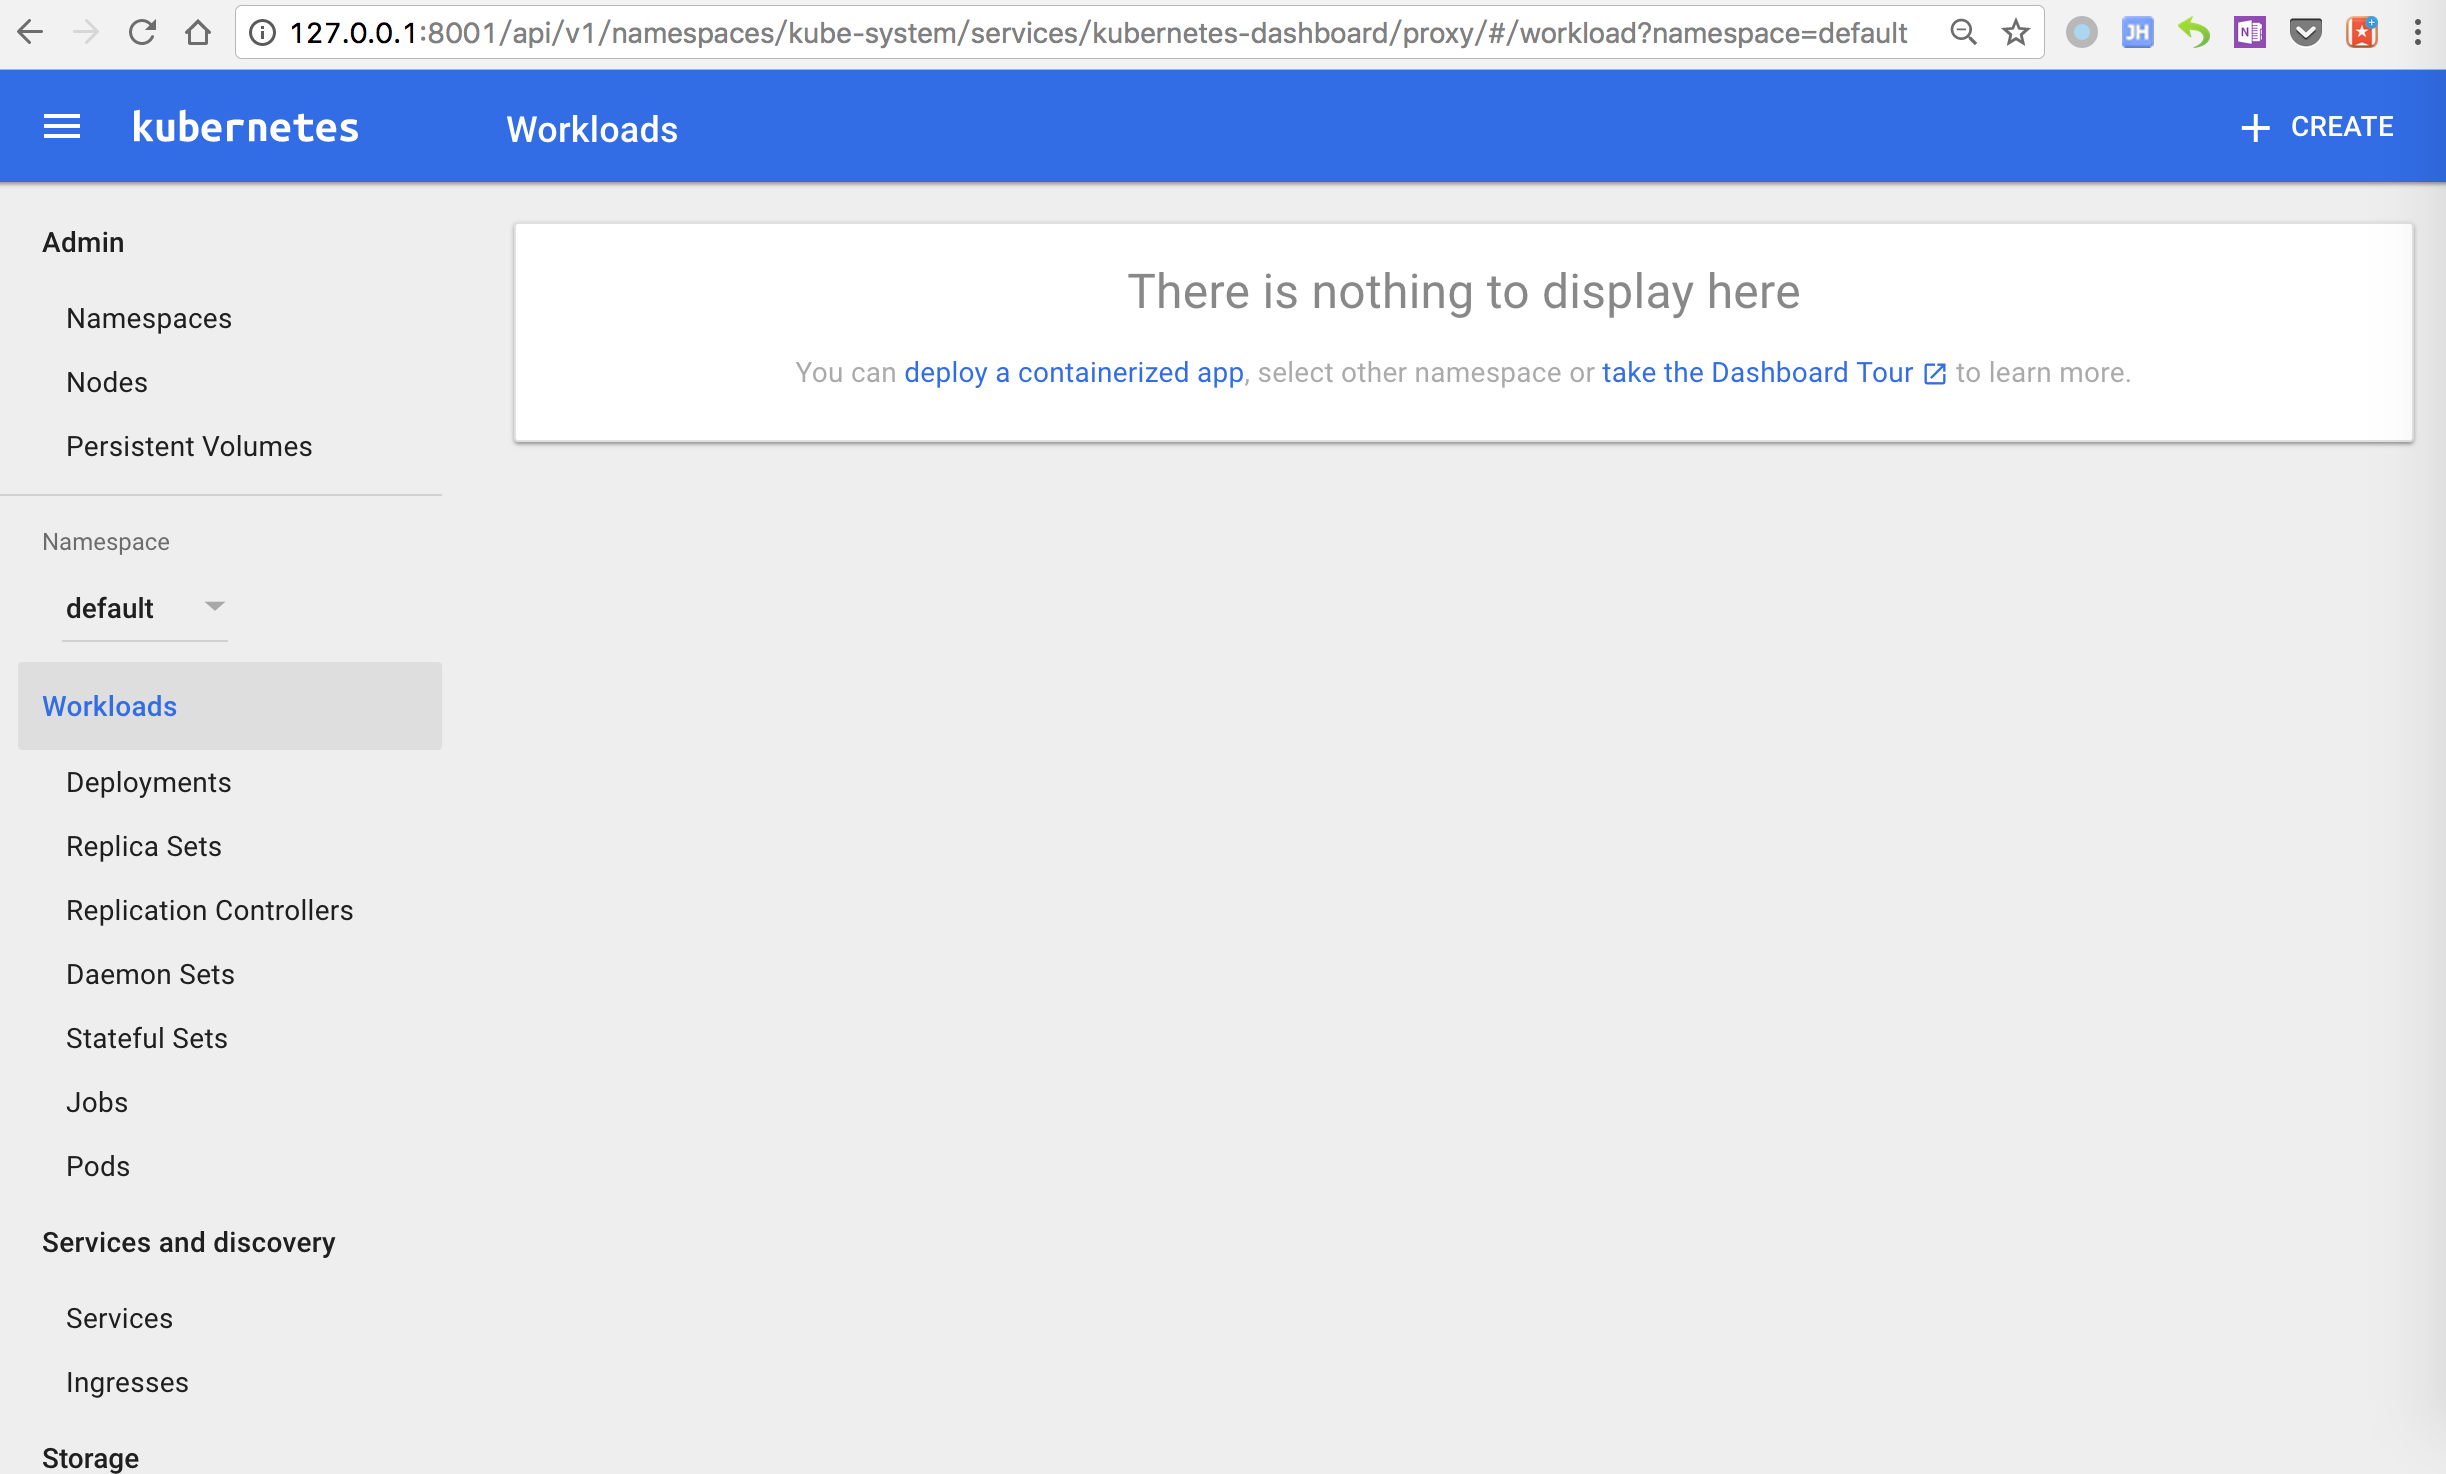
input kubectl.exe proxy You can open the proxy and access it in the browser 127.0.0.1:8001/ui You can access the dashboard 
5.3 Creating Dashboard Service in Linux Environment
$ kubectl create -f dashboard.yaml deployment "kubernetes-dashboard" created service "kubernetes-dashboard" created
apiVersion: apps/v1 kind: Deployment metadata: labels: app: kubernetes-dashboard name: kubernetes-dashboard namespace: kube-system spec: replicas: 1 selector: matchLabels: app: kubernetes-dashboard template: metadata: labels: app: kubernetes-dashboard spec: containers: - name: kubernetes-dashboard image: hub.baidubce.com/public/dashboard:v1.5.0-caas imagePullPolicy: Always ports: - containerPort: 9090 protocol: TCP volumeMounts: - name: "kubeconfig" mountPath: "/etc/kubernetes/" readOnly: true args: - --kubeconfig=/etc/kubernetes/config livenessProbe: httpGet: path: / port: 9090 initialDelaySeconds: 30 timeoutSeconds: 30 volumes: - name: "kubeconfig" hostPath: path: "/root/.kube/" --- kind: Service apiVersion: v1 metadata: labels: app: kubernetes-dashboard name: kubernetes-dashboard namespace: kube-system spec: type: NodePort ports: - port: 80 targetPort: 9090 selector: app: kubernetes-dashboard
kubectl proxy
be careful:
Localhost refers to the local machine used by the user, not the virtual machine, and the corresponding IP address is 127.0.0.1
6. Create a GuestBook through kubernetes kubectl
-
Web front-end service. -
The Redis storage system includes the Redis master node and the Redis slave node.
6.1 Creating a Redis Master Pod
*Note: All yaml files in this operation are saved in the same directory as kubectl.
kubectl apply -f redis-master-deployment.yaml
apiVersion: apps/v1 kind: Deployment metadata: name: redis-master spec: selector: matchLabels: app: redis role: master tier: backend replicas: 1 template: metadata: labels: app: redis role: master tier: backend spec: containers: - name: master image: hub.baidubce.com/public/guestbook-redis-master:e2e # or just image: redis resources: requests: cpu: 100m memory: 100Mi ports: - containerPort: 6379
kubectl get pods
NAME READY STATUS RESTARTS AGE redis-master-1068406935-3lswp 1/1 Running 0 28s
6.2 Creating a Redis Master Service
kubectl apply -f redis-master-service.yaml
apiVersion: v1 kind: Service metadata: name: redis-master labels: app: redis role: master tier: backend spec: ports: - port: 6379 targetPort: 6379 selector: app: redis role: master tier: backend
be careful: The tarPort attribute specifies the port number on which the Pod content container application listens.
kubectl get service
NAME CLUSTER-IP EXTERNAL-IP PORT(S) AGE kubernetes 10.0.0.1 <none> 443/TCP 1m redis-master 10.0.0.151 <none> 6379/TCP 8s 6.3 Creating a Redis Slave Pod
kubectl apply -f redis-slave-deployment.yaml
apiVersion: apps/v1 kind: Deployment metadata: name: redis-slave spec: selector: matchLabels: app: redis role: slave tier: backend replicas: 2 template: metadata: labels: app: redis role: slave tier: backend spec: containers: - name: slave image: hub.baidubce.com/public/guestbook-redis-slave:v1 resources: requests: cpu: 100m memory: 100Mi env: - name: GET_HOSTS_FROM value: dns # Using `GET_HOSTS_FROM=dns` requires your cluster to # provide a dns service. As of Kubernetes 1.3, DNS is a built-in # service launched automatically. However, if the cluster you are using # does not have a built-in DNS service, you can instead # instead access an environment variable to find the master # service's host. To do so, comment out the 'value: dns' line above, and # uncomment the line below: # value: env ports: - containerPort: 6379
kubectl get pods
NAME READY STATUS RESTARTS AGE redis-master-1068406935-3lswp 1/1 Running 0 1m redis-slave-2005841000-fpvqc 1/1 Running 0 6s redis-slave-2005841000-phfv9 1/1 Running 0 6s 6.4 Creating a Redis Slave Service
kubectl apply -f redis-slave-service.yaml
apiVersion: v1 kind: Service metadata: name: redis-slave labels: app: redis role: slave tier: backend spec: ports: - port: 6379 selector: app: redis role: slave tier: backend
NAME CLUSTER-IP EXTERNAL-IP PORT(S) AGE kubernetes 10.0.0.1 <none> 443/TCP 2m redis-master 10.0.0.151 <none> 6379/TCP 1m redis-slave 10.0.0.223 <none> 6379/TCP 6s 6.5 Creating Frontend Pod
kubectl apply -f frontend-deployment.yaml
apiVersion: apps/v1 kind: Deployment metadata: name: frontend spec: selector: matchLabels: app: guestbook tier: frontend replicas: 3 template: metadata: labels: app: guestbook tier: frontend spec: containers: - name: php-redis image: hub.baidubce.com/public/guestbook-frontend:v4 resources: requests: cpu: 100m memory: 100Mi env: - name: GET_HOSTS_FROM value: dns # Using `GET_HOSTS_FROM=dns` requires your cluster to # provide a dns service. As of Kubernetes 1.3, DNS is a built-in # service launched automatically. However, if the cluster you are using # does not have a built-in DNS service, you can instead # instead access an environment variable to find the master # service's host. To do so, comment out the 'value: dns' line above, and # uncomment the line below: # value: env ports: - containerPort: 80
kubectl get pods -l app=guestbook -l tier=frontend
NAME READY STATUS RESTARTS AGE frontend-3823415956-dsvc5 1/1 Running 0 54s frontend-3823415956-k22zn 1/1 Running 0 54s frontend-3823415956-w9gbt 1/1 Running 0 54s 6.6 Create Frontend Service
be careful: If you use the load balancer provided by Baidu Smart Cloud, please comment type: NodePort and uncomment type: LoadBalancer.
kubectl apply -f frontend-service.yaml
apiVersion: v1 kind: Service metadata: name: frontend labels: app: guestbook tier: frontend spec: # comment or delete the following line if you want to use a LoadBalancer type: LoadBalancer # if your cluster supports it, uncomment the following to automatically create # an external load-balanced IP for the frontend service. ports: - port: 80 selector: app: guestbook tier: frontend
kubectl get services
NAME CLUSTER-IP EXTERNAL-IP PORT(S) AGE frontend 10.0.0.112 <nodes> 80:32372/TCP 6s kubernetes 10.0.0.1 <none> 443/TCP 4m redis-master 10.0.0.151 <none> 6379/TCP 2m redis-slave 10.0.0.223 <none> 6379/TCP 1m 6.7 Viewing the Frontend Service LoadBalancer
kubectl get service frontend
NAME CLUSTER-IP EXTERNAL-IP PORT(S) AGE frontend 10.0.0.112 180.76.174.157 80:32372/TCP 1m
7. Bind domain name and provide services
7.1 Purchase domain name
7.2 Binding domain name
-
Log in to the management console and enter Domain name management -
Select the domain name of the Internet IP that needs to be bound to the frontend service, and click analysis 。 
-
On the pop-up Add Resolution In the menu bar, Record Type Select record type A, Record value Fill in the Internet IP address of the frontend service. 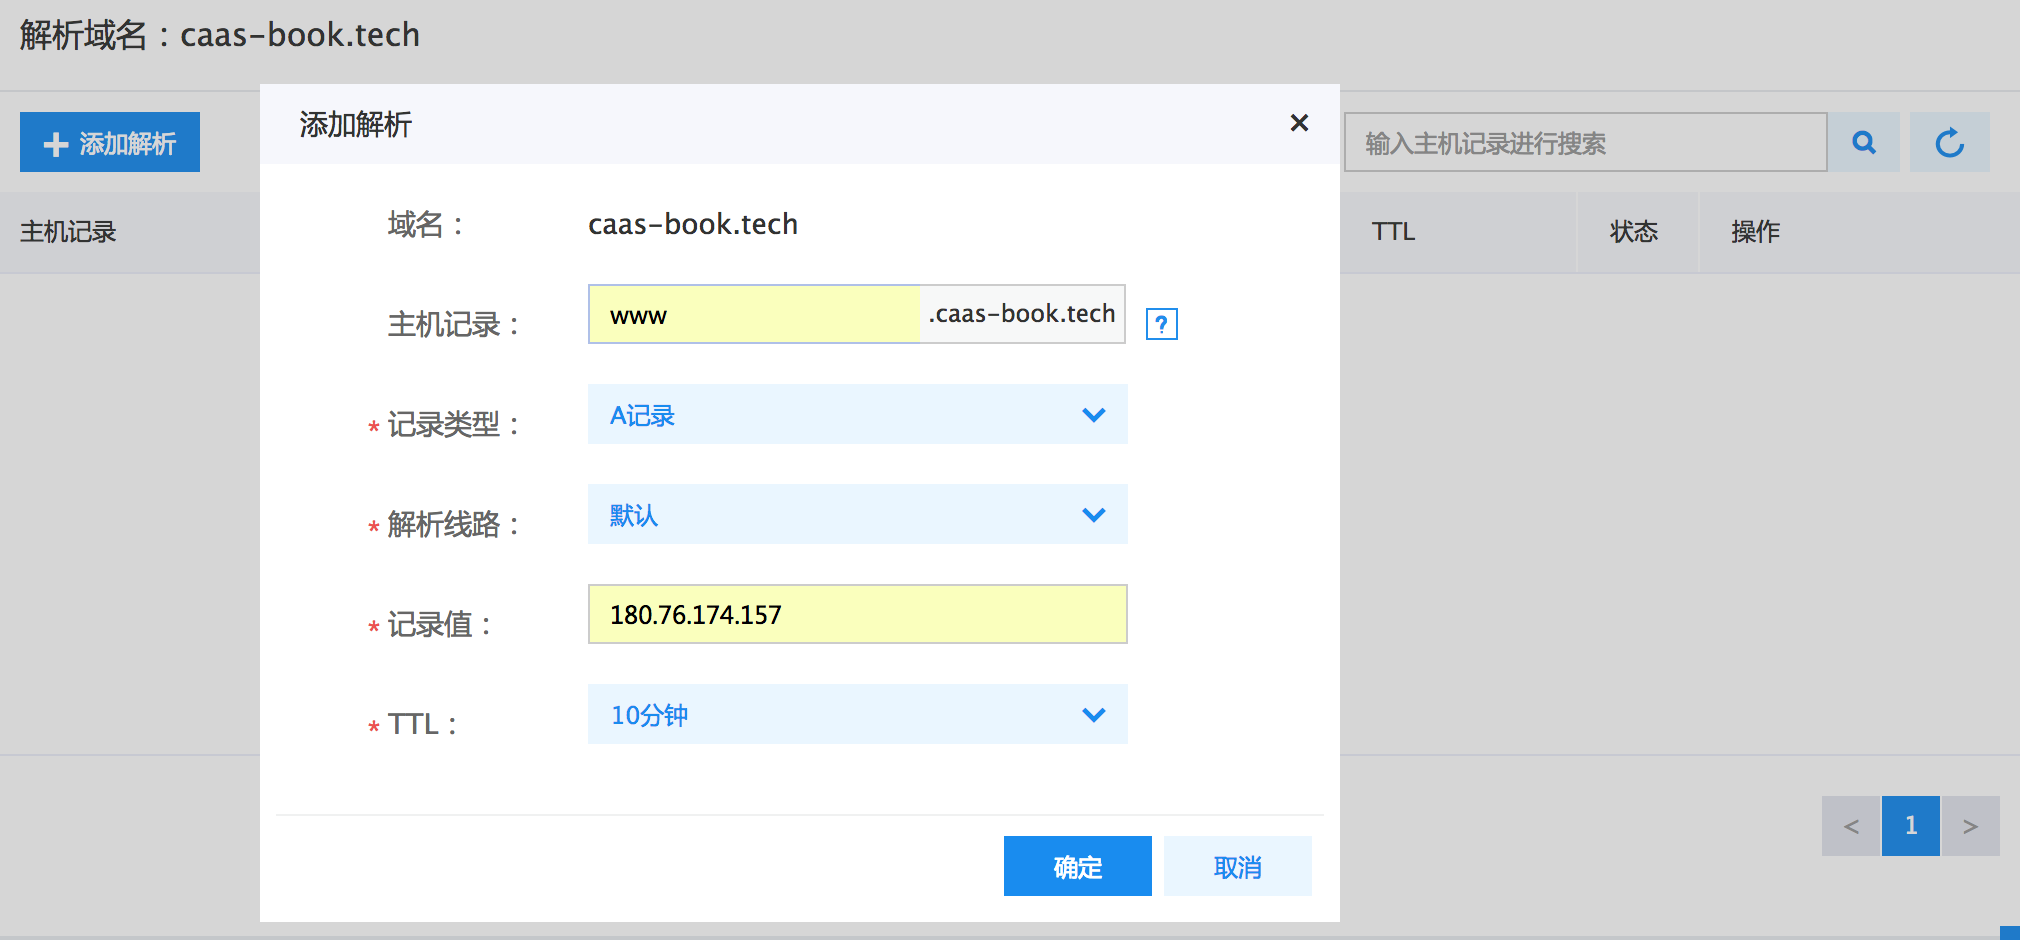
-
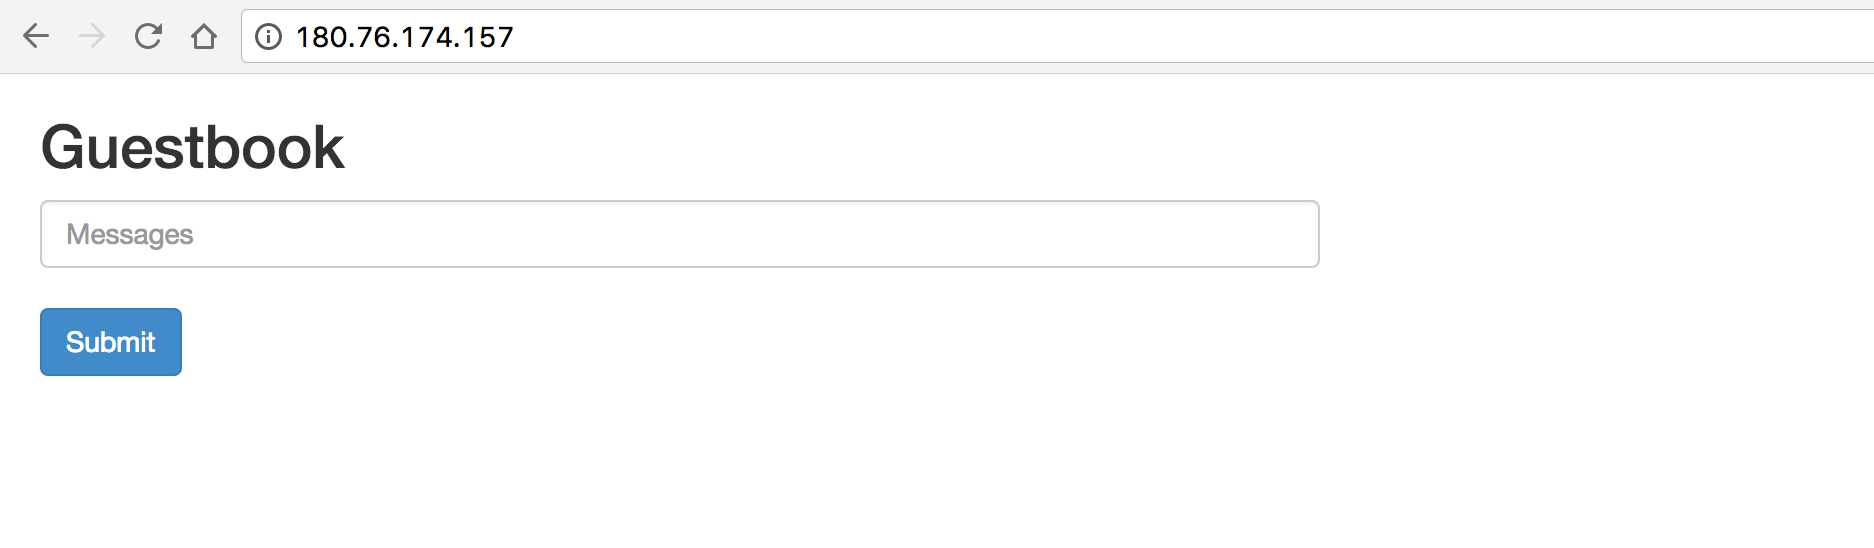
Use the domain name to access the service. The results are shown in the following figure: 