This website provides Linux server operation and maintenance, automated script writing and other services. If you need, please contact the blogger on WeChat: xiaozme
Proximizer is a powerful network tool that allows users to set up a dedicated proxy server for each independent application and supports Windows UWP applications. In this article, the blogger will show step by step how to use Proximizer to implement application level proxy. No matter you want to improve network access speed or need to configure special proxy requirements, you can find solutions.

Use Scenarios
I don't know if you have ever encountered this situation: some programs may be unable to connect to the network due to a magical interference, and these programs themselves do not support proxy settings. In this case, we usually have to rely on the global agent to access the network, but the global agent will affect the normal use of other applications. If there is a tool that allows the designated software to connect to the network through independent agents, it can effectively solve this problem. Proximizer is just such a tool, which can achieve accurate application level agents.
Download Proximizer
The Proximitor supports Windows, macOS and Android. The download address is: https://www.proxifier.com/
Note: Please try to download from the official. It is not recommended to use XX Chinese version and XX cracked version to avoid viruses!!!
Installing the Proximitor
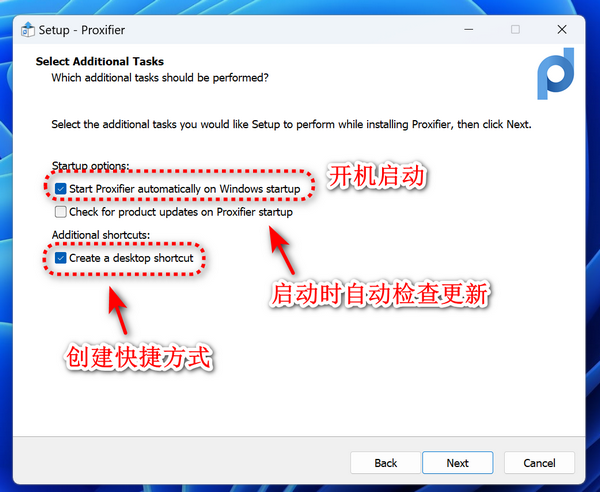
There is no special place to install the Proximizer. Choose whether to set it according to your own situation“ Startup ”And“ Shortcuts ”
The Proximator is a paid software. After the first installation, you can choose to try it, or enter the registration code. It is recommended to purchase genuine support if possible, or search for the registration code online (not recommended).
Using the Proximator
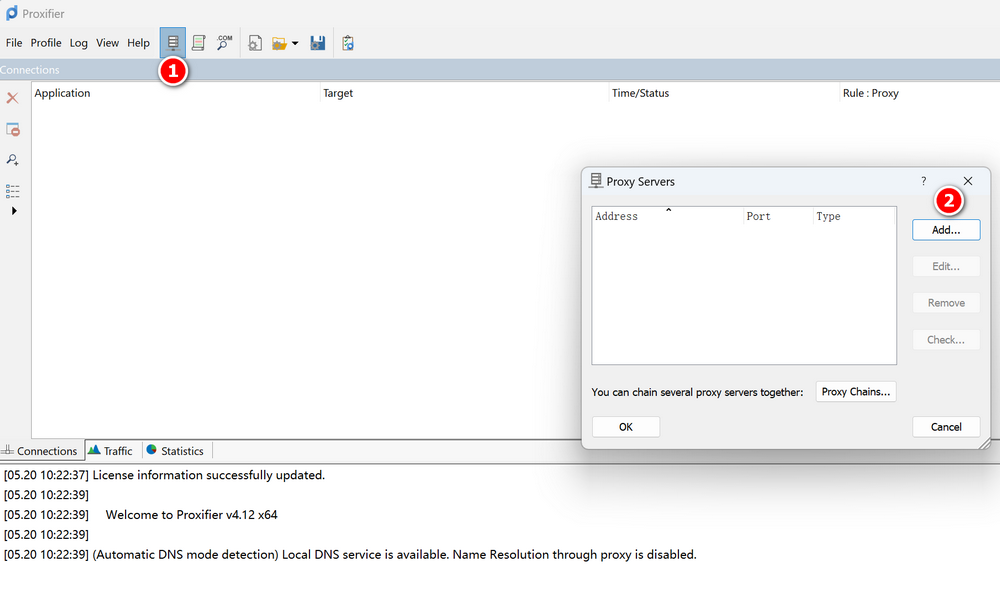
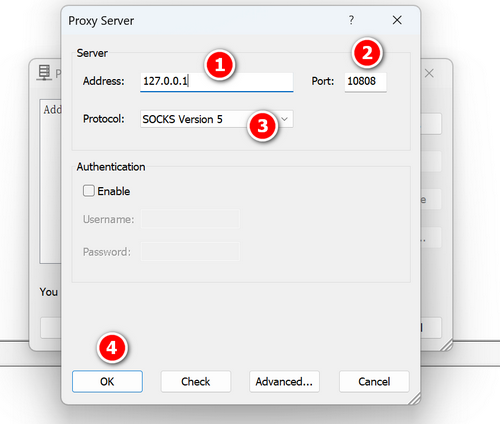
Open the "Server icon - select Add" button to add HTTPS or SOCKET 5 proxy first.
Enter SOCKET 5 proxy information. The following screenshot is for demonstration only. Please change it to your own SOCKET 5 IP and port.
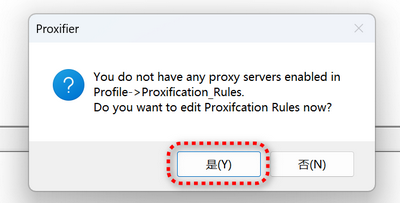
Next or prompt the following screenshot, we choose“ no ”, if selected yes Can walk the global proxy.

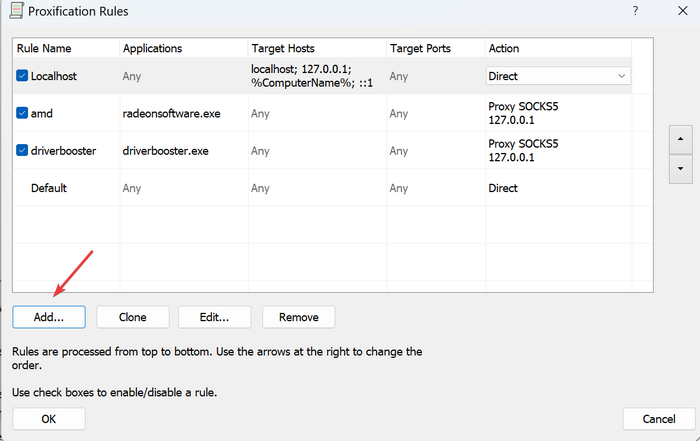
You will be prompted that there is no proxy rule. Select“ yes ”Add now.
click Add Button to add.
Then select the application that needs proxy according to the following figure.
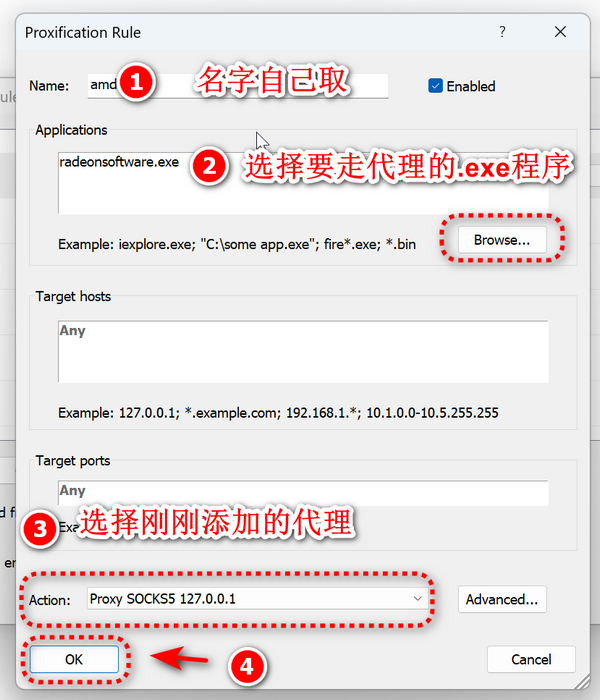
So far, the settings have been completed. In the software log, you can see that the corresponding application accesses the network through the proxy.

Other alternative software
The blogger found some software similar to Proximizer, but did not actually try it. If you are interested, you can study it by yourself.
Conclusion
Through this tutorial, you can not only configure agents for specific applications, but also ensure that the network performance of other applications is not affected. I hope this article can help you better use Proximizer to meet your personalized network needs.
Proxifier official website: https://www.proxifier.com/