
-
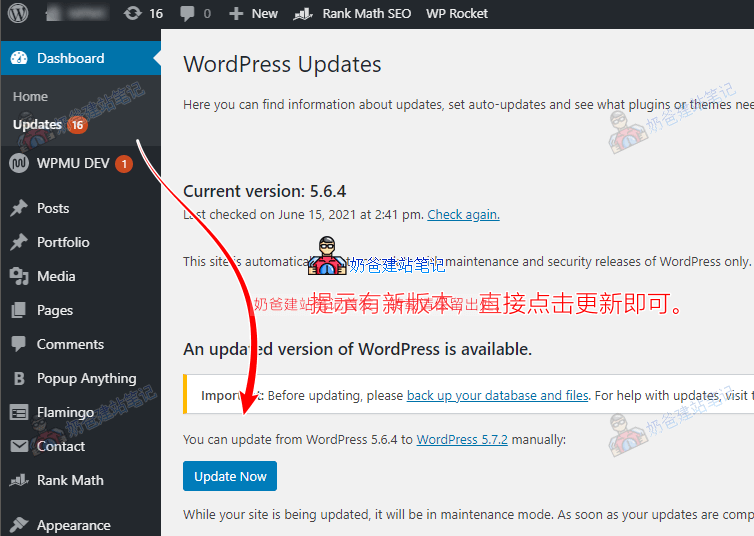
one Automatically update WordPress -
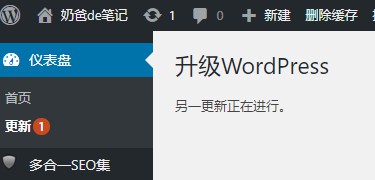
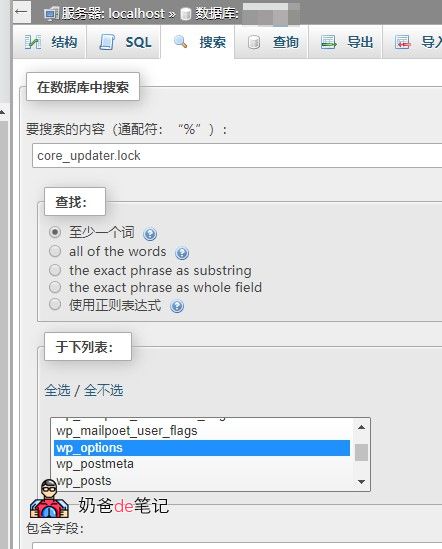
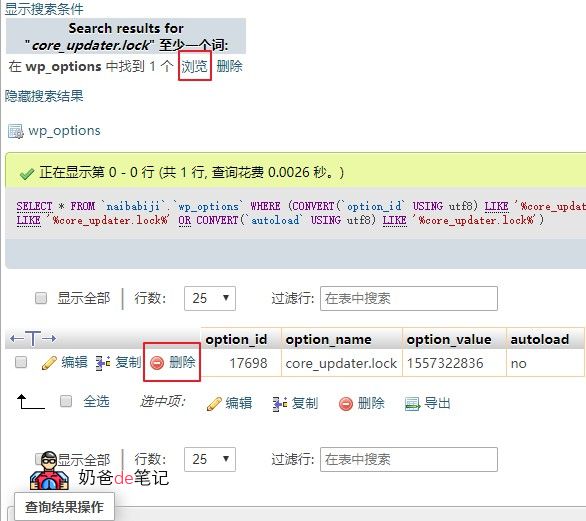
two Failed to update WordPress, prompting "Another update is in progress" -
three How to upgrade WordPress manually -
three point one Method 1: Download offline package for manual update -
three point two Method 2: Update with plug-ins -
three point three Method 3: Update with code+compressed package -
three point four -
three point five Method 4: Manually update WordPress tutorial with pagoda panel -
three point six Method 5. Update WordPress manually through the ssh command
-
Automatically update WordPress
Failed to update WordPress, prompting "Another update is in progress"
How to upgrade WordPress manually
Method 1: Download offline package for manual update
-
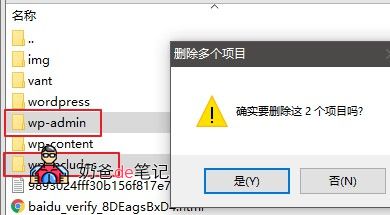
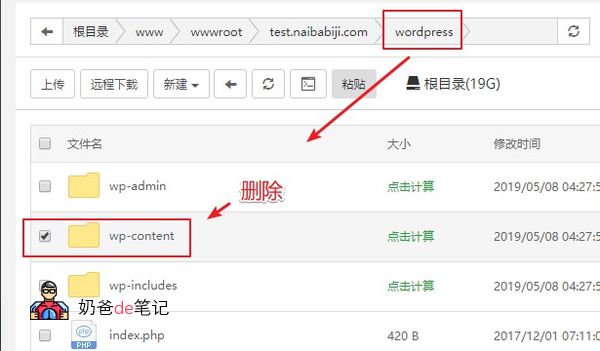
① . Unzip the downloaded installation package and delete the wp content folder; -
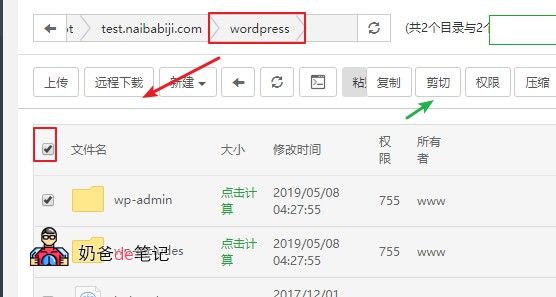
② . Delete with FTP On server Wp admin and wp includes; -
③ . Upload the remaining local files to the server to cover all files; -
④ . Log in to the background of the WordPress website to check whether there is a request to update the database. If there is a request, the database will be updated. If there is no request, the database will be updated.

Method 2: Update with plug-ins
Method 3: Update with code+compressed package
-
Download the WordPress installation package file and rename it wordpress.zip -
Upload wordpress.zip to the root directory of your website -
Copy the following code to the topic function file -
Click Update in Background -
After updating, delete the function code
/** *Temporarily change the WordPress package address so that WP can be successfully updated online - Long Xiaotianxia * https://www.ilxtx.com/how-to-update-wordpress-successfully.html */ function lxtx_site_transient_update_core( $value ){ foreach ($value->updates as &$update) { $update->download = home_url( 'wordpress.zip' ); $update->packages->full = home_url( 'wordpress.zip' ); } return $value; } add_filter('site_transient_update_core', 'lxtx_site_transient_update_core');
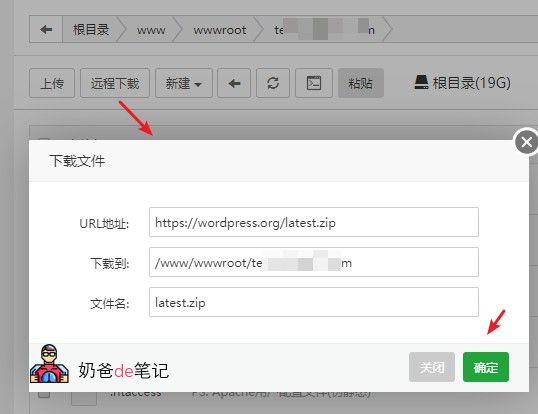
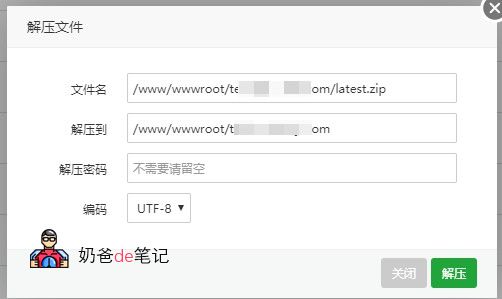
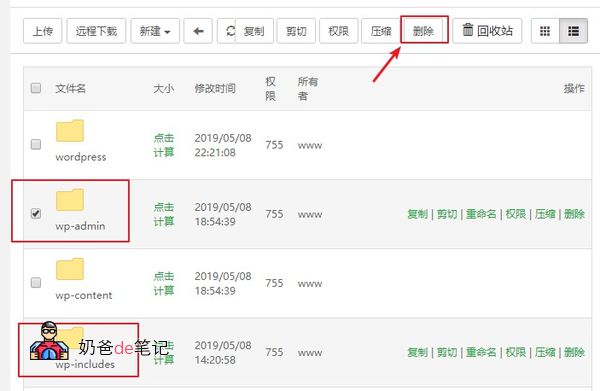
Method 4: Manually update WordPress tutorial with pagoda panel


Method 5. Update WordPress manually through the ssh command
cd /home/wwwroot/website
wget https://wordpress.org/latest.zip unzip latest.zip rm -rf wp-admin rm -rf wp-includes cd wordpress rm -rf wp-content mv -f * ..
cd .. chomd -R 755 * chown -R www:www *