Now, although the market share of the win10 system is gradually increasing, about 20% of the users still stay in the win7 system , There are many versions of the Windows 7 system. Now let's talk about the installation tutorial of the flagship version of Windows 7.
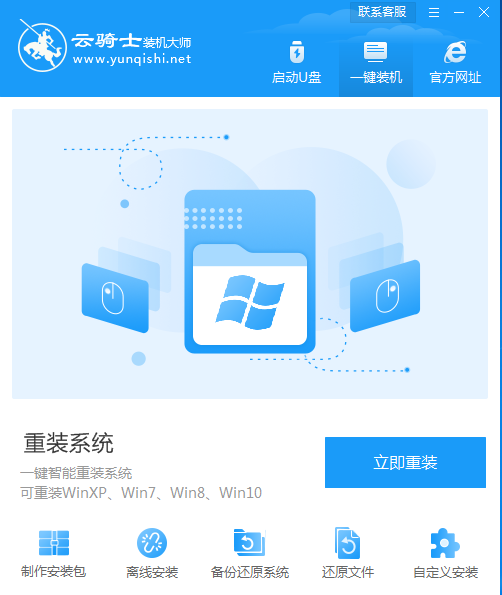
1. On Cloud Knight's official website https://www.yunqishi.net Download Cloud Knight and reinstall the system software.

2. After opening, the software will automatically configure the user's computer information. Click Refit Now 。
3. Then Cloud Knight will check whether the local environment meets the installation conditions, and click Next after the test.
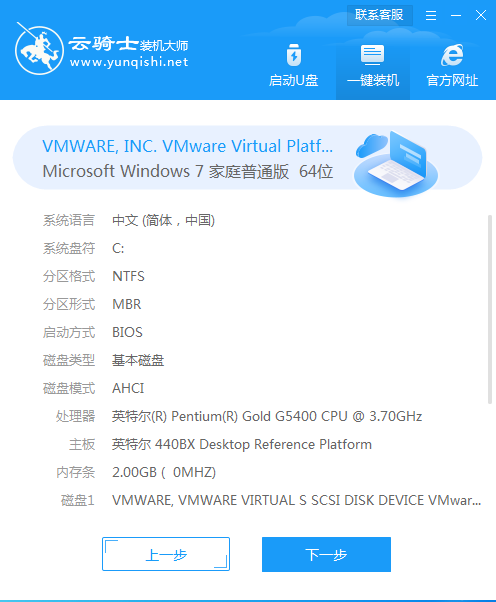
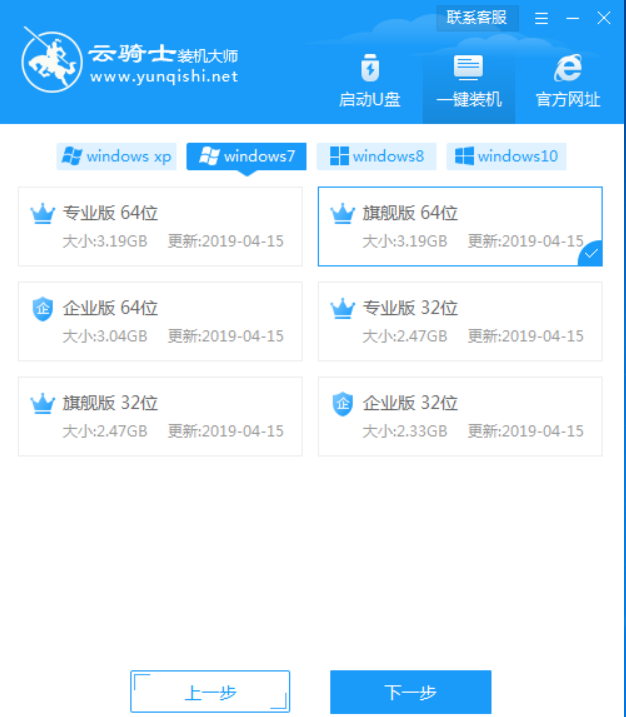
4. Then enter the system selection interface, where you can see that there are various versions of windows xp windows7 windows8 windows10 for users to select. Here, take the 64 bit win7 flagship version as an example, and click Next.

5. Common software for installation will be recommended here, which can be freely selected. The selected software can help users install together when reinstalling, saving the time for users to find software after installing the system.

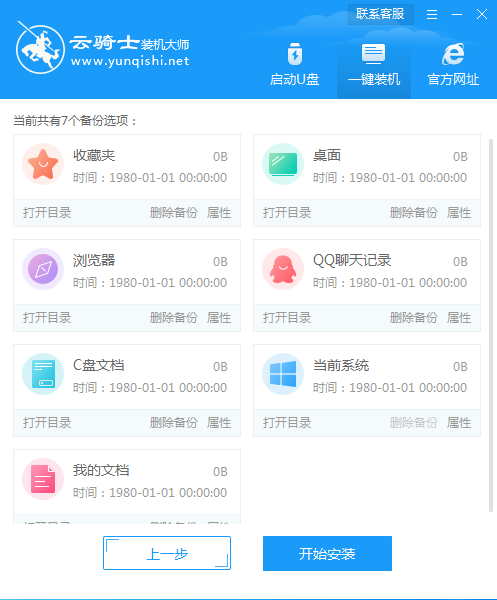
6. Then the data backup interface is entered. It is recommended to back up the files that need to be retained, or back up to another disk by yourself, because after the system is reinstalled, all files on disk C will be cleared. After selecting the backup files, click Start Installation in the lower right corner.
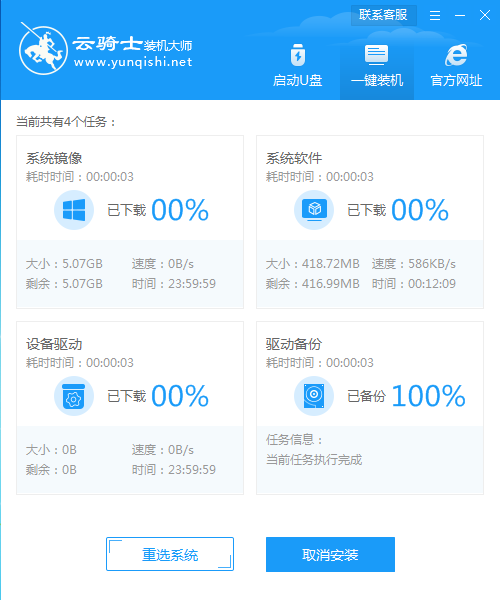
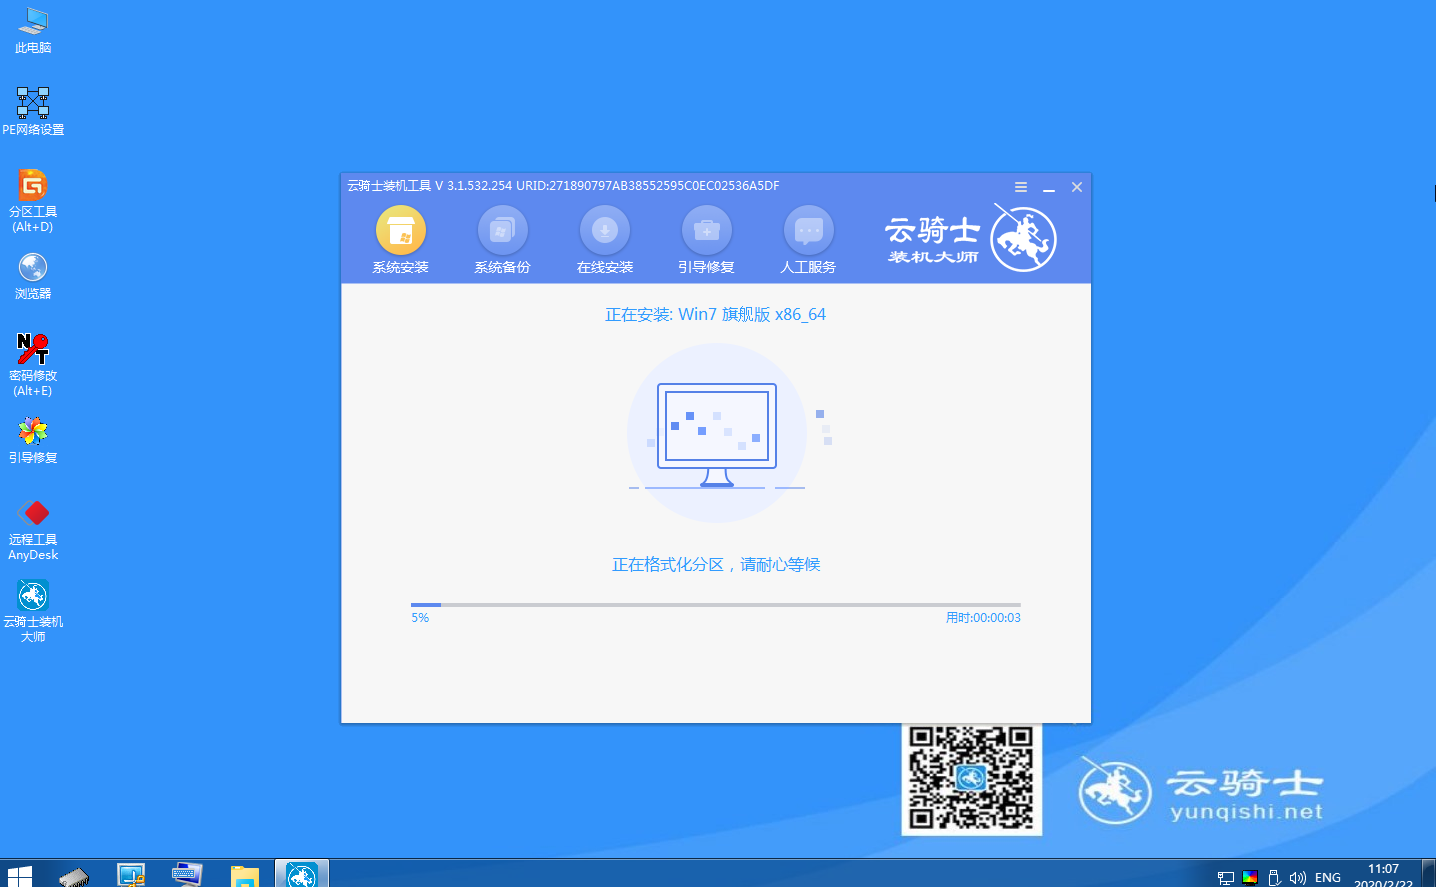
7. Next, Cloud Knight will start downloading the software device driver backup of the system image system. If you want to download from another system, you can click reselect system to cancel the replacement. Because the system file is large, you need to wait patiently.
8. After downloading, restart the computer.
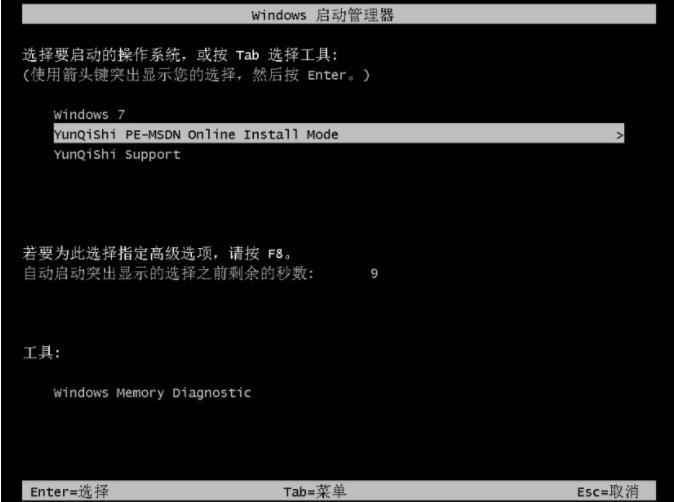
9. Select YunQiShi PE to enter the system.

10. After waiting to enter the system, Cloud Knight will automatically open the system for installation without any operation. Just wait patiently.
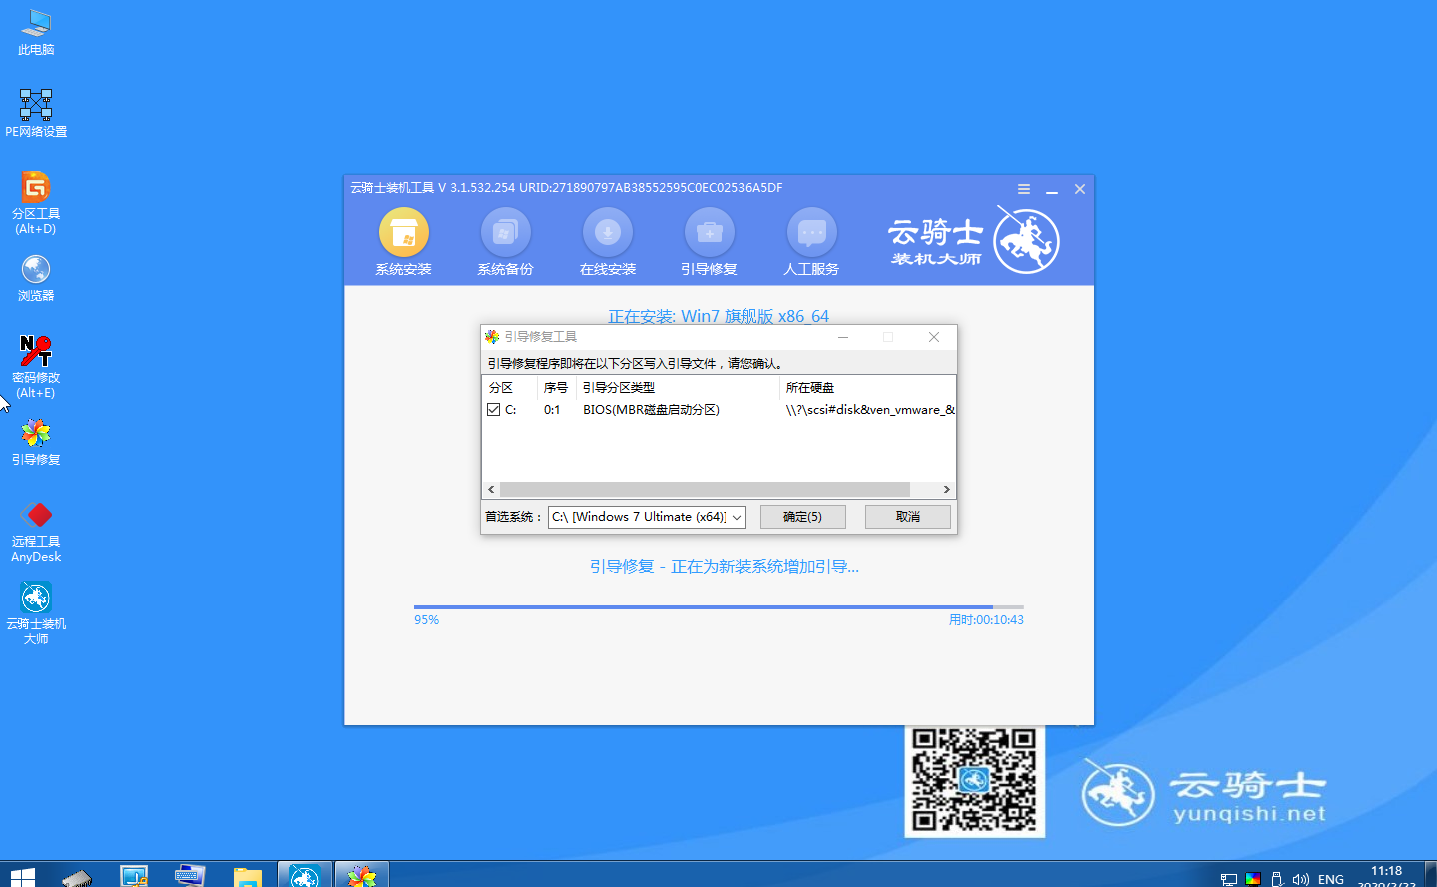
11. During installation, a boot repair tool will pop up to write the boot file. Click OK.
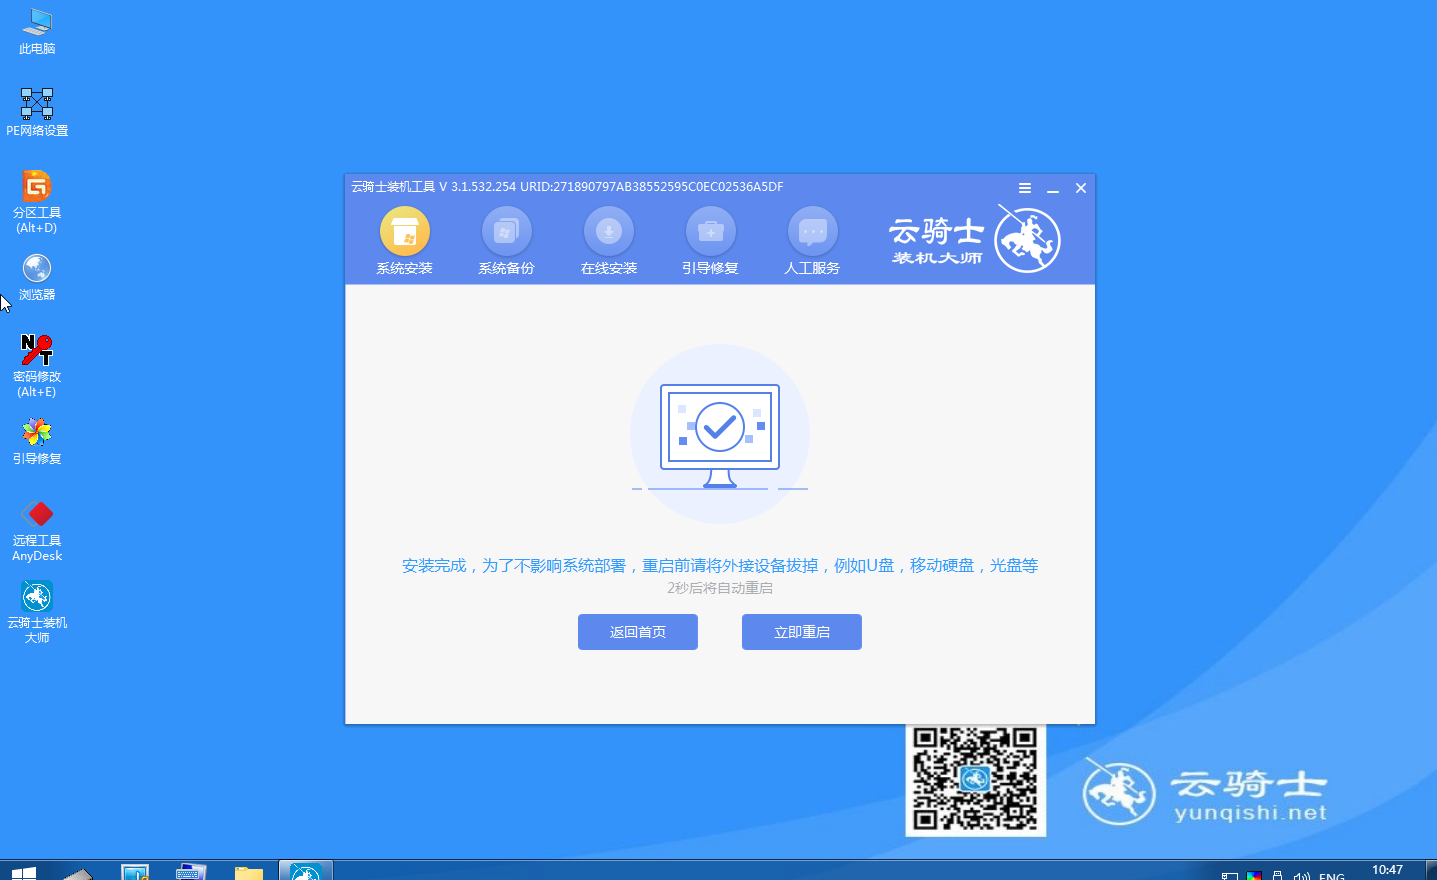
12. After installation, click Restart Now.
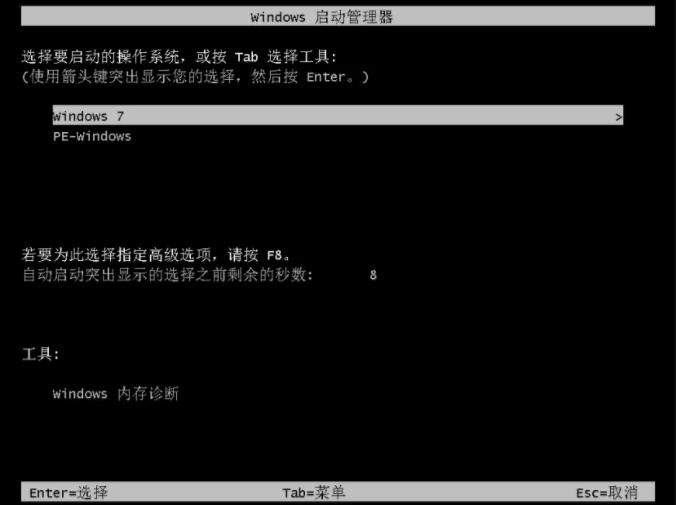
13. During restart, select Windows 7 system to enter and wait for installation.
14. The auto restore drive file will pop up, and click Yes to restore the locally existing drive backup file.

15. Pop up the operating system selection interface, select windows7, and enter the system.
16. After that, there is no need to operate, wait patiently for the system to be ready, and automatically upgrade and optimize.

17. During the upgrade and optimization process, a prompt window for broadband connection will pop up. Click Create Now to create a broadband connection. At the same time, there is a software butler tool that allows you to select commonly used software and install it with one click.

18. Wait for the optimization to complete, restart and enter the system to complete the system reinstallation.

PS: The above is a one click tutorial for installing the flagship version of Windows 7. Some users are slow to boot up after reinstalling the system, and they don't know what to do. Here's how to solve this problem.
What to do if the boot speed is very slow after reinstalling the system
Disable Startup Entry
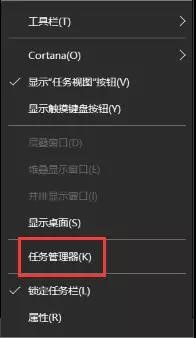
1. Right click in the blank space of the taskbar and select "Task Manager" (or use Ctrl+Alt+Del to call it up).
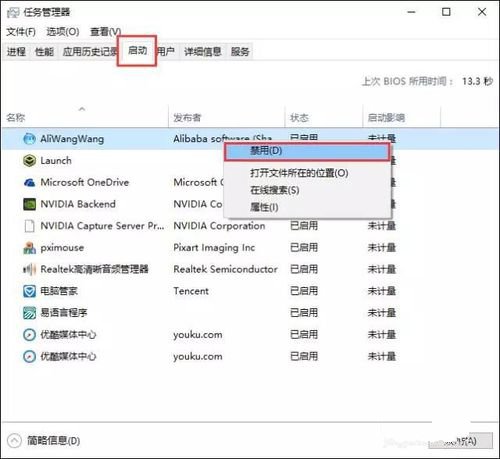
2. In the pop-up dialog box, select "Start", right click an unrelated startup item, and click "Disable" (generally, except for anti-virus software and butler software, it can be disabled).
Right click Computer Properties
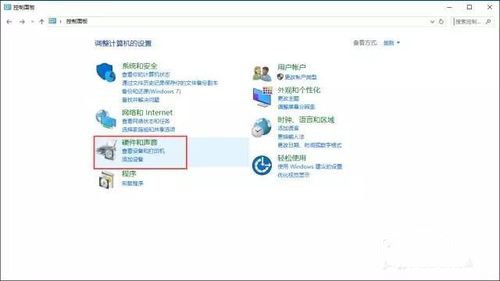
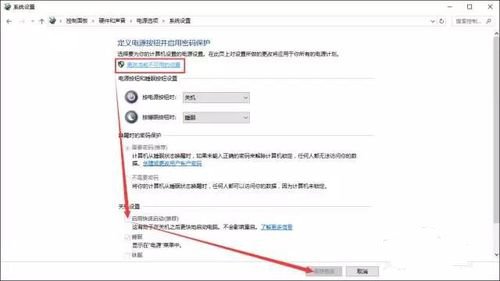
1. Click the control panel home page in the upper left corner to call up the "control panel" and enter "hardware and sound".
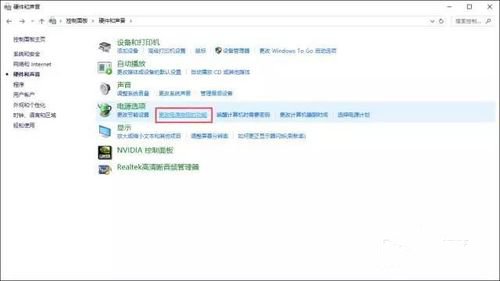
2. Under "Power Options", click "Change the function of the power button". Enter "Change settings not currently available".
3. Under "Shutdown Settings", tick "Enable Quick Start" and "Save Changes". PS. If this item has been ticked √, please go to √ Save and exit and check again.
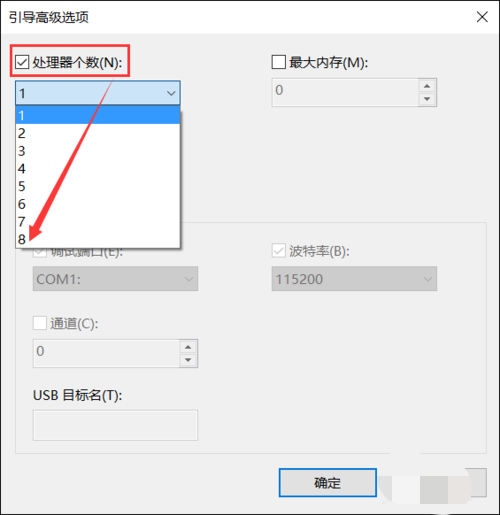
Maximize the number of processors
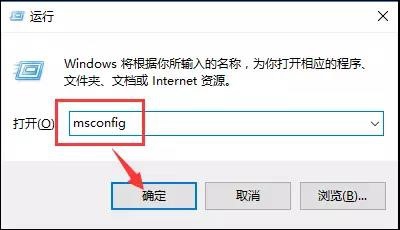
1. Press "[Win]+[R]", enter "msconfig" and confirm.
2. Click "Advanced Options" under "Boot".
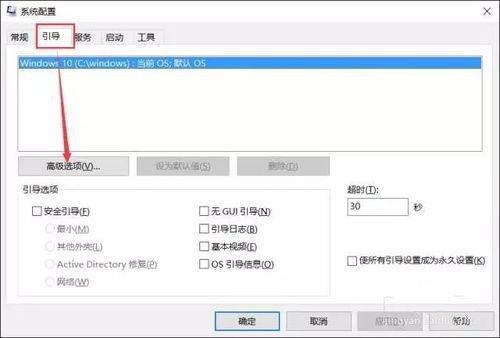
3. Tick √ before "Number of Processors", select the one with the largest value and confirm.