pyDash, It is a lightweight Linux performance monitoring tool based on the web visual interface, which is implemented through Python and Django. Although we can see from GITHUB that the version currently officially submitted was updated three years ago, Laozuo found that this tool can still achieve the monitoring function. This is not based on the principle of increasing insight. Find a limited test Linux VPS installation to see if it can be achieved.
Generally, our ordinary users do not need to use this kind of tools to build a website or for general purposes. For some operation and maintenance personnel, they will have their own favorite or convenient monitoring tools. Here, pyDash is just for installing and seeing the monitoring functions.
First, preparations
1. PyDash supports conventional CentOS, Debian, Ubuntu and other systems. Lao Zuo installs it in CentOS here.
2. For the first time, it is recommended to implement it directly in the test machine, and do not test it in the project production environment with existing websites or important data, in case of adverse reactions.
3. This article is from https://www.tecmint.com/pydash-a-web-based-linux-performance-monitoring-tool/ , refer to this article.
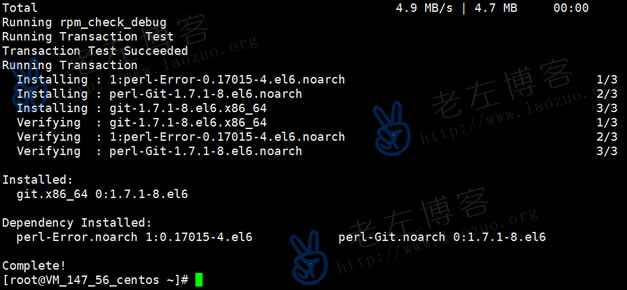
Second, install git and Python pip
yum install epel-release -y
yum install git python-pip -y
Third, install virtualenv
pip install virtualenv
Fourth, get the source code and enter the directory
git clone https://github.com/k3oni/pydash.git
cd pydash
Fifth, create a virtual environment
virtualenv pydashtest #give a name for your virtual environment like pydashtest

Then we can see the marked path, which will be used in the future.
Sixth, activate the virtual environment
source /root/pydash/pydashtest/bin/ activate
This needs to be activated according to our actual address.
VII. Installation requirements
cat requirements.txt
pip install -r requirements.txt
VIII. Modify encrypted files
vi pydash/settings.py

Here, you need to change the characters after SECRET_KEY to your own.
Ninth, create administrator account
python manage.py syncdb

We need to create a user name and password for later login to the WEB interface.
Tenth, Operation Start
1. Run locally by default
python manage.py runserver
After running locally by default, if the Linux native is running through the http://127.0.0.1:8000 Logged in.
2. Linux remote connection
./manage.py runserver server IP address: 1000
If we are VPS and want to connect remotely, we need to load our own server IP address and set a port to run.

XI. Login to the WEB interface
According to the IP: port mode we set, log in to the WEB, and then enter the set administrator user and password.

In this way, you can install and access the pyDash monitoring tool. I will not study its functions here. The basic hardware monitoring is relatively complete.