Wordpress forms are often used in website construction. Today, there are four ways to add wordpress forms to websites
The contents of this article are as follows
1. The easiest way - copy the excel form and paste it on the wordpress page
This method is suitable for very simple tables, preferably with two columns. The advantage is that it is simple and can be copied and pasted directly. The disadvantage is that the table is very simple and does not cool at all
The method is as follows
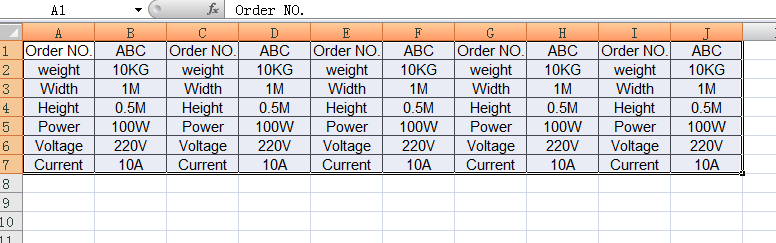
After editing the table in excel, select the table and copy it (do not copy the extra space)
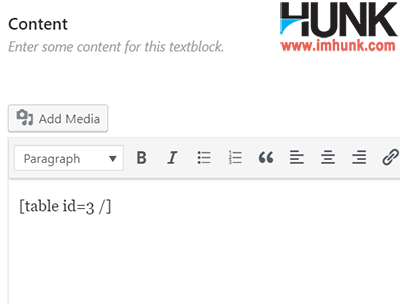
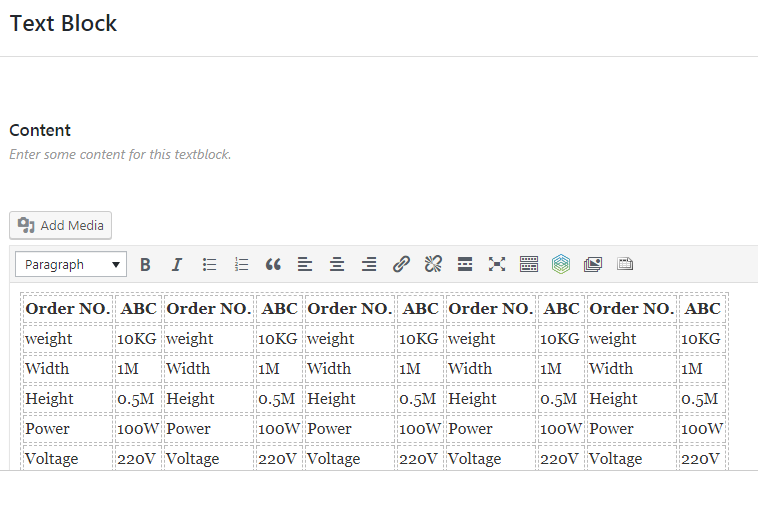
Then paste it to the WP website. You need to paste the background position of the page to AVADA Theme For example, it is usually pasted into the element of text block. Note certain To paste in the visual mode of the editor, as shown below
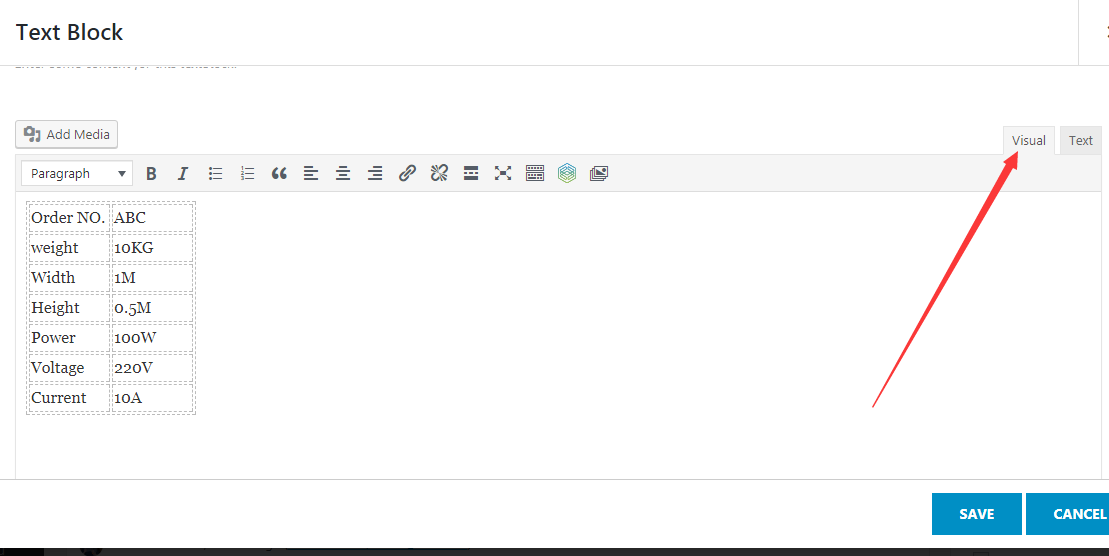
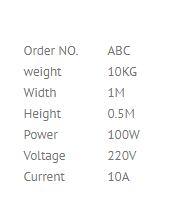
After saving and updating, refresh the foreground page, and you can see the table, but there is no border, and the text is not centered, as shown in the following figure
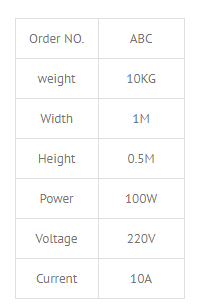
You need to add some css code to set the border and text center, as follows
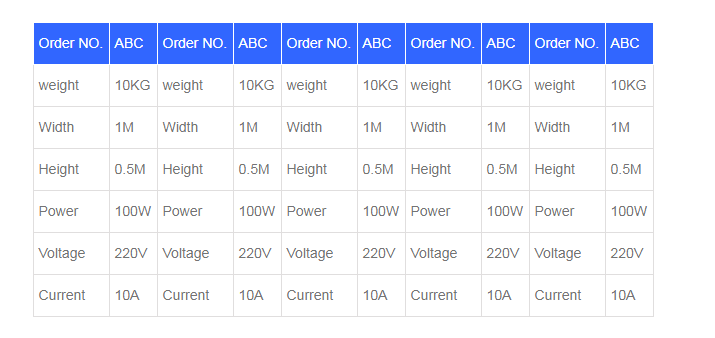
td,tr{border:1px solid #eee; text-align:center;padding:10px;}
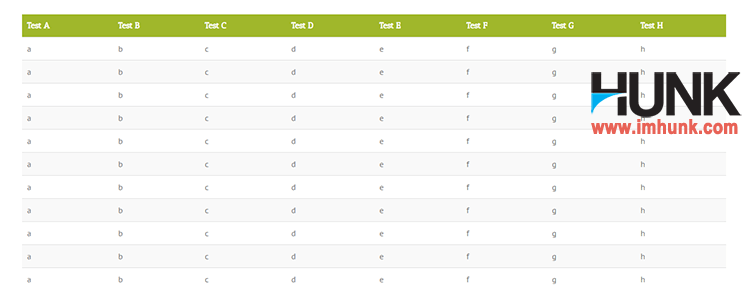
Add the above code to the website background - AVADA theme options – custom css, and then save it. Refresh the front desk, and you will see a lot more beautiful
Other operations
It is very simple to bold or link the text in the table. Select the text first, and then bold it.
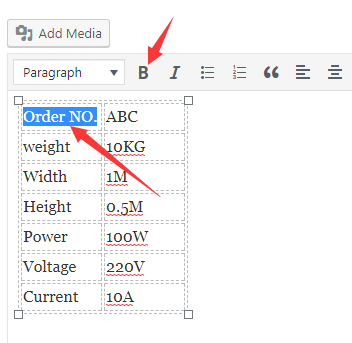
be careful : Some people will ask why there are double dotted lines at the backstage and solid lines at the front desk. The reason is that the foreground and background display are different. You don't need to study this problem. You just need to ensure that the foreground is the effect you want. It doesn't matter how the background is!
In addition, some people do WP pages. They prefer to click Preview to view them, but they don't like Publish or Update to view them. This operation is also wrong. Sometimes there is a bug on the website, and the preview results are different from the actual display results, so you can directly publish to view the foreground effect, and the page status after the front platform is published will prevail. Remember!
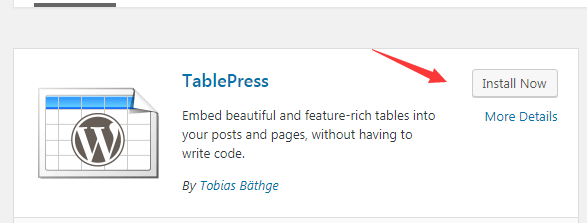
2. The tablepress plug-in implements the adaptive wp website table
Tablepress was developed by a German guy, and it is directly imported into excel tables. It also contains responsive functions, which can be used for free. Of course, you can donate some moeny to the author.
be careful : tablepress is not suitable for tables with merged cells because the operation is complex.
The method is as follows
Install and activate the following plug-in first
Then install the responsive plug-in of tablepress Download this plug-in , and then upload and install the plug-in.
Then you can see tablepress in the left menu of the background of wp. Click import a table to import your prepared Excel table file. Remember, it only reads the contents of the first Excel table.
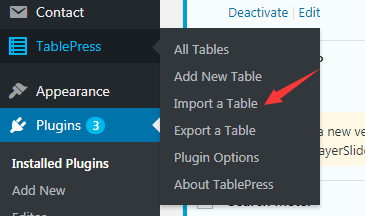
Select your excel file and file format, and click import to upload

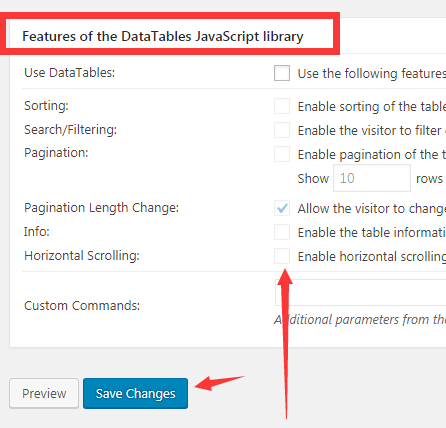
After uploading, automatically jump to the editing page of this table, scroll down, find the menu Features of the DataTables JavaScript library, remove all the following checks, these are useless functions, and then save changes,
Then turn to the page and copy the shortcode. Of course, you can also click the left menu of wp - tablepress – all tables to view the shortcode of the table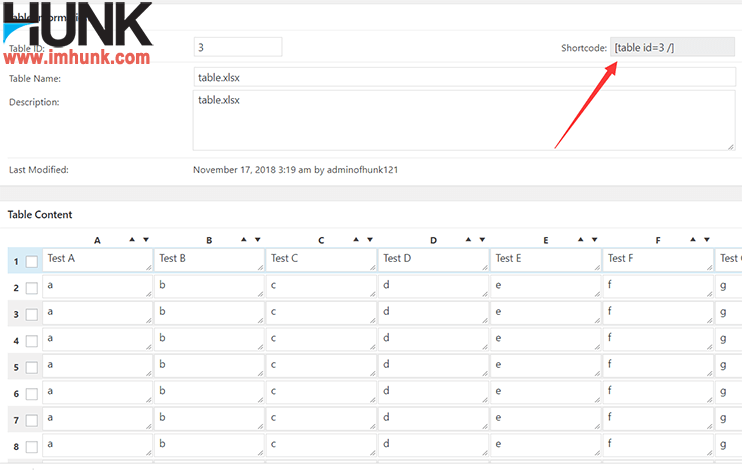
Then paste the shortcode into the text block of the page, save it, update the page, and refresh the foreground
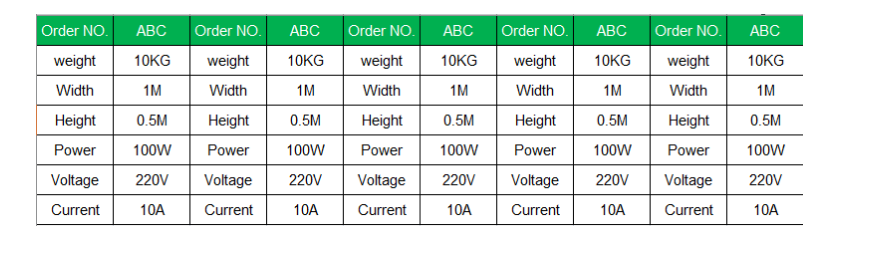
You can see the form in the foreground. It looks cool. Why is there an edit in the lower left corner? Because I have logged into the website, it has this prompt. If you are a visitor, you cannot see the edit.
The following is the effect displayed on the computer
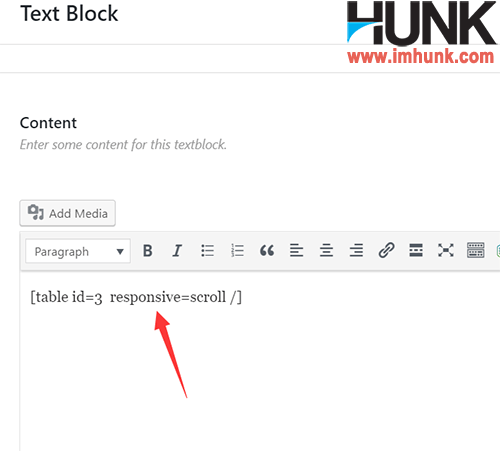
If you want to display in response mode on the mobile phone, you need to make a small change to the shortcode of the table, as shown in the following figure, add response=scroll after id=3
Then update.
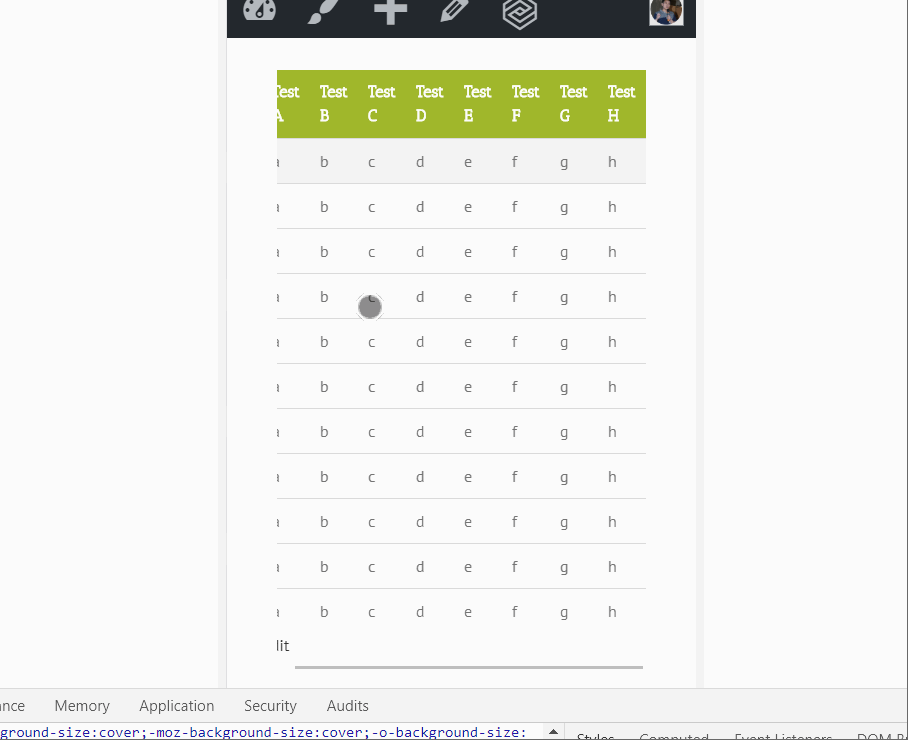
Refresh the foreground, and you can display the effect of sliding left and right on the mobile phone, which is very convenient, as shown in the following figure.
3. Implement wordpress forms on third-party websites
This website is http://www.tablesgenerator.com/html_tables
This method is suitable for more complex tables, with responsive functions, and can beautify tables.
The operation method is as follows
Copy the excel table first
Then enter http://www.tablesgenerator.com/html_tables
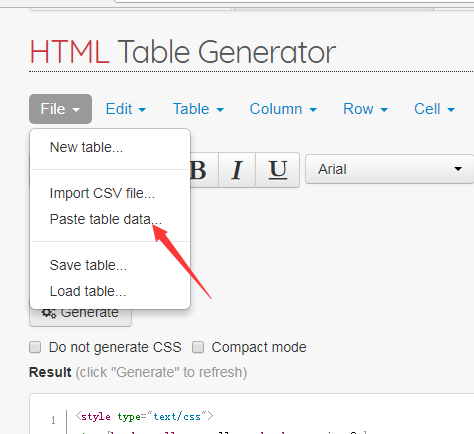
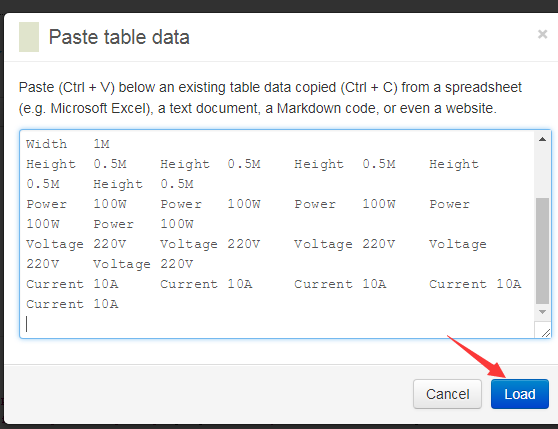
Then click file – paste more data and paste the table in the pop-up window
After pasting, click Load
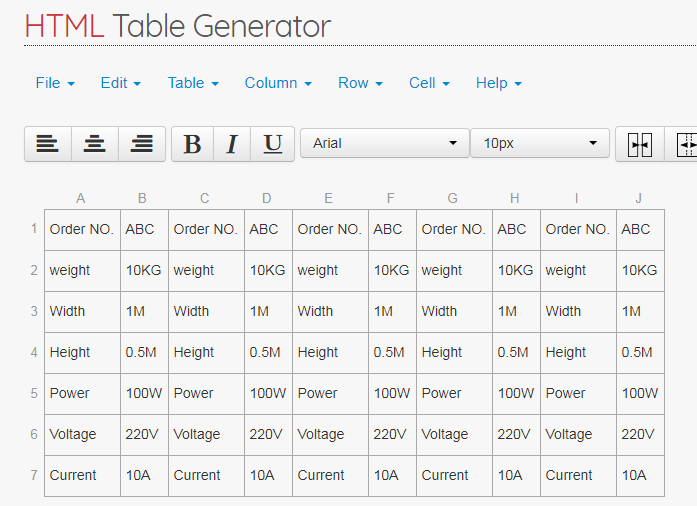
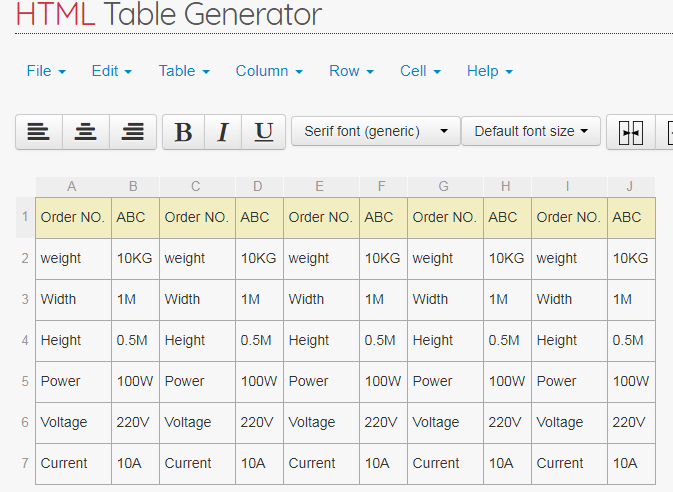
You can see that the table has been imported
Then select the top row by clicking the first cell, holding down the left button, and dragging to the right
Then click the background color in the menu on the right and select a background color
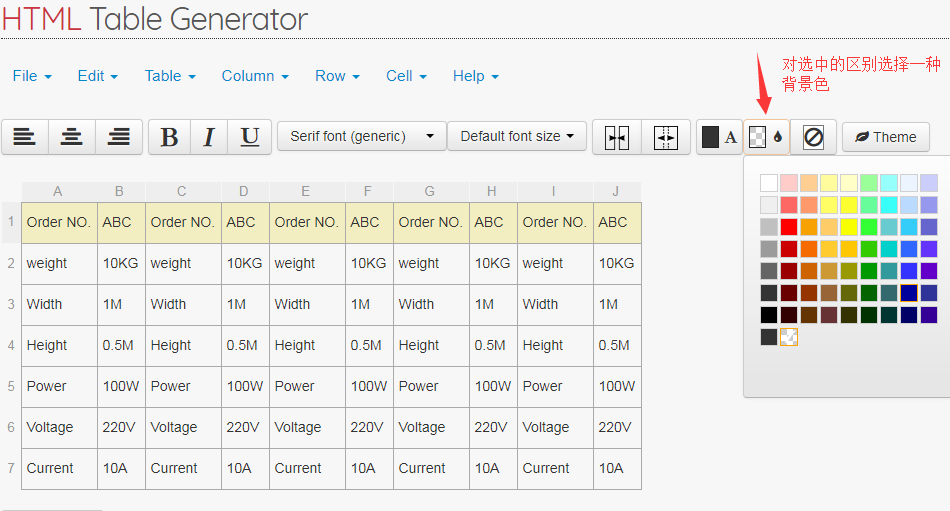
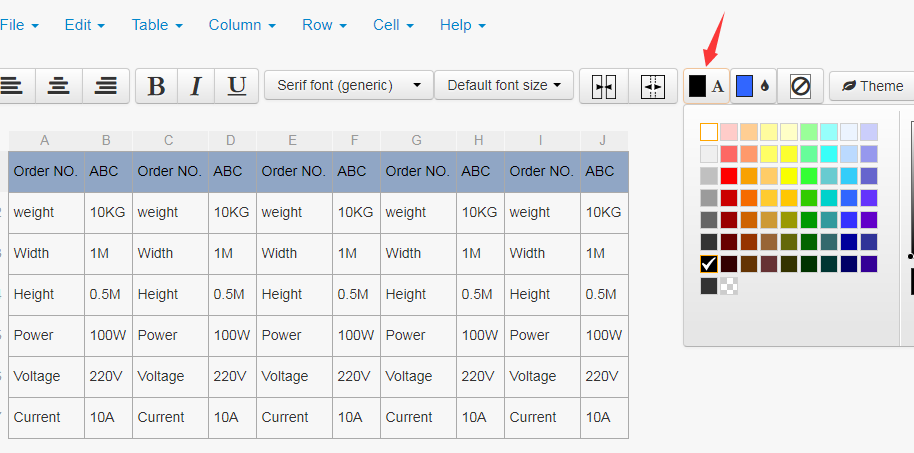
Then click the text color to turn it into white, which is more harmonious
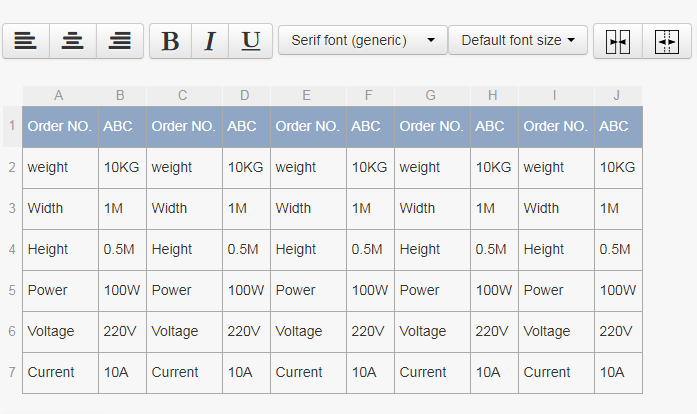
The final effect is as follows. Of course, other functions can be used in similar ways. You can explore them yourself.
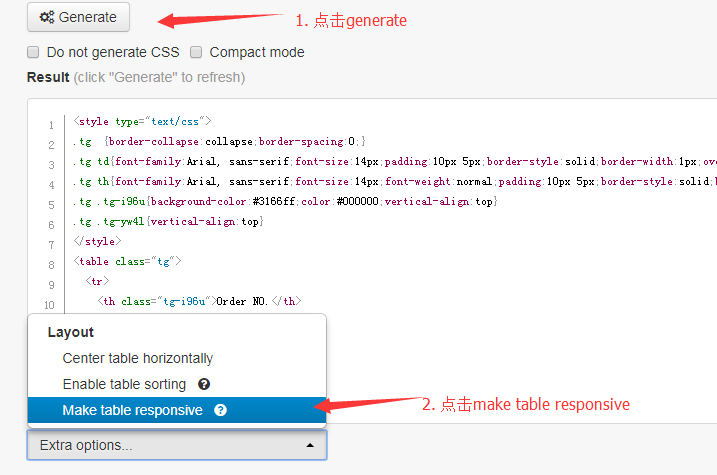
After completing the form, click the generate button below the form, then click the extra options, click make the able response, and add a responsive function to the form.
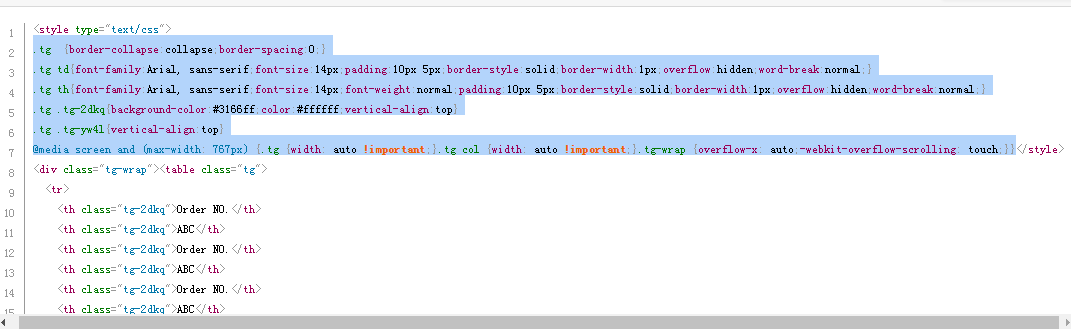
Then select the code as shown in the figure below and copy it. Remember the exact location, not more or less (that is, all codes between<style>and</style>)
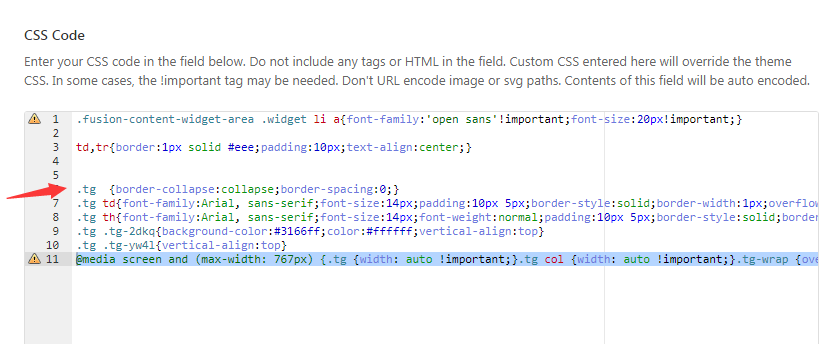
Then go to the wp background - avada - theme options – custom css, start a new line, paste the code copied above, and save it.
Then go to the code box on this page and copy all the remaining code as shown in the figure (drag to the bottom and copy again)
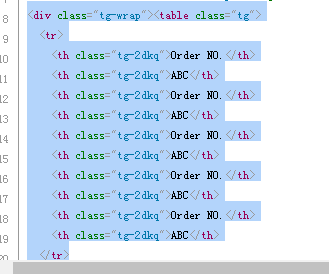
Then go to the text block where the code needs to be placed. In visual mode, paste the code and save it.
Refresh the foreground to see the effect.
4. The most direct method is to capture the form image and upload it
This method is applicable to any form, especially complex forms. The disadvantage is that the form content cannot be selected and copied
The method is also simple. First make the form and edit the style, then use QQ screenshot (shortcut key CTRL+ALT+A) to capture the form and save it as a picture with English name
Then upload it to media, and insert the picture in the text block (note that the size of the picture selected on the insertion page is full size). The final effect is as follows
These are four ways to implement Wordpress tables. You can choose different methods to operate according to the actual situation. The principle is to edit the form as simple as possible, which is not only easy to operate, but also good for typesetting.