WordPress Foreign Trade Website Building Tutorial The website building tutorial with the theme of enfold is a basic foreign trade website building tutorial carefully prepared by Hunk. This article explains how to use the theme of enfold to build an excellent foreign trade B2B enterprise website. Whether you are a novice in wordpress or have a certain foundation in wordpress, you can easily build your own website.
be careful
- Although this article is about the course of building a website for foreign trade in wordpress, enfold is also suitable for the construction of Chinese websites. The method is almost the same.
- The operation demonstration website of this article is enfold.imhunk.com
- The enfold version used is 4.41, and the difference between adjacent versions should be small
- The space where the demo site is located is siteground , an excellent foreign trade website space
The contents of this article are as follows
1. Purchase domain name and space, enfold theme, install wordpress, SSL and set website resolution
1) The website needs a domain name first. If there is no domain name, it is recommended to purchase, purchase and use it on namesilo Purchase of foreign trade domain name - purchase domain name on namesilo (including namesilo discount code)
2) Next, we need a website space. If there is no space to buy, we recommend buying a siteground space. It is fast, and after-sales service is good. Please refer to Tutorial for purchase and use of siteground
3) After purchasing the domain name and space, the next step is to install wordpress, do domain name resolution and install SSL certificates. Please refer to here
4) After the website and SSL are installed, you need to prohibit the collection first. The operation method is as follows
First, enter the Wordpress background. The background link address of Wordpress is Your domain name/wp admin/ , enter the account and password previously set, and then click Login.
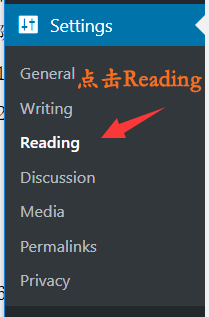
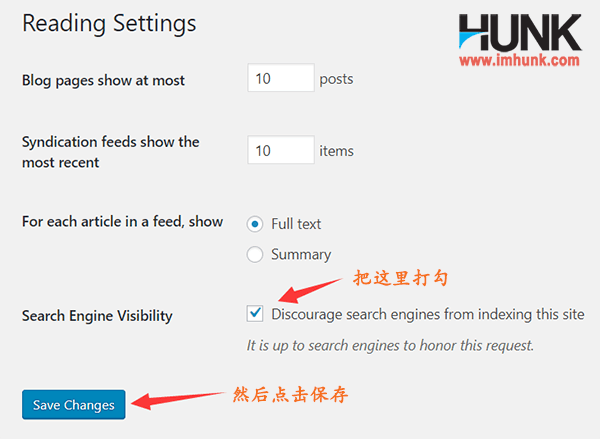
Enter the background of wordpress, click the reading menu under settings, tick in front of Discovery search engines from indexing this site, and then click save changes to save.
In this way, Google will not include your website.
5) Next, you need to purchase an enfold theme, which is much more convenient for the use of paid plug-ins and themes, so it is strongly recommended to purchase one. See Three step purchase of enfold theme
2. Prepare the data required for the establishment of Wordpress foreign trade station
After WordPress is installed, download the following materials for preparing WordPress foreign trade website List of website materials , just prepare according to the requirements inside.
The following picture requirements shall be specified
1) First process it to a reasonable size, and then drag it to tinypng.com for compression before use.
2) Different places have different size requirements, but some pages have the same size requirements.
3) For example, on the product detail page, all product feature images are required to be consistent in size. The size should be 500~700px wide, and the height should be adjusted proportionally.
In addition, the product pictures below the same product should also be consistent in size, 500~700px in width, and proportional in height.
3. Install the enfold theme and subtheme
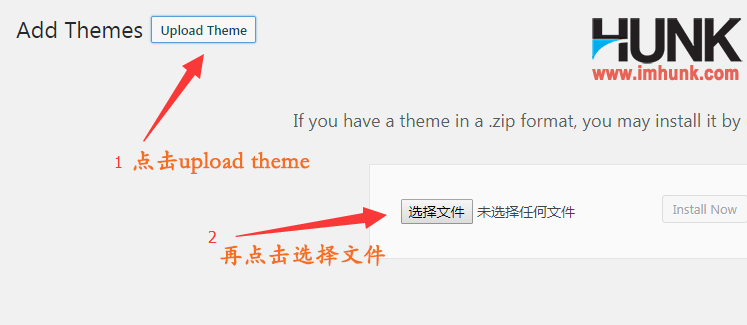
Step 1: Install the enfold theme
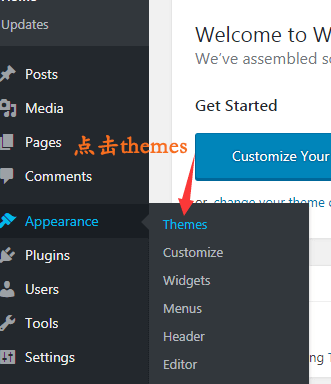
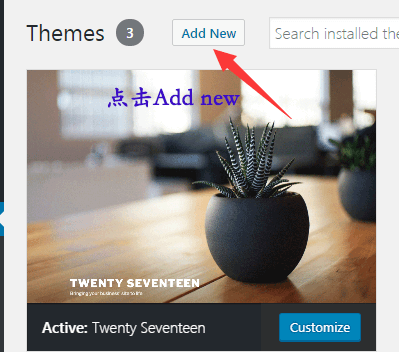
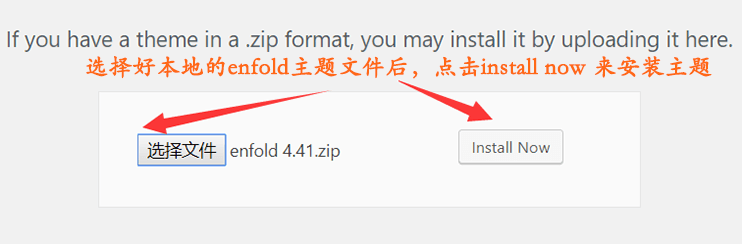
Click Appearance – themes, then click add new above, then click upload theme, then select your Enfold file package, click install now to upload successfully, after that, do not activate, continue to see the second step of the text ↓
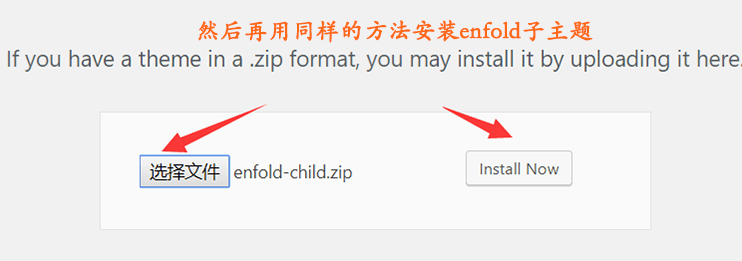
Step 2 Install the enfold sub theme
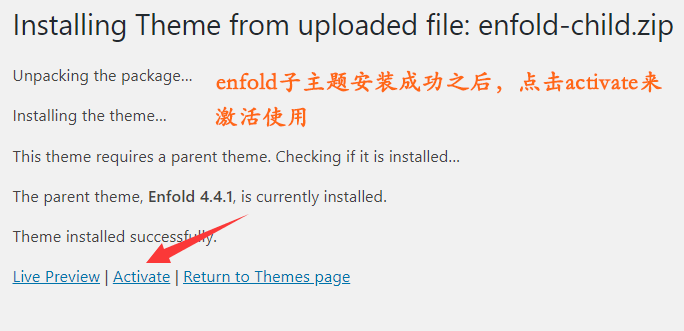
The method is the same as above. After the installation is successful, activate the sub theme. Open the website and you can see that the installation of the enfold theme is successful.
Step 3 Bind the api key in the background of the Enfold website
After installing the enfold theme and subtheme, you also need to bind the api key, so that you can get a new version of the push, and you can upgrade the theme online, which is more convenient. The method is as follows
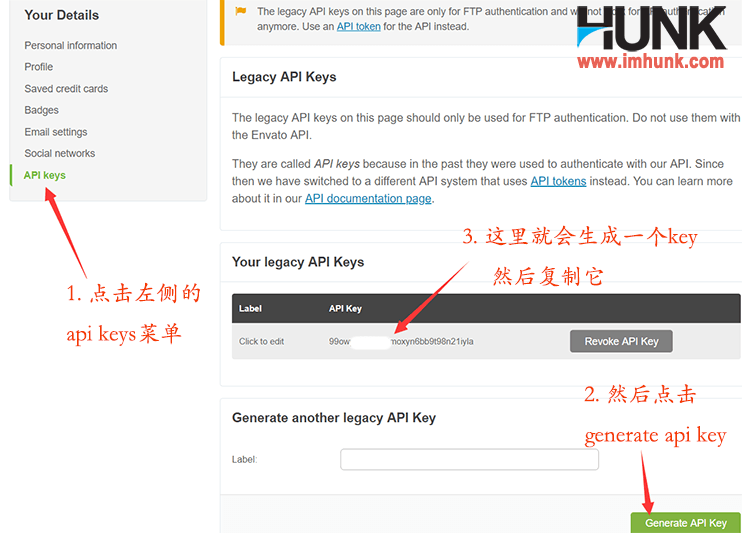
First log in to the backstage of themeforest and click settings under the account

In the menu on the left side of the open page, click api key, and then click generate api key. An api key will appear above, and then copy the key
Next, click the Enable child menu on the left side of wordpress, and then click the theme update menu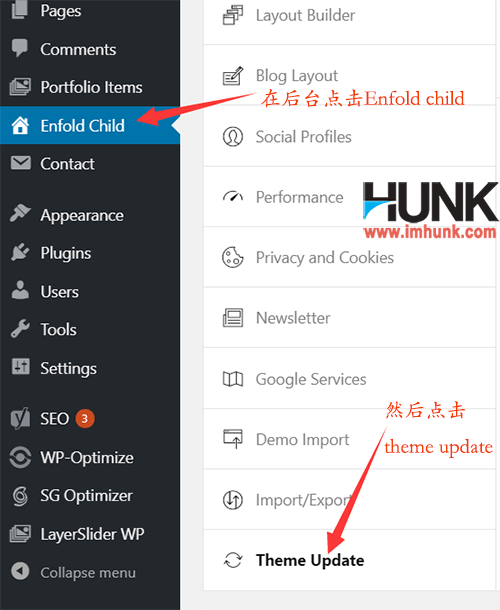
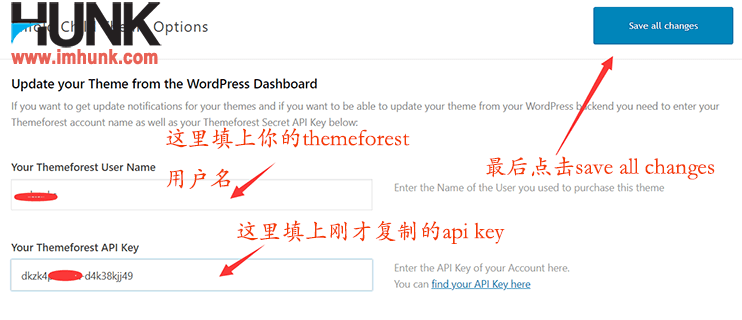
Then fill in your themeforest user name and api key, and click save all changes to save.
Then wait for 12 hours, and the official will verify your account and api key. If successful, you will tick the box later, and then you can get the version update push.
4. Install the necessary plug-ins and set them on the Enfold website
Plug ins are an addition to WordPress website functions, which can help us achieve some functions and effects.
4.1 First, introduce the method of installing the wordpress plug-in
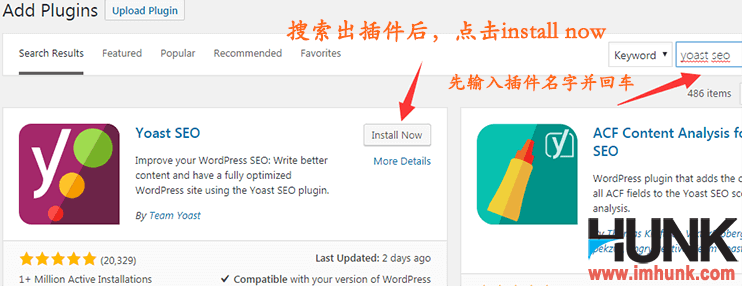
The first installation method Search, install and activate directly in the background plug-in library. This method is suitable for installing some free plug-ins and plug-ins that can be searched in the background. The method is as follows
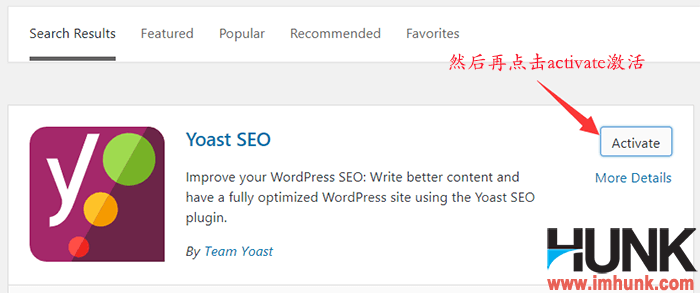
In the background of the website, click Plugins – add new, and then enter the name of the plug-in in the search box. Take the yoast seo plug-in as an example, click Enter. After the search results are found, click Install now to install it. After success, click Activate to activate it
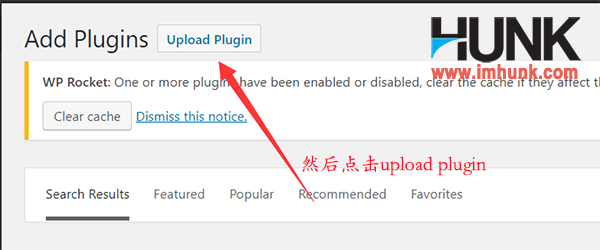
Second installation The method of installing is manual. This method is suitable for plug-ins that cannot be found in the plug-in library or some fully paid plug-ins. The method is as follows
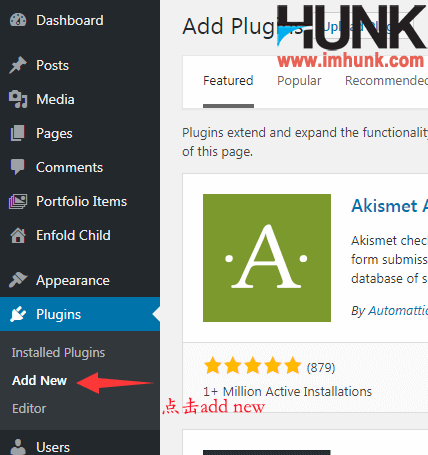
First, click Plugins – Add new, and then click upload plugin
Next, click Select File and select the plug-in file to be installed on the computer
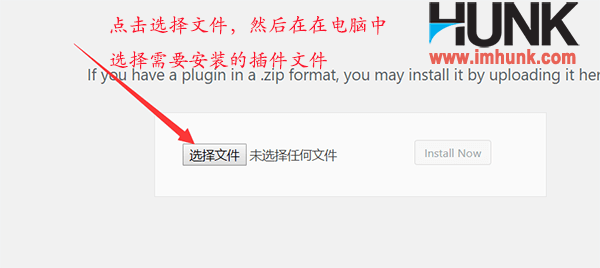
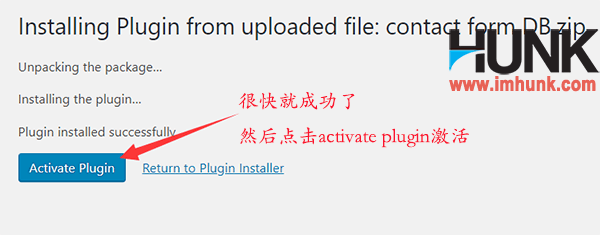
Take the contact form DB as an example. After selecting it, click install now

The installation is successful soon, and then click activate plugin to activate
4.2 What plug-ins are recommended to be installed on the Enfold website
yoast seo Plug in for SEO optimization, use tutorial reference https://www.imhunk.com/yoast-seo-plugin/
wp optimize Plugins for cleaning up website garbage
contact form 7 Inquiry form plug-in, use reference Introduction and FAQ of Contact form 7 plug-in
search meter Record plug-ins searched by customers on the website
contact form db Inquiry record plug-in, all inquiries sent through cf7 can be recorded here, Need to upload and install manually 。 Plug in files Download here
duplicate menu The plug-in of the copy menu can be deleted after use
duplicator The website backup plug-in can be installed after the website is completed, deleted after downloading the backup, and used for reference Introduction and use of the Duplicator plug-in
layerslider Create a plugin for the website banner. After you purchase the theme of Enfold and register successfully, you can install the plugin for free.
sg optimizer It is an official plug-in of siteground, which is specially optimized for websites on the siteground space. Other spaces cannot be used. This plug-in will be installed automatically after you install WordPress. You do not need to install it separately.
Wp rocket The paid speed optimization plug-in is simple to set up and has remarkable effect. Installation and use method reference How to use the wp rocket website acceleration plug-in
The above is Hunk's suggestion to use the plug-ins on the Enfold website. If you have other requirements, you can install them as needed.
5. Basic settings of the enfold website
5.1 Establishment of common pages of the Enfold website
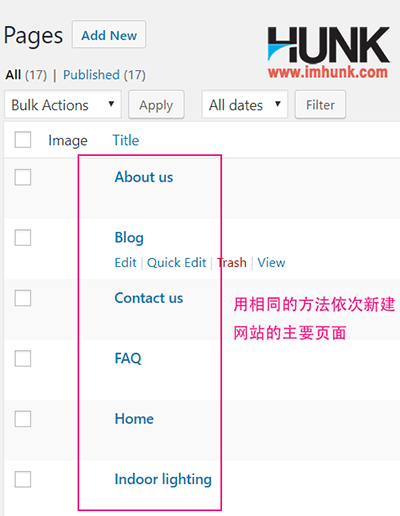
First, we need to create a common page of the website.
Common pages of the website include Home, ABout us, Contact us, Product FAQ Blog News, etc.
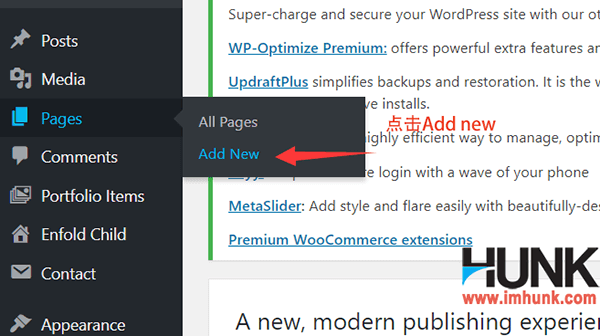
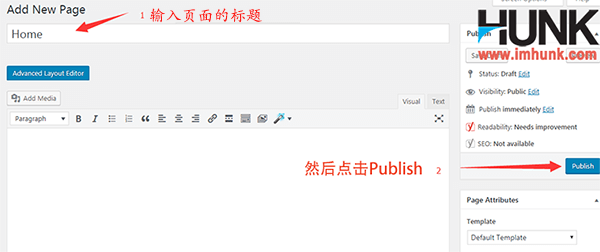
Click Pages – add new to create a new page, enter the name of the page in the title, and then publish.
Then create the Product FAQ Contact us and About Blog News pages in the same way.
5.2 Establishment of the product page of the Enfold website
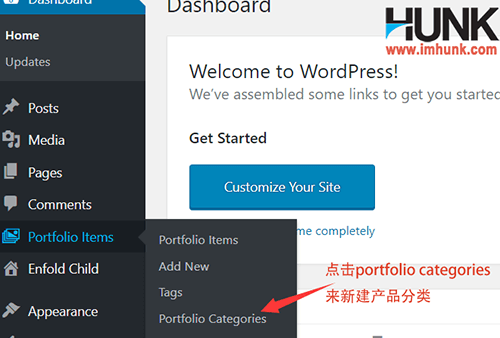
Step 1 , first establish a portfolio category, which is generally not recommended to exceed two levels. If there is a secondary classification, the subordinate relationship should be selected
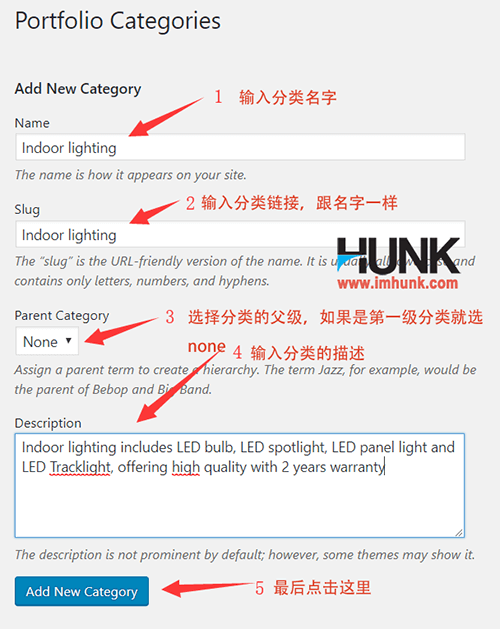
The specific method is to click portfolio items – portfolio categories to enter, and fill in the following in order under add new category
Name Name of product classification
Slug The link part is the same as the product category
Parent category If it is a primary classification, select none. If it is a secondary classification, select its parent
Description Fill in a brief description of this classification here
Click after filling in the above Add new category
Then use the same method to create all product classifications, and pay attention to the dependency relationship
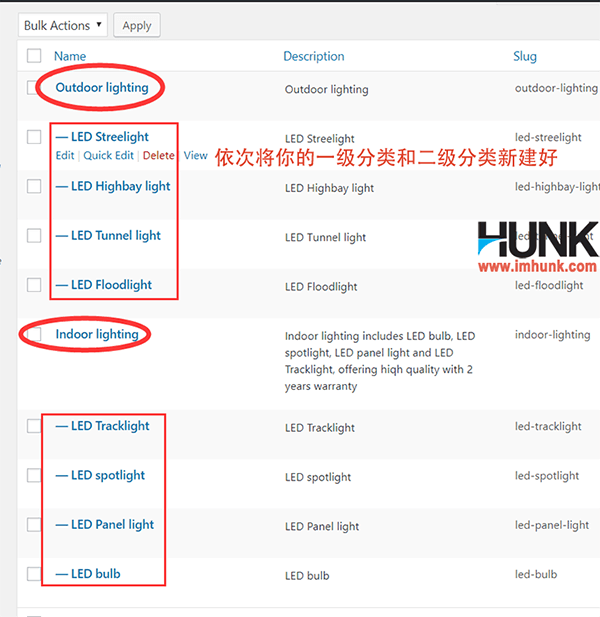
Step 2 , use the above method to create a page, establish all product classifications, and then publish.
The following pages will introduce how to build the product page Enfold one by one
5.3 Establishment of blog and news page of the Enfold website
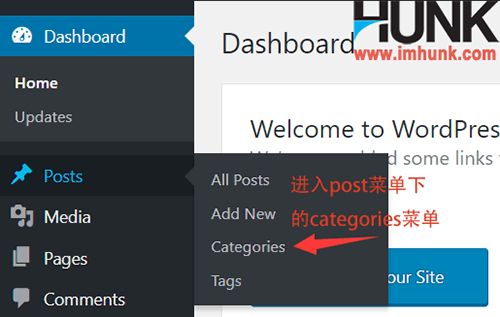
Blog and news pages have been created in 5.1. Now we need to create corresponding post category pages
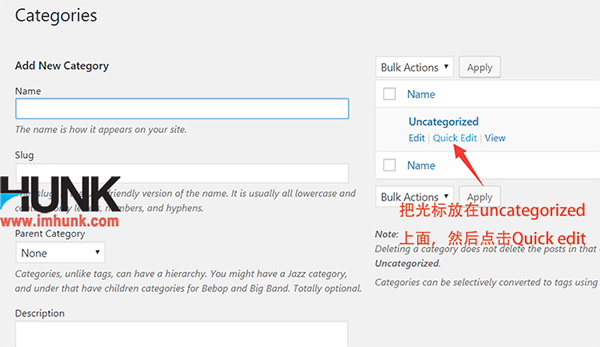
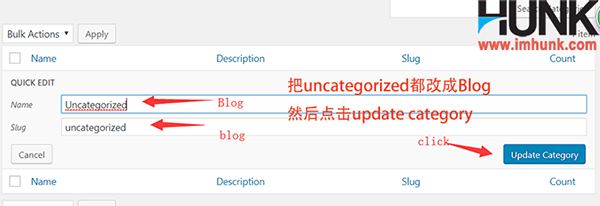
Click posts – portfolio categories, you can see that there is an Uncategorized category, place the cursor on it, click quick edit, and then fill in Blog in the title and slug
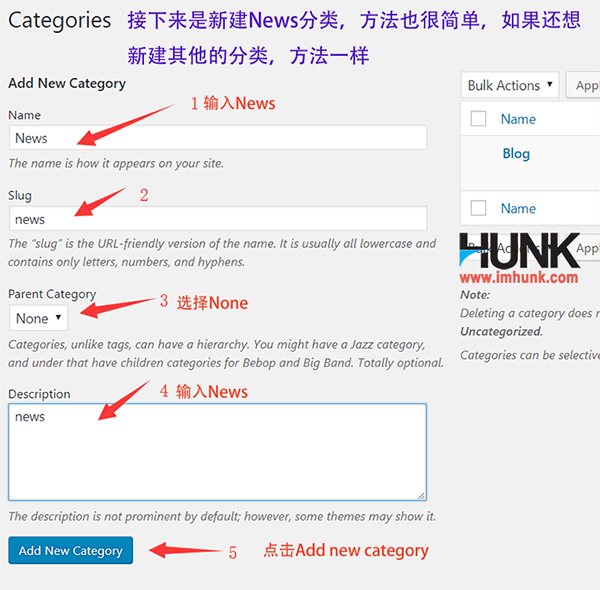
Next, fill in the name, slug, parent category, description, etc. in the add new category on the left, and click add new category to add
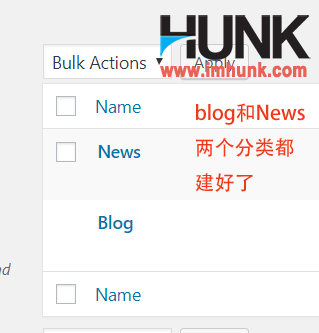
The following pages will introduce how to create blog and news pages one by one
5.4 Basic Settings of the Enfold Website
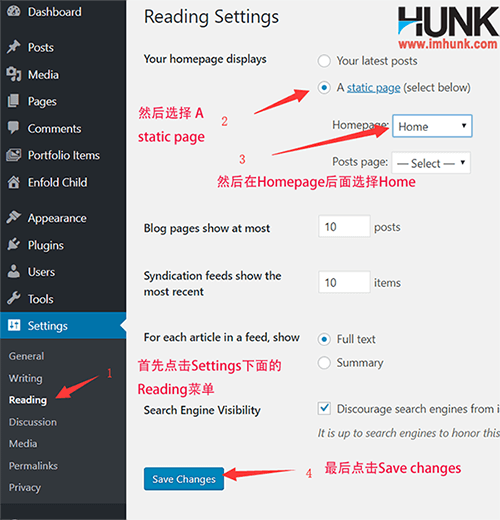
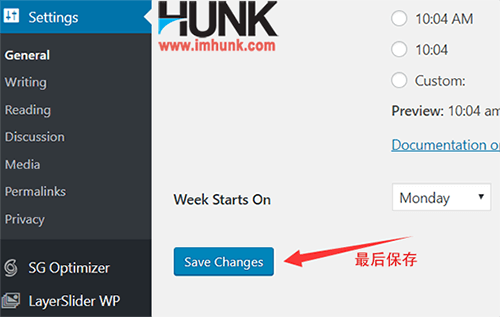
first It is to set the homepage of the website, click Settings – Reading, select a static page from your homepage displays, then Home from the homepage, and finally save changes.
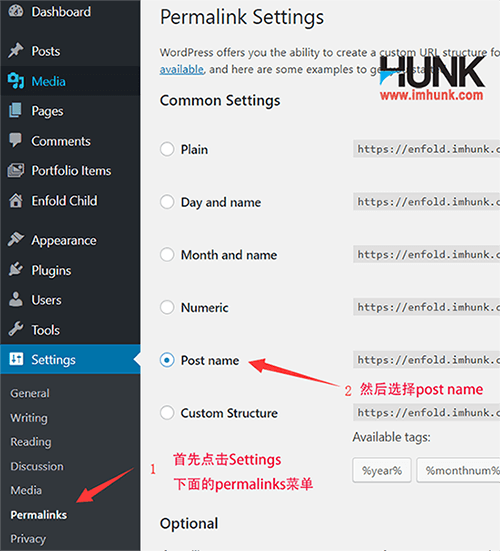
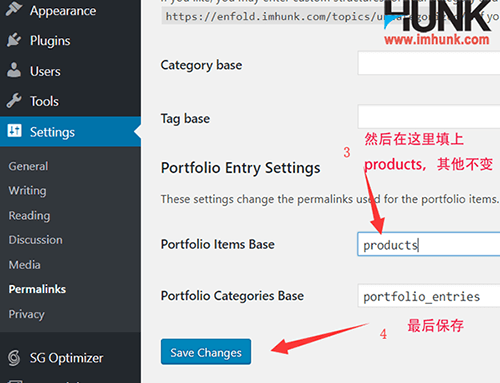
The second step is To set the link form of the website, click settings – permalinks, select post name, and then select products from the Portfolio items base. Other settings remain unchanged. Finally, click save changes to save
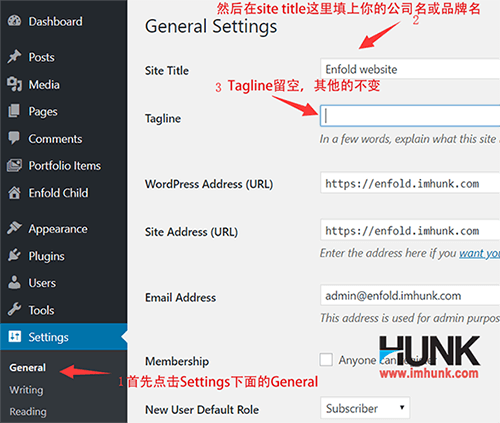
The third step is Set the name of the website, that is, the site title. Click settings – general, and fill in your company name or brand name in the site title. If your company is called baidu technology ltd, fill in baidu here instead of the full name
Tagline can be left blank. Finally, click save changes to save
6. Upload the logo and favicon of the Enfold website
Logo images can be in png or jpg format. The official size recommendation is 340px * 156px, but the actual size is about 200px * 88px. The height is about 88px, and the width can vary. After processing, drag it to tinypng.com to compress it, and then upload it.
If you don't have a logo, you can outsource one, which only costs 6USD. Please refer to the method How to outsource a logo on fiverr
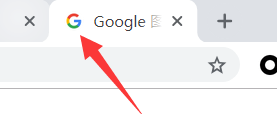
Prepare a favicon picture while preparing the logo. What is favicon?
Favicon is the small icon displayed in the browser address bar, as shown in the figure. Favicon's image display size is small, only 16px * 16px, so it is not suitable for the whole image. Generally, only one letter or icon is placed. For example, Google's favcion is a G
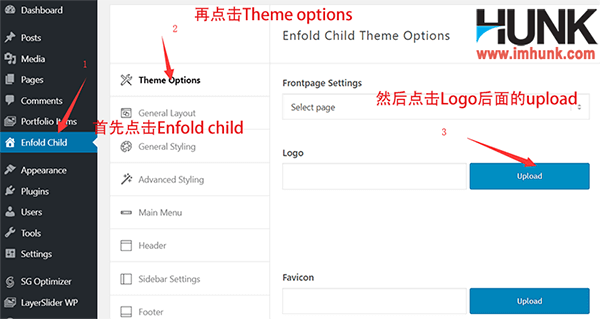
After the logo and favicon are ready, we upload them in the background of Enfold. I use my blog logo and favicon as examples.
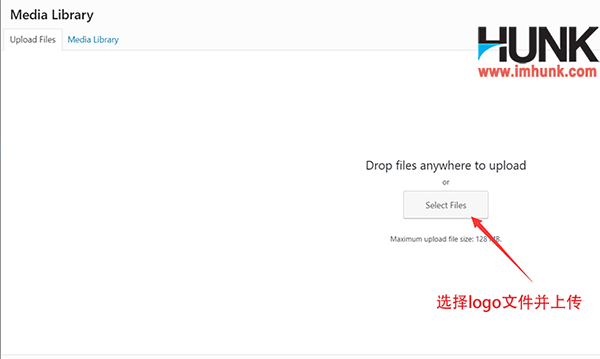
First, click the Enable child menu on the left, then click theme options, click upload in the background of the logo, select your prepared preparations, and upload them. The same is true for favicon upload. Click upload in the background of favicon and select the file.
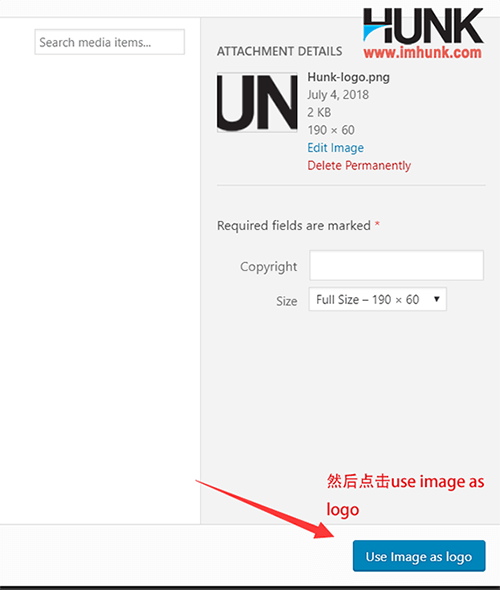
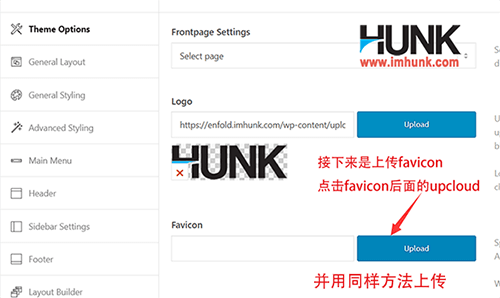
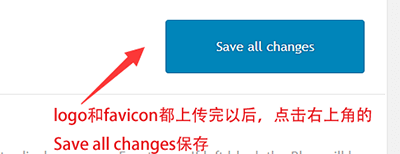
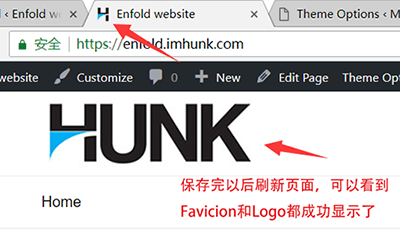
After uploading, refresh the foreground, and you can see that the logo and favcion have been updated.
7. Overall page layout setting of the enfold website
Next, we need to set the page layout of the entire website.
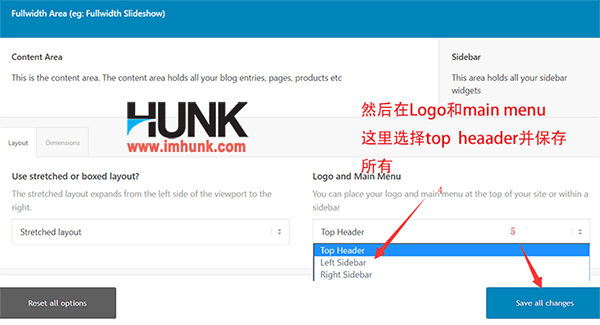
7.1 Setting the layout of enfold website
In the background, click the menu of the enfold child on the left, then click the general layout menu, and then select the striped layout in the use striped or boxed layout, and then select the head style you want in the logo and main menu. In this demonstration website, select the top header, and then click save all changes
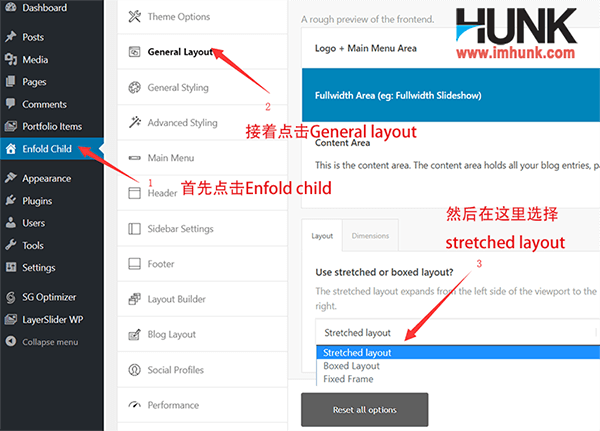
Next, let's set the page width of the website and click the dimensions menu
Maximum Container width, fill in 1200px or the page width you want
Content | Sidebar Ratio: 78% | 23% or the proportion you want
Content+Sidebar width: 100%
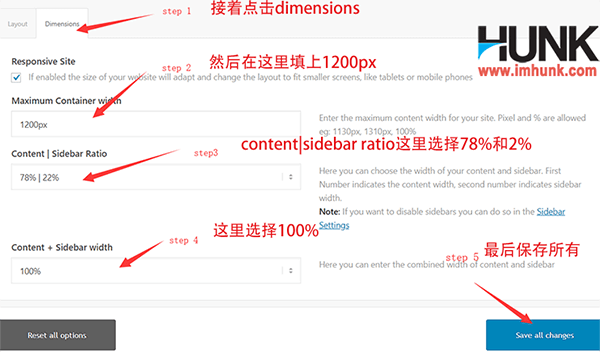
Finally, click save all changes to save all.
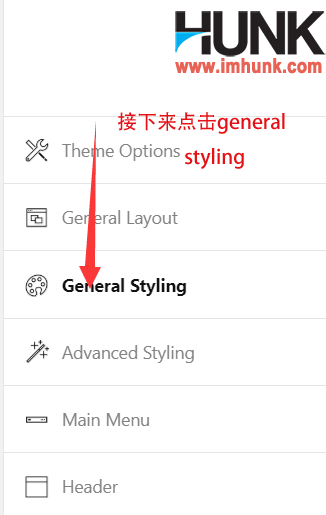
7.2 Setting the basic style of enfold website
Then click the General Style menu
Select a predefined color scheme
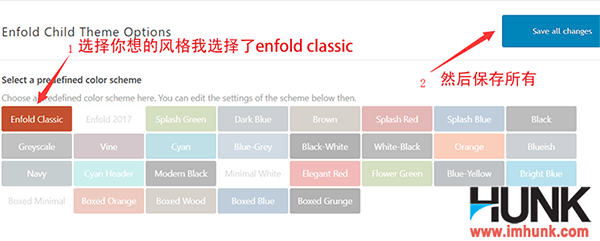
Then select white # ffffff from the logo area background color below the logo color. The other options remain unchanged.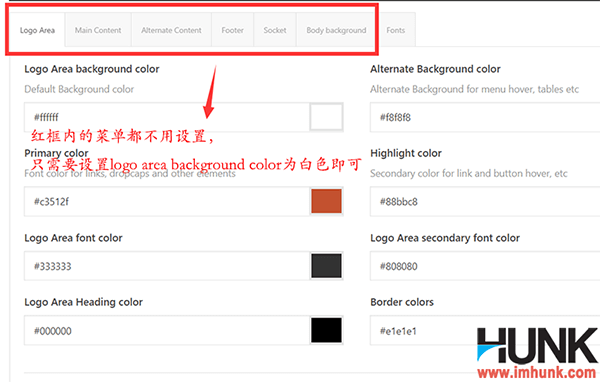
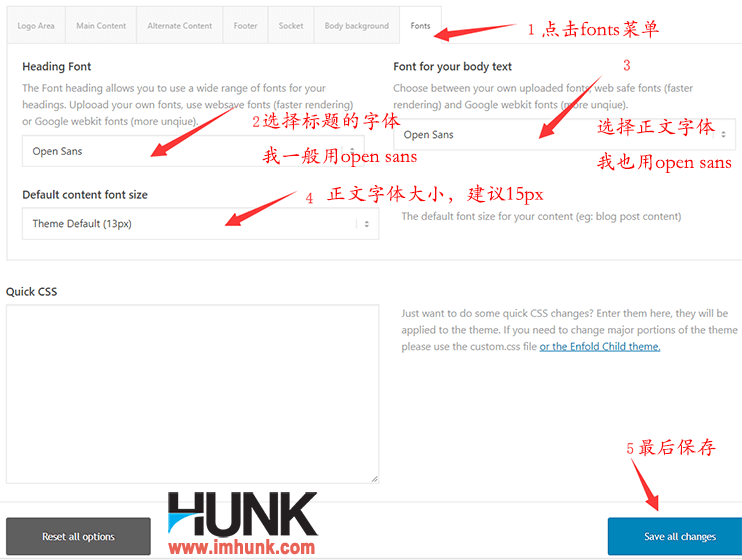
Then click the font menu,
Heading Font This is the H1-H6 title font. Just choose one you want. I choose Open sans
Default content font size The text size of the body paragraph, 15px is recommended
Font for your body text: select the font style you want. I choose Open sans
Finally, click save all changes to save.
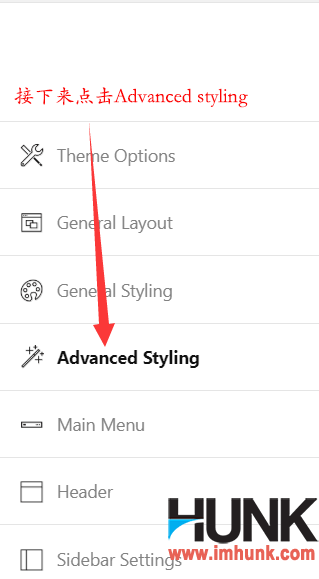
7.3 Setting the advanced style of enfold website
Click advanced styling to enter
Then click select an element to customize, select h1 in the pop-up drop-down menu, and click edit element
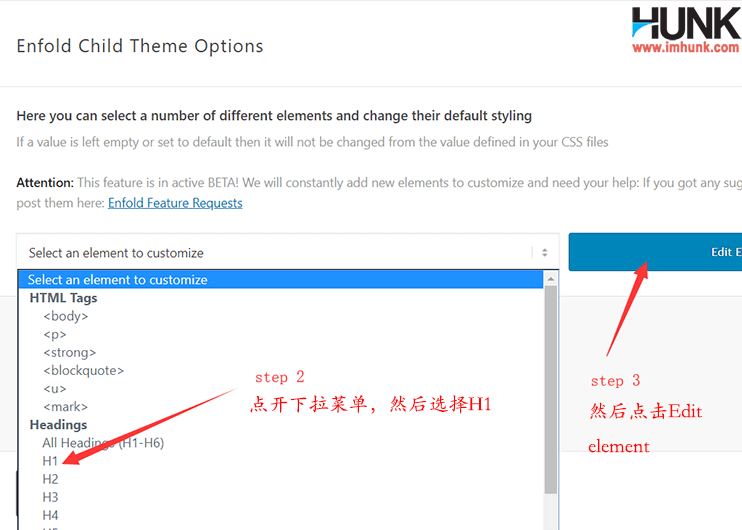
Then select the elements of h2 and h3 in the same way
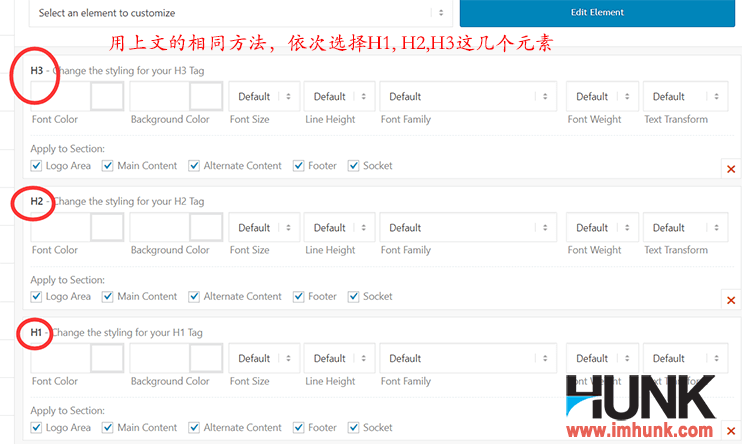
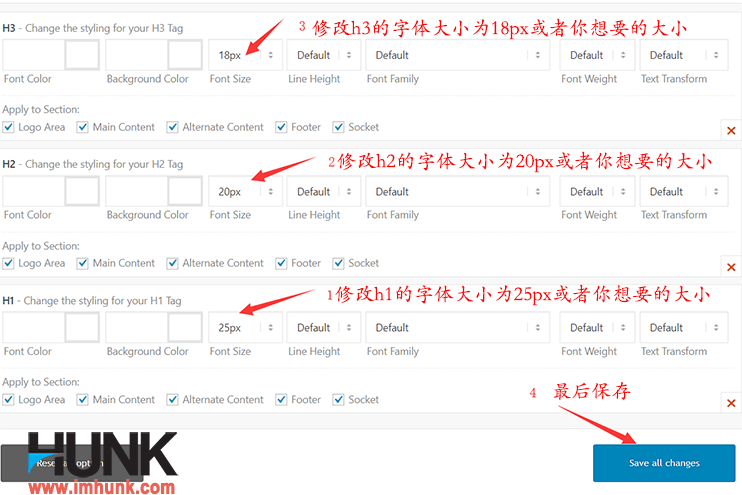
Next, modify the font size of H1, h2, and h3 respectively. The font size of h1 is recommended to be 25px, h2 is 20px, and h3 is 18px. Then click save all changes to save.
Then click select an element to customize again, select main memnu links to edit, and change font size to 16px
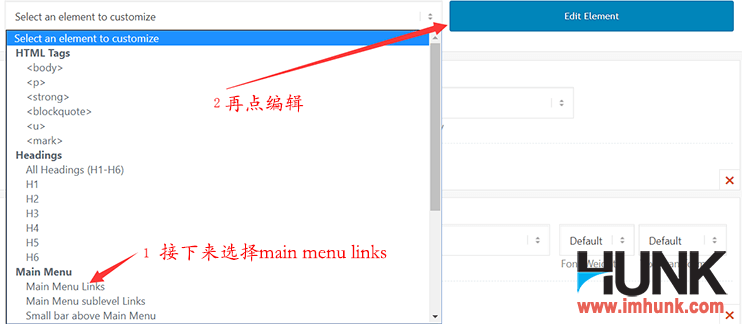
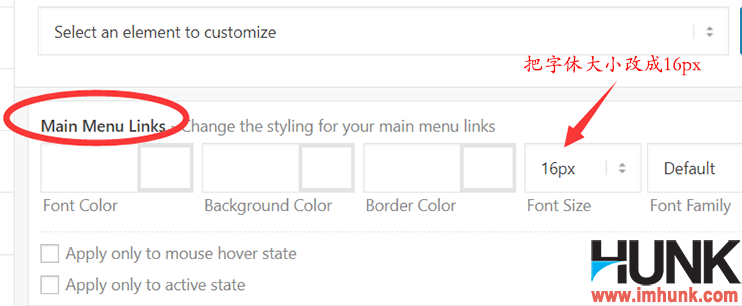
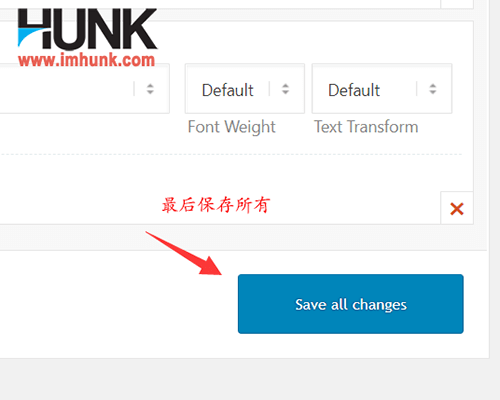
Finally, click save all changes to save.
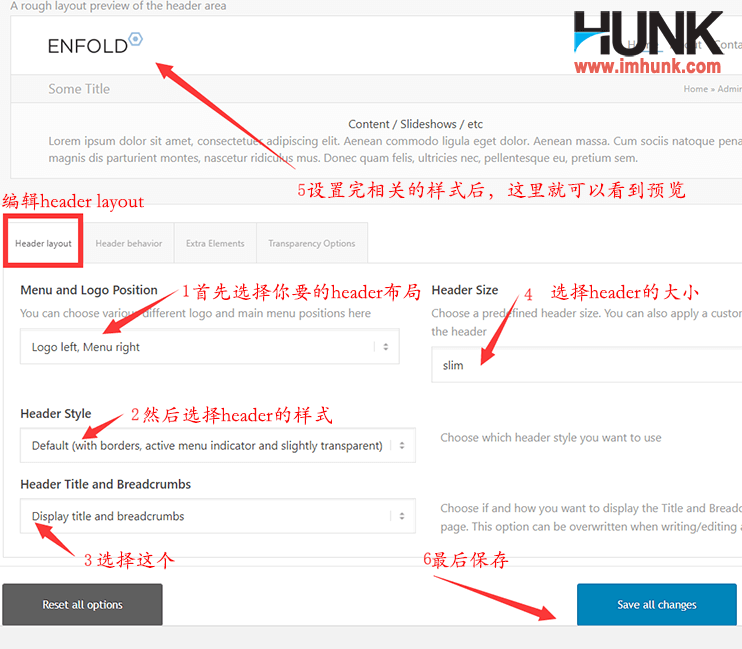
7.4 Setting the header of the enfold website
Click the header menu

Under the header layout
Menu and Logo Position Select the menu style here
Header Title and Breadcrumbs Select title and breadcrumbs
Header size Select slim
After setting, you can see the preview at the top
Finally, click save all changes to save
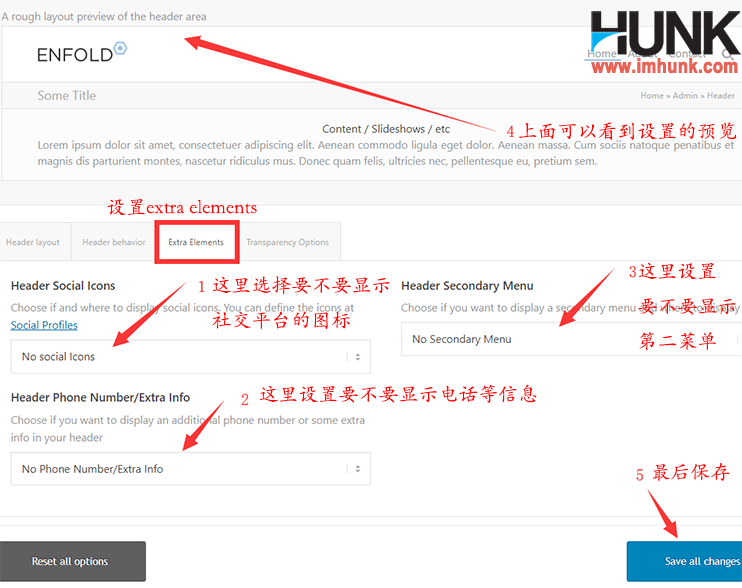
Then click extra elements to set
Header Social Icons Here, choose to display or not display the social link icon at the top
Header Phone Number/Extra Info Here you can choose to display no phone number or other information
Header Secondary Menu Here, choose to display or not display the second menu of the head
Click save all changes to save
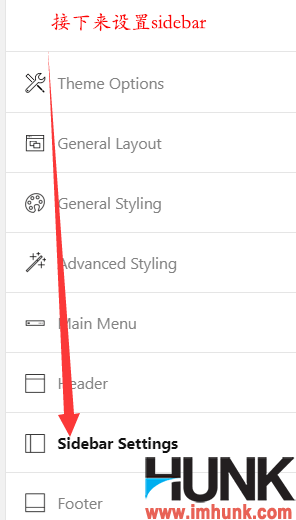
7.5 Setting the sidebar style of enfold website
Next, click the sidebar
Then, the submenus of Sidebar on Archive Pages, Sidebar on Blog Page, Sidebar on Single Post Entries, and Sidebar on Pages have three options, namely, no sidebar, left sidebar, and right sidebar
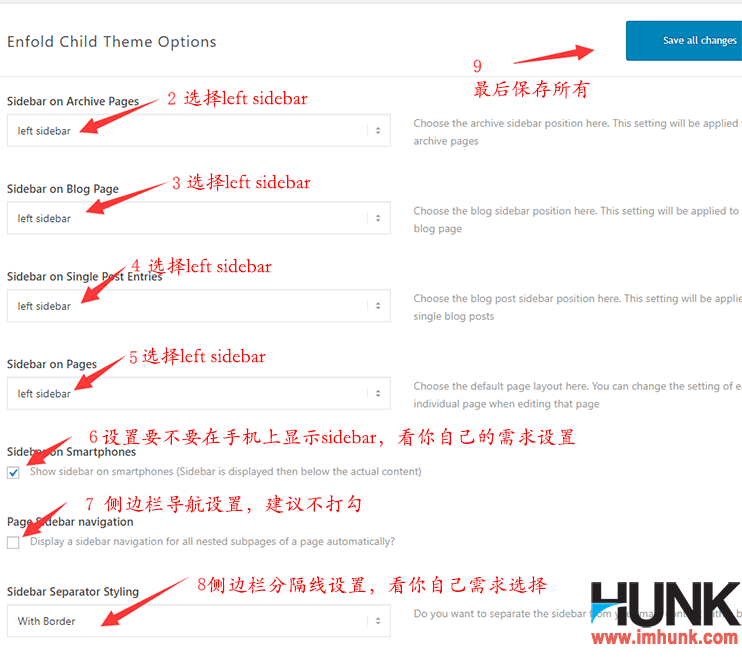
You can choose to display or not display the sidebar according to your own needs. The demonstration websites in this article all display the sidebar on the left
Sidebar on Smartphones Whether to display sidebar on your phone depends on your choice
Page Sidebar navigation It is not recommended to tick this
Sidebar Separator Styling See your own needs and choices
Finally, click save all changes to save all
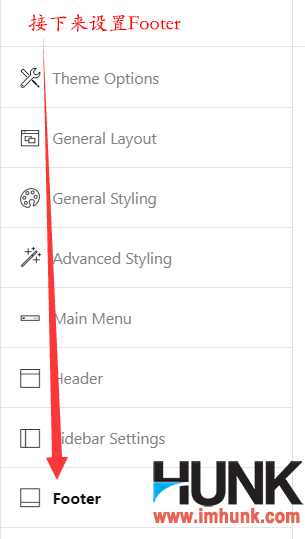
7.6 Setting the layout of the footer on the enfold website
Next click footer
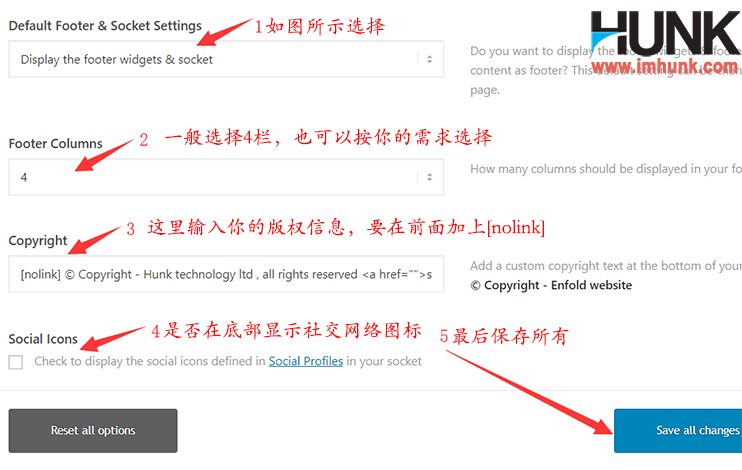
Default Footer & Socket Settings Select display footer widget and socket
Footer columns Select the bottom part into several columns, generally 4, or more or less
copyright Here is a format that can be used directly. Copy the following paragraph,
[nolink]Copyright © 2015 – 2018 company name, all rights reserved | a href=" https://enfold.imhunk.com/sitemap_index.xml ”>sitemap</a>
Change the company name to your company name, and change enfold.imhunk.com to your website domain name,
Social icons Select whether to display the social network icon at the bottom, depending on your needs
Finally, click save all changes
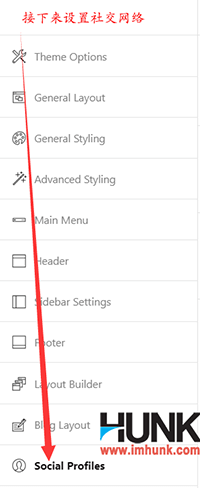
7.7 Set social network of enfold website
Click social profiles to enter
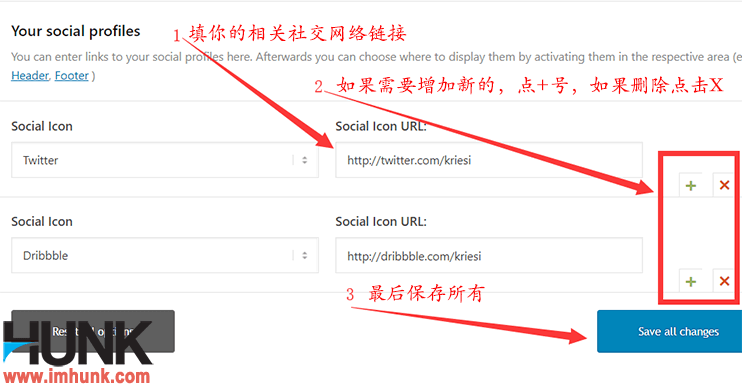
stay Social Icon Select the platform you want to display
Social Icon urls Fill in your social network platform
You can add and delete related SNS links through the following+and cross signs.
Click after setting save all change S Save
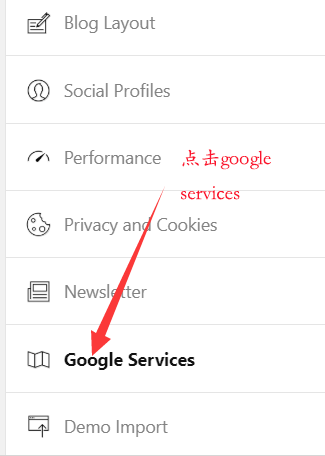
7.8 Setting Google services on the Enfold website
Click the Google services menu
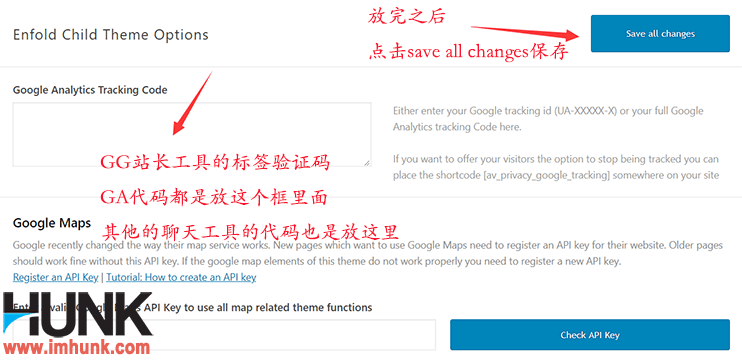
Here is mainly the GA analysis code or the verification code of the gg webmaster tool. Please refer to here for the method of obtaining relevant codes Installation of Google Webmaster Tools and Google Analytics
Get the code and put it in the box below Google Analytics Tracking Code, and then save it.
If a chat tool is added to the website, the code will also be placed here
Click save all changes to save
7.9 Other settings of the enfold website
The menus not mentioned in this article can be left as default for the time being.
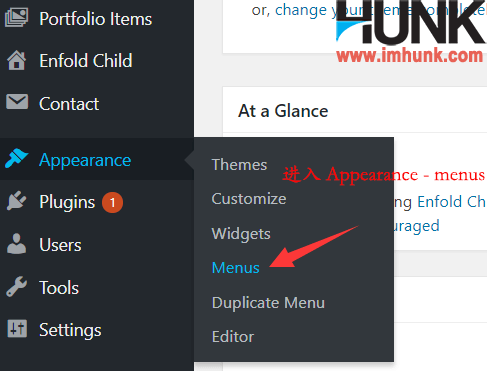
8. Create navigation/menu for the enfold website
Generally, you need to set three menus on the website, which are displayed in different places. Let's create the first menu first. The method is as follows
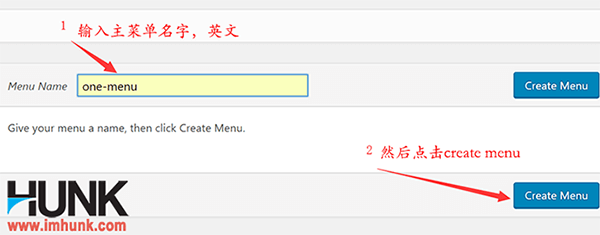
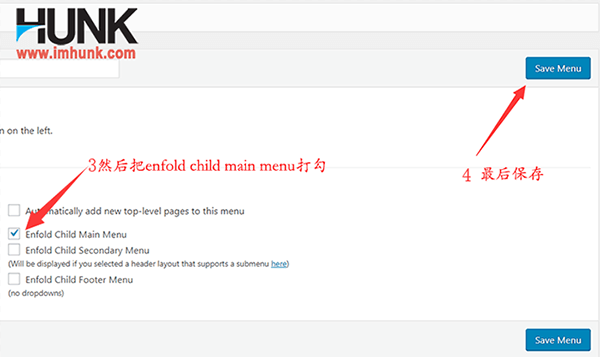
Click appearance – menu in the background of wp, and then enter the name of the menu in menu name, as long as it is in English, then click create menu, check enfold child main menu, and click save to save.
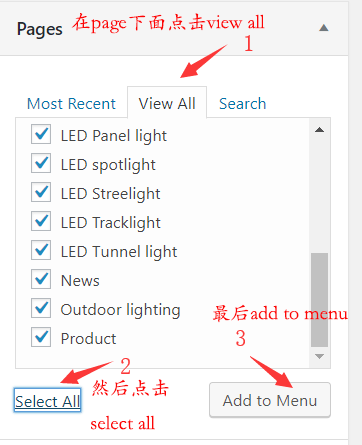
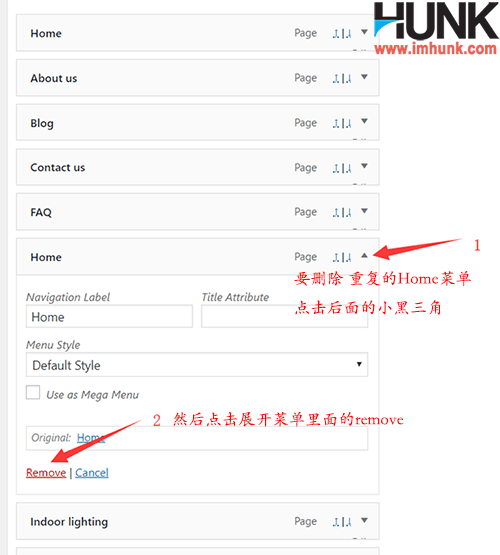
Then click View all in the pages column on the left, click Select all to select all, and then click Add to menu. All pages will be added to the menu one.
There will be a duplicate Home. Click the right triangle of Home to expand it, and then click Remove to delete it.
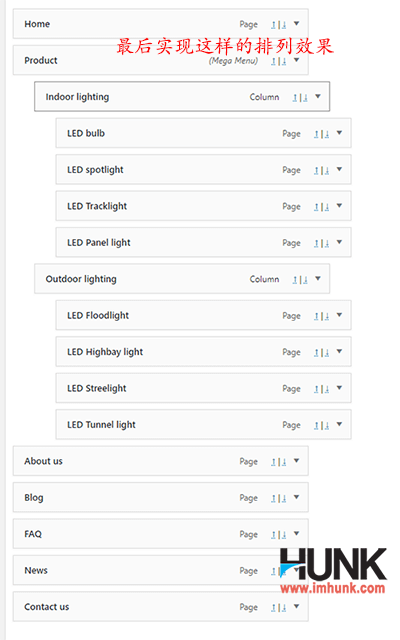
Next, adjust the order of the menu, including the order of the first level menu. Generally, from left to right, it is Home product About us FAQ Blog News Contact. Of course, the specific order is up to you.
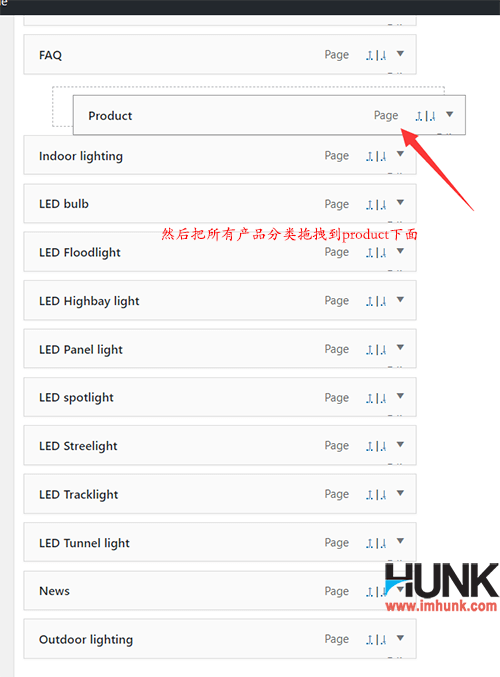
In addition, the products are adjusted according to the hierarchical relationship of classification and placed under product. Each menu can be adjusted in order and level by dragging. If you can't operate, you can refer to my record Tutorial for WP Menu Settings
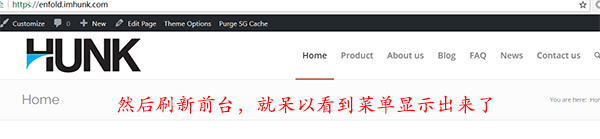
The adjusted effect is as follows. Finally, click save menu to refresh the foreground. The main menu is displayed at the top. The first menu, which is also the main menu, is created.

9. Set the content of sidebar and footer of the Enfold website
The layout and style of sidebar and footer have been set in the above section. If you need to modify the layout and style, you can go to the above section to learn.
This section describes how to set the content in the sidebar and footer of the Enfold website.
9. 1 First, we need to create two new menus, one on the sidebar and the other on the footer
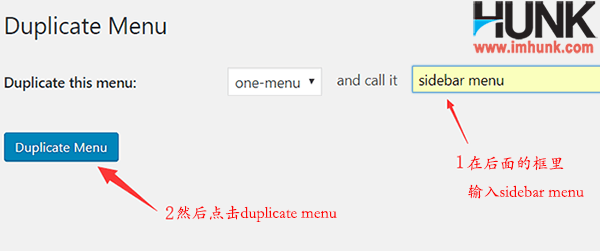
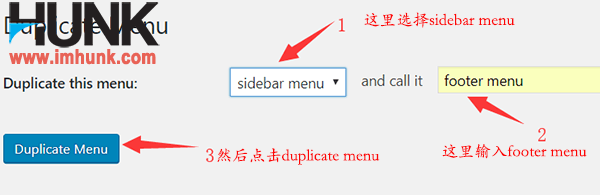
Click appearance – duplicate menu, then enter the sidebar menu in the box behind call it, and then click duplicate menu, so that the sidebar menu is created successfully.

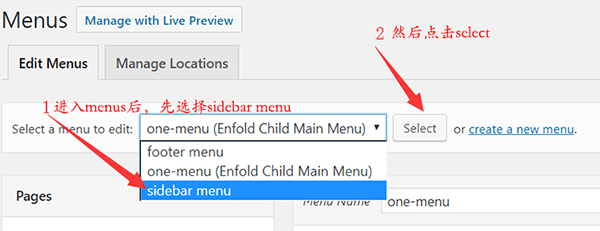
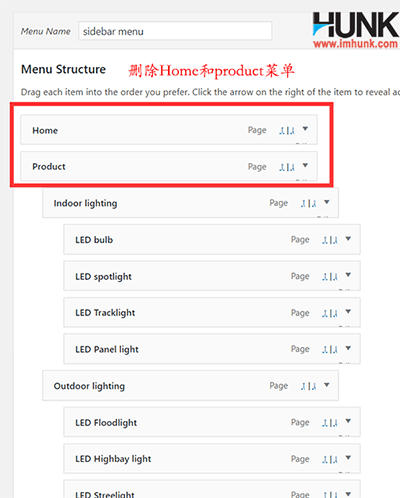
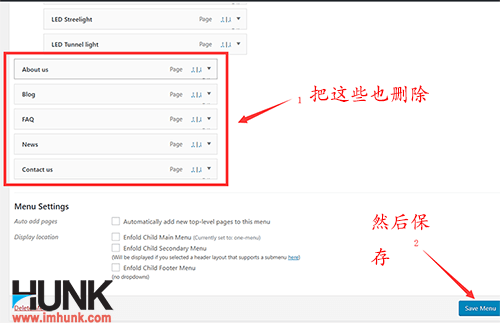
Next, we enter the appearance menu, select the sidebar menu, click select, and then delete the common menus such as Home about us, leaving only the product category menu. After editing, click the save menu. The sidebar menu is created successfully.
Next, we create the footer menu
Click appearance – duplicate menu, select the sidebar menu in the front, then enter the footer menu in the box behind call it, and then click duplicate menu, so that the footer menu is created successfully.
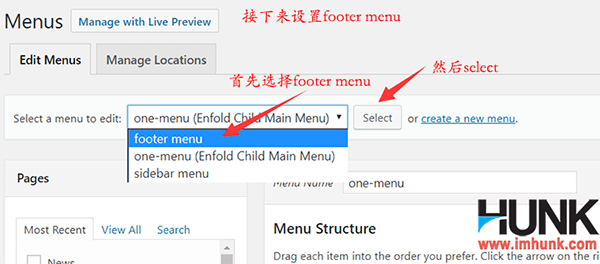
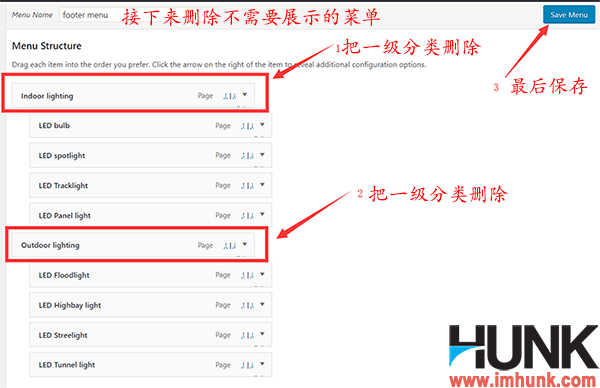
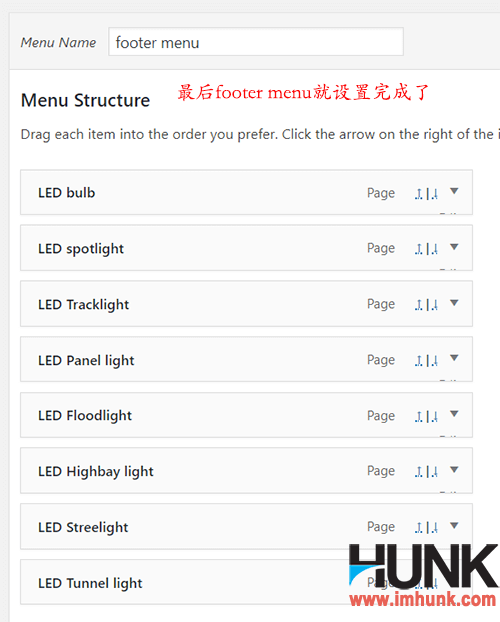
Enter Appearance – menu, select Footer menu, click Select, delete the primary product category, keep the secondary product category, and click Save menu after editing.
If you only have one level of product classification, you can keep it directly. On the other hand, if you have too many secondary classifications, you can also keep the primary classification and delete the secondary classification, which is entirely up to you.
9.2 Next, let's set the content in the sidebar
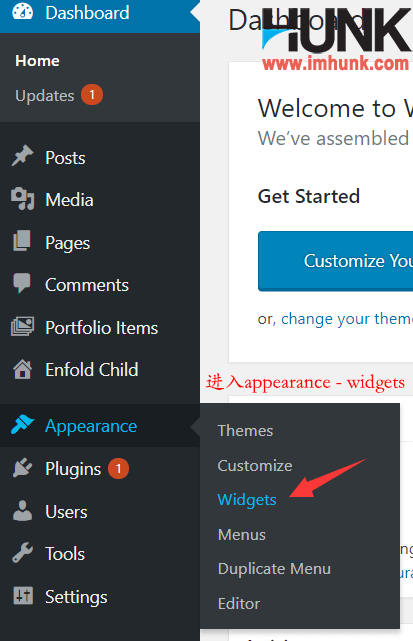
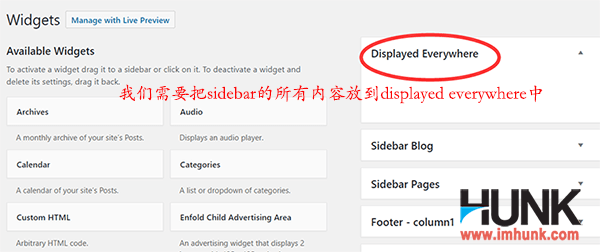
Enter appearance – widgets, we need to put the content in the sidebar in display everywhere.
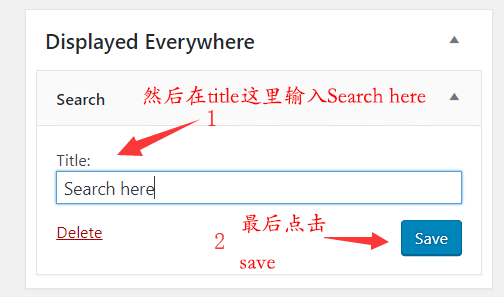
First find the search widget, and then click it to expand a list of menus. Then click display everywhere, and click add widget. Then search is added to display everywhere.
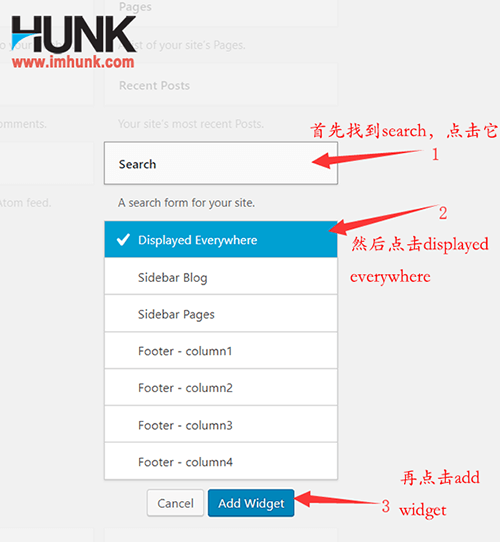
Then enter search here in title, and click save to save
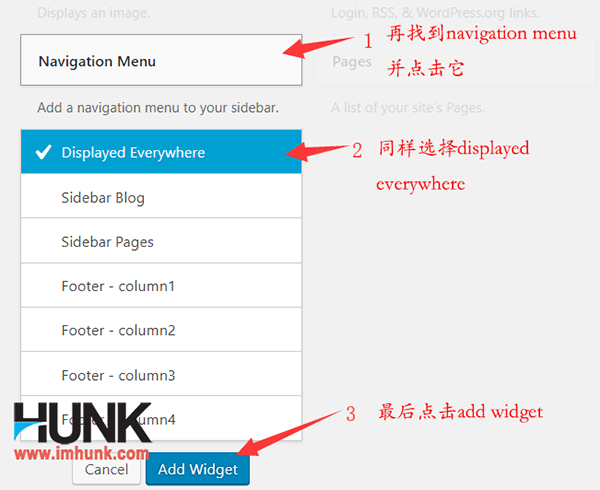
Then we find the navigation menu widget, click it, click display everywhere in the expanded menu, and click add widget, so that the navigation menu is added to display everywhere.
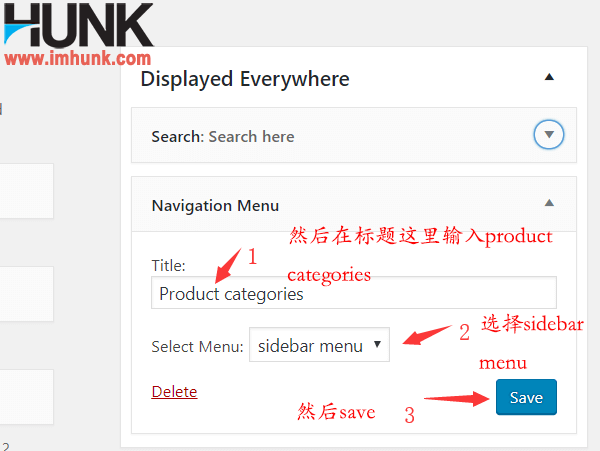
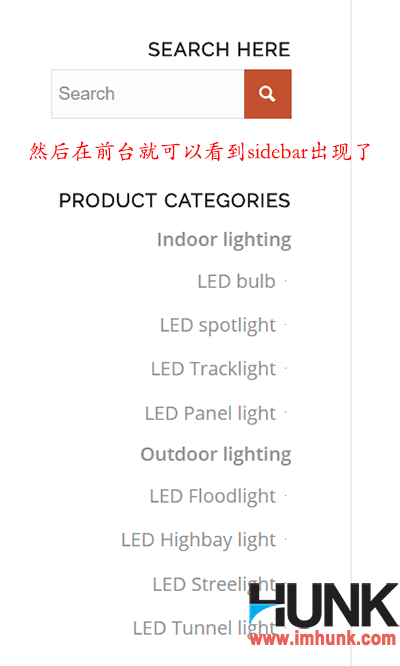
Then enter Product categories in the title of the navigation menu, select the sidebar menu in the select menu, and click save to save. Then refresh the foreground to see the sidebar display.
9.3 Next, let's set the content in footer
Go back to appearance – widgets, find the enfold child latest portfolio, click it, select column 1, and then click add widget to add the widget to the first column of footer.
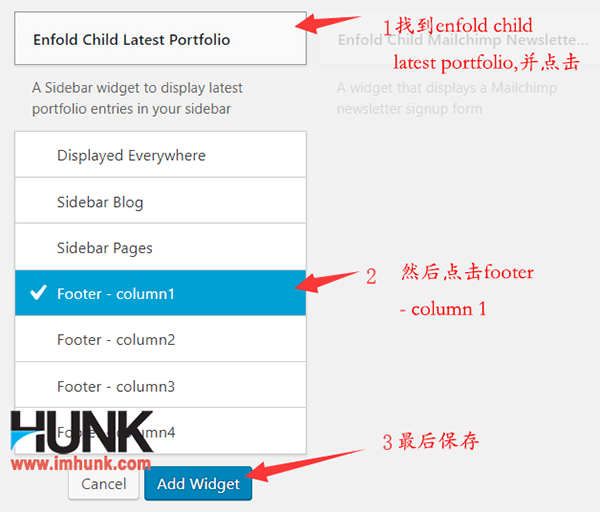
Then enter Receive products in the title, select 6 for the number of displayed products, select the category you want to display in the category, display title only&excerpt, select show the title only here, and finally click save to save.

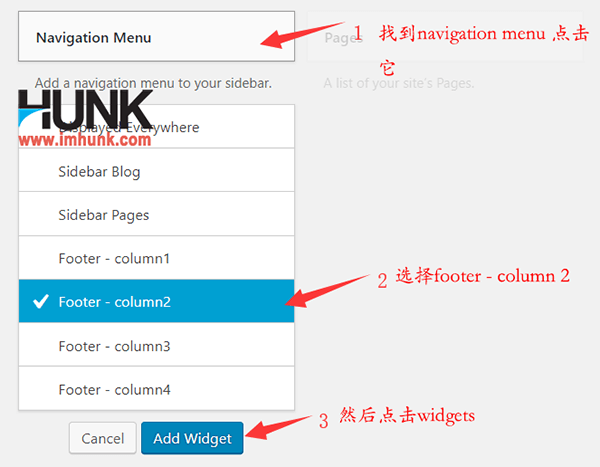
Then find the navigation menu and click it, select footer – column 2 in the expanded menu, and finally click add widgets. Then enter Product category in title, select footer menu in select menu, and click save to save.

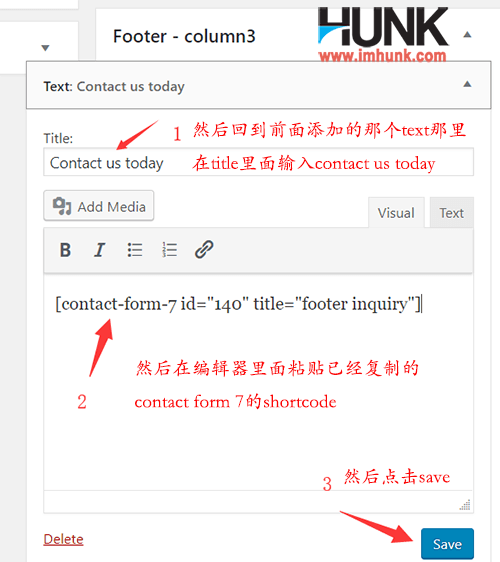
Next, find the text widget and click it, then click footer – column3, add widget. Here is the inquiry form
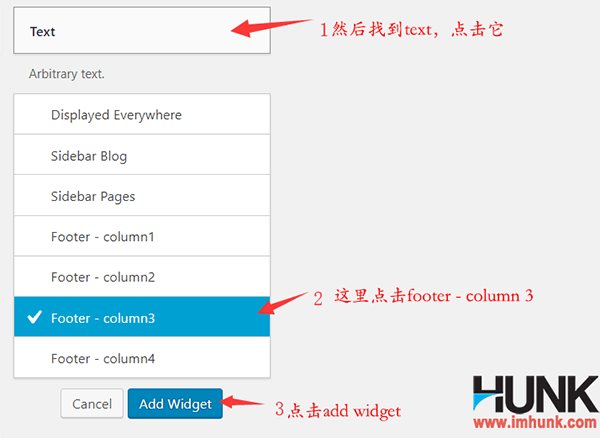
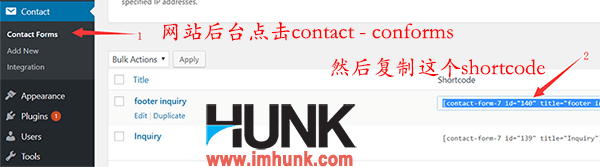
So we click contact – contact forms, copy the shortcode after footer inquiry, return to the text widget just added, enter Contact us today in the title, paste the shortcode into the editor below, and click Save to save.
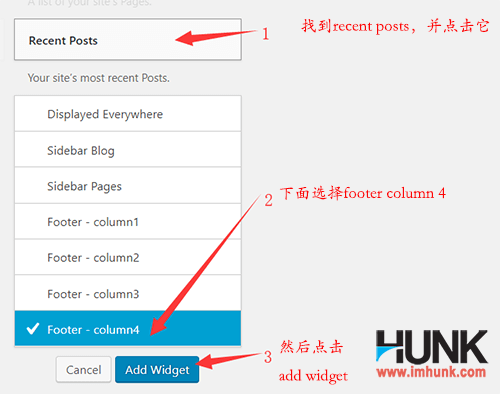
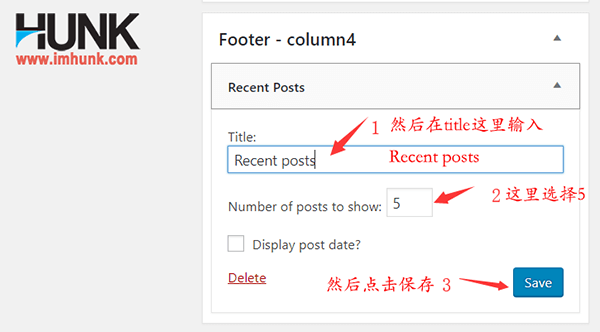
Finally, we find the recent posts, click, select footer – column 4, and then click add widget Then enter recent posts in title, select 5 in number of posts, and click save to save.
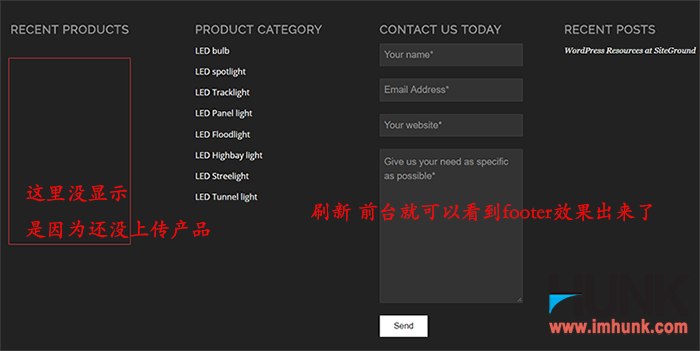
After the above is completed, refresh the foreground page, and you can see that the footer has been displayed. The recent products part is blank because the product has not been uploaded. When the product is uploaded, the latest product will be displayed here.
10. The homepage of the website with the theme of Enfold
The home page is one of the most important pages of a website, so the content of the home page is very important.
In addition to Banner and product classification, we also need to put the company profile, enterprise advantages, customer evaluation and other content as rich as possible. In addition, call to action access to relevant pages to increase the number of page views, increase customers' understanding of us, and improve the conversion rate.
The specific methods are described below
10.1 Add Banner on the homepage of the Enfold website
Banner's role is to let website users know what products you are working on at a glance. Banner generally recommends no more than 3 screens. The full screen size is 1920px in width and 600-800px in height. The non full screen size is, the width is the same as your page width, and the height is 400-600PX. Choose one of the two sizes.
Make it according to your own needs. If you can't make it yourself, you can outsource it on fiverr. See Outsourcing method on fiverr 。 After making the banner, remember to drag it to tinypng.com, compress it once, and then upload it.

We use the layerslider plug-in to create the banner effect. The method is described below.
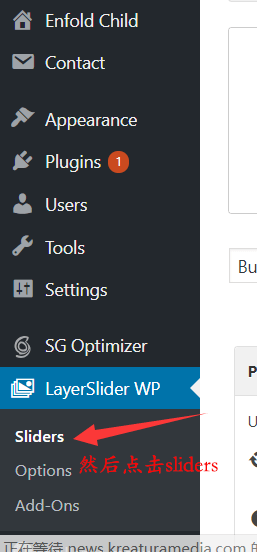
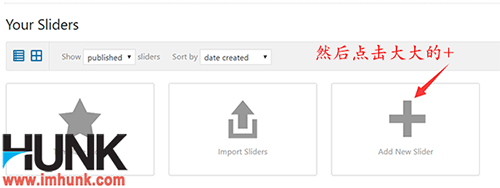
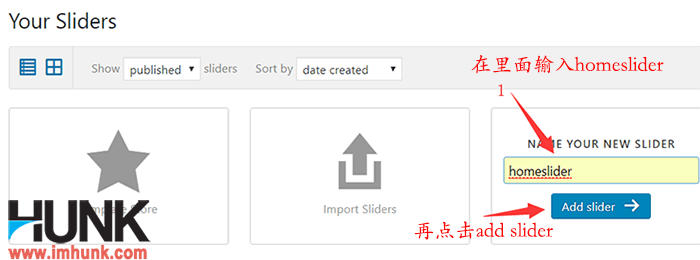
First click layerslider wp – sliders, then click the big+sign, enter homeslider in it, and then click ADD slider
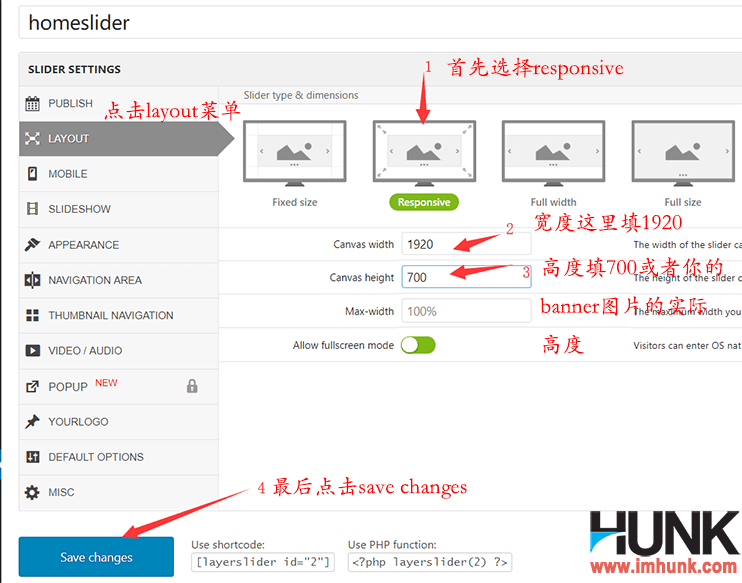
Then click the layout menu, and select slider type&dimensions Responsive
canvas width Fill in the width of your banner image. The banner image of this demonstration website is 1920px, so fill in 1920
canvas height Fill in the height of your banner picture
Click save changes to save.
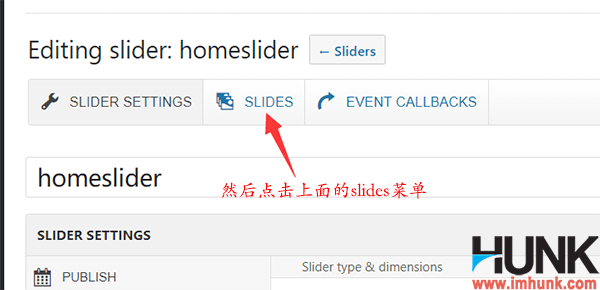
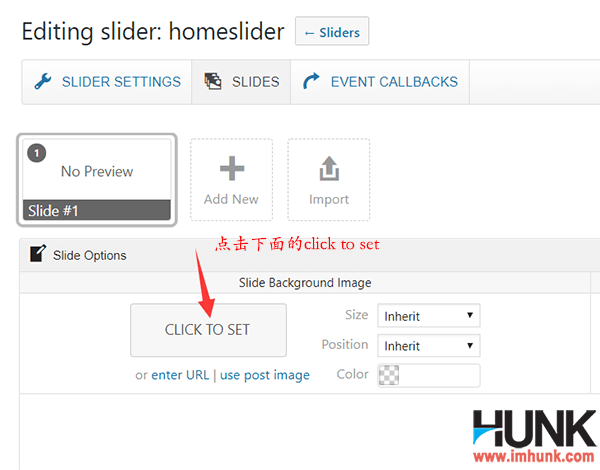
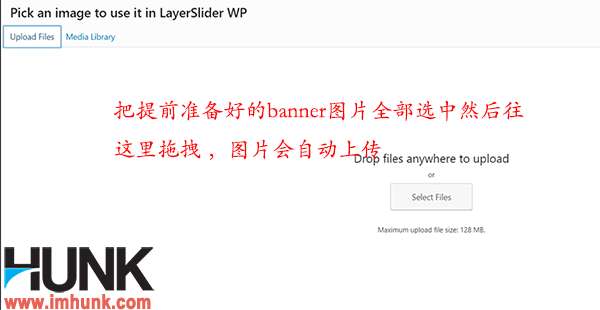
Next, click the slides menu, which will add a slide by default. Click to set under the slide to switch the image upload window, upload the prepared images, and drag three images directly into it
After uploading the pictures, the three pictures are checked by default, indicating that they are selected. Click each picture, and the attribute editing window of the picture will appear on the right. Fill in the description of the picture in alt text. If you don't know how to write it, it will be the same as the name of the picture.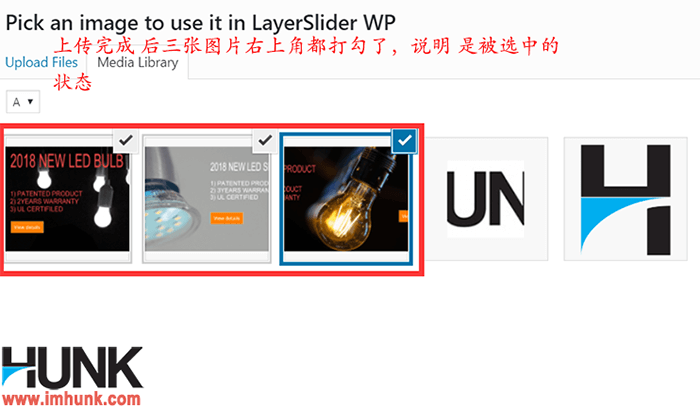
After filling in all three pictures, click Insert. In this way, a total of three slides are automatically created and each image is inserted into them.

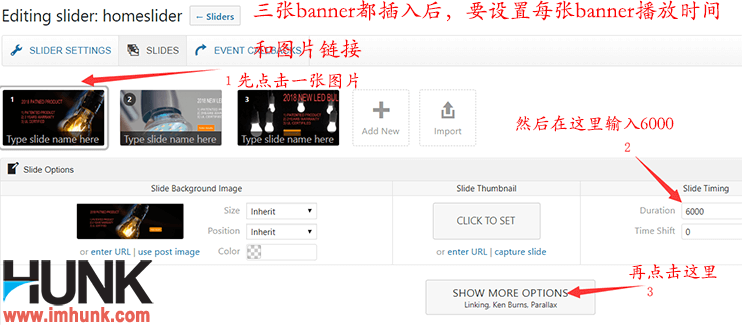
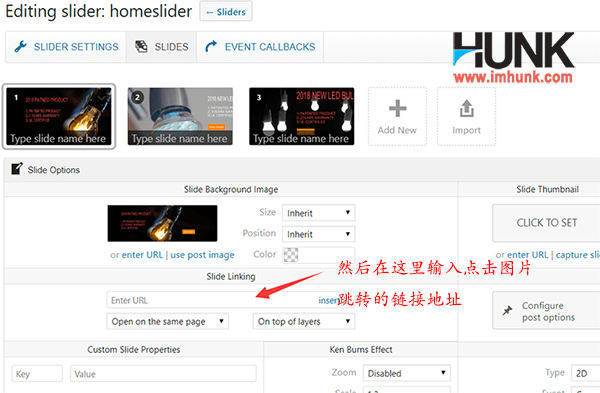
Next, set each slide, click the first picture, fill in 6000 in the duration, which means that the stay time of the slide is 6S, then click more options below, and enter the link to jump to after clicking the slide in the box below slide linking.
If you don't know what the link needs to be transferred temporarily, you can leave it blank first.
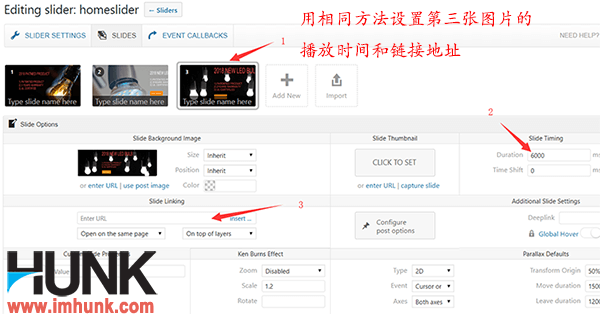
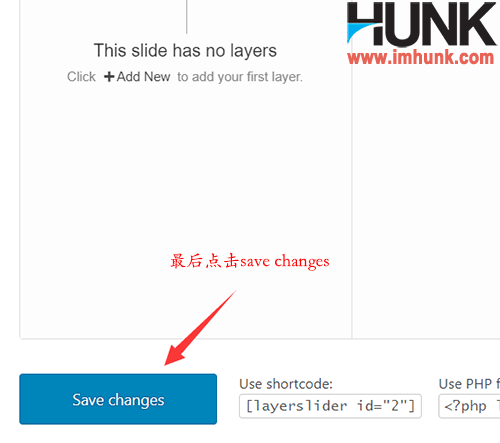
Then use the same method to set the dwell time and link of the second and third slide. Finally, click save changes, and the banner effect is completed.
Next, we need to display Homeslider on the home page.
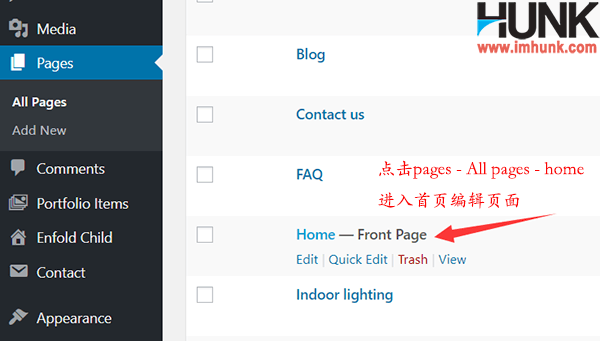
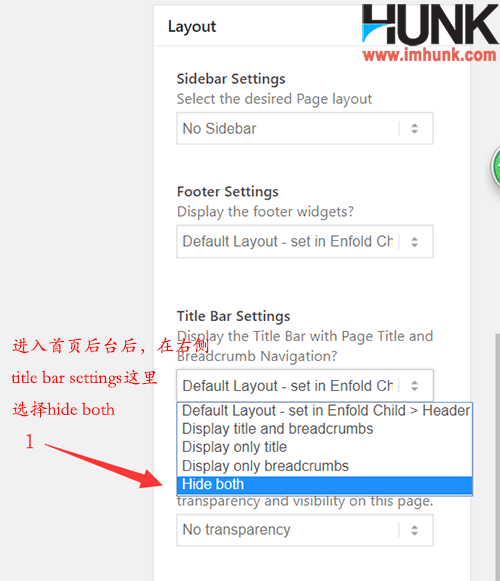
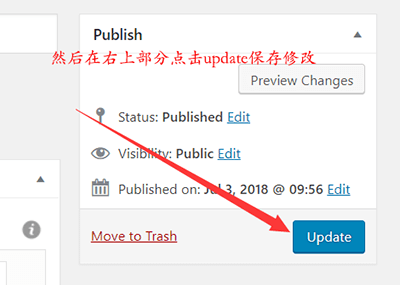
First, click pages – home to enter the editing page, select hide both from the title bar settings on the right, and then click update on the upper right corner to save the settings.
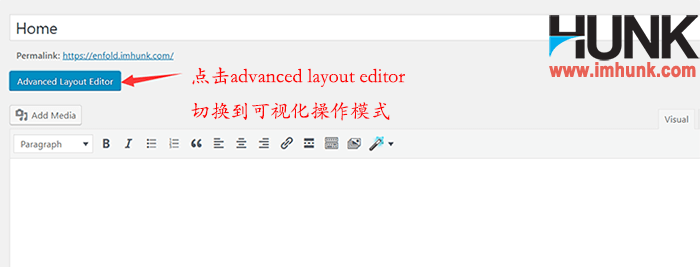
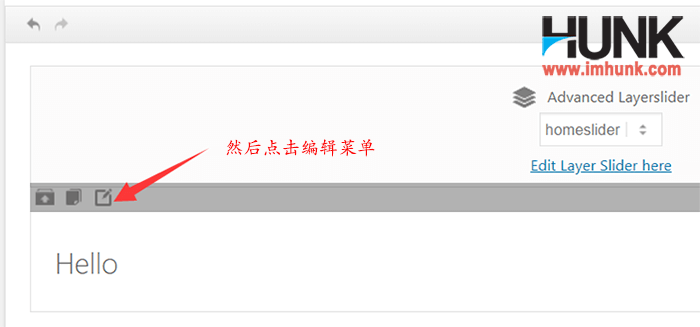
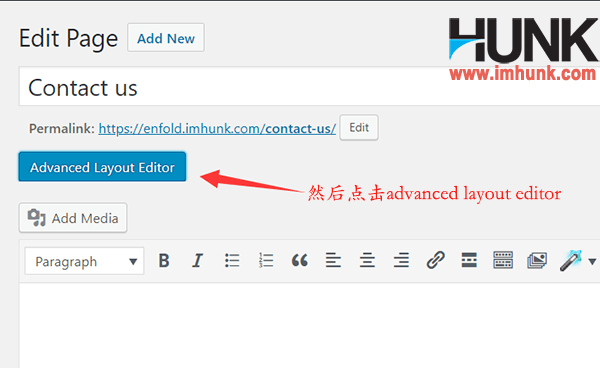
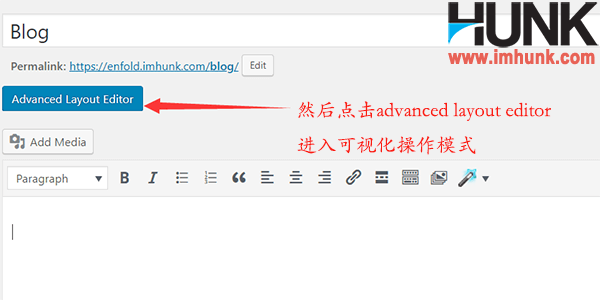
Then we click the advanced layout editor to switch the editor to the visual operation mode.
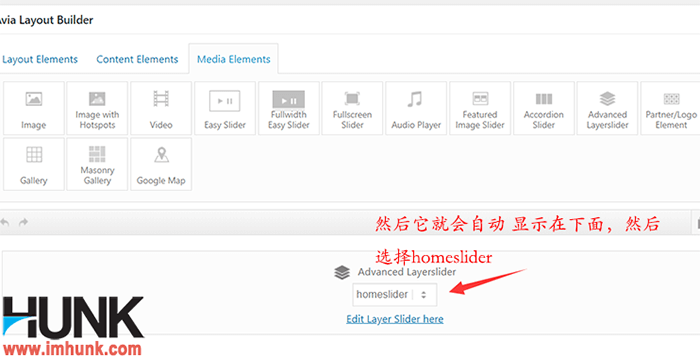
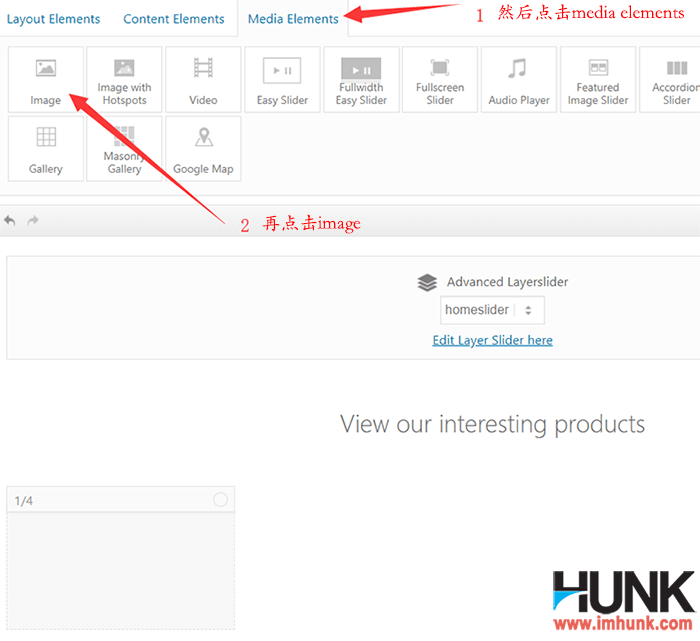
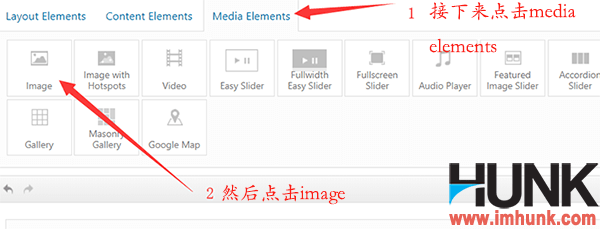
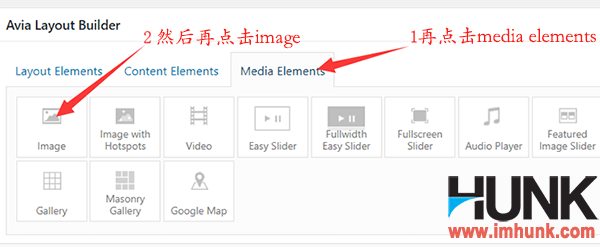
Then click media elements, and then click the advanced layslider below. This element will be added to the editor,
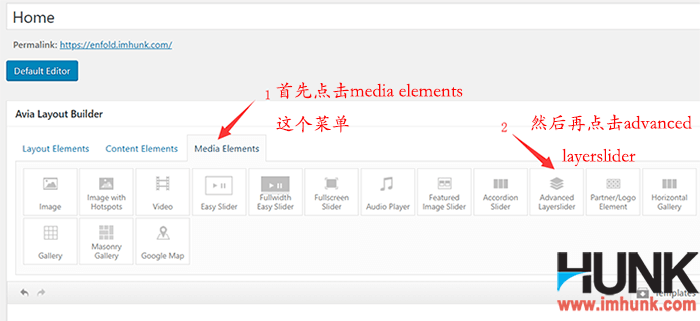
Then click the selector under the advanced layerslier, select Homeslider, and finally click the update in the upper right corner to successfully set.

Then refresh the foreground to see the banner effect set.

10.2 Set up product classification display on the homepage of enfold website
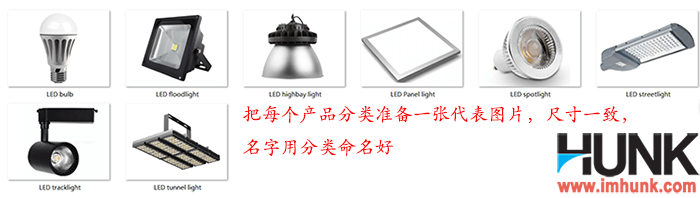
We need to put the product categories on the home page and add links to attract users to click, so we need to prepare a picture for each category and name the file with the category.
The size is consistent, the recommended width is 380px, and the height can be adjusted proportionally. After processing the size, drag it to tinypng.com to compress it once.
If there are two levels of classification, it depends on whether the requirement shows the first level or the second level classification. This article demonstrates the secondary classification, because the primary classification is too extensive, and there are only two.
The method is described below.
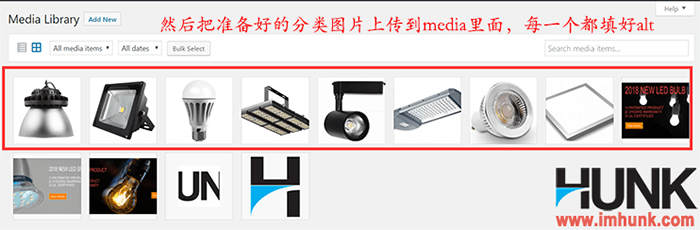
First, upload the prepared classified images to media, and edit each alt text
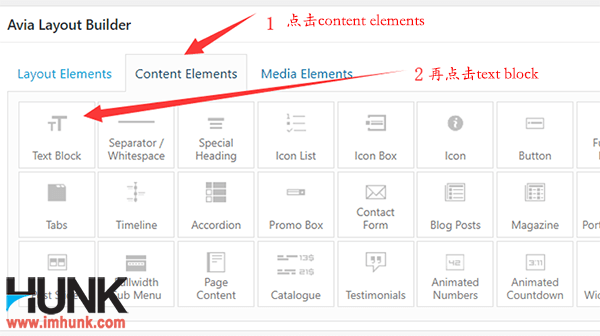
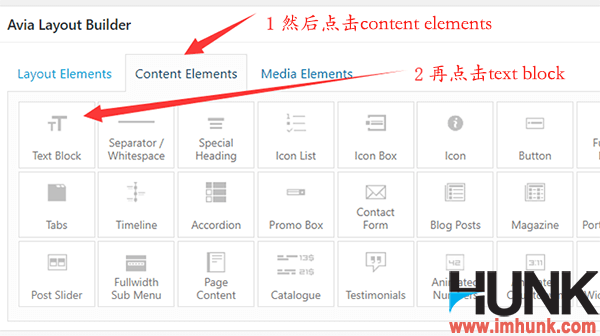
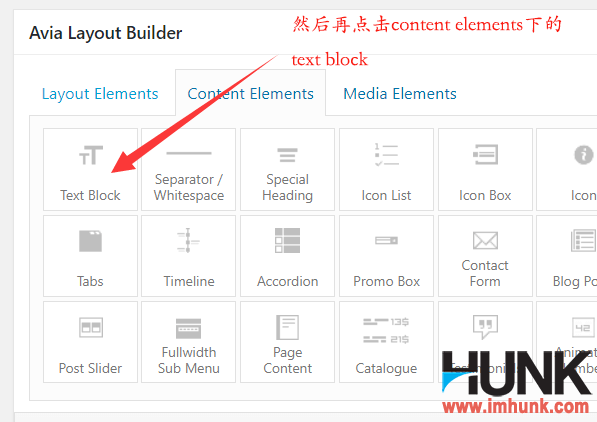
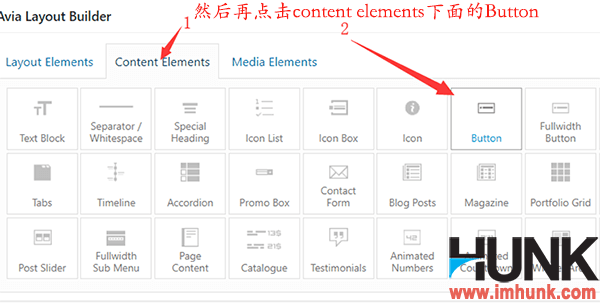
Next, click content elements, and then click the special heading below to add a title to this part
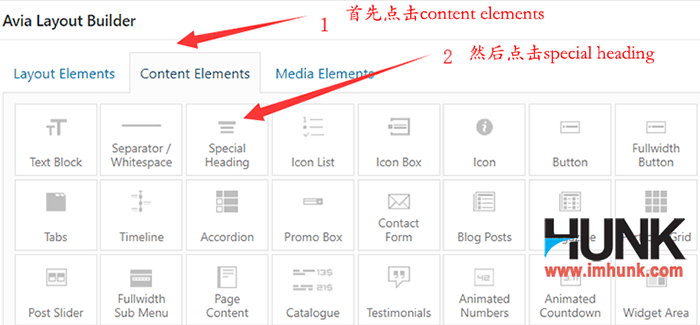
After adding to the editor, click the edit menu of special heading
heading text Enter the title here, which is simple and attractive,
heading type Select h2 here,
heading style Select modern centered
Heading size Select 25px
Finally, click Save to save

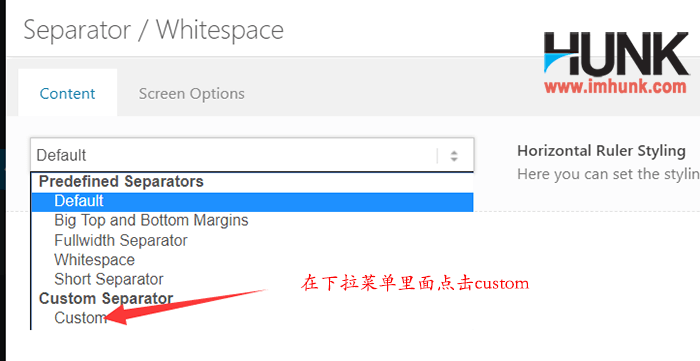
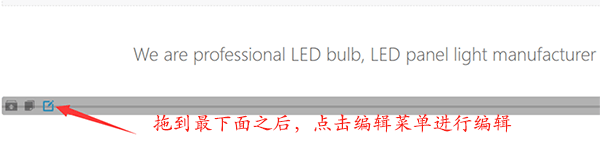
Next, add a separator line. Click the separator/whitespace in the content elements to add it to the editor. Then place the cursor on it to display the gray and menu, and click the edit menu
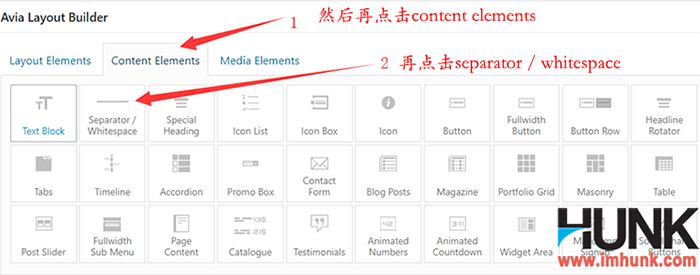
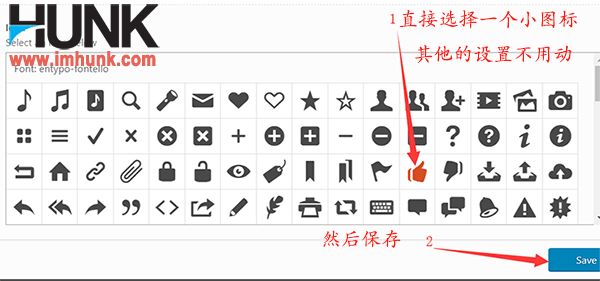
Horizontal Ruler Styling: select custom
Width, fill in 40% here
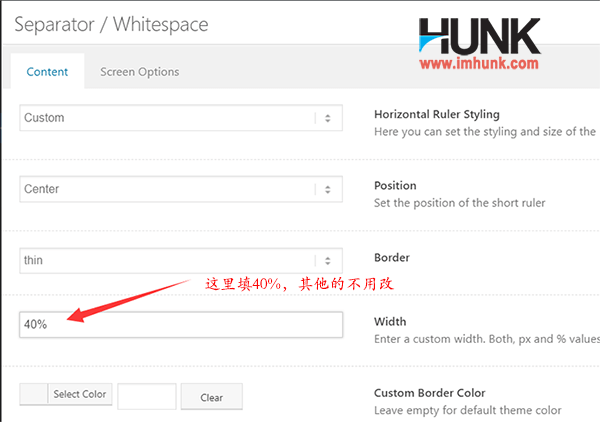
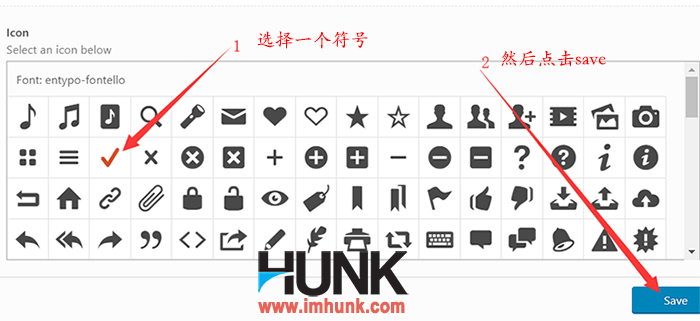
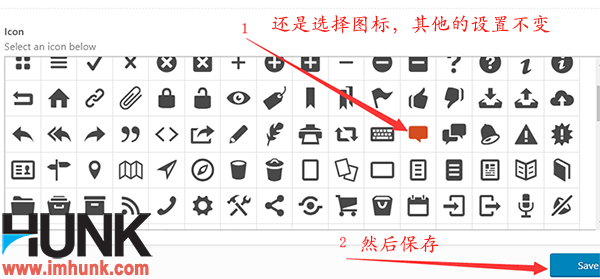
Other settings remain unchanged. Then select an icon in the icon below, and click Save to save.
Then click the update page in the upper right corner and refresh the foreground to see the effect.

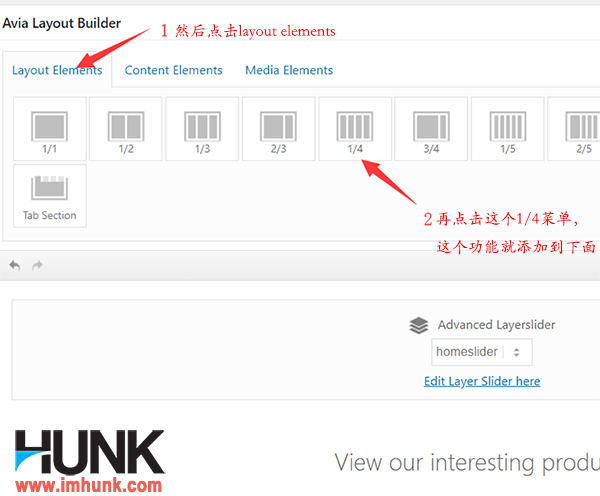
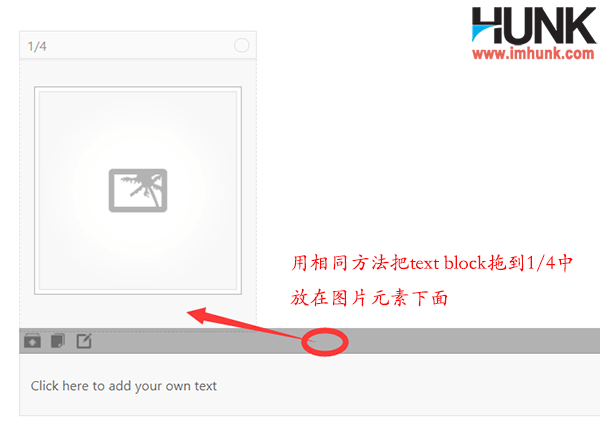
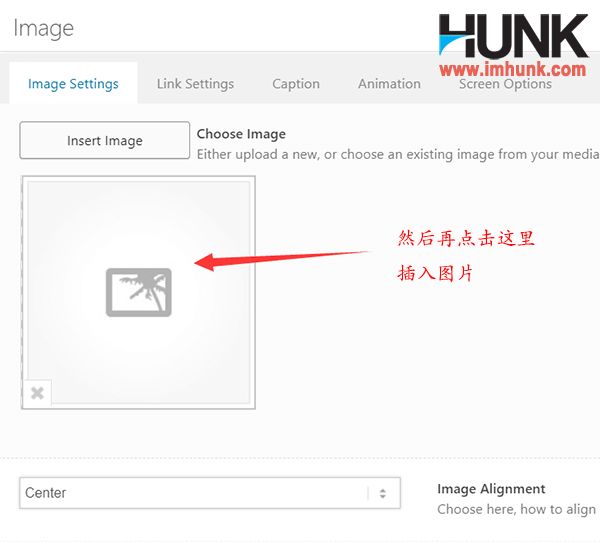
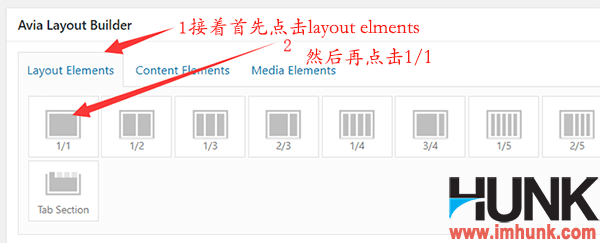
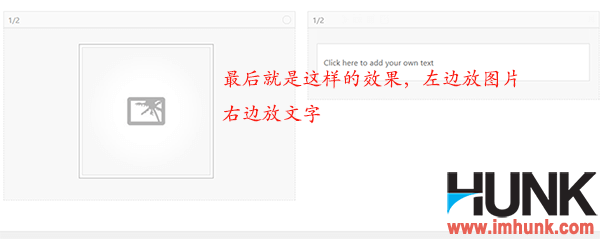
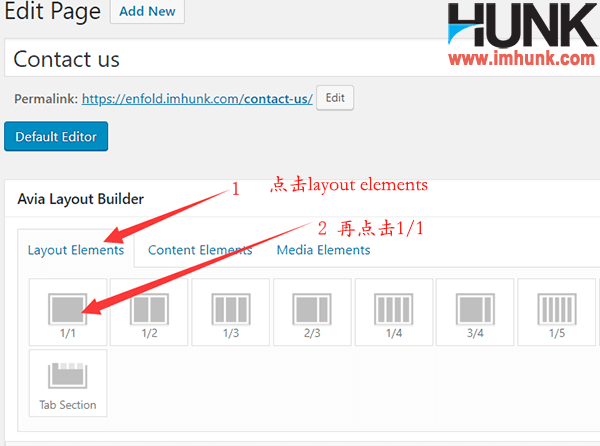
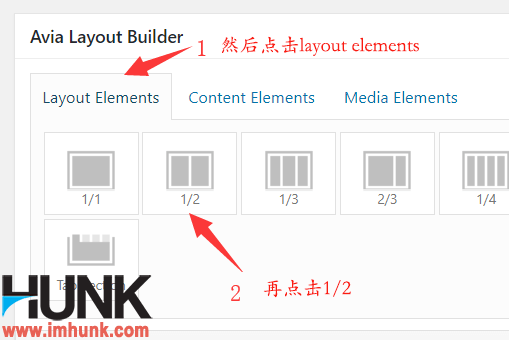
Next, we add pictures and category names, click layout elements, then click 1/4 of the elements, and then click image under media elements
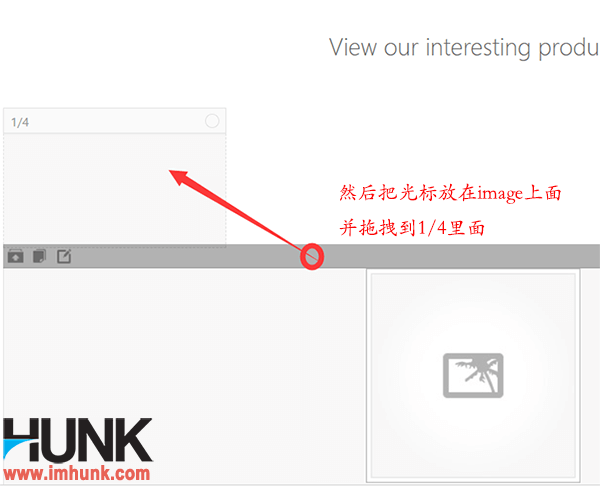
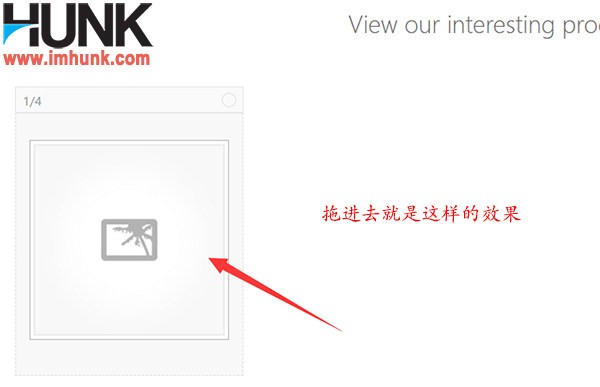
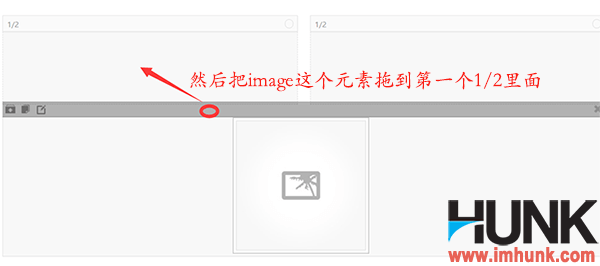
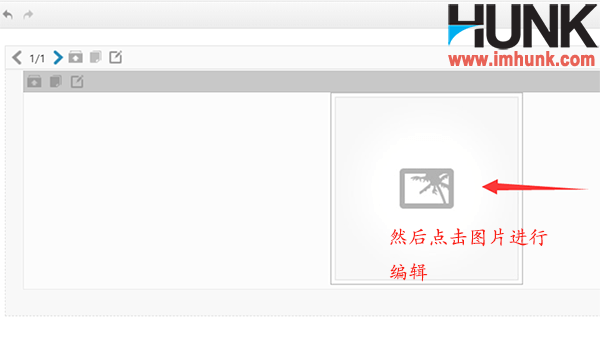
Place the cursor on the image, a shadow will appear, and then drag it to 1/4. The effect is as follows.
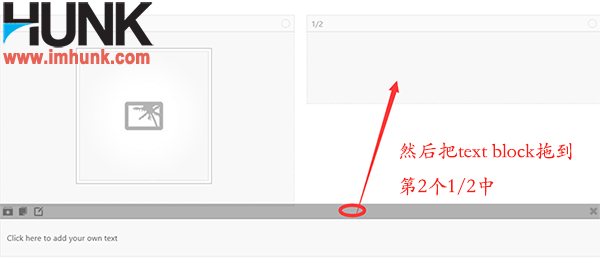
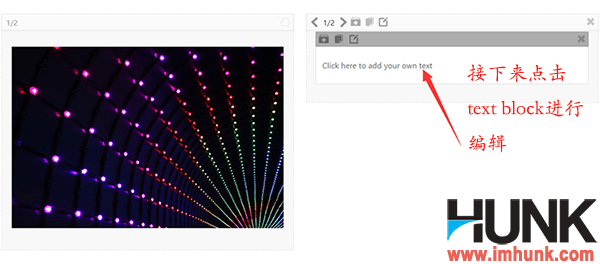
Then click the text block under the content elements, and drag the text block to 1/4 of the image using the same method.
 \
\
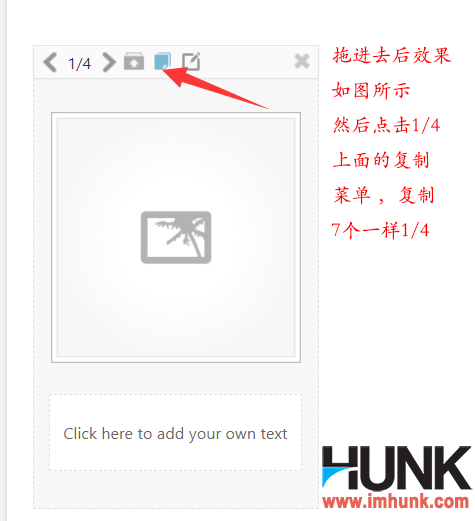
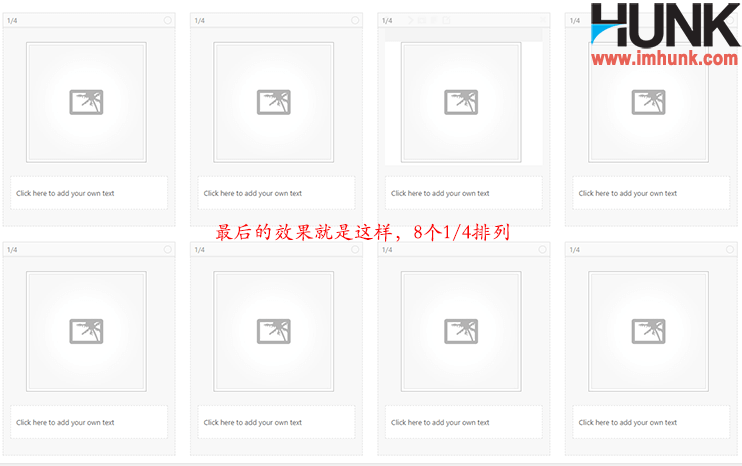
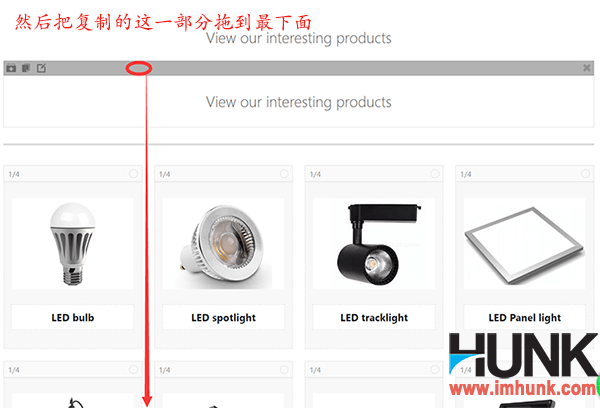
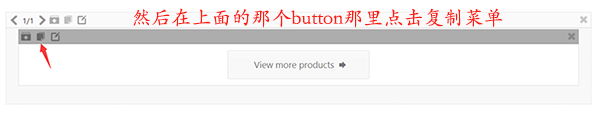
Then place the cursor over 1/4 and click the copy menu that appears. Since I have 8 categories, click 7 times to copy 7 identical 1/4 function templates. The effect is as follows
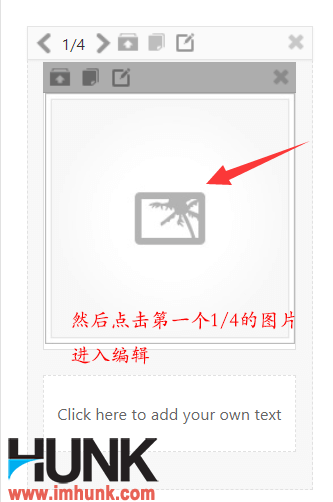
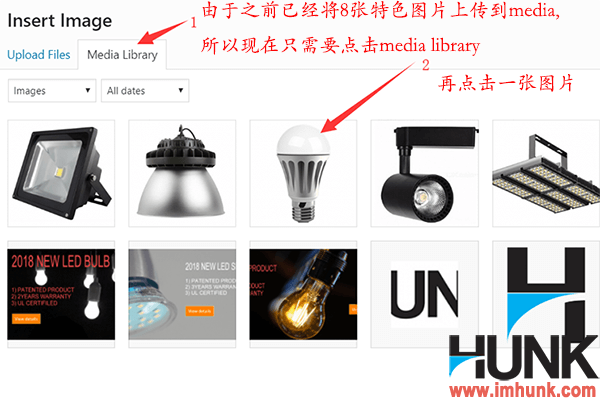
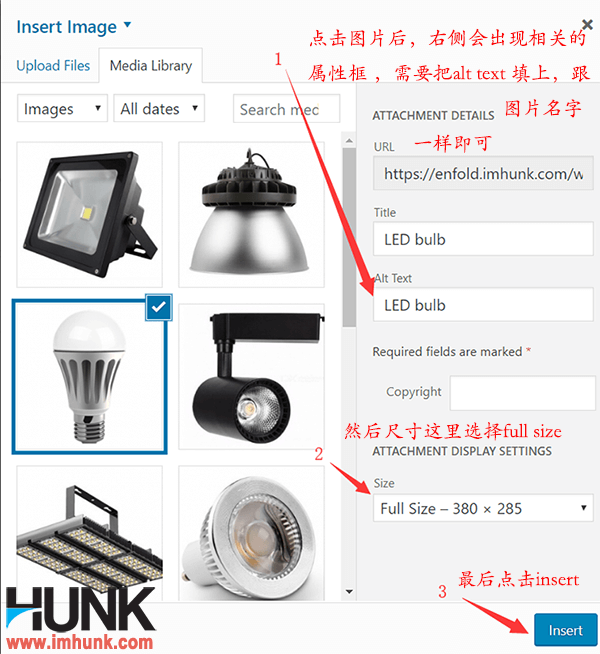
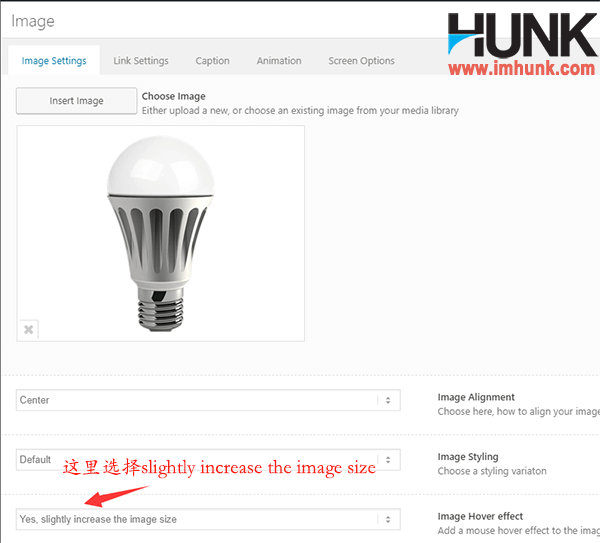
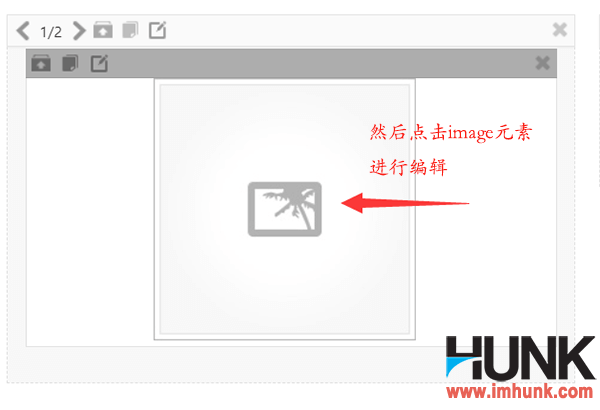
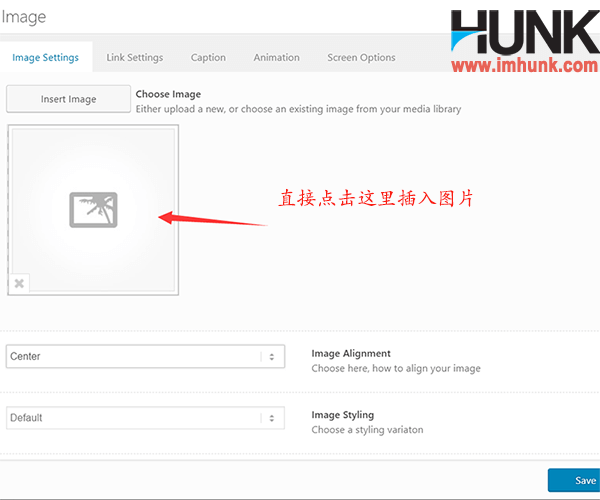
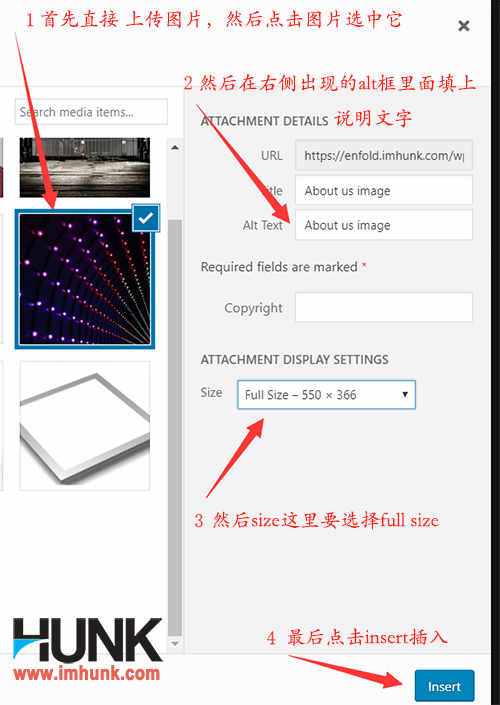
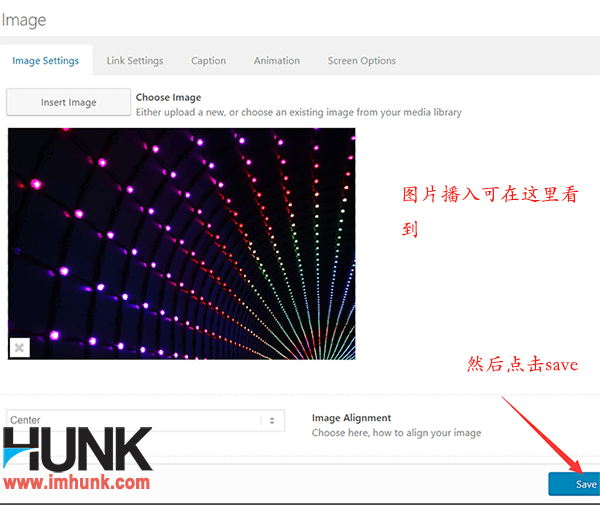
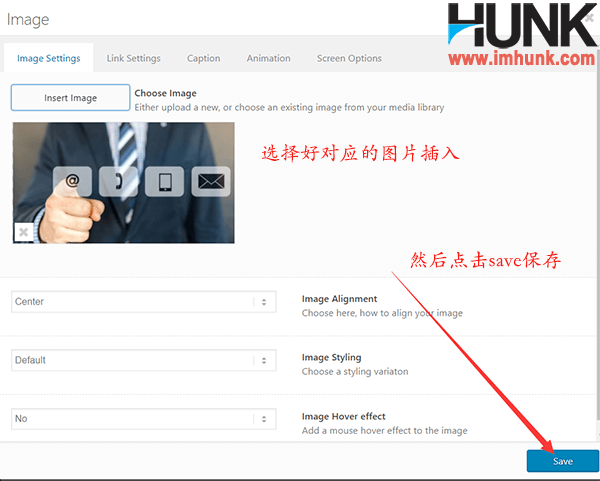
Then click the element of the first quarter of the image, go in and click the image to enter the image upload page, click media library, and then click the image of a product category, and the image properties will appear on the right side. If alt text has been filled in, don't worry about it. If not, fill in alt text, select full size from size, and then click insert to insert the image
After inserting the image, select slowly increase the image size in the image hover effect below
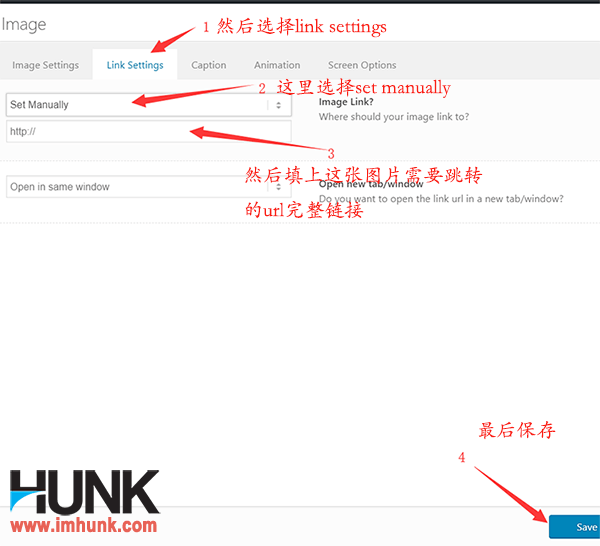
Then click the link settings above, set manually in front of the image link, fill in the link of the product category corresponding to this picture, and finally click save to save.
Next, click the text below the image to edit. First, enter the name of the category in the editor, then select Heading h3, click the center menu, and finally click save.
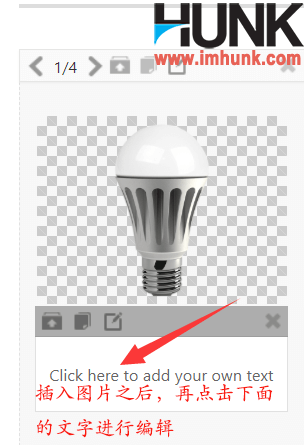

Then the picture and the name of the product category are edited.

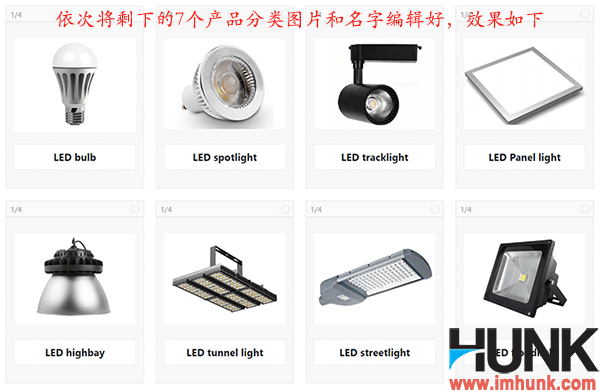
Then use the same method to edit the remaining seven product categories in turn. The results are as follows
Finally, click update in the upper right corner to save the changes.

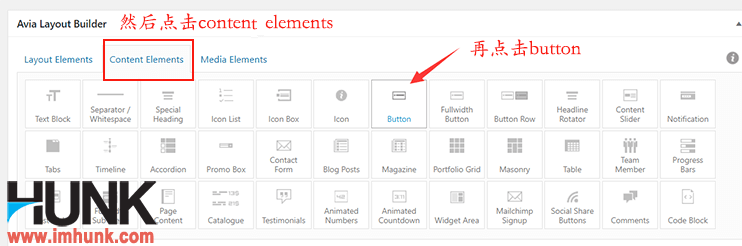
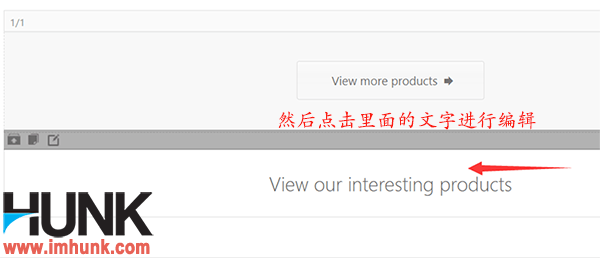
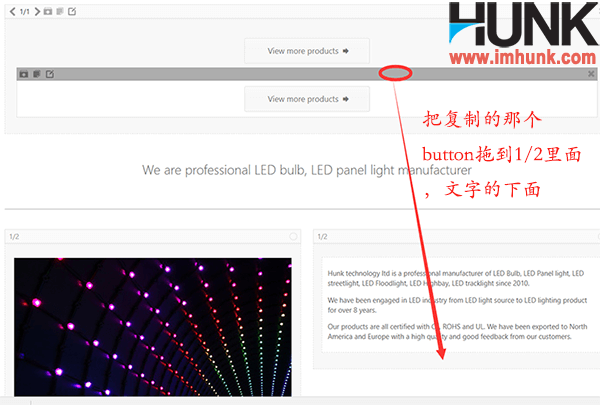
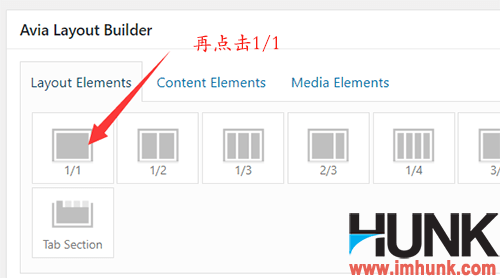
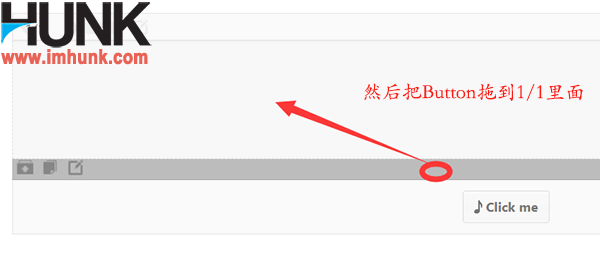
Then we add a CTA to guide users to click more pages. Click 1/1 under layout elements, and then click Button under content elements

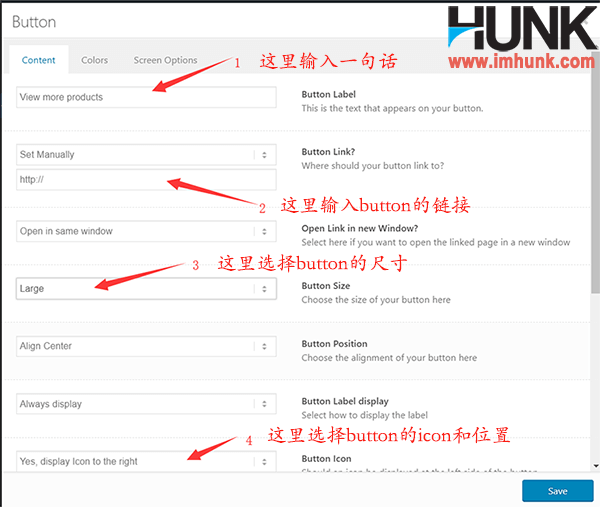
Then directly click click me to edit
Button label Enter a sentence here
Button link Enter the link to the product summary page here
Button size Select large
Button icon Select yes display icon on the right
Then select the right arrow from the following icons and click save to save
In this way, the effect of the button will be good.


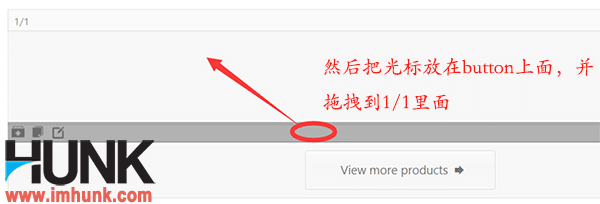
Then drag the Button to 1/1. Finally, click update in the upper right corner to save the changes. Then refresh the foreground to see the effect.


10.3 Add company profile on the homepage of the Enfold website
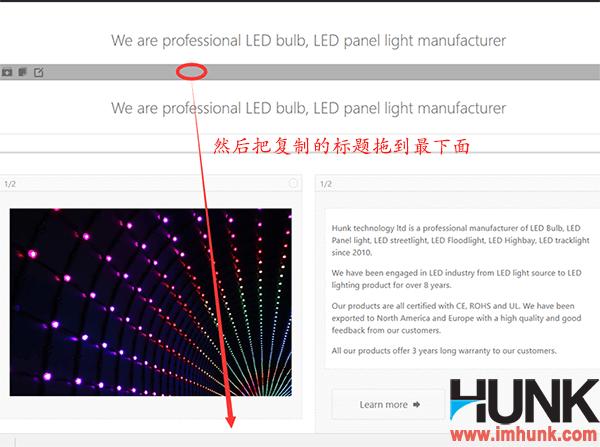
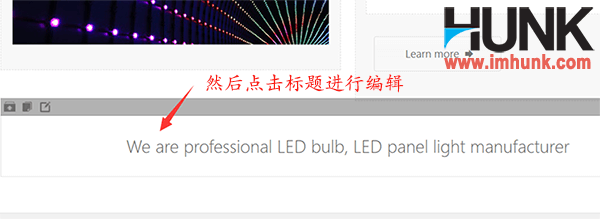
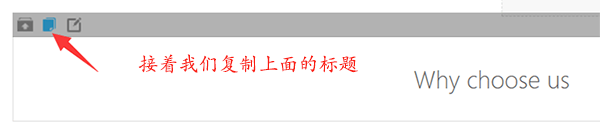
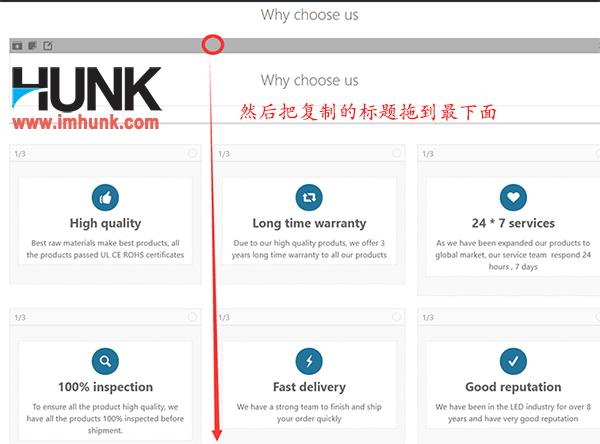
First, let's add a title to the company profile
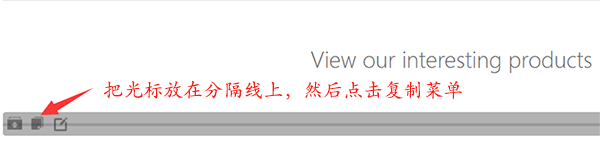
Place the cursor over the title of the previous paragraph, click the Copy menu, drag the copied title to the bottom, and then click the title to edit,
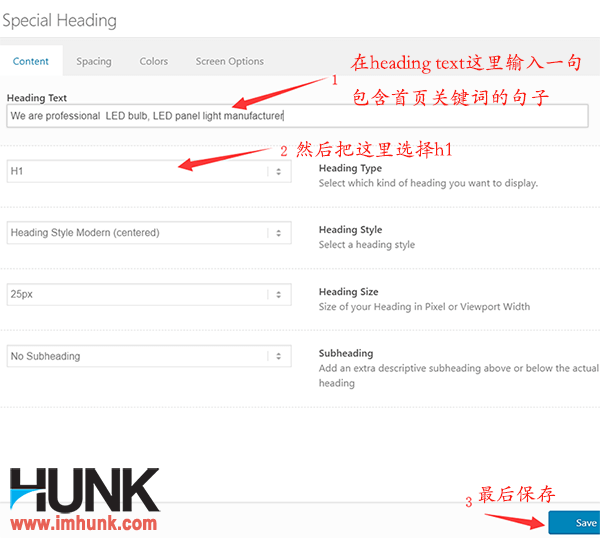
Enter a sentence in the heading text, including the product keywords on the home page
Select H1 for Heading type
The others remain unchanged. Finally, click Save to save.
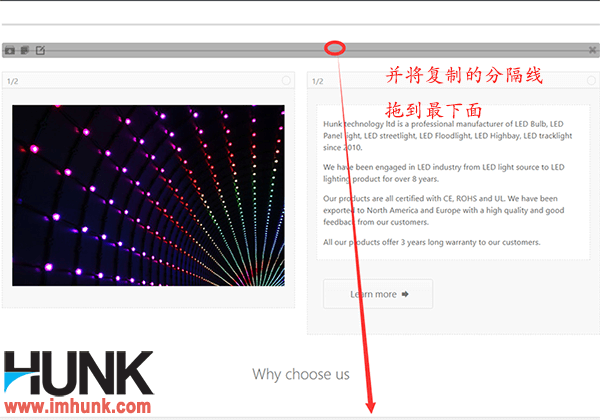
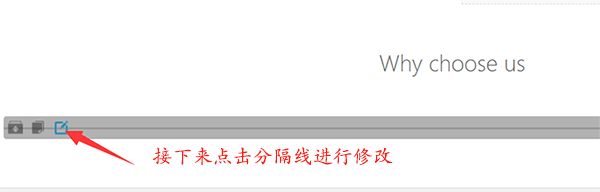
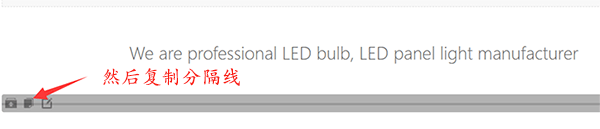
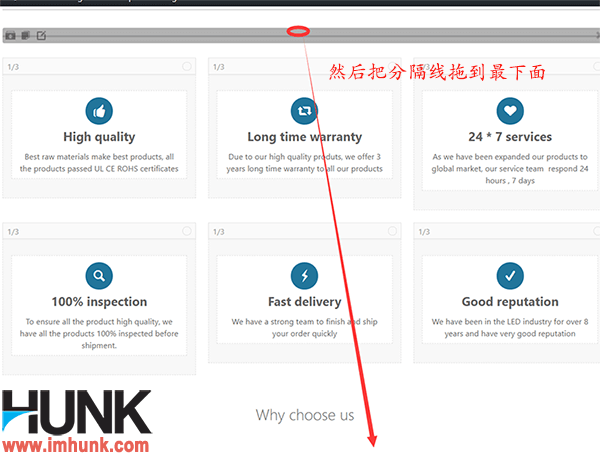
Next, we add a separator line to the title, click the copy menu on the separator line of the previous paragraph, drag the copy menu to the bottom, and click it to edit
Just reselect an icon and click save to save
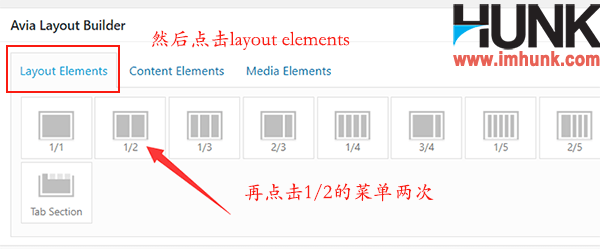
Then click 1/2 under layout elements twice to form two 1/2 effects

Next, we need to upload a picture on the left half, which can be a product picture of your company or a picture of your company, in short, a picture that can represent your company.
Add a paragraph of company introduction to the 1/2 on the right.
Click the image in media elements, and then drag the image to the first 1/2
Then click the text block in content elements, and drag the text block to the second text block.
Then click the image element, directly click to insert an image, and upload a representative image in media. The width of the image is 550px, and the height is scaled. After uploading, click the image, fill in ALT TEXT on the right side, and select full size here
Then click insert to insert the image. Insert the picture and click save.
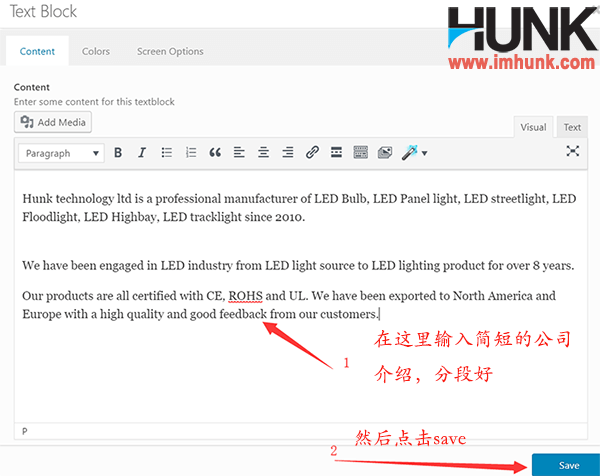
Next, click the text block, and then enter your brief company introduction in the editor. You only need to enter part of it. Then click save
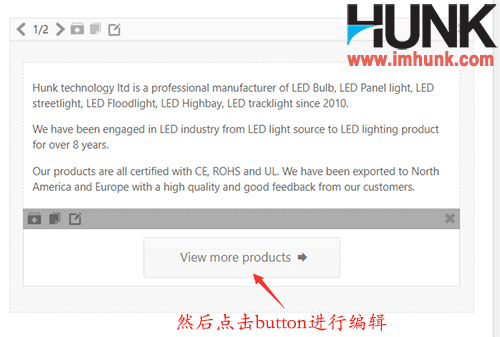
Then click the Copy menu on the button above, and drag the copied menu to the company profile, 1/2.
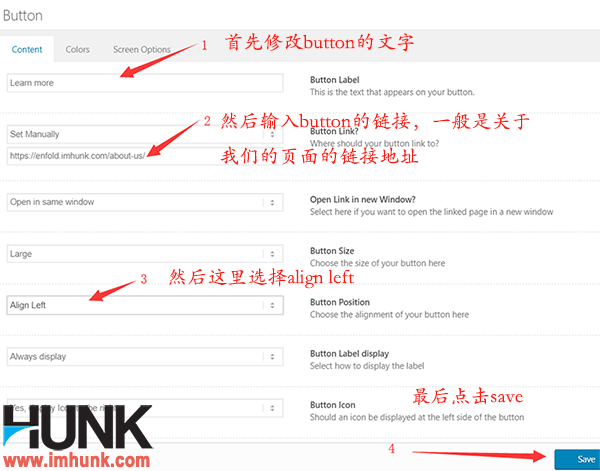
Then click this Button to edit
Button label Change it here to Learn more or Read more
Then fill in the link of About us page in the link address
Button position Fill in align left
Finally, click save
Then the company introduction is finished, and click update in the upper right corner to save the changes. Then refresh the foreground, you can see the actual effect.


10.4 Why choose us
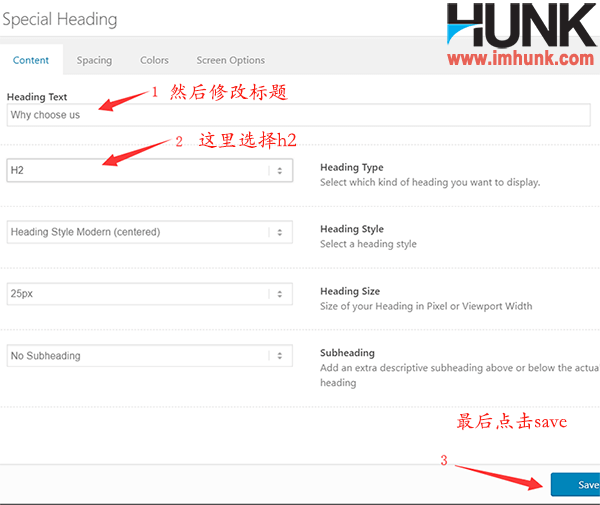
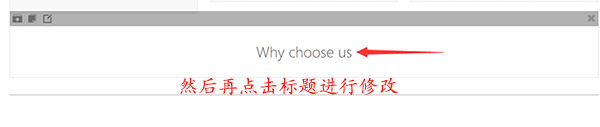
First add the title why choose us
Click the Copy menu above the title of a paragraph, drag the copied title to the bottom, and then click the title to edit

Heading text Fill in why choose us
Heading type Select h2
The others remain unchanged, and then click save to save.
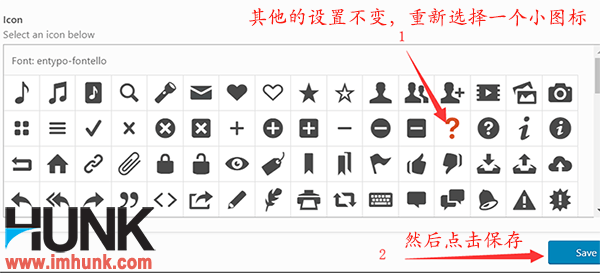
Next, copy the separation line above, drag the separation line to the bottom, click the separation line to edit, and change the icon to ""?, Then click save to save.

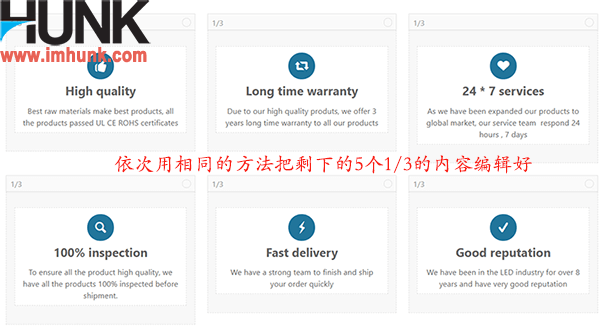
Next, add the content of why choose us. This article has prepared 6 articles. If you have more, you can also.
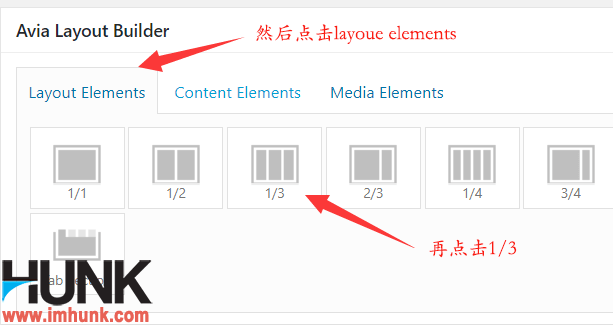
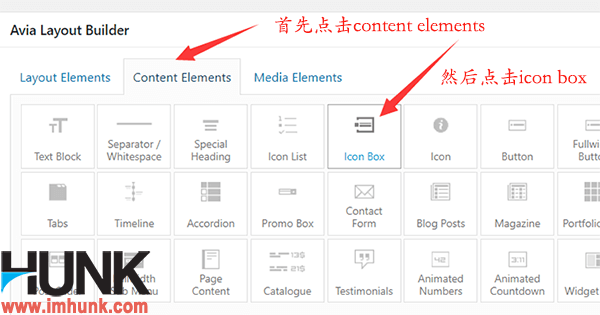
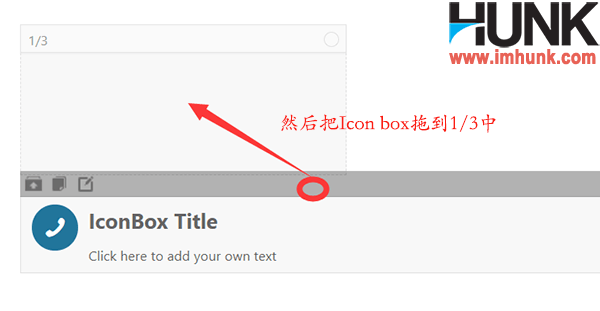
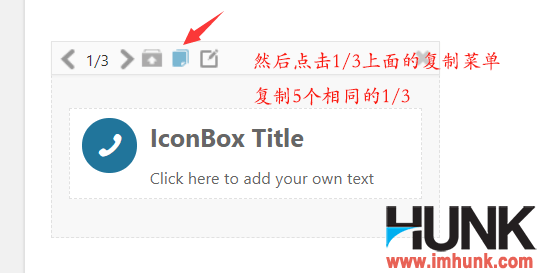
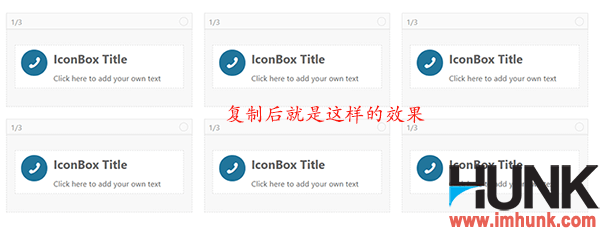
Click layout elements – 1/3, then click content elements – icon box, drag icon box to 1/3, and then click the copy menu above 1/3 to copy 5 times
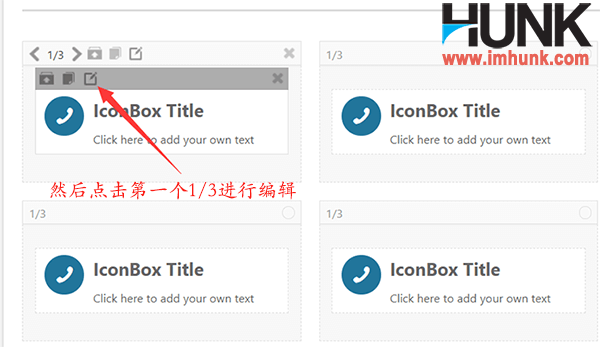
Then click the edit menu of the first icon box
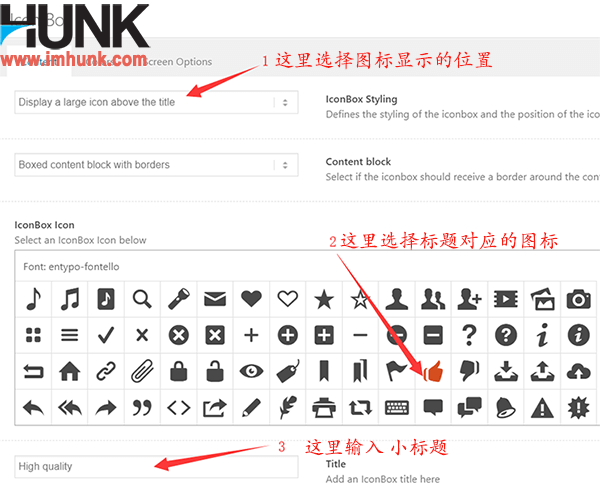
IconBox Styling Select display a large icon above the title or the effect you want
Then select a small icon corresponding to the title from the following icons
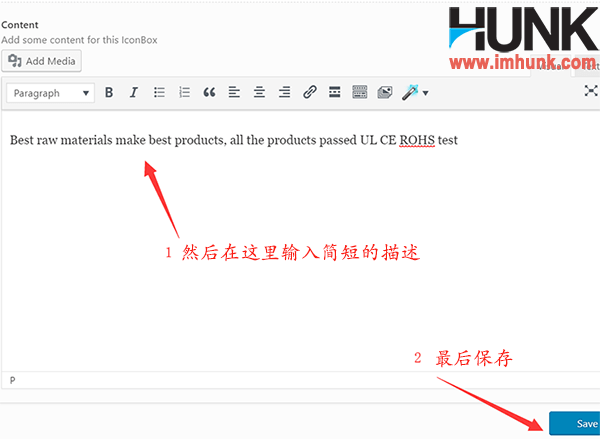
Title Enter the title here
Then enter a brief content description in content, and click save to save.
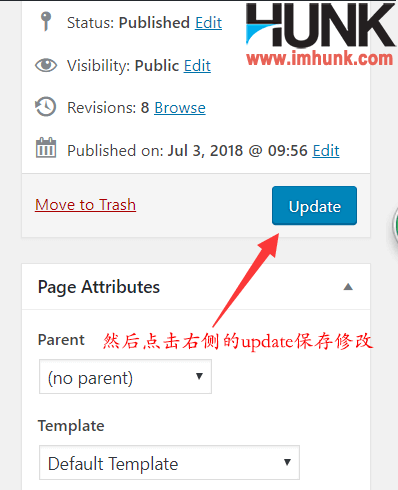
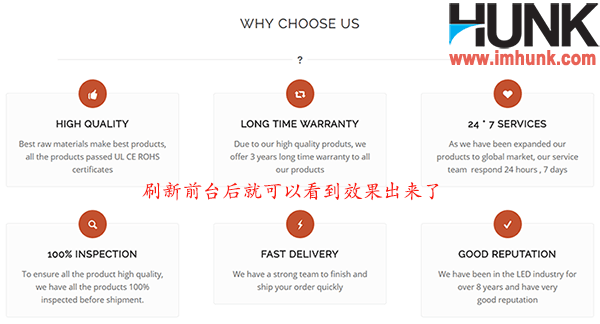
Then use the same method to edit the remaining five. Finally, click the update in the upper right corner to save the changes, and then refresh the foreground.
10.5 Customer evaluation on the homepage of the Enfold website
Customer comments can well prove that your products or services are good, so it is necessary to add.
Prepare the customer's avatar and evaluation content in advance. The recommended size of the avatar is 100X100PX. This article has prepared 4 comments and 4 customer avatars.

First add the title of the evaluation section
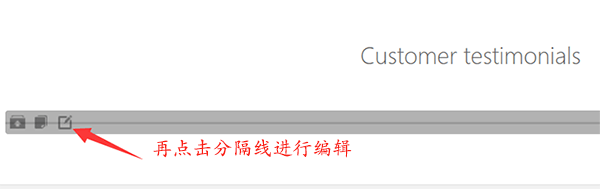
Copy the title above, and then drag it to the bottom. In addition, copy the separation line above and drag it to the bottom.
Then click the title to modify
Heading text Enter Customer testimonials here, and then click save to save.
Then click the separator to modify it, select a corresponding icon, and click save.
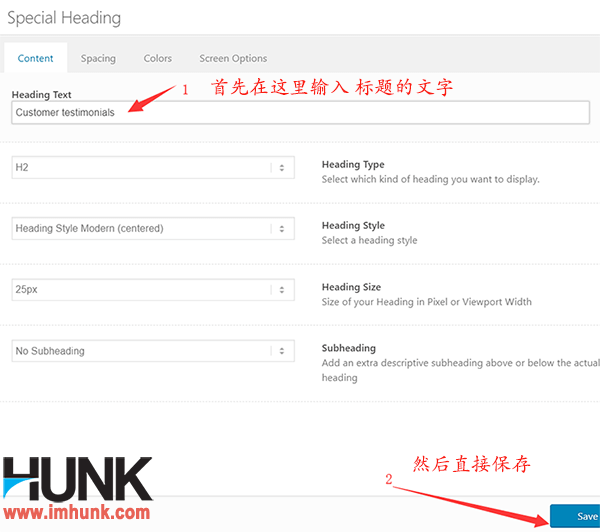

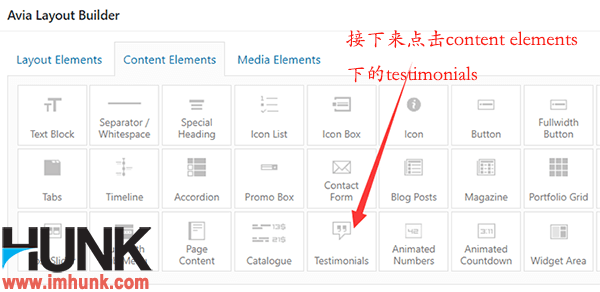
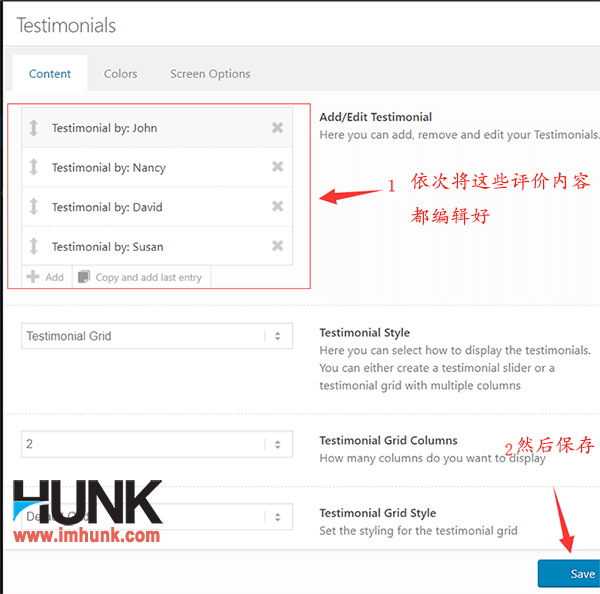
Next, click testimonials under content elements, and then click the edit menu of testimonials to edit

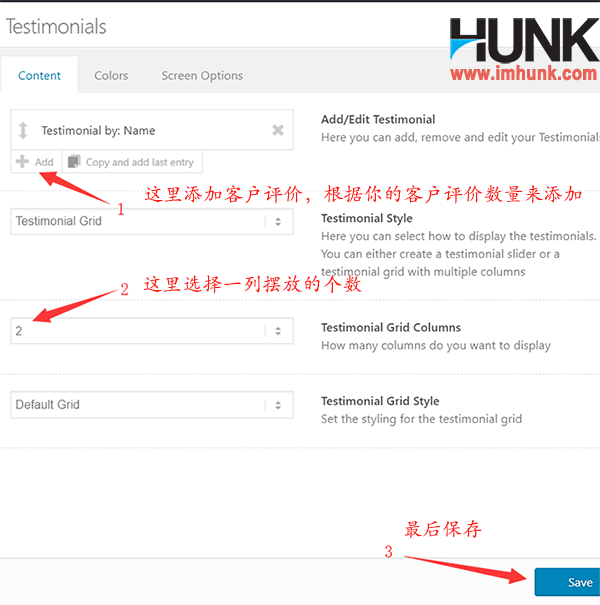
Click add to add 3 comments
Testimonial Style Select the layout style you want here. I use the default
Testimonial Grid Columns Choose 2 here or according to the number of your evaluations
Finally, click Save to save.
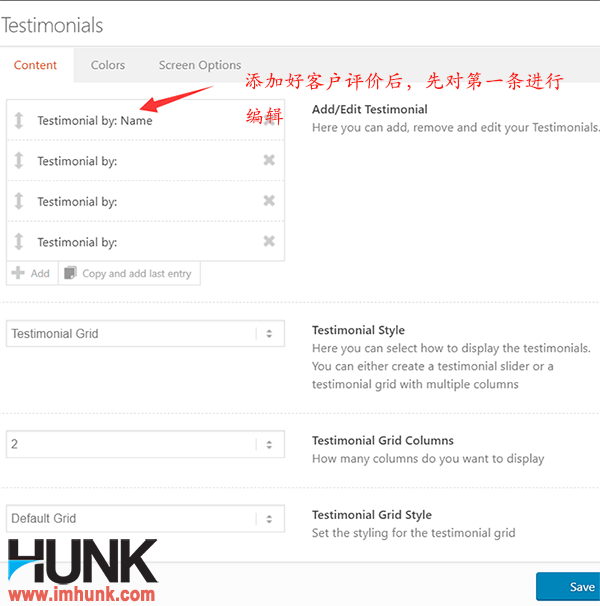
After adding comments, click the first item to edit
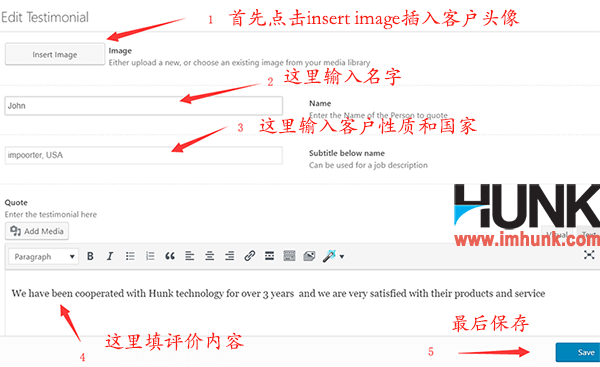
Step 1 Insert image
Name Fill in the customer's name here
Subtitle below now
Then enter the content of customer comments in content.
Finally, click Save to save.
Then edit all the remaining comments in turn, and finally click save to save. Then click update in the upper right corner to save the changes. Refresh the foreground to see the effect.


10.6 Add CTA to the homepage of the Enfold website
After the above content is added, another CTA can be added to guide users to click or send you an inquiry.
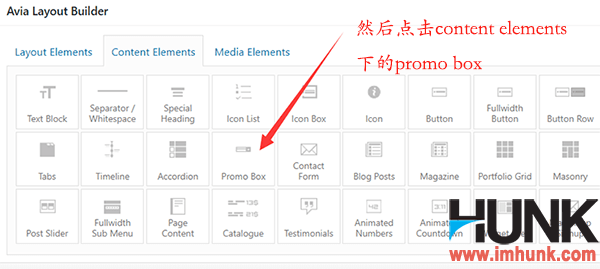
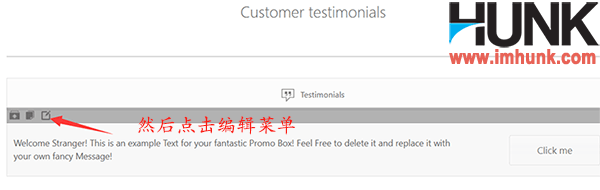
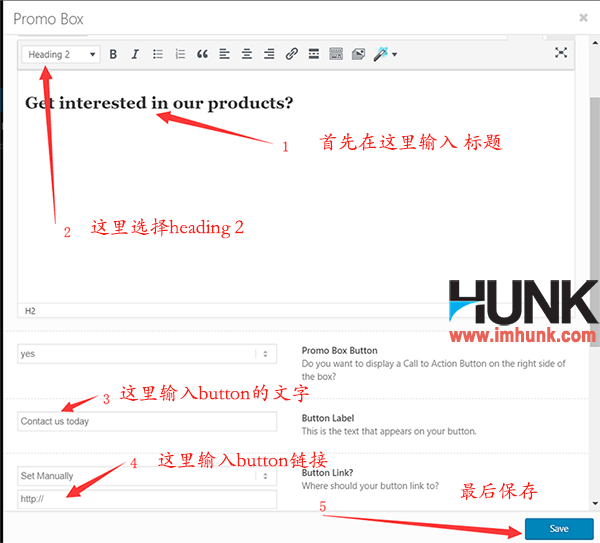
Directly click the promo box under content elements, click the edit menu, enter a sentence in the first text box, and then select heading 2
stay button label Fill in contact us today
stay button link Fill in the link of the CONTACT US page here
Finally, click Save, and click Update in the upper right corner to save the changes.

Then refresh the foreground to see the effect

If you need to add other content on the home page, you can also add it in the same way.
11. Product Classification Page of the Theme Creation Website
The product classification page is a centralized display page of the product page, which allows customers to find what products they need.
The product classification page has been created in the previous article. In this part, we will talk about how to make content.
First create the product product summary page
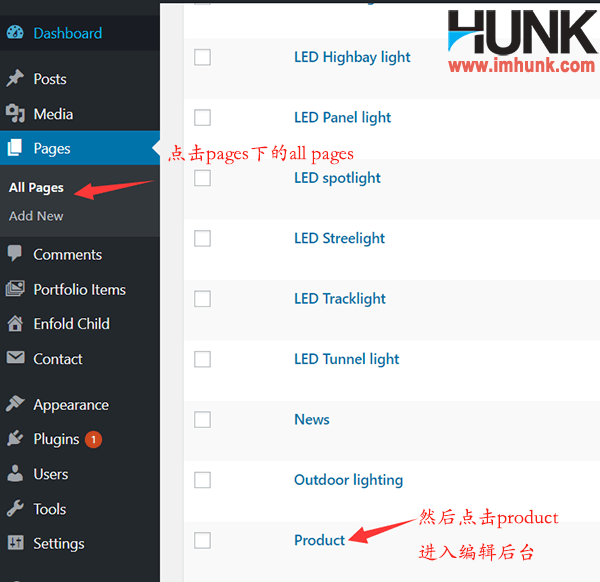
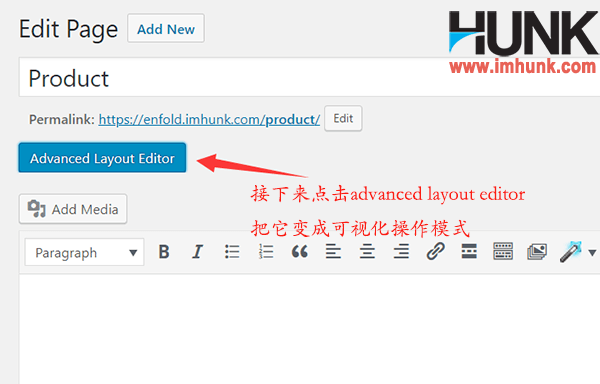
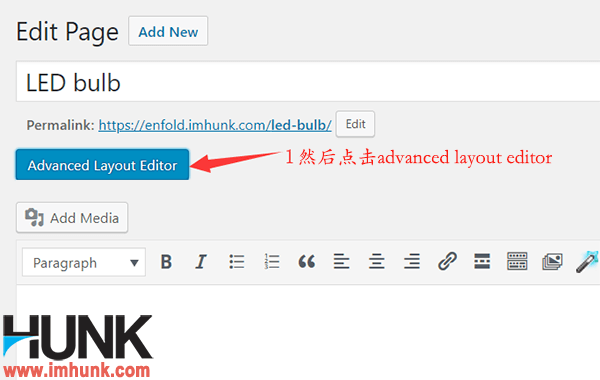
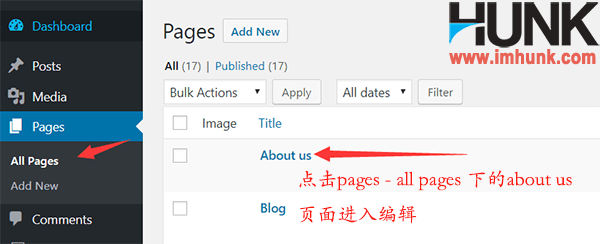
Click Pages – all pages, then click product to enter editing, and then click advanced layout editor to change it into visualized operation mode.
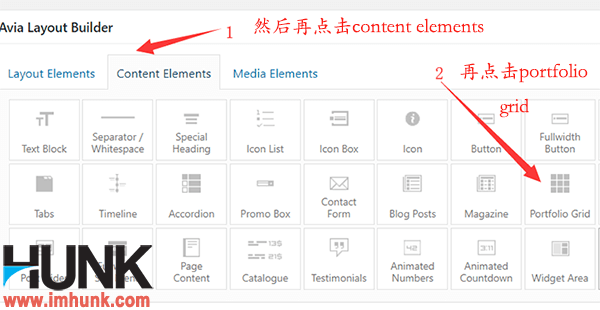
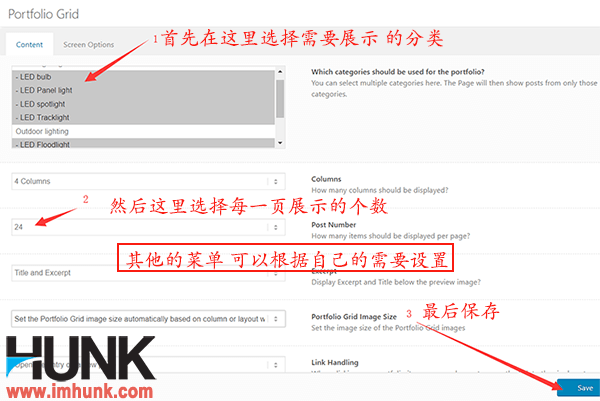
Then click portfolio grid under content elements
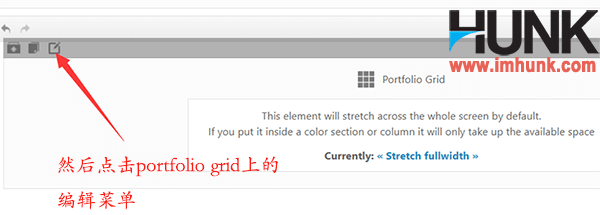
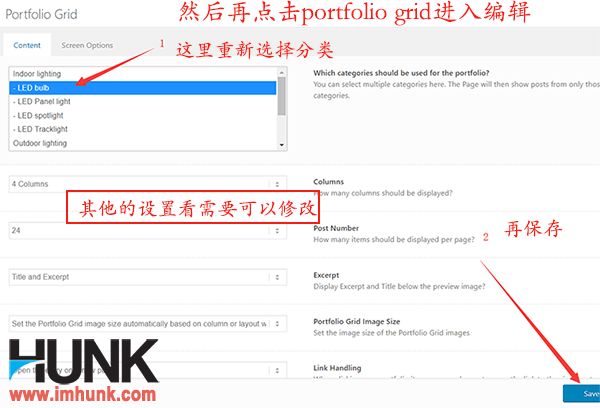
Then click the Edit menu on the portfolio grid to edit
Which categories should be used for the portfolio? Select the categories you want to display here. You can select multiple categories
Post Number Select the quantity displayed here
Others can be defaulted. Of course, you can also modify the settings according to your own needs, and then click Save to save. Finally, click update in the upper right corner to save the changes.

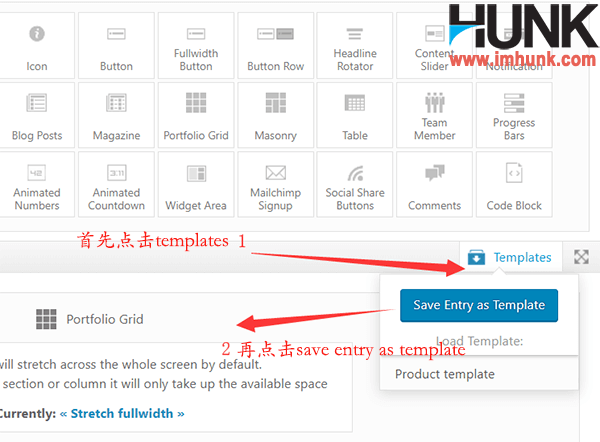
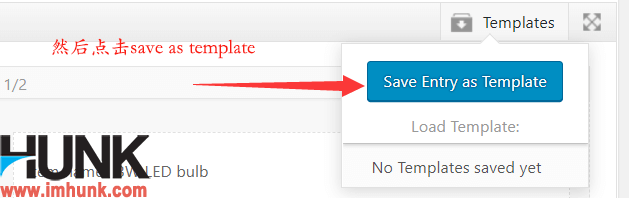
Then we need to save this setting as a template, so that other product classification pages can be easily created.
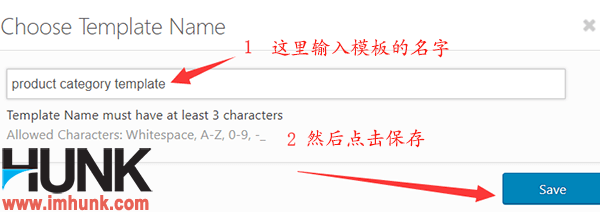
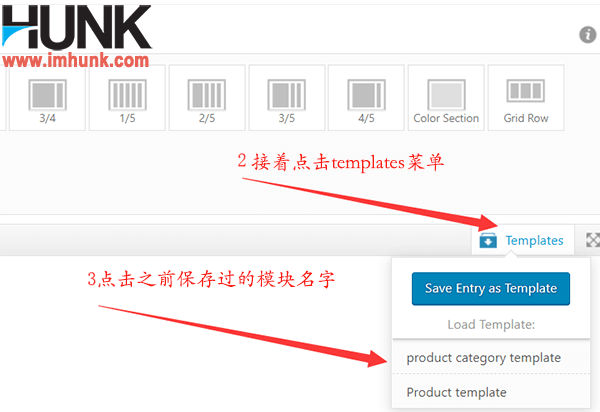
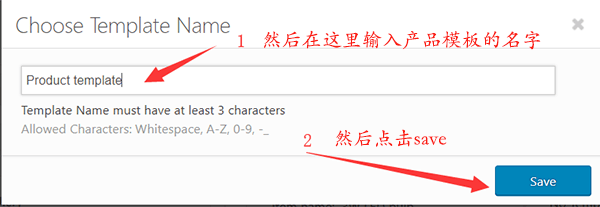
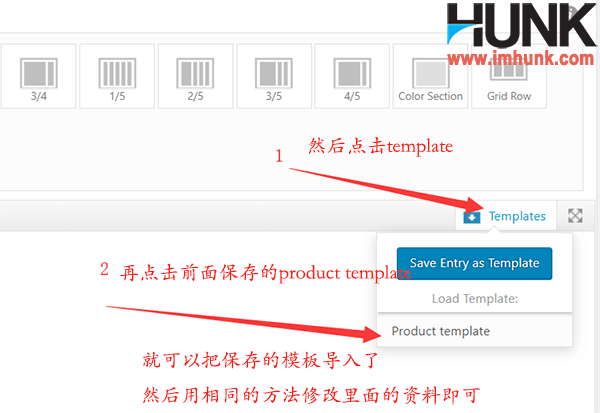
Click the templates menu, and then click save entry as template. Enter the name of the product classification template in choose template name, and click save to save.
Then click the LED bulb on the second category page in the pages to enter editing. First click the advanced layout editor, then click the template again, and then click the name of the saved template product portfolio category to import the template.
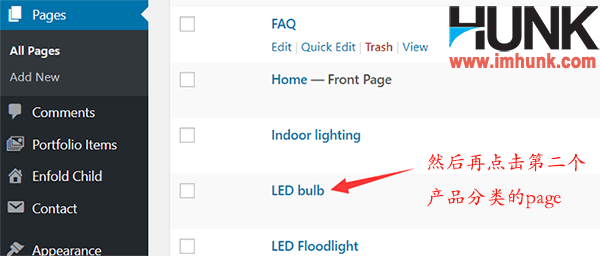
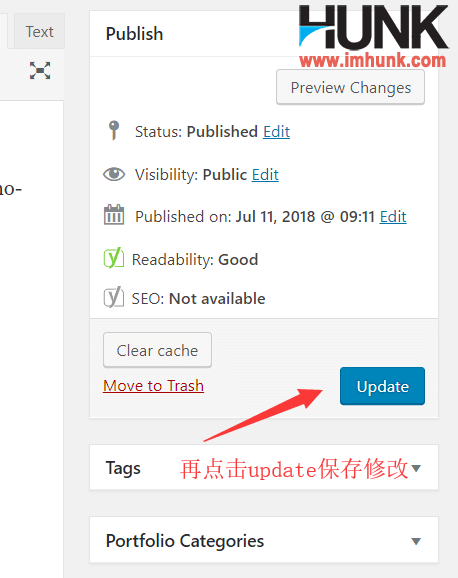
Then click the portfolio grid to modify it. Then select the category again, and select the category corresponding to the led bulb. The others remain unchanged. You can also modify other settings as needed. Then click Save, and click Update in the upper right corner to save the changes.

Next, use the same method to complete the classification of other products.

12. FAQ page of the theme production website
The FAQ page gathers customers' questions about your company and products, which can let customers know more about your company's basic situation, so it is necessary to add one.
The method is described below.
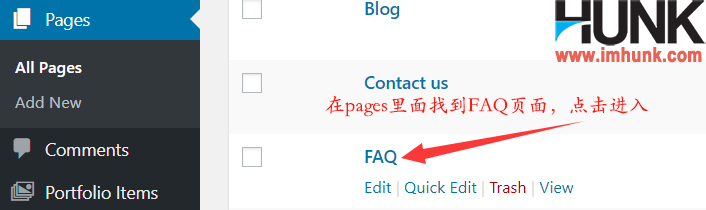
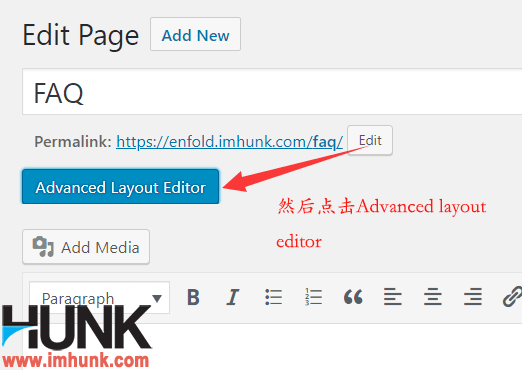
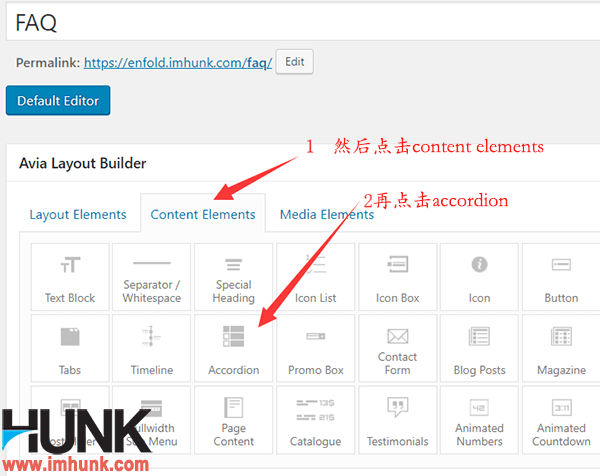
Click Pages – all pages – FAQ to enter the page, then click the advanced layout editor to switch to the visual operation mode, and then click the agreement under content elements
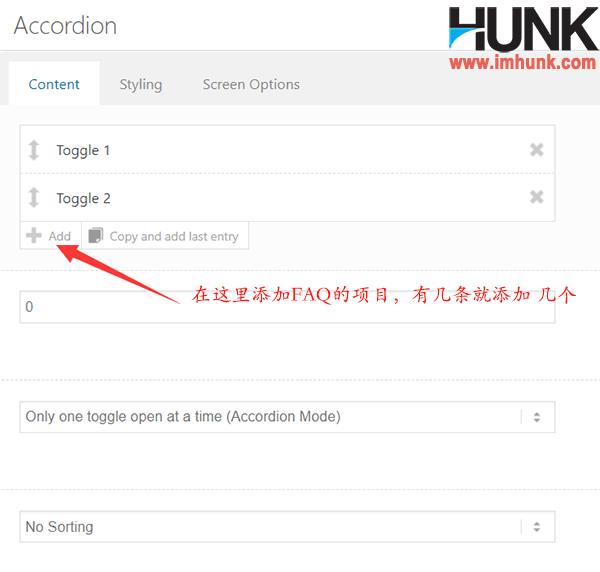
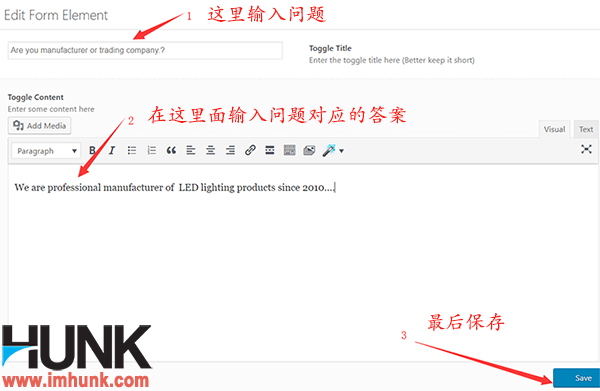
Then click the accordion to edit. First, click Add to add several FAQs. After adding them, click the first one to edit. Enter a question in the toggle title, and then enter an answer in the toggle content.

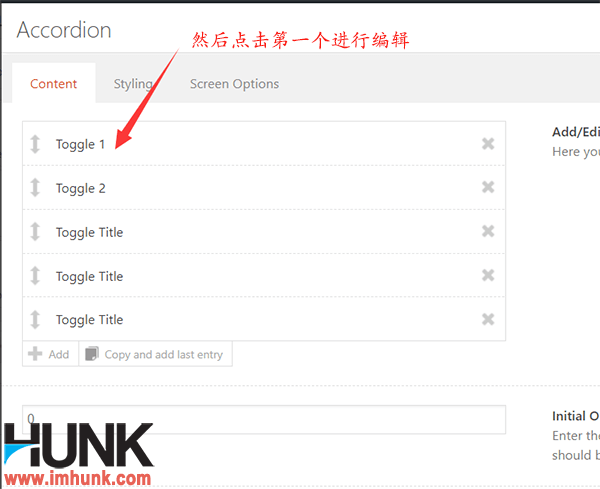
Finally, click Save to save
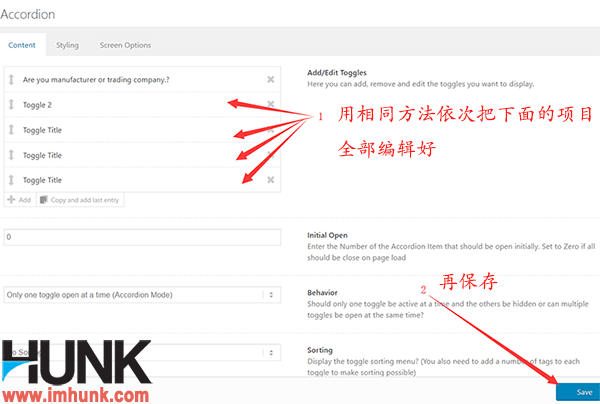
Next, edit the remaining FAQs in the same way, and then click save to save.
Next, we need to add a CTA so that customers can directly contact us when they don't find the answers they want to know.
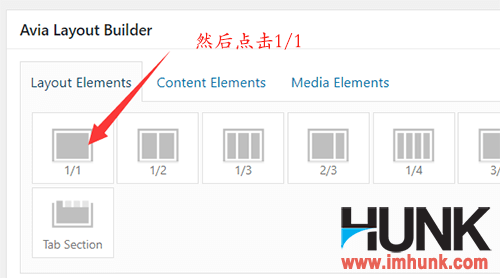
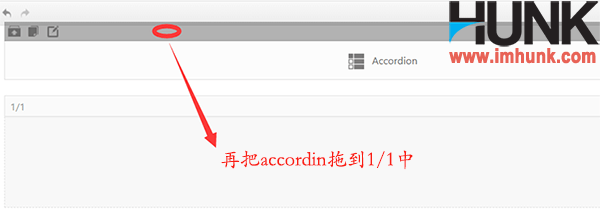
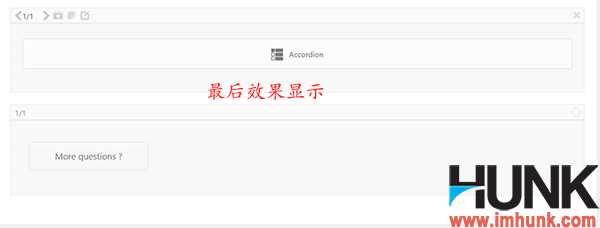
Click 1/1 in layout elements, and then drag the accordion to 1/1. Click 1/1 in layout elements, and then click the button under content elements
Then drag the button to the second 1/1, and click click me to edit


stay button label Fill in the title
button link Fill in the link of button
Button size Select the required size here
button position Select align left
button icon Select no icon here
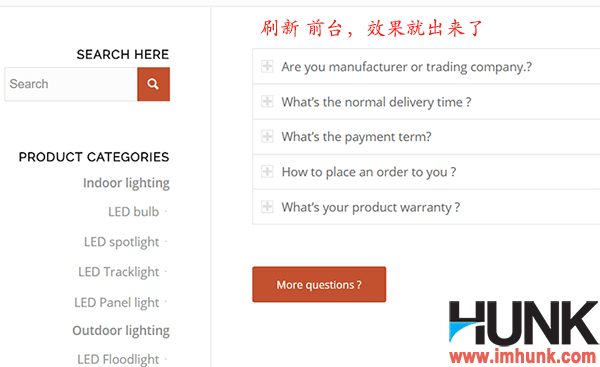
Then click save to save. Click update in the upper right corner to save your changes, and then refresh the foreground to see the effect.


If you need to add it later, click Add in the accordion, and then edit it.
13. The contact us page of the website established with the theme of Enfold
Contact us page is an indispensable page of the website, mainly including common contact information, address, telephone, email, website whatsapp, etc. It can also be added to the inquiry form, so that customers can directly send inquiries to you through the form. The following describes the specific method of creating a contact us page.
First, you need to add a contact image with a width of 1100px and a height of 400-600PX. This picture can be realized by layerslier. Today, I will introduce a simpler method.
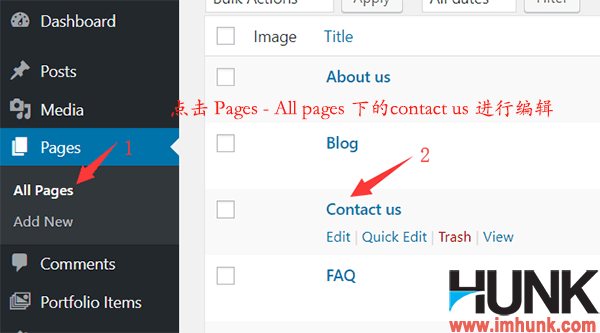
First, click PAGES – all pages – Contact us to enter editing, and click the advanced layout editor to switch to the visual operation mode.
Then click 1/1 Add under layout elements, and then add image under media elements, and then drag image into 1/1.
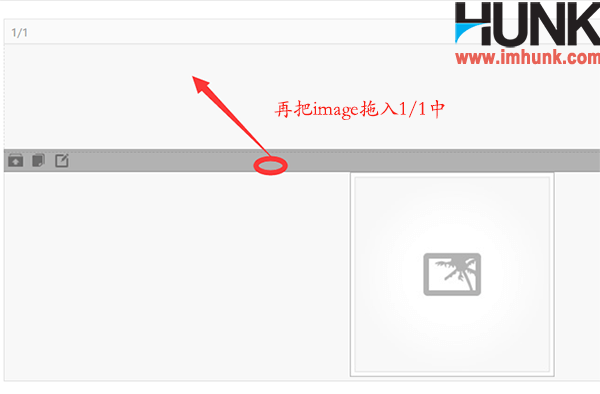
Then click image to edit, click insert to insert the image, and click save to save. Click update in the upper right corner to save the changes.

Next, we add contact information and inquiry form
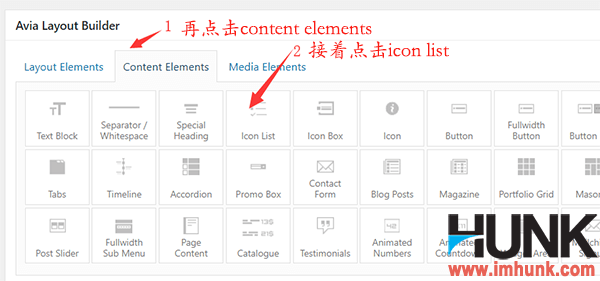
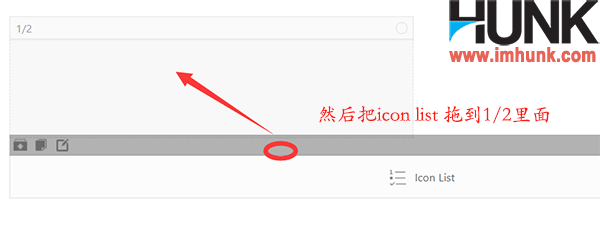
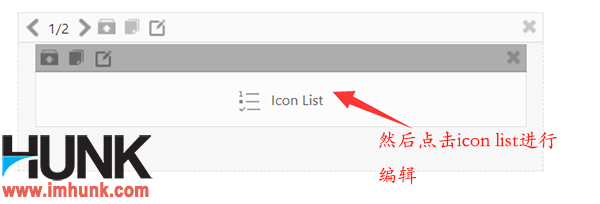
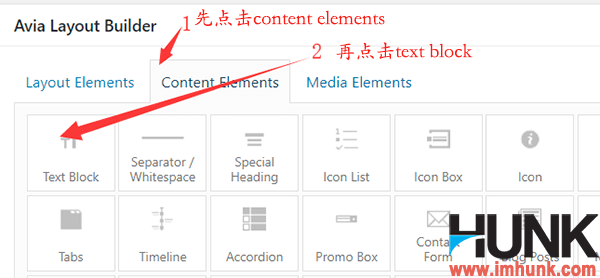
Click 1/2 under layout elements, then click icon list under content elements, and drag icon list to 1/2.
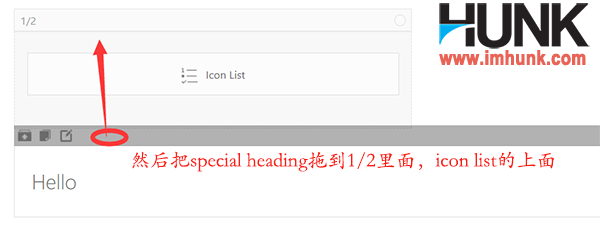
Then click the special heading under content elements, and drag the special heading to 1/2, above the icon list.

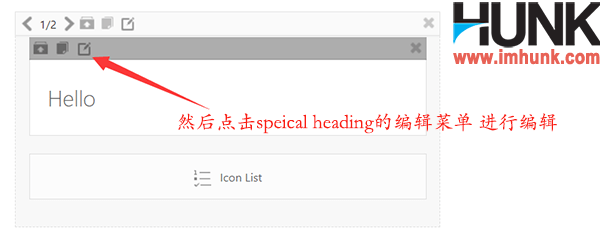
Next, click the edit menu of special heading to edit
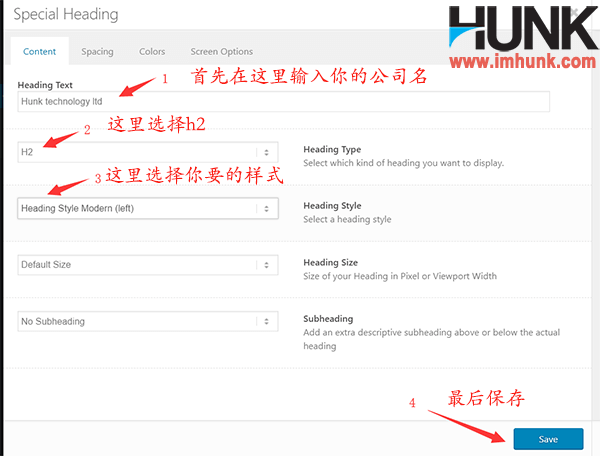
Heading text Fill in the full name of your company
Heading type Select h2
Heading style Select the style you want.
Then click save to save.
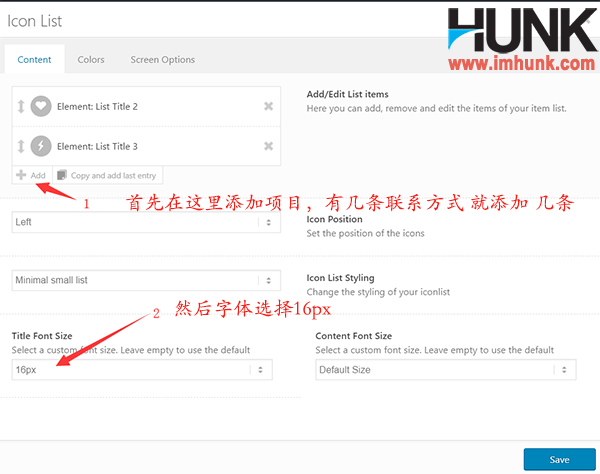
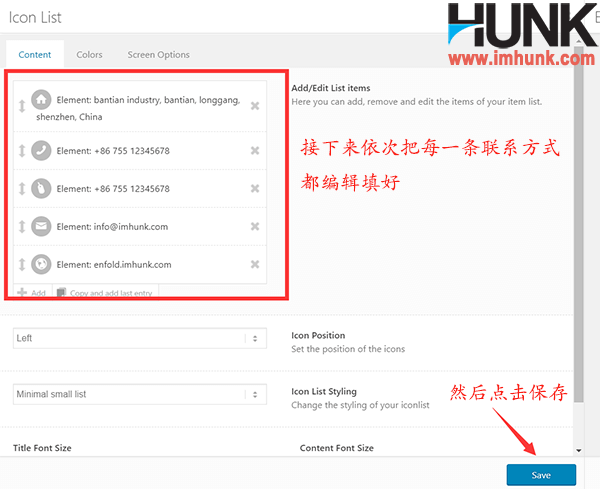
Next, click icon list to edit
First, add the contact information in Add, and then set the title font size to 16px
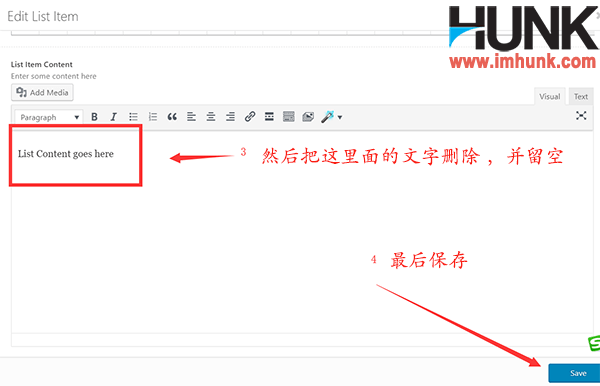
Then click the first item to modify it, delete the default text in the list item content, and leave it blank

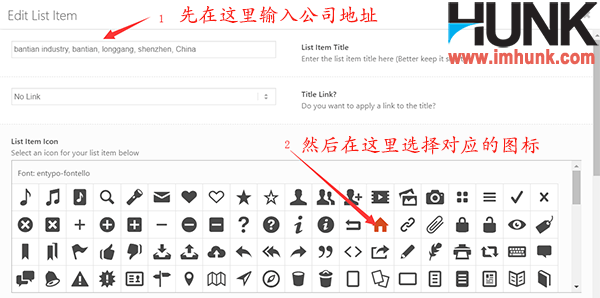
Next, enter your company address in the list item title, select a corresponding small icon in the list item icon, and click save to save.
Use the same method to edit the remaining contact information, and click save to save. Then click update in the upper right corner to save the changes.

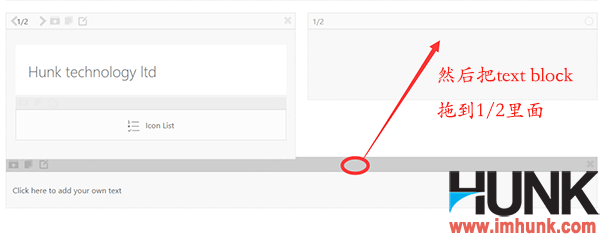
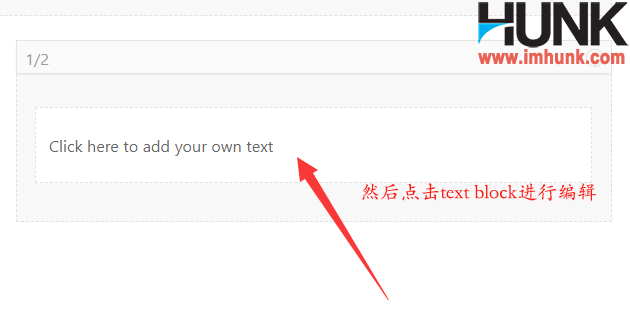
Then click 1/2 in layout elements, click the text block in content elements, and drag the text block to 1/2

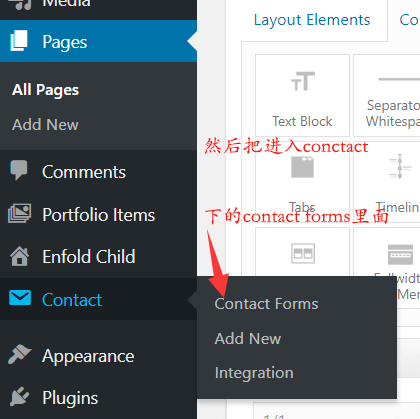
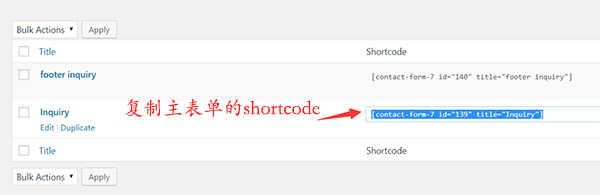
Then enter Contact – contact forms, copy the shortcode behind the main form inquiry, return to the contact us page, click text block, and paste the shortcode into the editor of the text block. Then click save to save.
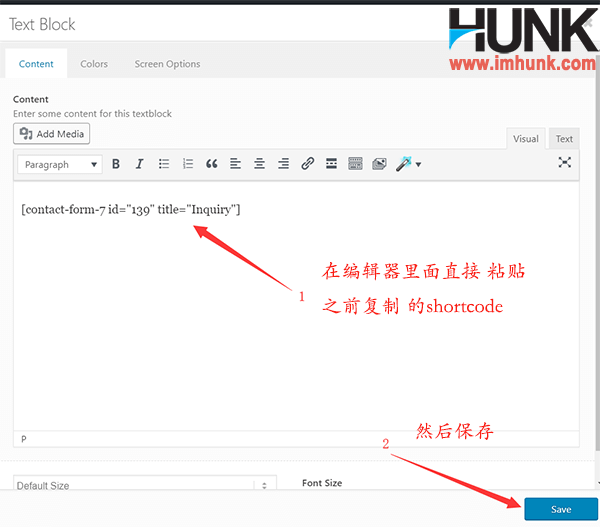
Finally, click update in the upper right corner to save the changes.

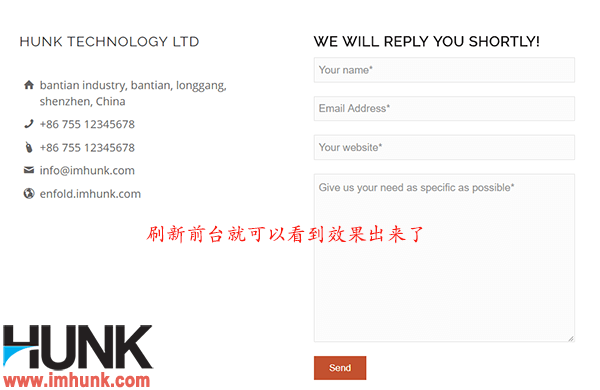
Then refresh the foreground page of contact us to see the effect.
14. About us page of enfold theme production
About us page is also a very important page of the website. It contains the basic introduction of the company, as well as factory pictures, team introductions and other contents, so that customers can have a clear understanding of the company.
The specific methods are described below
14.1 About us page production company introduction
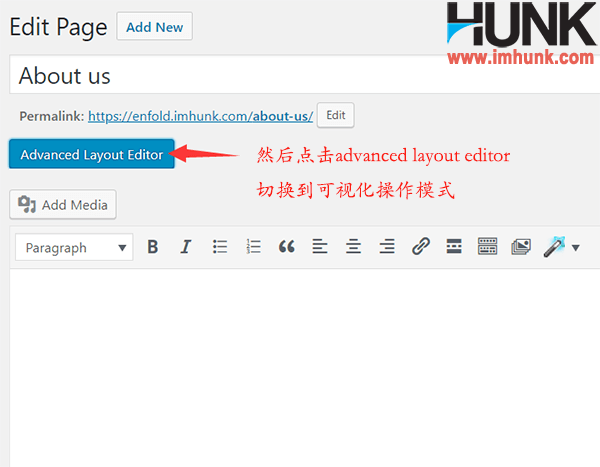
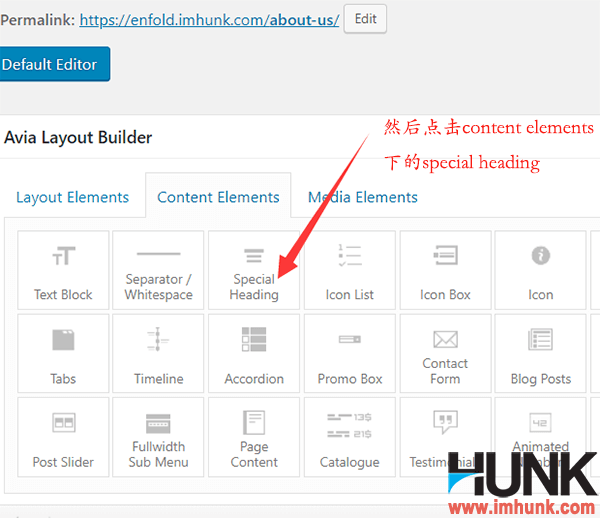
Enter the Pages – all pages – about us page, click the advanced layout editor to switch to the visual operation mode, then click the special heading under content elements, and then click the special heading to edit

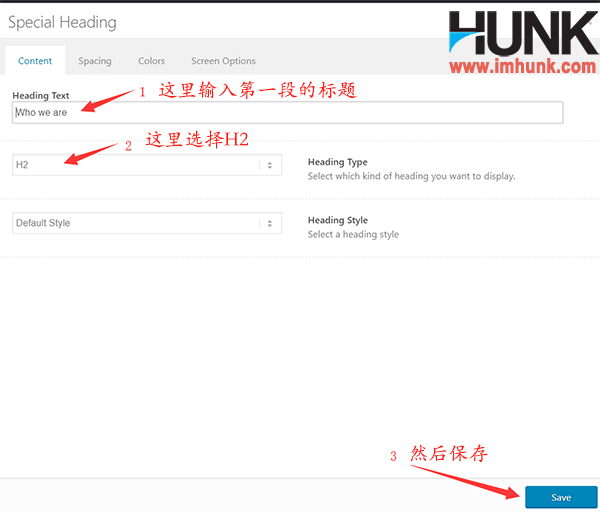
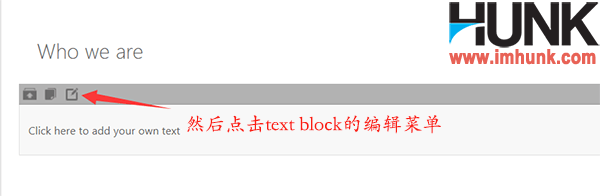
Heading text Fill in the title here, such as Who we are
Heading style Fill in H2 here
Finally, click Save to save
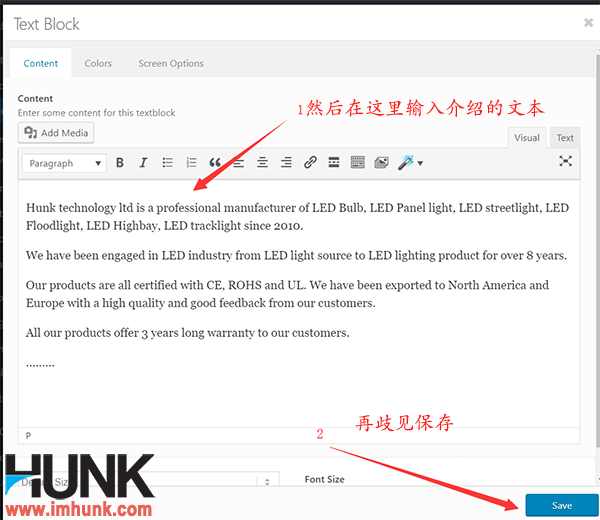
Next, click text block under content elements, and then click text block to edit. Then enter the text of company introduction in content, and click save to save.
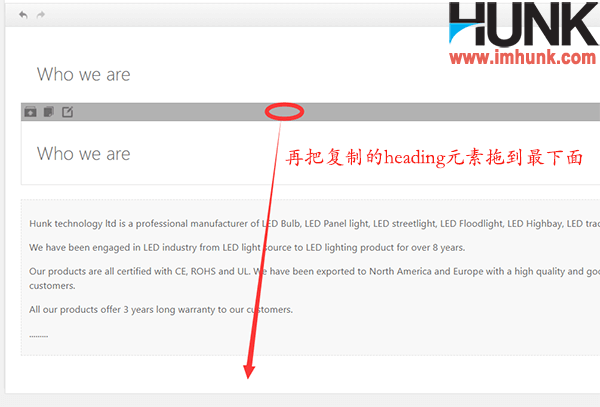
14.2 About us
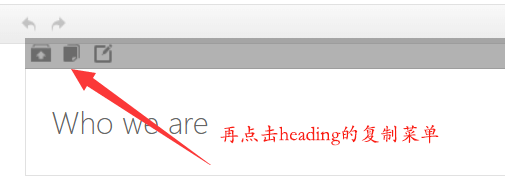
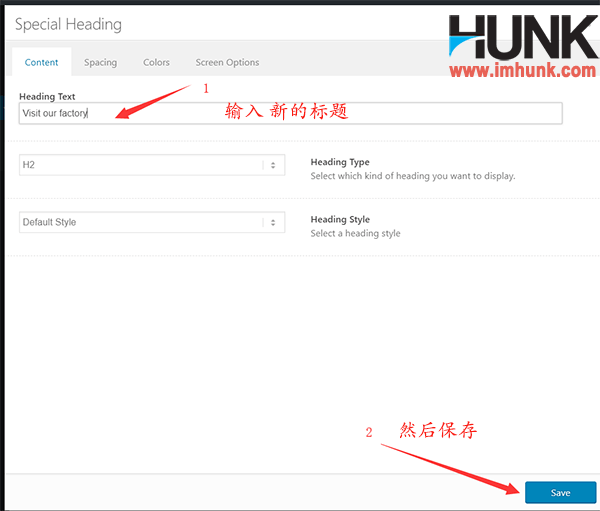
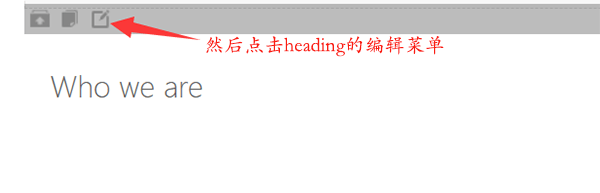
Click the copy menu of heading, drag the copied heading to the bottom, click heading to edit, modify the heading text to visit our factory, and then click save to save.

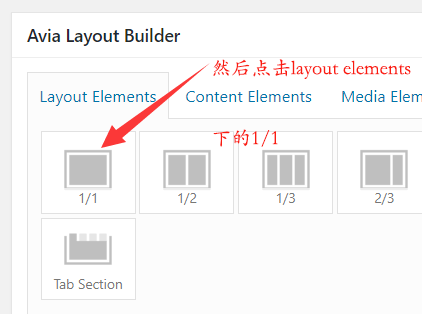
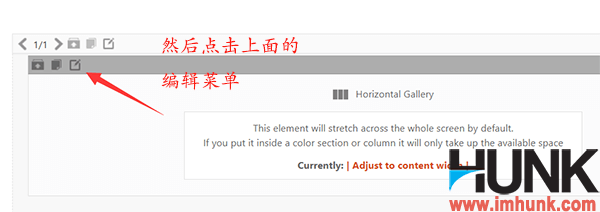
Then click 1/1 in layout elements, click horizontal gallery in media elements, and drag the horizontal gallery to 1/1
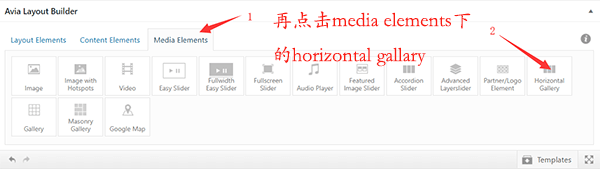

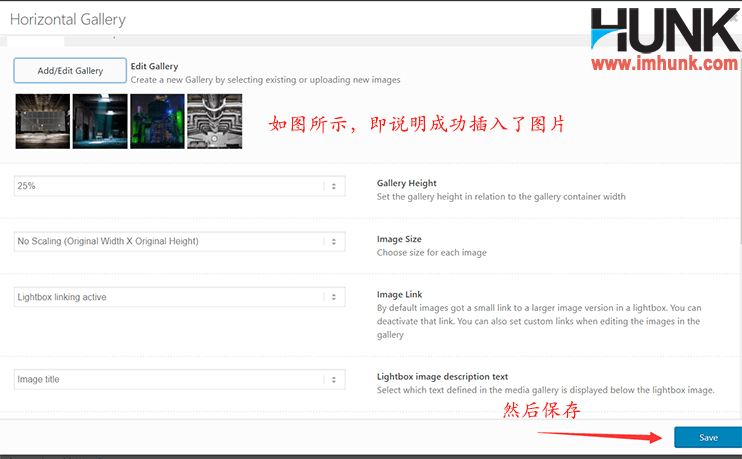
Then click horizontal gallery to edit,
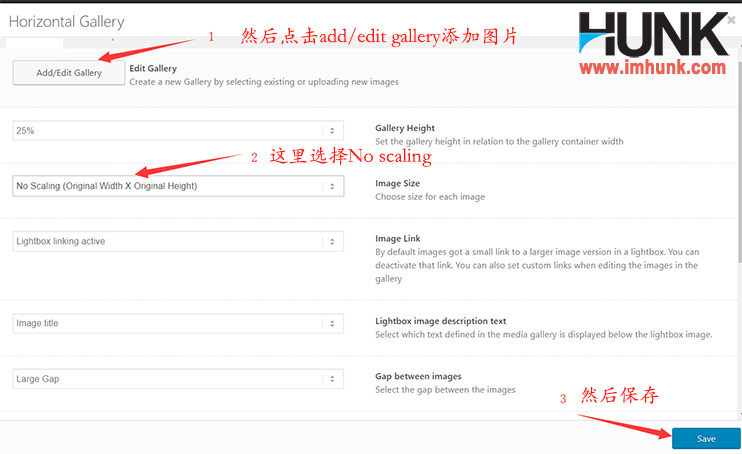
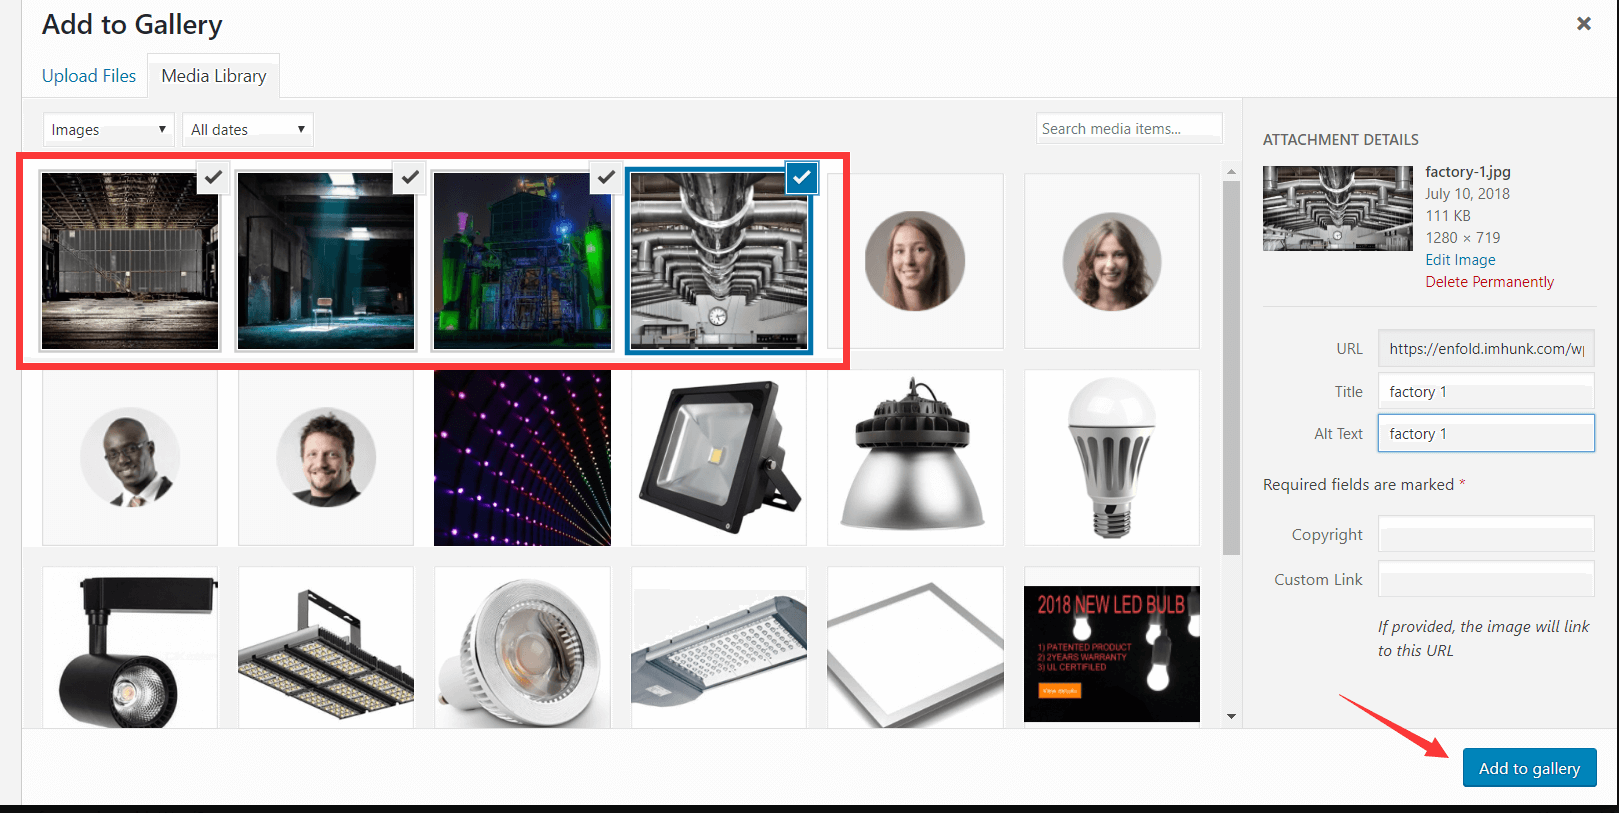
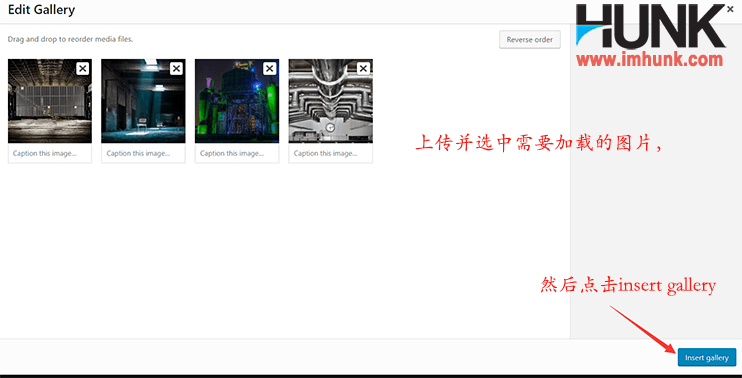
First, add the factory image to be displayed here in the edit gallery
Then select no scaling in the image size
Then click save to save.
14.3 About us page production company team presentation
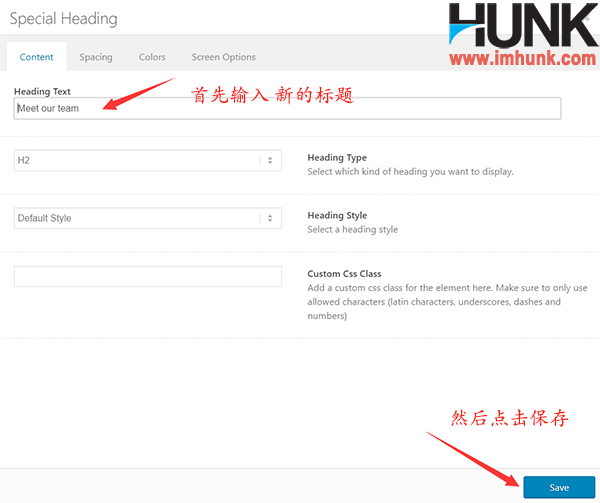
First add the title, copy the heading, drag the heading to the bottom, click the heading to edit, modify the heading text to Meet our team, and then click save to save.


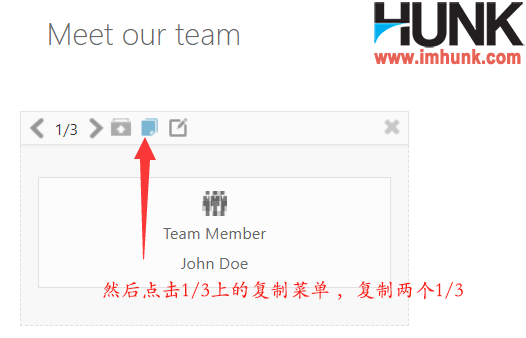
Then click team member under content elements, click 1/3 under layout elements, and drag team member to 1/3


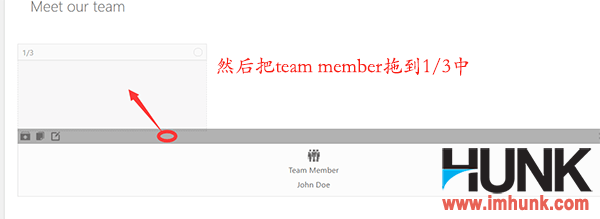
Then click the copy menu above 1/3 to copy two 1/3, so there are three team members in total
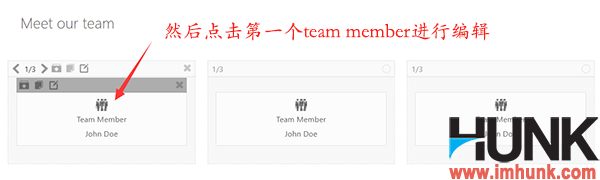
Click the first team member to edit
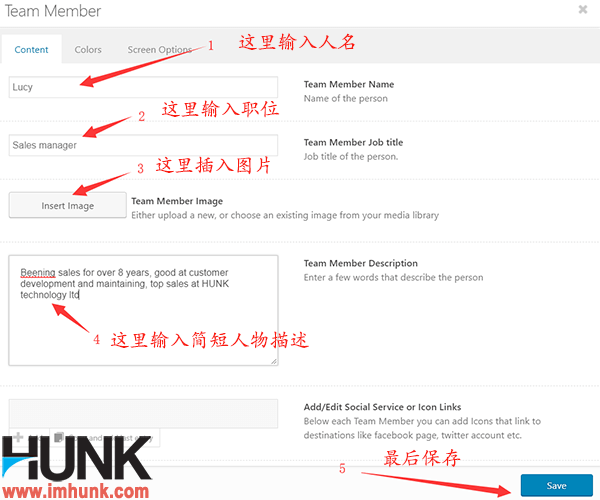
Team member name Enter the name of the member here
Team member job tilte Enter position here
Team member image Click insert image here
Team member description Enter a brief introduction of members here
Then click save to save.
Then edit all the remaining team members in the same way.
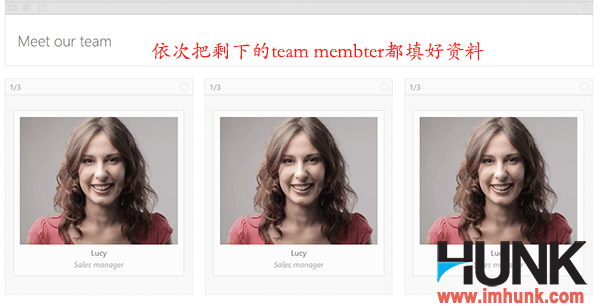
Finally, click update to save the changes, and then refresh the foreground.


If you have more team members, you can add more in the same way.
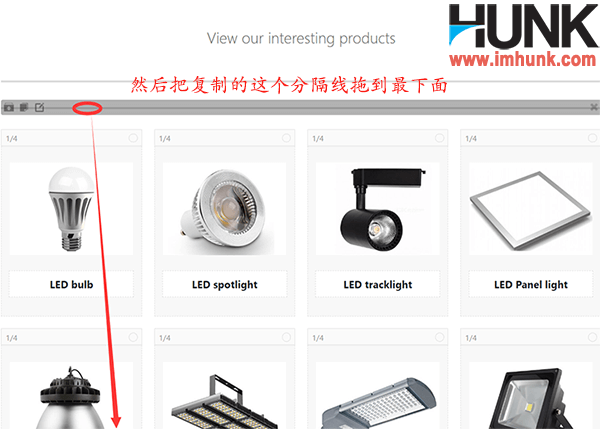
Next, we need to add a CTA to guide users to the product page.
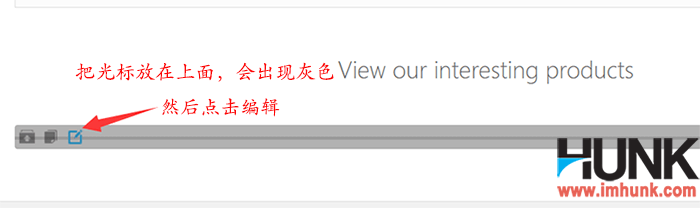
Click 1/1 under layout elements, and then click the button under content elements,

Then drag the button to 1/1, and click click me to edit

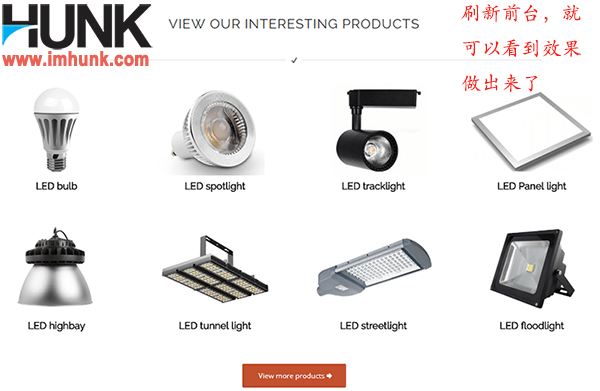
Button label Enter a sentence here, such as View our interesting products
Button link Enter the link to the product summary page here
Button size Select large
Button icon Select yes display icon on the right

Then select the right arrow from the following icons and click save to save
In this way, the effect of the button will be good. Then click update in the upper right corner to save the changes. Then refresh the foreground to see the effect.

15. Establish website blog or news page with enfold theme
Blog or news page is a very important page besides product information, which is generally realized by post page.
Blogs or news pages are helpful for the enrichment of website content and SEO optimization, because for enterprise websites, products are limited, but they can publish many useful
Blogs or technical articles are on the top to attract users to click, so as to achieve the purpose of optimization.
15.1 Creation of blog classification page
The blog classification page is realized by using the page page. The content of post category is called in the page page, that is, the page is used to replace the post category as the article classification.
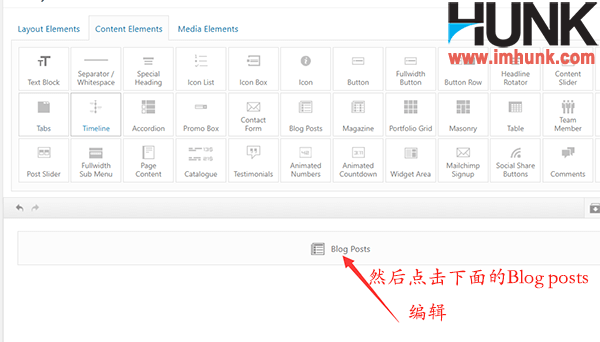
First click page – all pages – Blog page to enter editing, then click advanced layout editor to switch to visual operation mode, and then click blog posts under Content elements

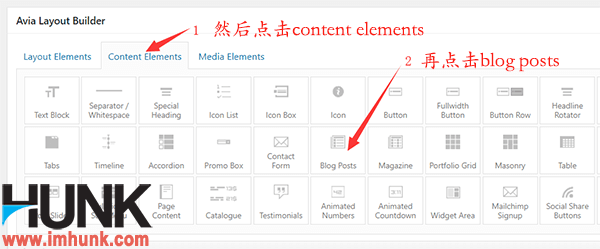
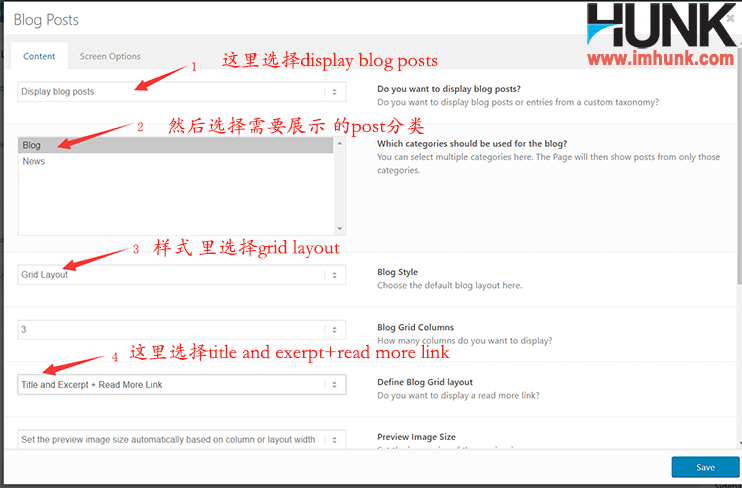
Click blog posts to edit
Do you want to display blog posts? Select display blog posts
Which categories should be used for the blog? Select Blog here
Blog Style Select grid layout here
Define Blog Grid layout Here, select title+excerpt+read more link
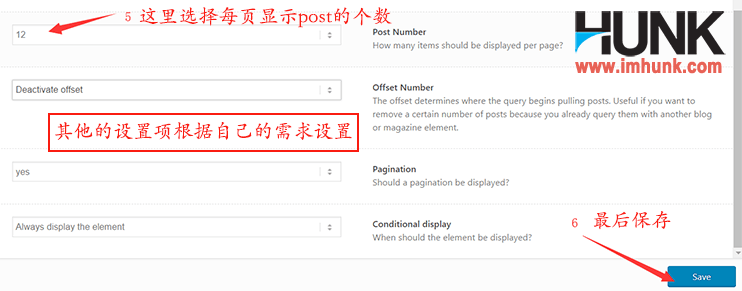
Post Number Set the number of blog posts displayed according to your needs
Other menus can be left as default, or can be set according to your own needs
Then click save, and click update in the upper right corner of the page to save the changes.

15.2 Creation of blog post page
The blog classification page has been made in the above, and we need to make the blog post page next, so that the blog can be displayed on the blog classification page.
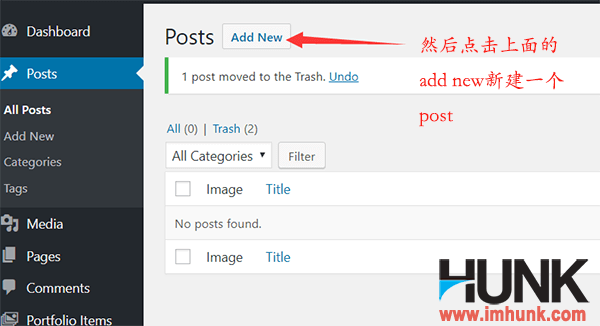
Click posts – all posts, and put a post article generated by default in the siteground into the trash

Next, click add new to create a new post page
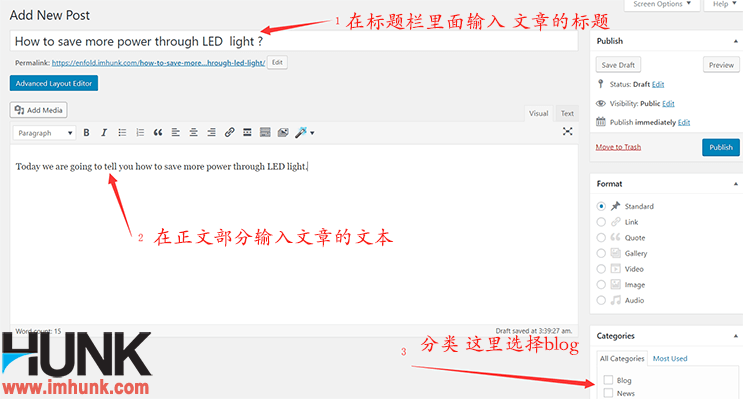
Step 1 , and then enter the title of the article in the title bar
Step 2 , enter the main content of the blog in content. The content is well arranged and divided into sections.
Step 3 , select the post classification
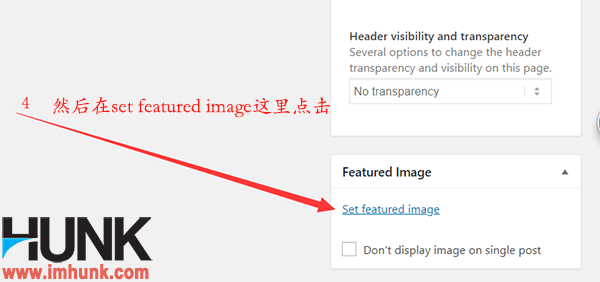
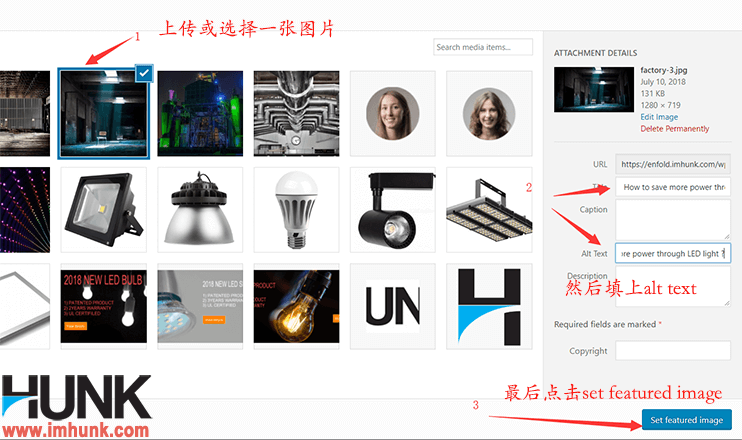
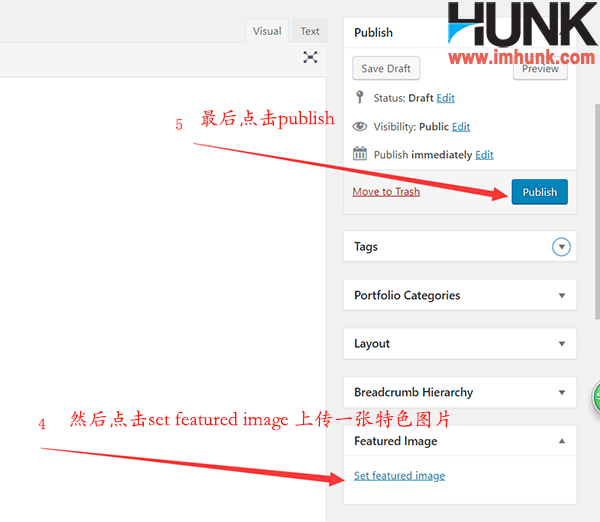
Step 4 , click set featured image to set featured images, upload or select an image directly, fill in alt text, and then click set featured image to upload successfully.
Step 5 , click publish to publish the article.
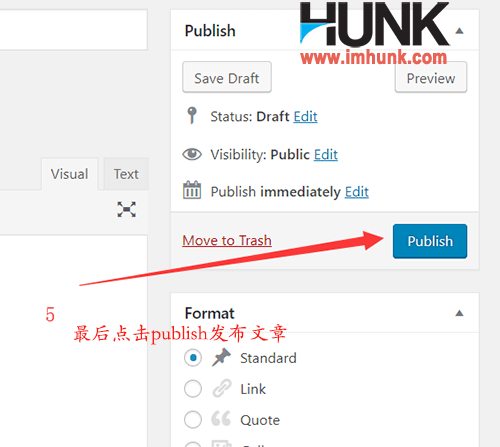
In this way, an article will be published successfully. You can see this article in ALL POSTS
Then use the same method to create a new blog post
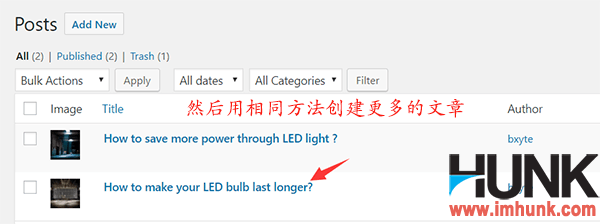
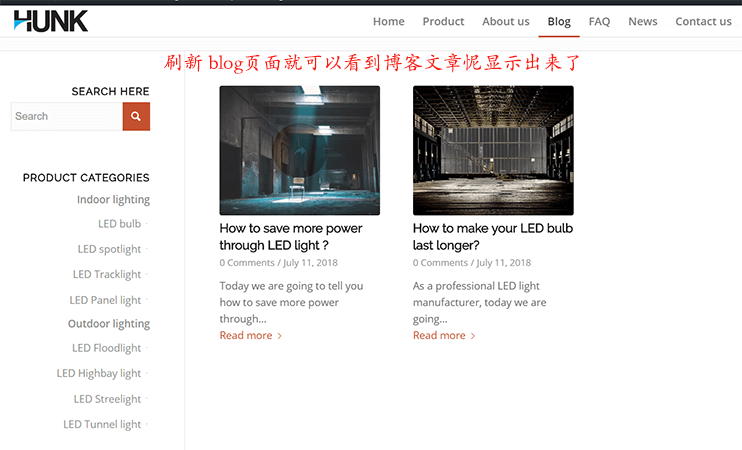
Then refresh the BLOG page, so that the two published articles are displayed.
The method of making news classification pages and news articles is the same as that of making blog classifications and blog articles, so you only need to refer to the method of making blogs 。
Of course, if there are other classifications, such as technical skills, you can also use this method.
16. Enfold Theme Production Website Product Details Page
The production method of the product classification page has been introduced previously. In this section, we will introduce the production method of the product details page.
16.1 Portfolio Page Production Product Details Page
In the enfold theme, the product details page is implemented with the menu portfolio.
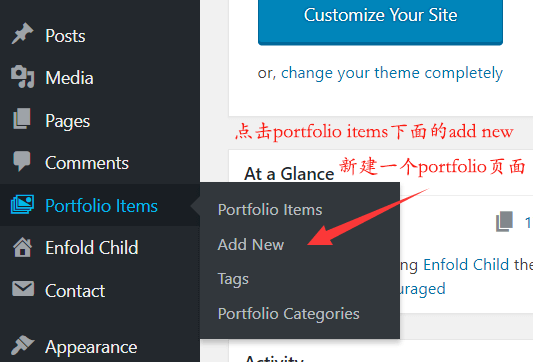
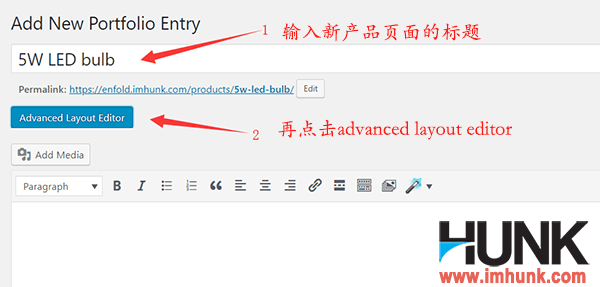
First click portfolio – Add new to create a blank portfolio page

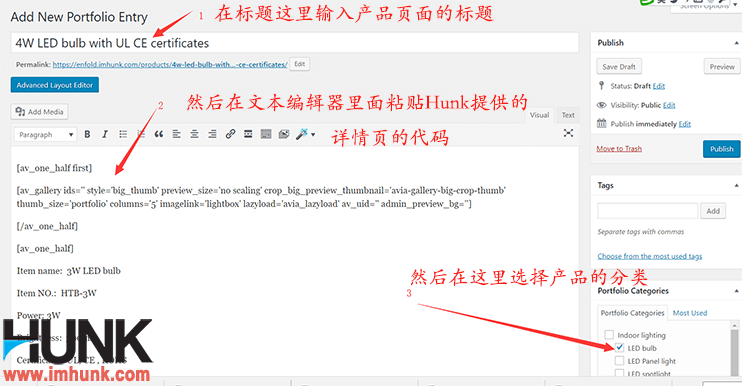
Step 1 , enter the title of the product here
Step 2 , copy the following code and paste it into the editor. This code is the layout of the portfolio page I have already done, which can be used directly
 [av_one_half first min_height='' vertical_alignment='' space='' custom_margin='' margin='0px' link='' linktarget='' link_hover='' padding='0px' border='' border_color='' radius='0px' background='bg_color' background_color='' background_gradient_color1='' background_gradient_color2='' background_gradient_direction='vertical' src='' background_posit ion='top left' background_repeat='no-repeat' animation='' mobile_breaking='' mobile_display='' av_uid='av-mzjvn']
 [av_gallery ids='281,280,279,278,277' style='big_thumb' preview_size='no scaling' crop_big_preview_thumbnail='avia-gallery-big-crop-thumb' thumb_size='portfolio' columns='5' imagelink='lightbox' lazyload='avia_lazyload' av_uid='av-jjgpts56' admin_preview_bg='']
 [/av_one_half]
 [av_one_half min_height='' vertical_alignment='' space='' custom_margin='' margin='0px' link='' linktarget='' link_hover='' padding='0px' border='' border_color='' radius='0px' background='bg_color' background_color='' background_gradient_color1='' background_gradient_color2='' background_gradient_direction='vertical' src='' background_position='t op left' background_repeat='no-repeat' animation='' mobile_breaking='' mobile_display='' av_uid='av-ercar']
 [av_textblock size='' font_color='' color='' av-medium-font-size='' av-small-font-size='' av-mini-font-size='' av_uid='av-t9gb' admin_preview_bg='']
 Item name: 3W LED bulb
 Item NO.: HTB-3W
 Power: 3W
 Brightness: 300lm
 Certificates: UL, CE , ROHS
 Warranty: 3years
 Package: 100pcs/carton
 [/av_textblock]
 [/av_one_half]
 [av_one_full first min_height='' vertical_alignment='' space='' custom_margin='' margin='0px' link='' linktarget='' link_hover='' padding='0px' border='' border_color='' radius='0px' background='bg_color' background_color='' background_gradient_color1='' background_gradient_color2='' background_gradient_direction='vertical' src='' background_posit ion='top left' background_repeat='no-repeat' animation='' mobile_breaking='' mobile_display='' av_uid='av-gvh1f']
 [av_textblock size='' font_color='' color='' av-medium-font-size='' av-small-font-size='' av-mini-font-size='' av_uid='av-jjgqlszd' admin_preview_bg='']
 <h2>Description</h2>
 Best seller in 2018 , 3W LED bulb with UL CE certificates ....
 <h2>Why choose this product?</ h2>
 1) Best seller in 2018
 2) UL certified
 3) Popular with global customers
 <h2>Specification</h2>
 ...
 <h2>Details</h2>
 ...
 <h2>Packaging details</h2>
 ...
 [/av_textblock]
 [/av_one_full] [av_one_full first min_height='' vertical_alignment='' space='' custom_margin='' margin='0px' link='' linktarget='' link_hover='' padding='0px' border='' border_color='' radius='0px' background='bg_color' background_color='' background_gradient_color1='' background_gradient_color2='' background_gradient_direction='vertical' src='' background_posit ion='top left' background_repeat='no-repeat' animation='' mobile_breaking='' mobile_display='' av_uid='av-7ifjv']
 [av_textblock size='' font_color='' color='' av-medium-font-size='' av-small-font-size='' av-mini-font-size='' av_uid='av-jjgqm7c0' admin_preview_bg='']
 [contact-form-7 id="139" title="Inquiry"]
 [/av_textblock]
 [/av_one_full]
Step 3 , select the product category corresponding to this product in the portfolio category
Step 4 , click set featured image to set featured images.
Step 5 , click publish to release the product.

After the product is released, we will modify the content of the page. Because the content in the code is my content, you need to replace the corresponding data with your own product.
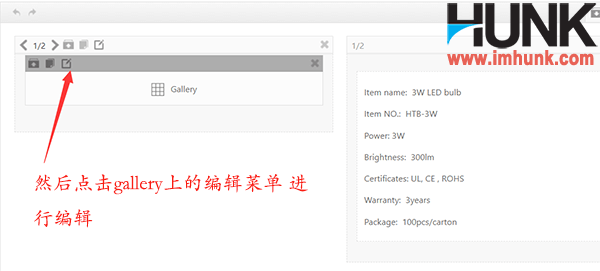
First, click the advanced layout editor to switch to the visual operation mode, and then click the gallery above to edit. Here is the picture of the product.
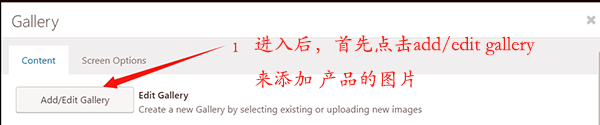
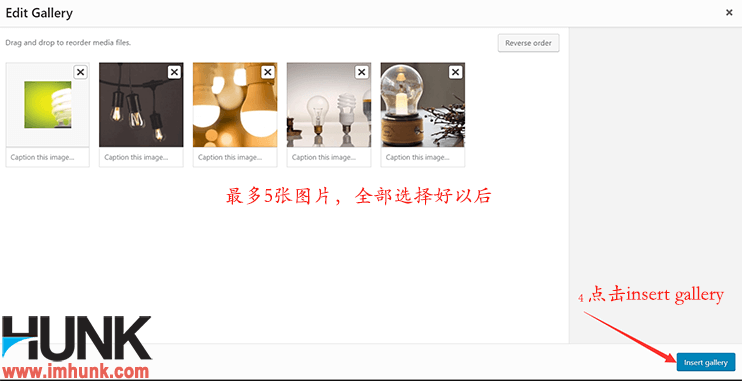
Click Add/edit gallery to add product pictures, select the pictures to be added to the gallery, fill in the alt text of each picture, click Add to gallery, five pictures are enough, and then click Insert gallery
stay gallery style Here, select Big image with thumbnails below
Gallery Big Preview Image Size Select No Scaling (Original Width X Original Height)
Thumbnail Columns Select only a few, not more than 5.
Finally, click Save to save. Then click update in the upper right corner to save the changes.


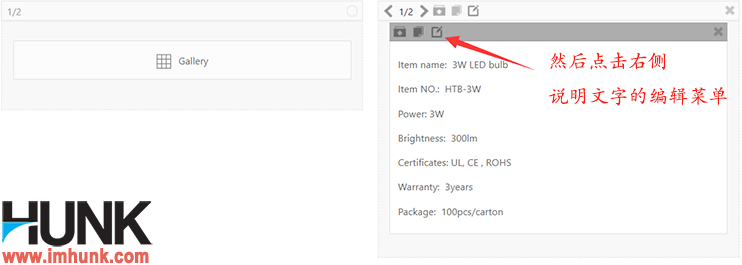
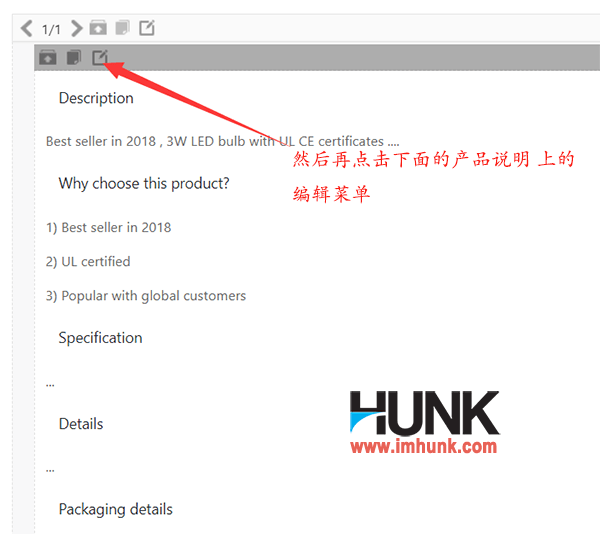
Then click the description on the right to modify, directly change the data in the editor to your own, and then click save to save.
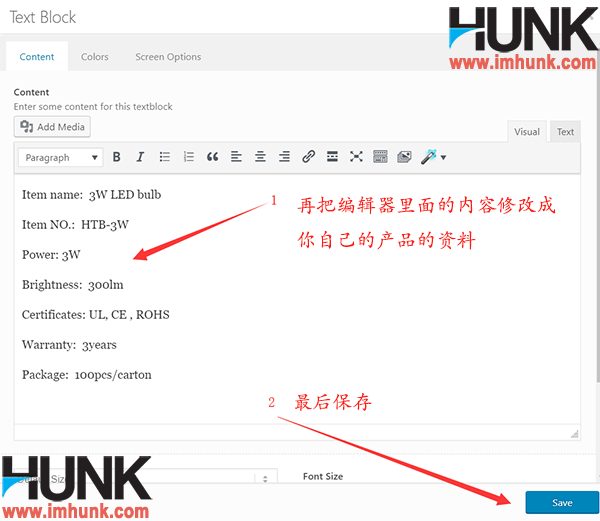
The next step is to modify the information in the body. Click the Edit menu directly to open the editor.
Since I have edited the title and paragraph, the format can remain unchanged, and the heading can also remain unchanged. Just change the content of the paragraph to your own. Click Save after modification.

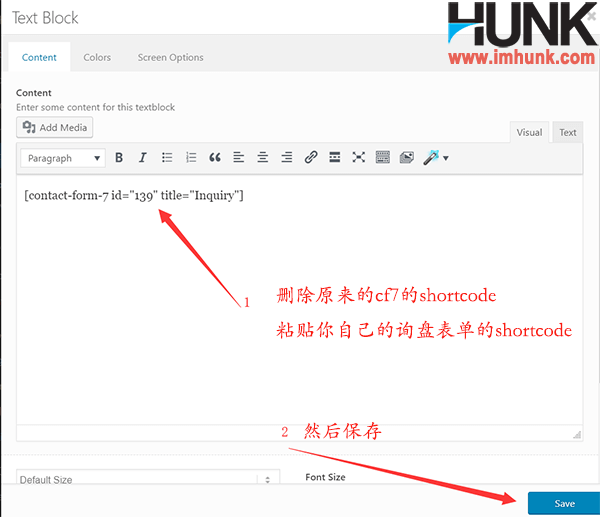
Then click the Edit menu of the inquiry form below, delete the original inquiry form in content, paste your own inquiry form, and click Save to save. Finally, click Update in the upper right corner to save.

Then refresh the foreground of the product details page to see if there is any problem. If there is no problem, continue the following operation.
16.2 Create product detail page template and upload products efficiently
Since the product details page can maintain the same page layout, we can save the completed product details page as a template, then call it when creating other product pages, and then just modify the key information, saving time and effort. The method is described below.
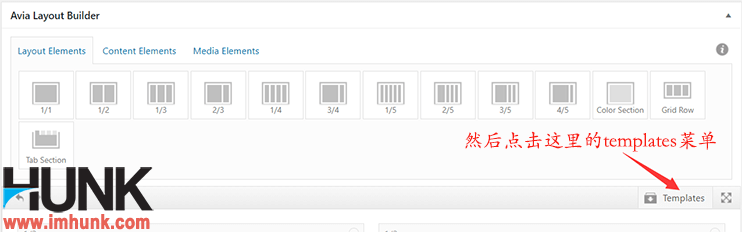
In the background of the above product page, click the templates menu, click save entry as template, enter the name of the template product template, and click save to save.
Next, click portfolio items – add new to create a new product page, enter the title, select the corresponding category, set featured pictures, and click publish.
Then click the advanced layout editor to switch to the visual operation mode.
Then click the templates menu, and then click the name of the template on the previously saved product page, product template, to import this template into the body part, and then modify the relevant pictures and materials in the same way.
And so on, to create more product detail pages.
17. What to do after the completion of the enfold theme website
reference resources 11 things to do when the website goes online 。