Many friends do not know how to install the mail system after they have successfully studied the LINODE configuration space, which makes it impossible to send mail. Today Hunk will share two methods to solve the problem that LINODE VPS cannot send emails
1. Simple method - install the smtp plug-in to solve the problem of unable to send mail
Advantages: simple operation
Disadvantages: It is a little slow when sending on the form
Using tools
One 126 public mailbox
Easy wp smtp plug-in( The wp smtp plug-in can also Yes, the setting method is similar)
usage method
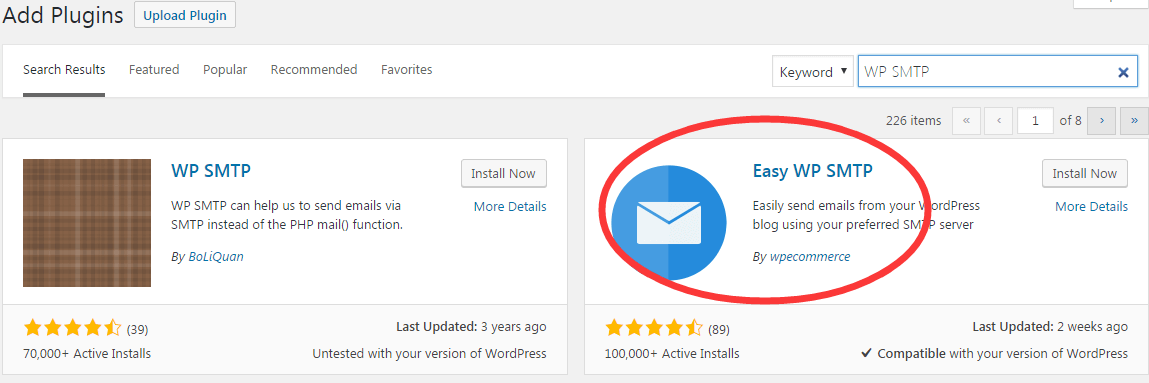
1.1 Enter wp smtp or easy wp smtp in the plug-in search, find the plug-in easy wp smtp, install and activate it
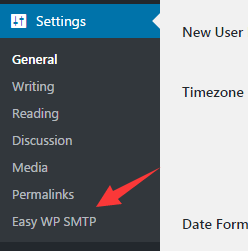
1.2 Find Easy wp smtp in the background settings of wp and click it to go to the settings page
1.3 On the setting page, set as shown in the figure below. Both from email address and smtp usename are filled with your 126 email account
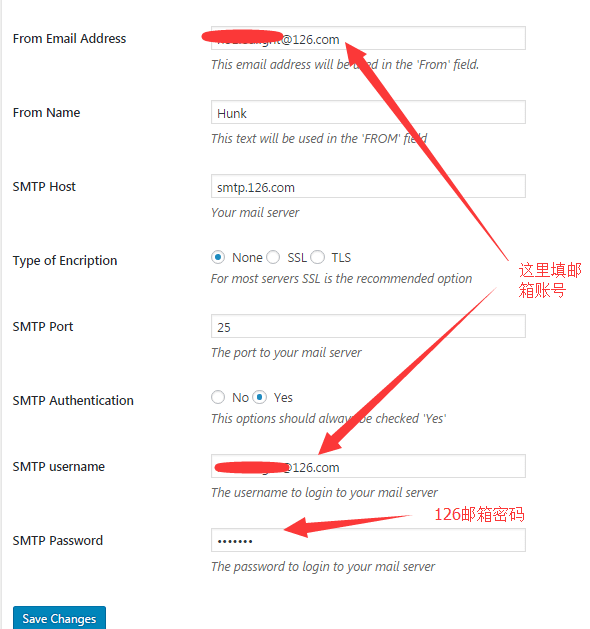
Save changes after setting
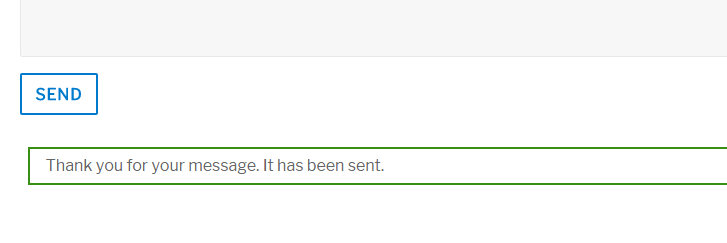
1.4 Then enter the test email on the set CONTACT FORM table to prompt that the sending is successful.
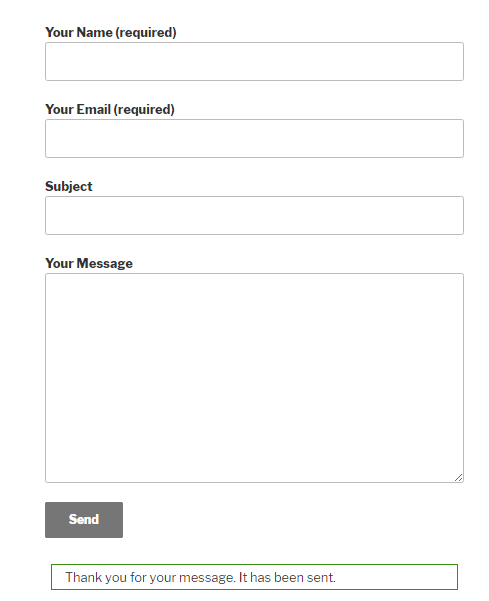
1.5 Then you will receive the email in your inbox. The settings are relatively simple.

2. Complex method – install postfix software on Linode vps and combine it with gmail to solve the problem of unable to send emails
Postfix is a software with similar functions to smtp. It is used to set up an email server. After installation, it uses the gmail account to send inquiries and emails.
Note: Linode prohibits the use of ports 25, 465 and 587 by default for accounts registered after November 5, 2019, which will lead to the failure of successful postfix transmission after successful installation. If this is the case with your Linode account, you need to open a ticket in the background of Linode to let Linode remove the restrictions on port use.
Advantages: The inquiry is sent quickly, almost every second, and it is not easy to enter the dustbin.
Disadvantages: the settings are a little complicated
The method is as follows:
Note: The following methods are based on the Ubuntu 16.04+nginx system. If you use Centos, you can find out by yourself. The methods should be similar
2.1 Installing postfix software
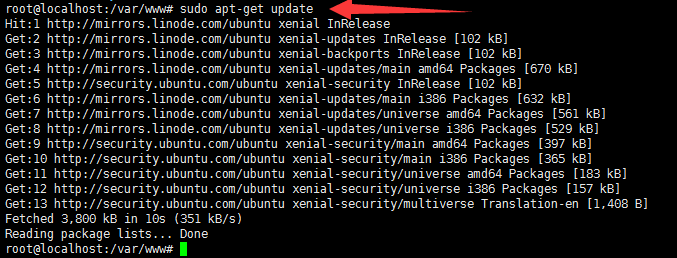
First use xshell Log in to your space, then update the system, enter the following command and enter
sudo apt-get update
Then install postfix, enter the following command and enter
sudo apt-get install libsasl2-modules postfix
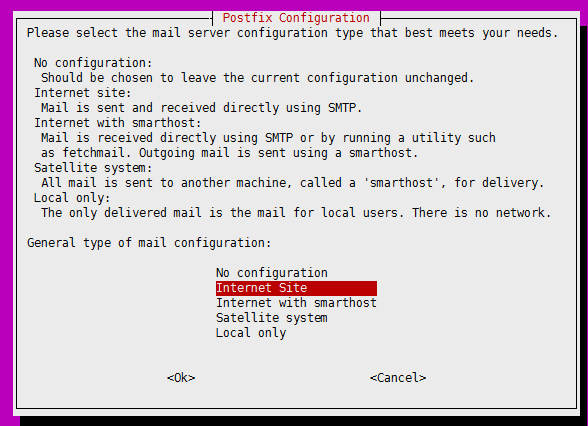
It will pop up this box, do nothing and enter directly
Then another box will pop up, change the system mail name to your domain name www.domain.com, click TAB, switch to OK, and enter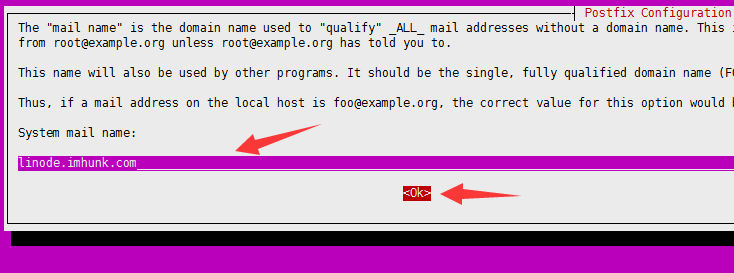
The installation was completed in a few seconds.
2.2 Get the exclusive password of your gmail account
Specific method reference How to load gmail mailbox on foxmail , the first and second steps.
2.3 Configuring Postfix Files
First open flashfxp and connect it to your LINODE space. Then enter/etc/postfix in the path and press Enter. Find the main.cf file, download it locally, and open it with notepad++

find myhostname For this item, replace the value after the=sign with your own domain name, www.domain.com

Find again relayhost For this item, change the value after the=sign to [smtp. gmail. com]: 587

Then main.cf Add this paragraph at the end of the document content
# Enable SASL authentication
smtp_sasl_auth_enable = yes
# Disallow methods that allow anonymous authentication
smtp_sasl_security_options = noanonymous
# Location of sasl_passwd
smtp_sasl_password_maps = hash:/etc/postfix/sasl/sasl_passwd
# Enable STARTTLS encryption
smtp_tls_security_level = encrypt
# Location of CA certificates
smtp_tls_CAfile = /etc/ssl/certs/ca-certificates.crt
Then save and upload to the space to replace the original file.
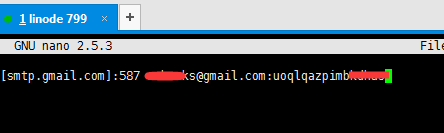
next Copy the following code To txt text
[smtp.gmail.com]:587 username@gmail.com :password
hold username@gmail.com Change to your gmail account
Change the password to the gmail exclusive password you generated above
Do not change the others, and copy them after modification
Then enter the following code in xshell and press Enter
nano /etc/postfix/sasl/sasl_passwd
Will open a black box and paste the code copied above
Then press CTRL+X, you will be prompted whether to save. Then enter y and press Enter to finish saving.
Then enter the following commands and enter in turn
Sudo postmap/etc/postfix/sasl/sasl_passwd Enter
Sudo chown root: root/etc/postfix/sasl/sasl_passwd/etc/postfix/sasl/sasl_passwd.db Enter
Sudo chmod 0600/etc/postfix/sasl/sasl_passwd/etc/postfix/sasl/sasl_passwd.db Enter

Then restart postfix
sudo systemctl restart postfix
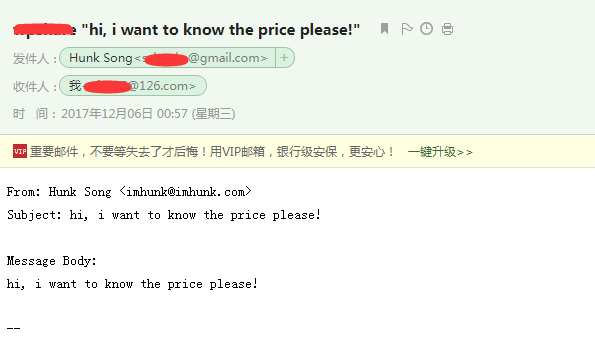
2.4 Test whether inquiry can be sent and received
The test result is that it can be successfully sent and received quickly, and the sending box is a gmail account. This indicates that the setting has been successful!
The above two methods can solve the problem that linode vps cannot send emails. You can choose the appropriate method to solve your own needs.