Bluehost sometimes draws air, which causes the one click installation of WP to fail. Today we will talk about how to manually install Wordpress on Bluehost
Background knowledge: what is Site Root ? ( very important )
For Bluehost space, the public_html folder is the root directory of the primary domain's website, that is, the website information of the domain name you filled in when you purchased bluehost
If you add a second and third website, such as www.abc.com, then the root directory of abc's website is Public_html/abc/. The specific abc depends on what directory you fill in when you use the ASSIGN domain name. The corresponding relationship is as follows:
The root directory of the website corresponding to the primary domain of the main website is public_html
From the website - for example, the root directory of the website corresponding to abc.com is public_html/abc/
From the website – for example, the root directory of the website corresponding to xyz.com is public_html/xyz/
And so on...............
1. Binding domain name (Assign domain name)
Reference for specific contents How to establish multiple websites in Bluehost
( Skip this step if the installed domain name is the primary domain of the space )
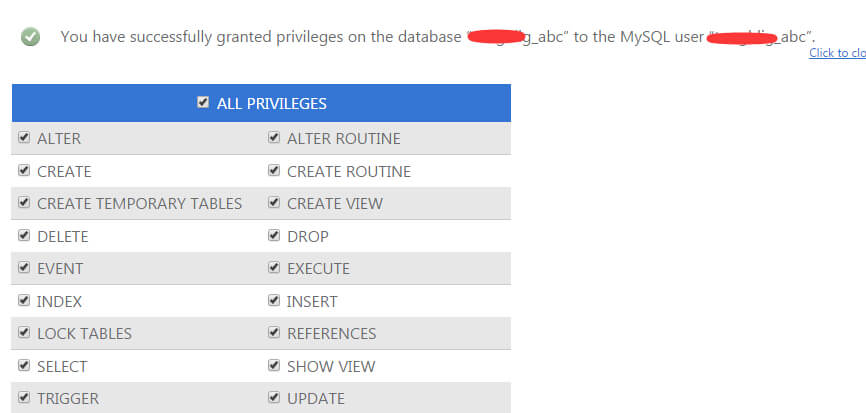
2. Create a new database and user name and empower them
Enter the bluehost background and click hosting databases to enter the database page

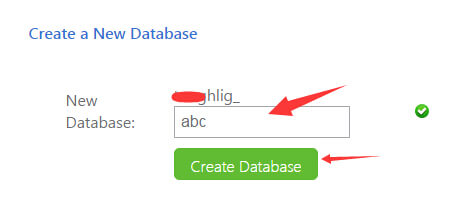
To create a new database, enter a name in the box and click Create
Create a new user name, enter the user name and password in sequence, and click Create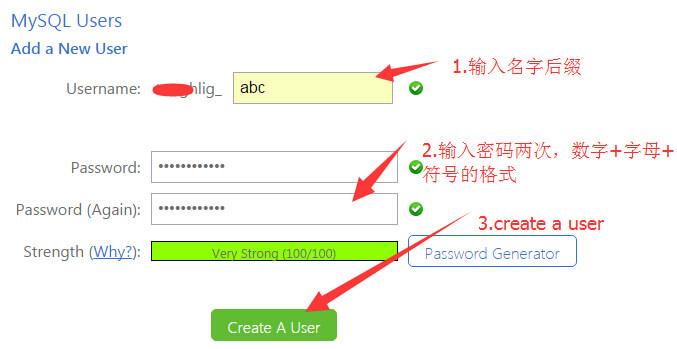
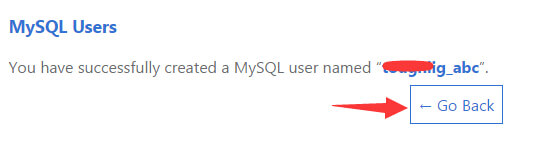
Return after creating
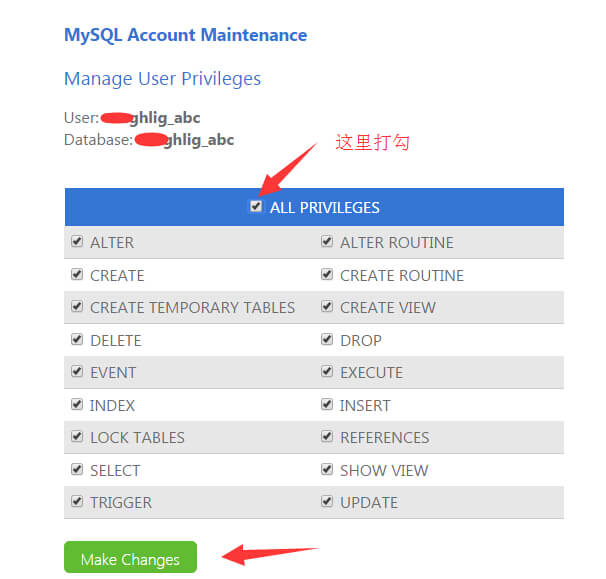
To empower users, select the new user name and database, and add them. Select all privileges from all privileges, and click make changes. After success, you will be prompted that you have successfully added them.

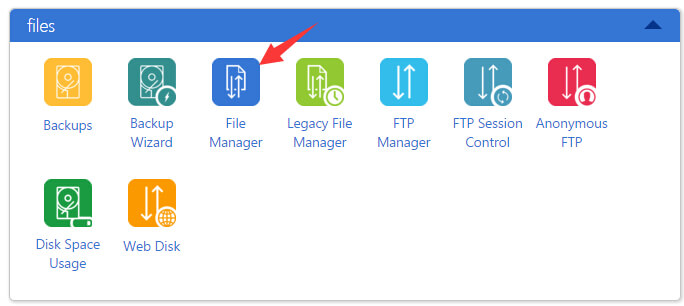
3. Upload the wordpress installation file to the website root directory
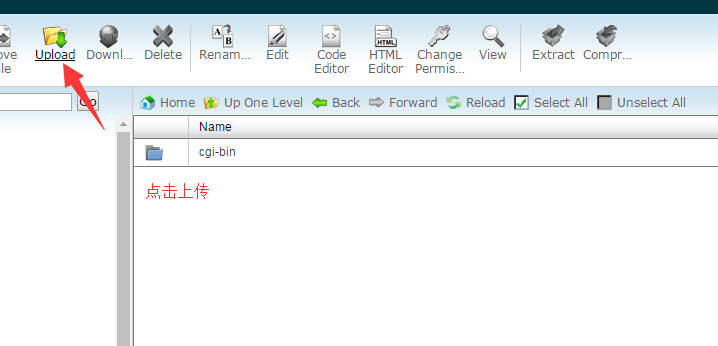
In the background of Bluehost, click the logo of bluhost to enter cpanel, find the files menu and click file manager to enter the file management page, This page is also very powerful and can completely replace FTP
Enter the page and click public_html in the left menu. This is The root directory of the space. If the primary domain is installed, upload the files to this folder
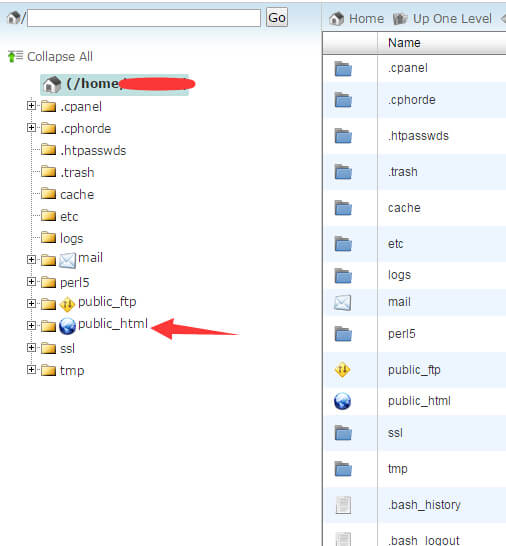
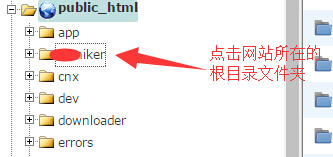
If the installed website is the second and third in the space.. Website, such as abc.com, find the website folder abc under public_html, which is the Site Root , upload the wp installation file to this folder
Method of uploading method WP file:
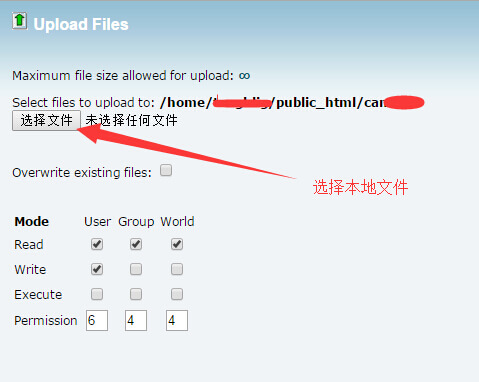
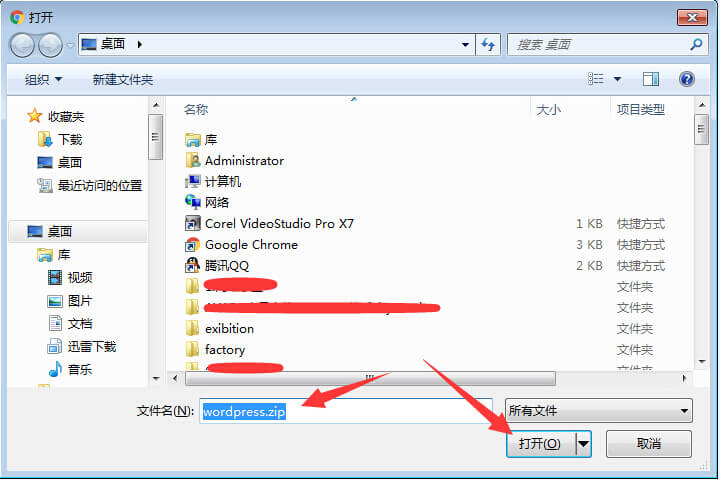
get into Root folder Then, click upload in the above menu, select the wordpress package in the pop-up window, and click Open to upload the file
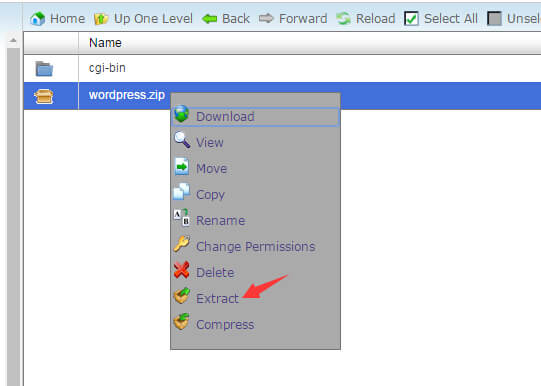
After the upload starts, the upload progress will appear on the left, and there will be a prompt after the upload is completed

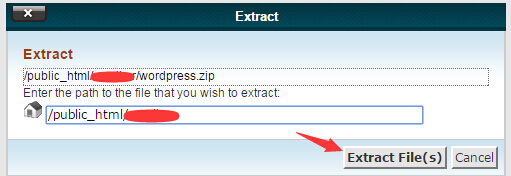
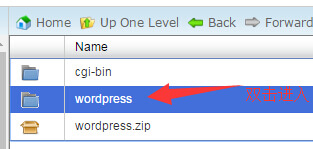
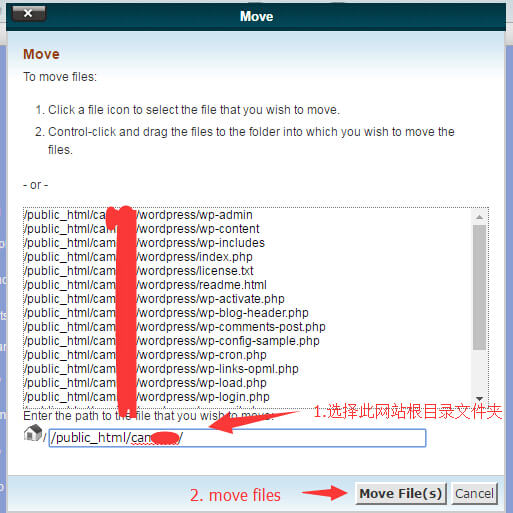
Return after uploading Site Root , select the wordpress file package just uploaded, right click extract to extract it
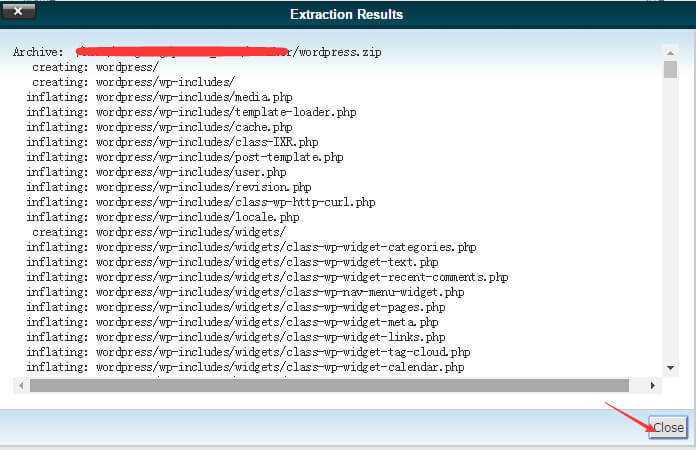
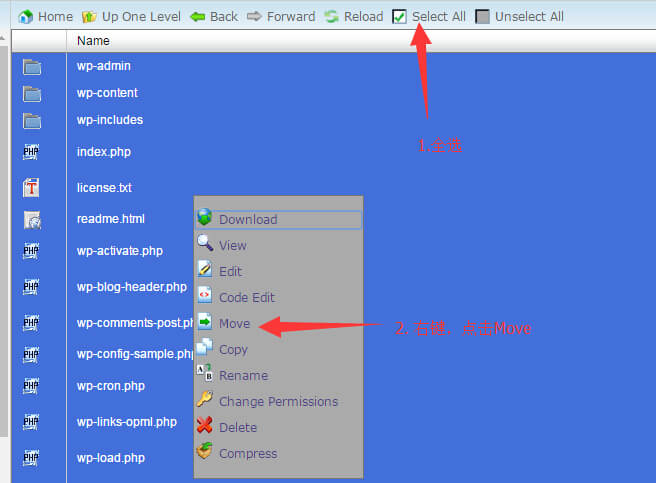
After decompression, all the files are placed in the wordpress folder. You must move these files Site Root Double click to enter the wordpress folder, select all files, right click move, and change the path in the pop-up window to your Site Root , and then click move files to transfer successfully
4. Install the wordpress website
After entering your website, you can jump to the installation interface and click Start Now

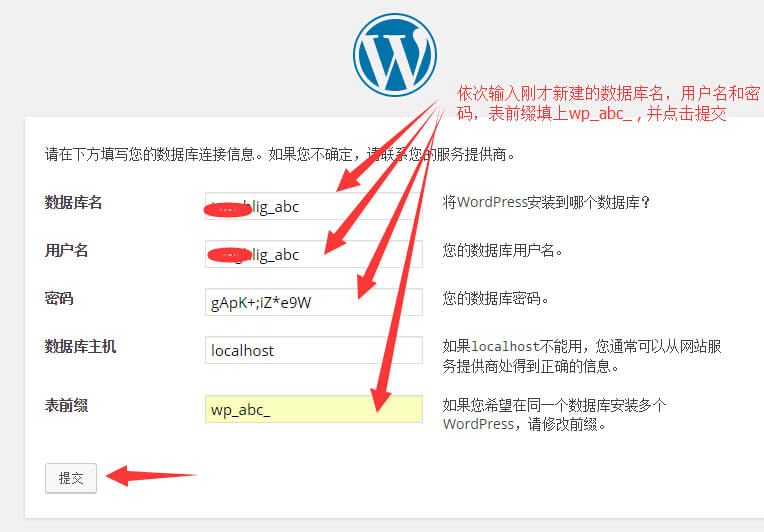
Fill in the database name, user name, password, and database host that were just created in the background of bluehost in the corresponding location in turn. Do not change the database host. Fill in wp_abc_ for the table prefix. After filling in, submit it and continue the installation

Then you need to enter the site title, user name, password, email, etc. of your website, and click to install WordPress.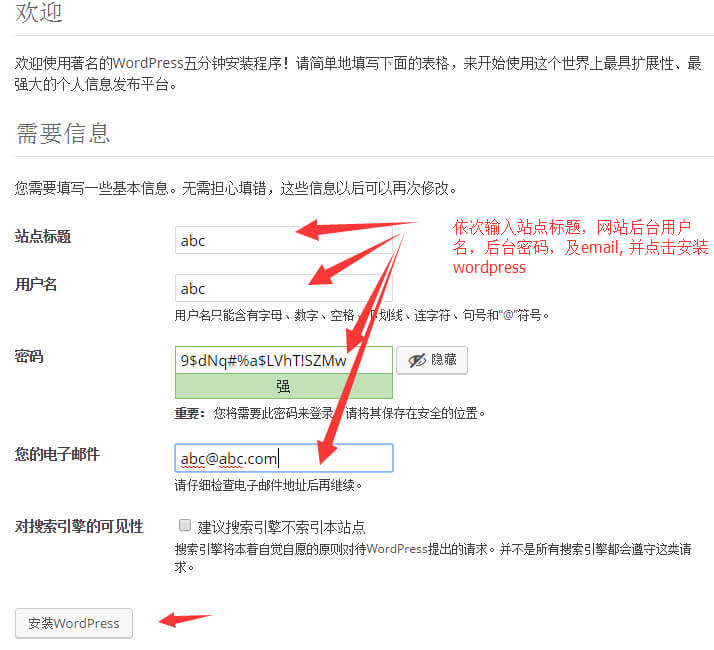
Next, we can build the website.
If you use AVADA to build a station, you can refer to How to install Avada themes and subthemes