This article mainly explains the method of domain name resolution in Bluehost space, that is, DNS resolution. It mainly explains website resolution (A record) and mailbox resolution (MX record)
Note: This article only works for two types of domain names
1) Domain name purchased on Bluehost platform
2) Domain name purchased on other platforms but ns on bluehost platform (you can query where the NS of the domain name is through whois.com)
For the resolution of domain names purchased on other platforms and the Name servers are not in the bluehost space, refer to How to set A record in domain name DNS
OK, lets start!
1. Website resolution (A record)
Whether your domain name is purchased on Bluehost or the NS of your domain name is on bluehost, as long as your website space uses bluehost space, the website resolution can be ignored once Bluehost will automatically add A record for you , very convenient.
2. Mailbox resolution (MX record+TXT record)
In fact, Bluehost will also help you set up the mailbox resolution, but this resolution is directed to Bluehost's own mailbox. If you want to use other corporate mailboxes, you need to reset them. Next, Bluehost will set up the resolution of Netease's corporate mailbox and Tencent's corporate mailbox in the background
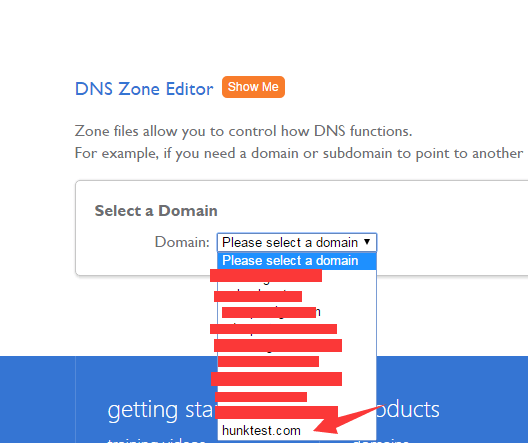
1) Enter the DNS setting zone and select the domain name you want to set resolution
Click Bluehost background – domains – zone editor

Then select the domain name you want to resolve
2) Resolution settings of Netease mailbox
MX record:
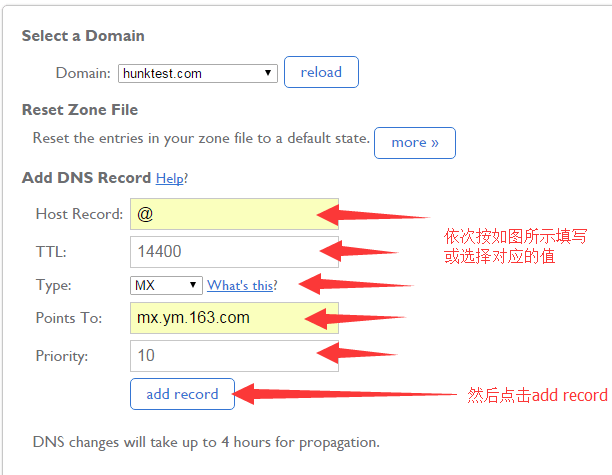
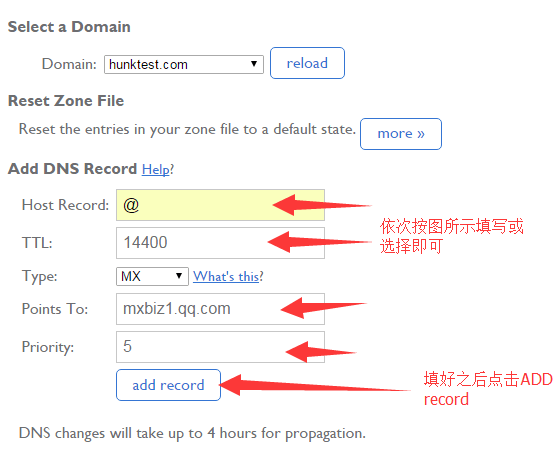
First fill in the corresponding value in the ADD DNS record
Host record filling@
TTL fill 14400
Type Select MX
Points to fill in mx.ym.163.com
Fill in 10 for priority
Then add record, as shown in the figure
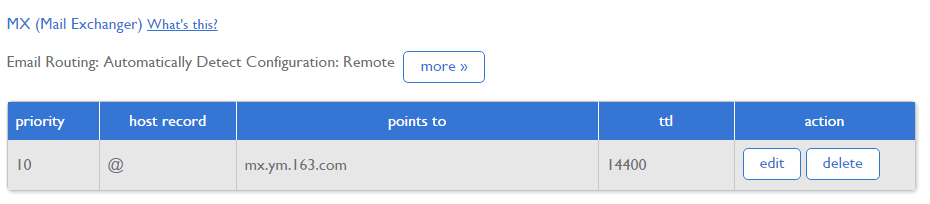
Then find the MX record area at the bottom of the page and delete the MX settings that come with bluehost
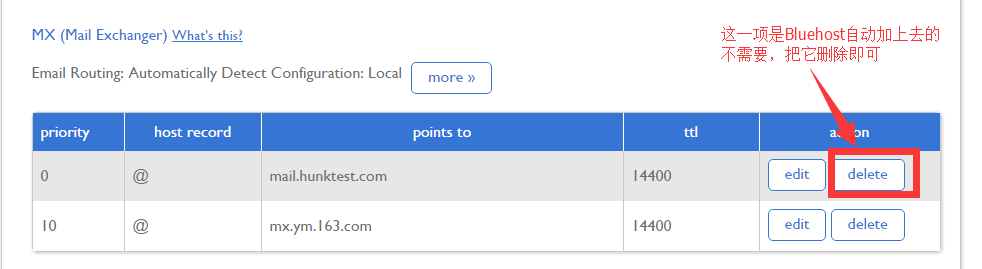
Finally, the settings are successful, as shown below
TXT record
Bluehost will add one by default and modify it directly. Find the TXT record and click EDIT

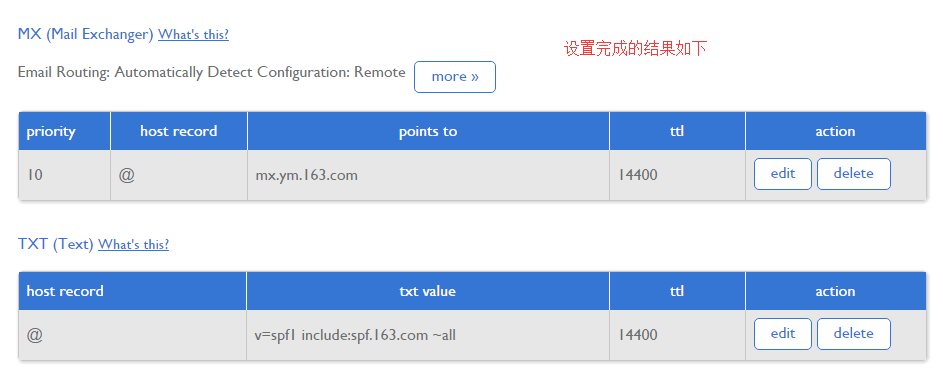
Then paste the value v=spf1 include: spf.163.com~all recorded in the TXT of NetEase corporate email into the text value, and leave the rest in place, then save

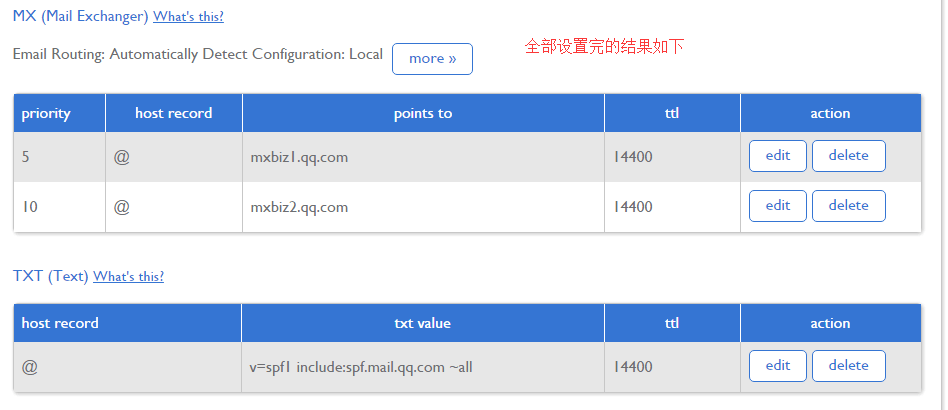
After all settings are completed, the following results are obtained
3) For the resolution settings of Tencent's corporate mailbox, 3 resolutions need to be added
MX record
First fill in the corresponding value in the ADD DNS record
The first record:
Host record filling@
TTL fill 14400
Type Select MX
Points to fill in mxbiz1.qq.com
Fill in 5 for priority
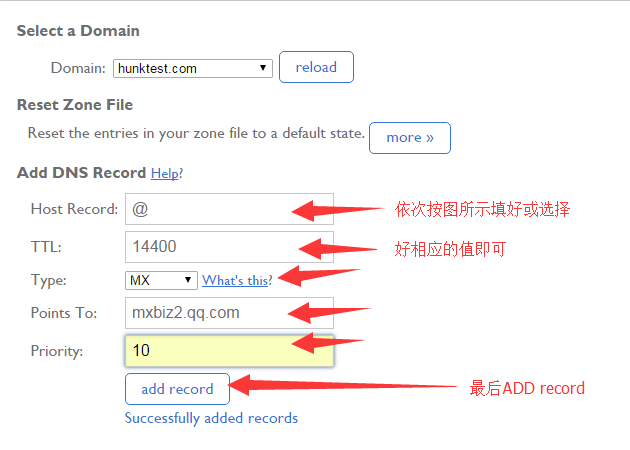
Second record
Host record filling@
TTL fill 14400
Type Select MX
Points to fill in mxbiz2.qq.com
Fill in 10 for priority
Then find the MX record area at the bottom of the page and delete the MX settings that come with bluehost
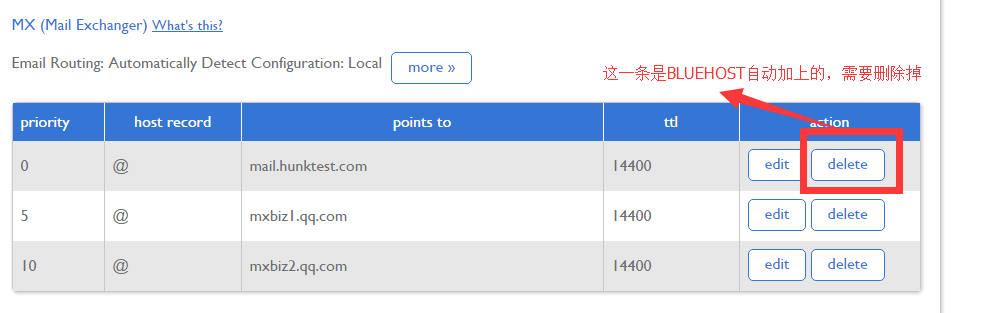
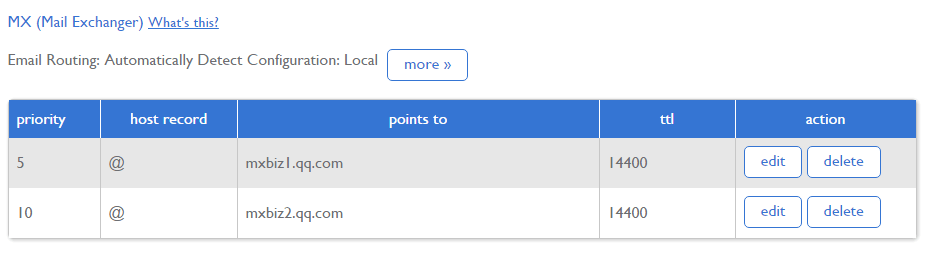
The deletion is successful, as shown below
TXT record
Bluehost will automatically add TXT record to the domain name, find the TXT record, and click EDIT

Then record the value of Tencent email TXT v=spf1 include:spf.mail.qq.com ~all Paste it into txt value. Don't move the others. Finally, click SAVE to save

After all settings are completed, the results are as follows