A free Git client for Windows and Mac
Simple for beginners
Powerful for experts
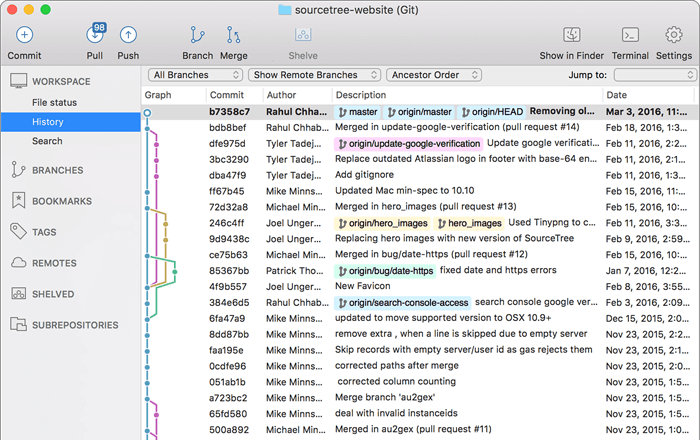
Visualize your code
Git and Hg on your desktop
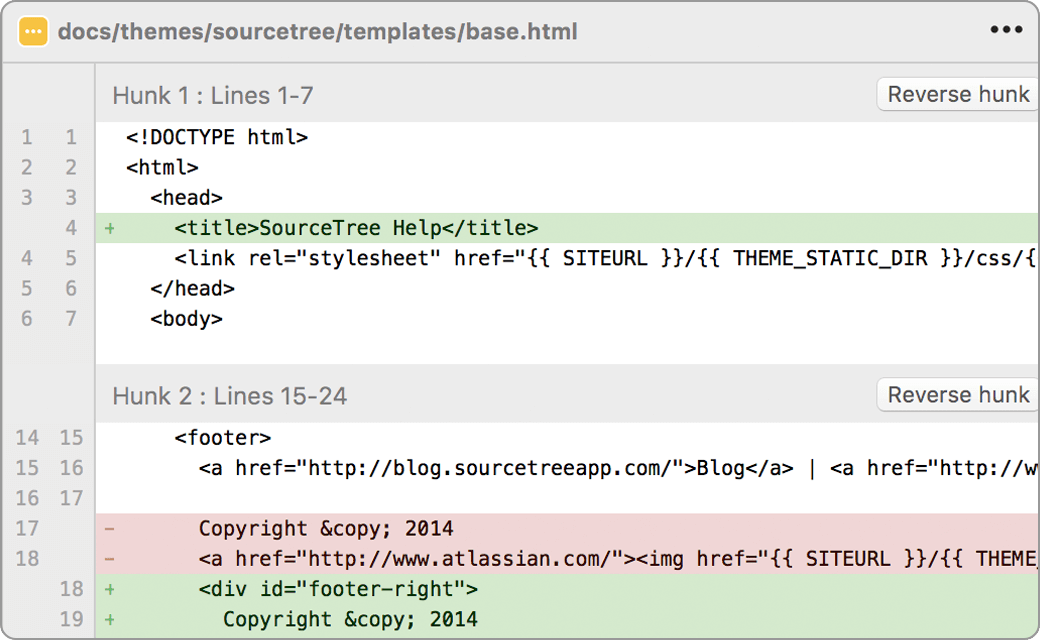
Commit with Confidence
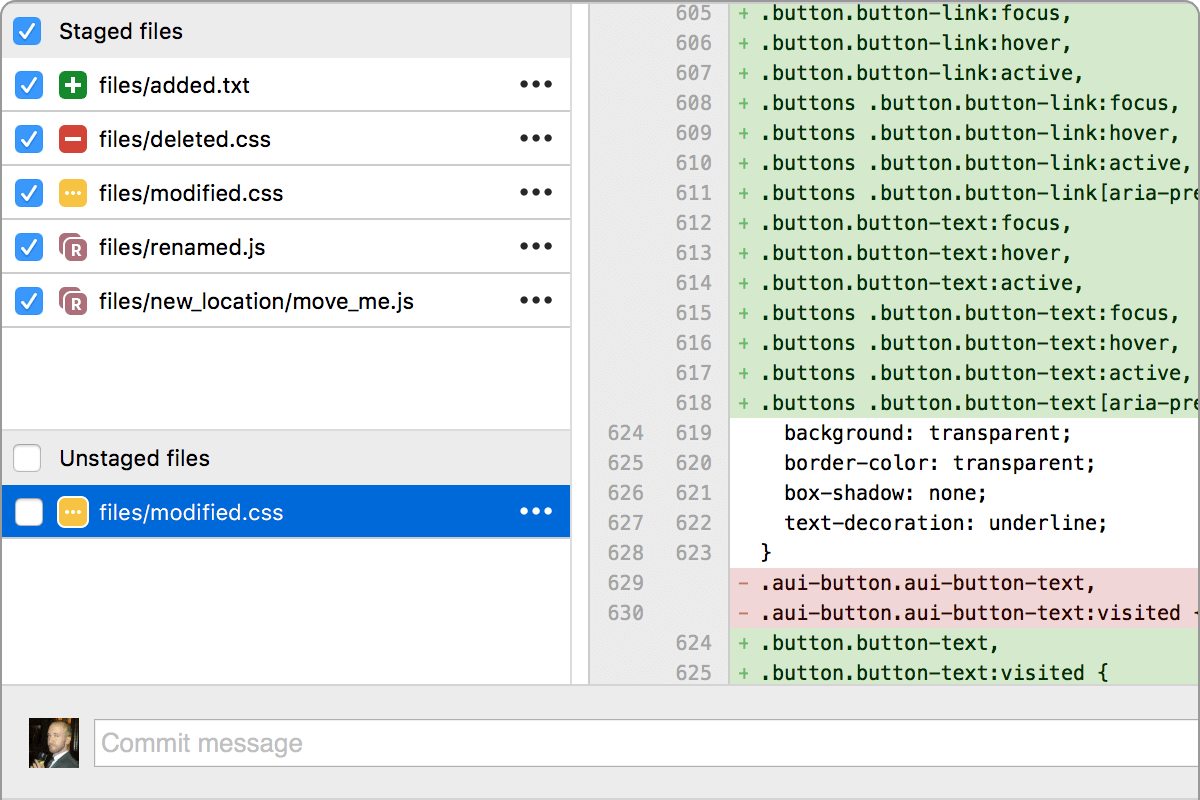
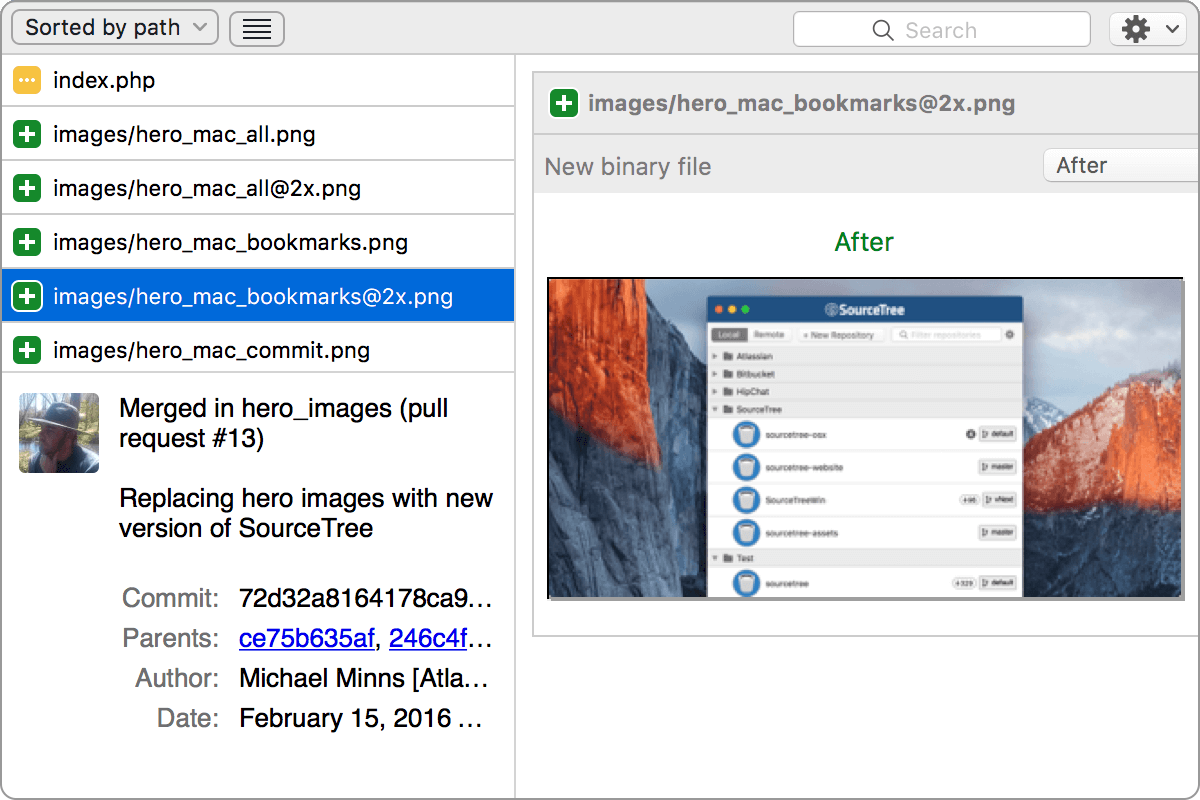
A fully-featured client

The new Git status

Visualize your progress

Git for Windows & Mac

Get Git right
Git at your fingertips

Git Large File Support

Git-flow out of the box

Submodules

Local commit search

Interactive rebase

Remote repository manager

Sourcetree for Windows Enterprise

Join the Sourcetree Beta Program
Improve your productivity with Bitbucket


Blog

Learn
Next up: Learn Sourcetree with Bitbucket
Step 1: Create a Git repository
Step 1: Create the repository
-
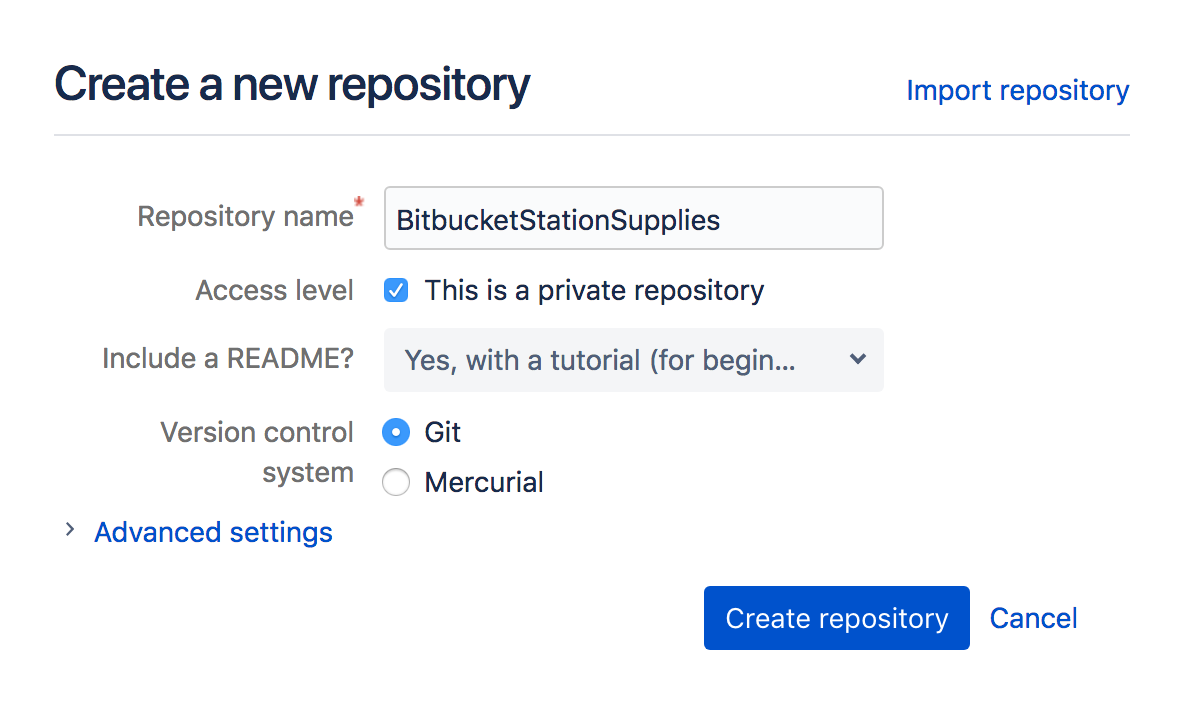
From Bitbucket , click the + icon in the global sidebar and select Repository . Bitbucket displays the Create a new repository page. Take some time to review the dialog's contents. With the exception of the Repository type , everything you enter on this page you can later change.
-
Enter BitbucketStationSupplies for the Name field. Bitbucket uses this Name in the URL of the repository. For example, if the user the_best has a repository called awesome_repo , the URL for that repository would be https://bitbucket.org/the_best/awesome_repo . -
Keep the rest of the options as is unless you want to change them: -
Access level —Leave the This is a private repository box checked. A private repository is only visible to you and those with access. If this box is unchecked, anyone can see your repository. -
Include a README? —If you recently created your account, this defaults to a tutorial README. For the purposes of this tutorial, pick either of the Yes options, that way you'll start out with a file.
-
-
From Version control system , you can choose either Git or Mercurial . If you aren't sure which one to go with, keep Git as your option. -
Click Create repository . Bitbucket creates your repository and displays its Source page.
Step 2: Explore your new repository
Step 2: Copy your repository and add files
Step 1: Clone your repository to your local system
-
As you use Bitbucket more, you will probably work in multiple repositories. For that reason, it's a good idea to create a directory to contain all those repositories. So start by creating a directory on your local system and call it repos. -
From Bitbucket, go to your BitbucketStationSupplies repository. -
Click the Clone button in the top right corner. Bitbucket displays the Clone this repository dialog. .gif?cdnVersion=1869)
-
From the Clone this repository dialog, click Clone in Sourcetree . -
From the Clone New dialog box, update the Destination Path to /repos/bitbucketstationsupplies . This destination path refers to the directory you just created with the folder for the repository. The Name field remains the same with the folder name of the repository. 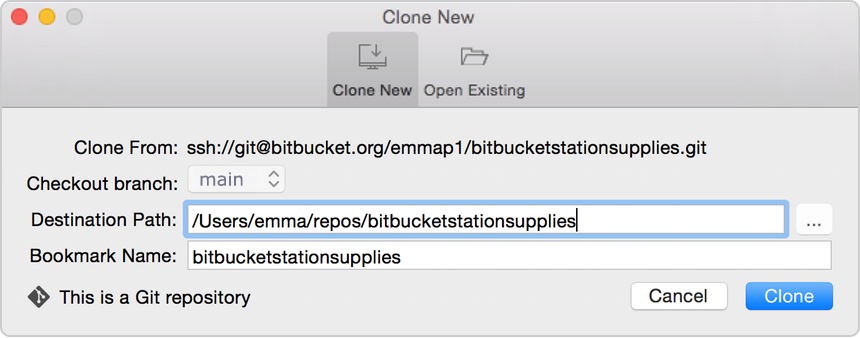
-
Click the Clone button.
Step 2: Create a file, add it locally, and push it to Bitbucket
-
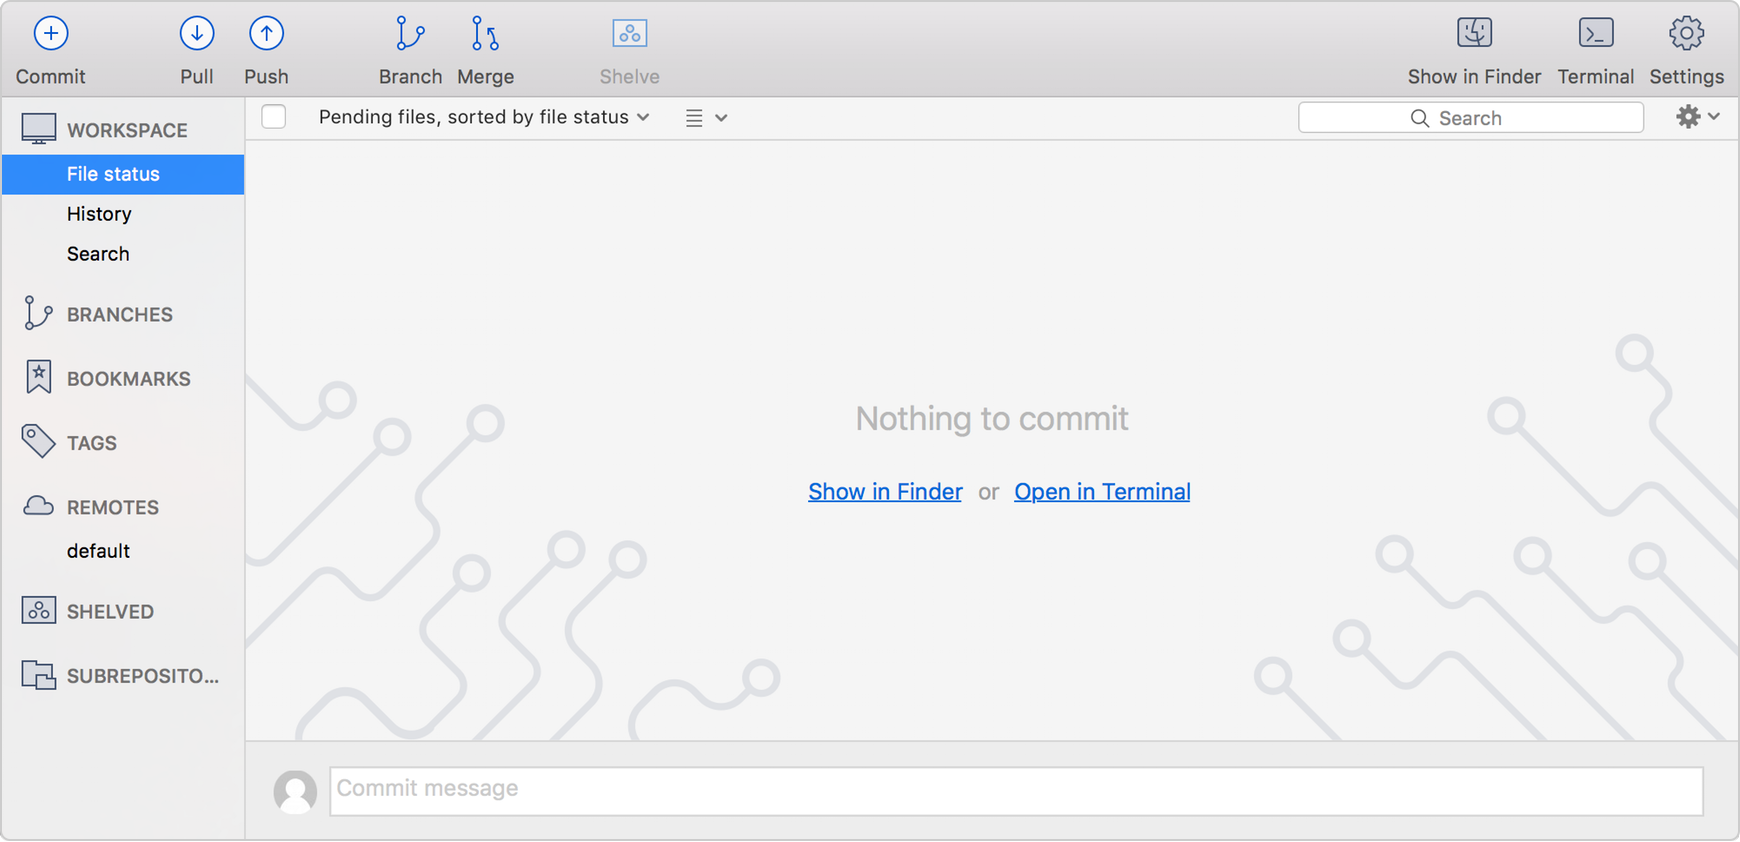
Double-click the bitbucketstationsupplies repository in Sourcetree and notice that there is nothing to commit from your local repository to the remote repository.
-
Use a text editor to add the following three lines:
 space ice
 cream nerf
darts telescope light shield -
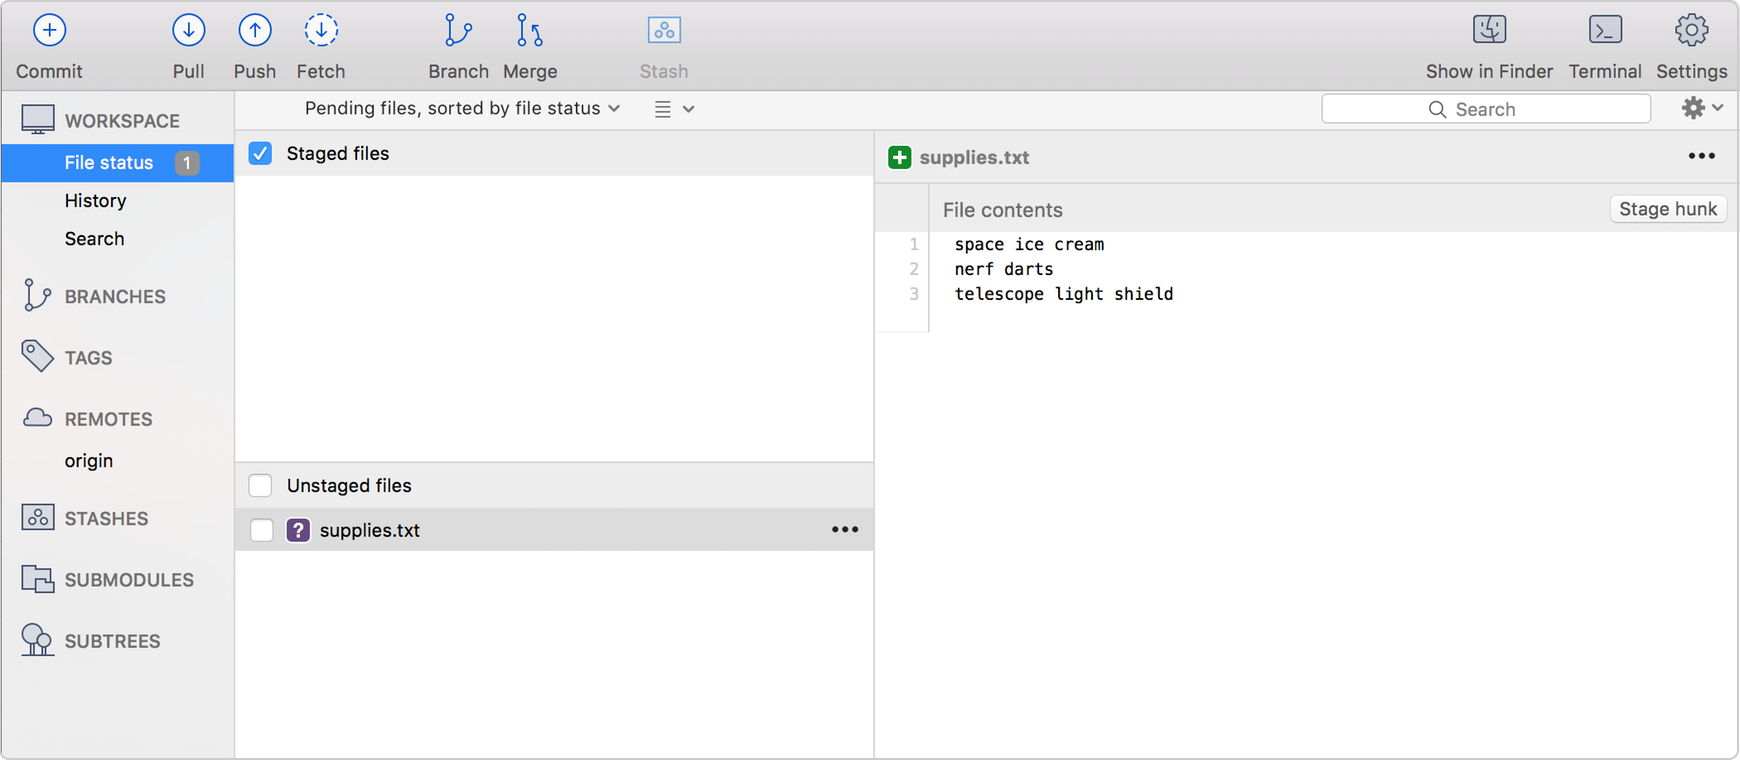
Save the file as supplies.txt to the bitbucketstationsupplies directory on your local system. The supplies.txt file now appears in Sourcetree since you created it in your local repository.
-
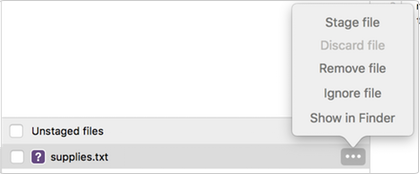
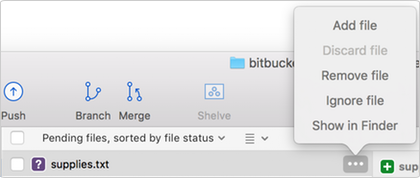
Now is the point where you prepare a snapshot of the changes before committing them to the official history. From the options menu of the supplies.txt file, select Stage file (for a Git repository) or Add file (for a Mercurial repository).
-
Click the Commit button at the top to commit the file. -
In the message box, enter "Initial commit. "

-
Click the Commit button under the box. Your new file is now committed to the project history.
Up until this point, everything you have done is on your local system and is invisible to your Bitbucket repository until you push those changes to your remote Bitbucket repository. -
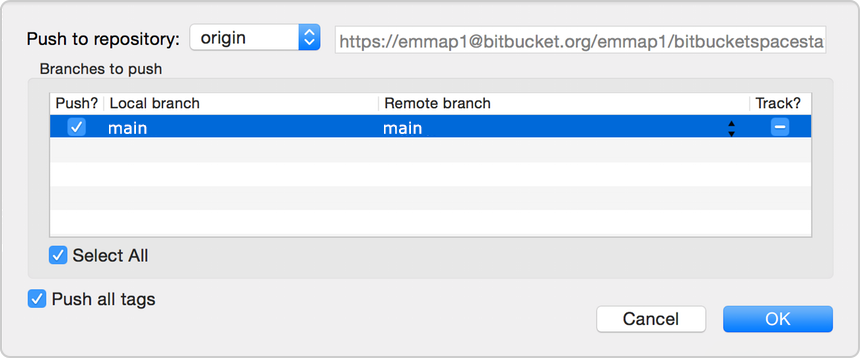
From Sourcetree, click the Push button to push your committed changes. Pushing lets you move one or more commits to another repository, which serves as a convenient way to publish contributions.

-
From the dialog box that appears, your next step depends on whether you are using Git or Mercurial: -
Git–Under the Push? column, select the main branch to indicate that you are pushing that branch to origin and click OK .
-
Mercurial–Everything is automatic, so all you have to do is click OK .
-
-
Go to your BitbucketStationSupplies repository in Bitbucket. -
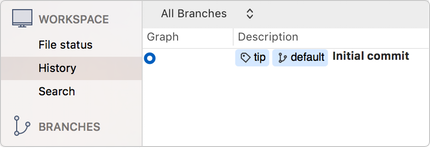
If you click Commits in the sidebar, you'll see your commit in the repository. Bitbucket combines all the things you just did into that commit and shows it to you. -
If you click Source in the sidebar, you'll see your file in the repository, the supplies.txt file you just added.
.gif?cdnVersion=1869)
-
Step 3: Pull changes from your repository
Step 1: Create a file in Bitbucket
-
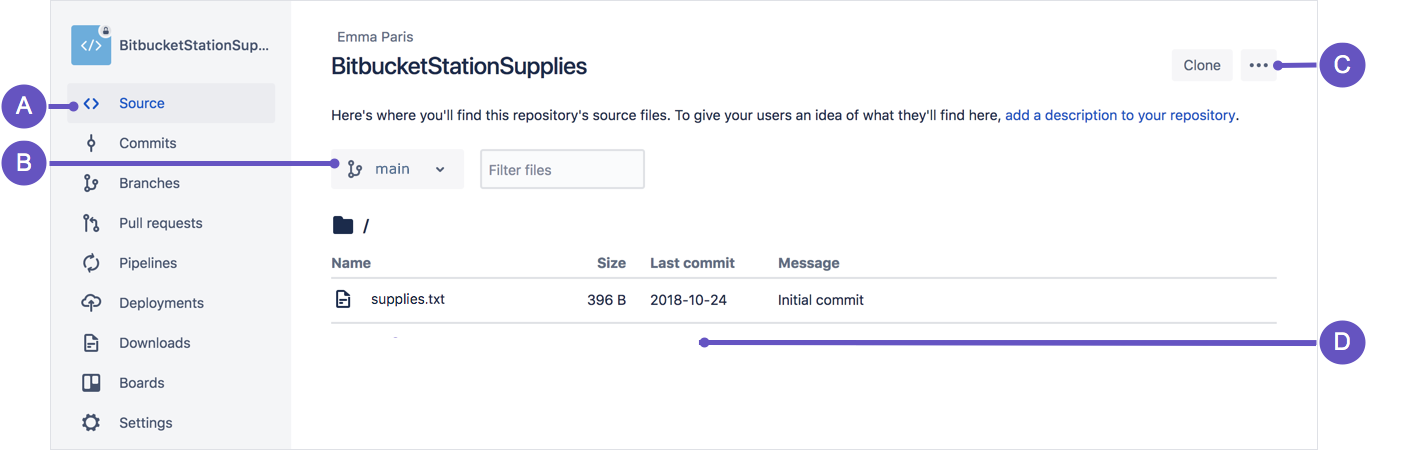
From your BitbucketStationSupplies in Bitbucket, click Source to open the source directory. Notice you only have one file, supplies.txt , in your directory.
-
A. Source page: Click the link to open this page. -
B. Branch selection: Pick the branch you want to view. -
C. More options button: Click to open a menu with more options, such as 'Add file'. -
D. Source file area: View the directory of files in Bitbucket.
-
-
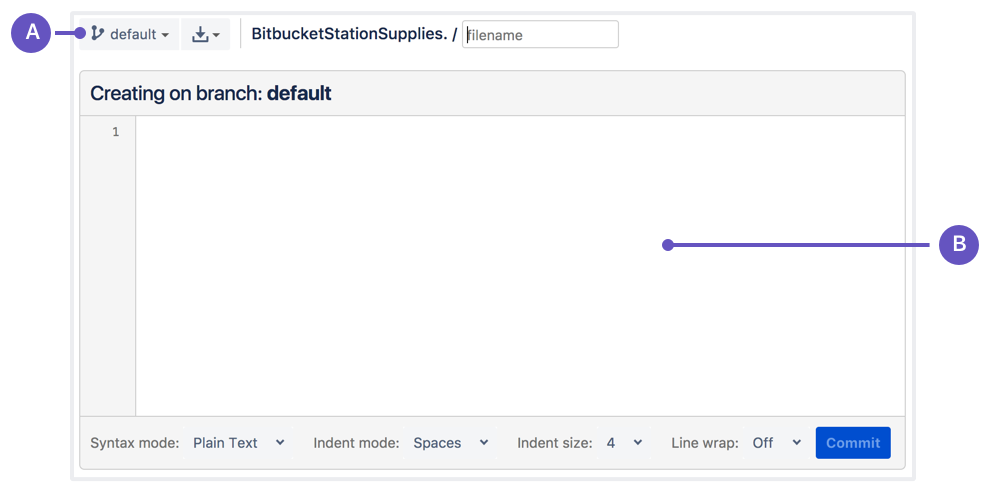
From the Source page, click the More options button in the top right corner and select Add file from the menu. The More options button only appears after you have added at least one file to the repository. A page for creating the new file opens, as shown in the following image.
-
A. Branch with new file: Change if you want to add file to a different branch. -
B. New file area: Add content for your new file here.
-
-
Enter supplyrequest in the filename field. -
Select HTML from the Syntax mode list. -
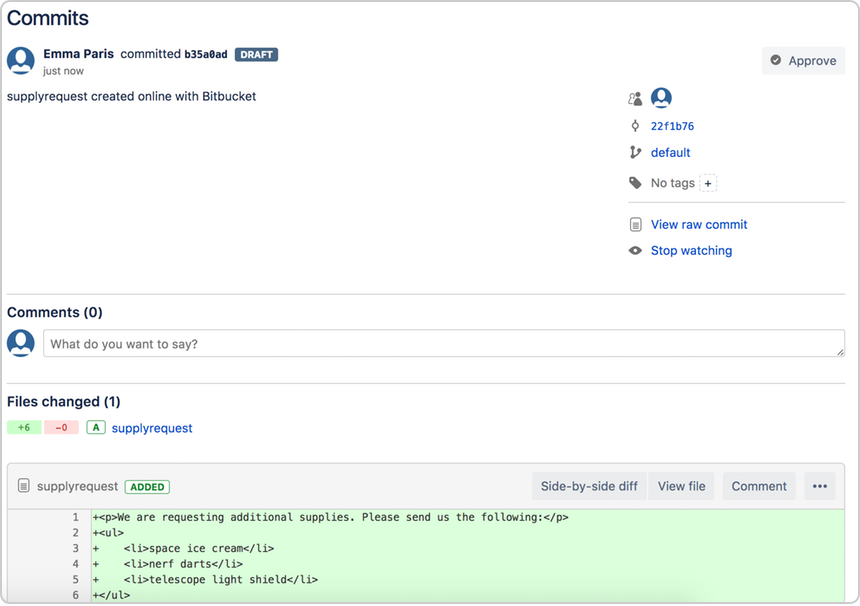
Add the following HTML code to the text area: We are requesting additional supplies. Please send us the following:
-
space ice cream -
nerf darts -
telescope light shield
-
-
Click Commit . The Commit message field appears with the message: supplyrequest created online with Bitbucket. -
Click Commit under the message field.
Step 2: Pull changes from a remote repository
-
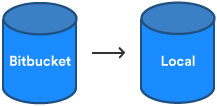
Open your repository in Sourcetree, and click the Pull button.

A popup appears to indicate that you are merging the file from Bitbucket to your local repository.
-
Click OK from this box. Sourcetree updates with a description of the merged file.
-
Navigate to your repository folder on your local system and you'll see the file you just added.
Step 4: Use Sourcetree branches to merge an update
Step 1: Create a branch and make a change
-
From Sourcetree, click the Branch button.

-
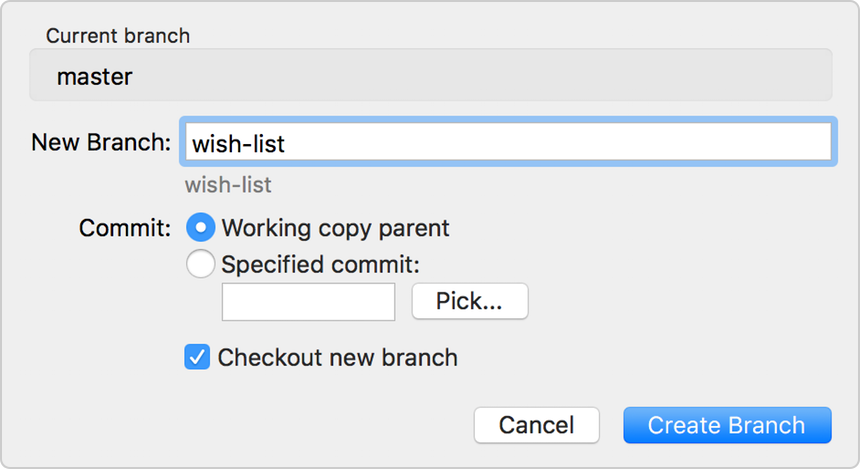
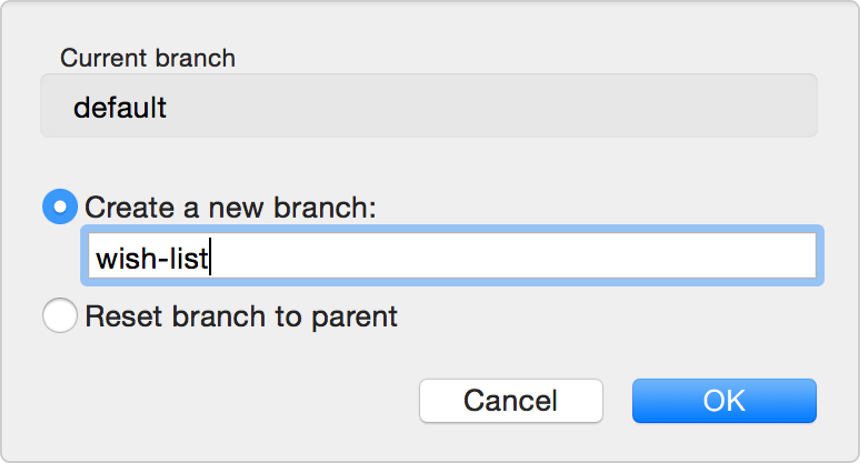
Depending on whether you have a Git or Mercurial repository, you see a different popup for creating a new branch. From the New Branch or Create a new branch field, enter wish-list for the name of your branch.
-
Click Create Branch or OK . -
From Sourcetree, click the Show in Finder button. The directory on your system opens. 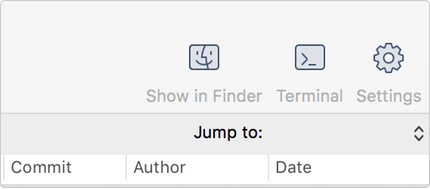
-
From the directory folder, open the supplyrequest file with a text editor. -
Making a change to the file by adding the following item to the list of supplies:
anti-gravity speakers -
Save the file. -
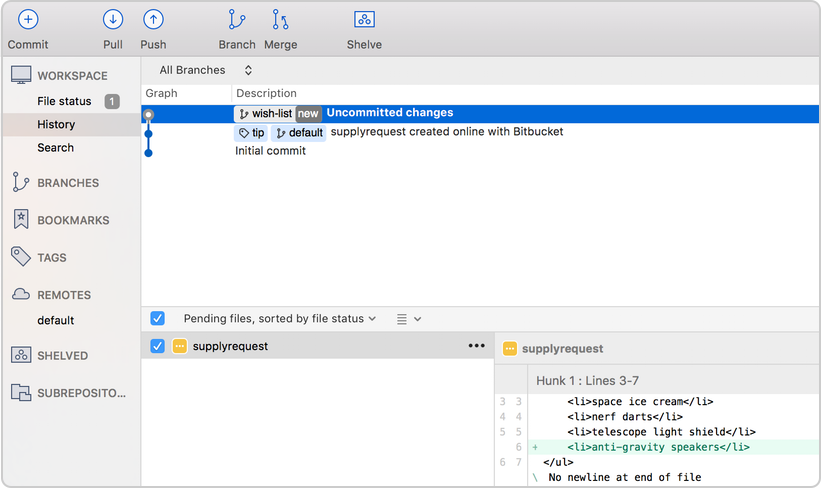
Open the view in Sourcetree and notice that your repository now has uncommitted changes.

From here, everything you do is the same as you did when you added the supplyrequest file and initially committed it. -
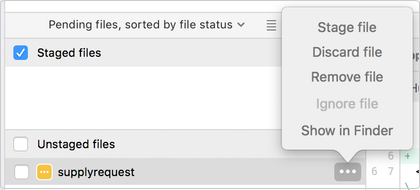
If you have a Git repository, make supplyrequest.txt ready to commit by selecting Stage file from the options menu.
-
Click the Commit button at the top to commit the file. -
In the message box, enter "Adding an item for my wish list. " -
Click the Commit button under the box. From Sourcetree, you see that the file has been updated on the wish-list branch.

Step 2: Merge file changes from a branch
-
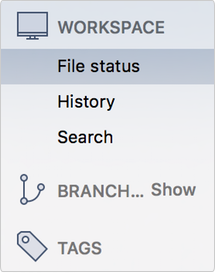
First, you want to switch back to the main branch. From the left-side menu items in Sourcetree, hover your mouse over the right side of the Branches label so that the word Show appears.
-
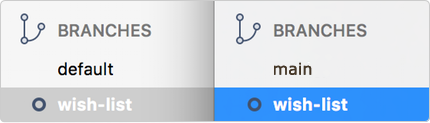
When Show appears, click it. Under the Branches heading, you will see the two branches for this repository, the main branch, and the wish-list branch. The main branch for a Git repository is called main . The main branch for a Mercurial repository is called default .
-
Double-click the feature branch (in this case wish-list ) to switch to that branch. -
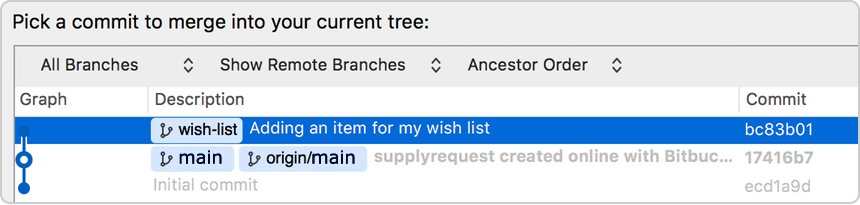
Click the Merge button.

-
From the popup that appears, make sure the commit on your wish-list branch is highlighted. You are indicating that you want to add the commit from this branch to the main branch.
-
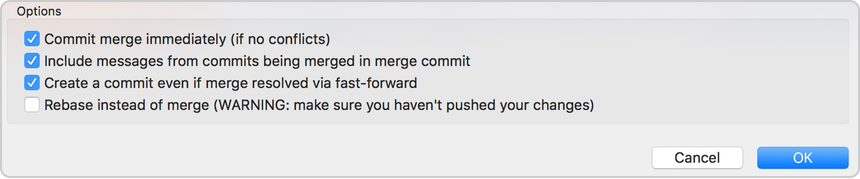
If you have a Git repository, check this option at the bottom: Create a commit even if merge resolved via fast-forward.
-
Click OK . You have updated the supplyrequest file in your main branch with your wish-list item. Sourcetree will look slightly different based on whether you have a Git or Mercurial repository.
-
If you have a Git repository, you are done. If you have a Mercurial repository, you will notice that you need to commit your changes. Click the Commit button at the top. The commit message defaults to a description with "Merge." Keep this message and go ahead and click Commit .
Step 3: Push your change to Bitbucket
-
From Sourcetree, click the Push button to push your committed changes. -
From the dialog box that appears, click the OK button to push changes to your local repository. -
Click the Overview page of your Bitbucket repository, and notice you can see your push in the Recent Activity stream. -
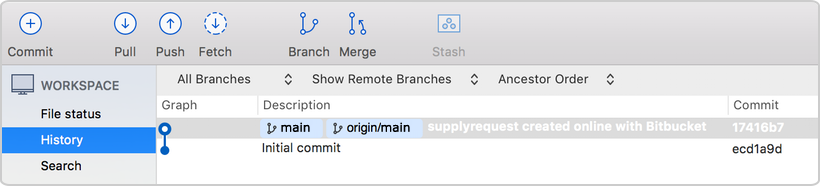
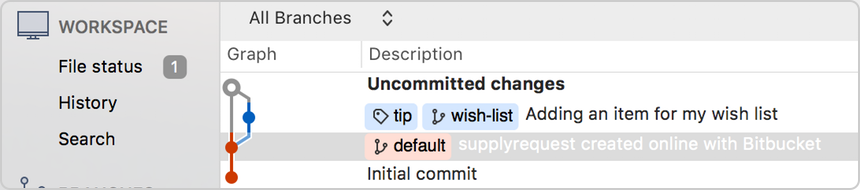
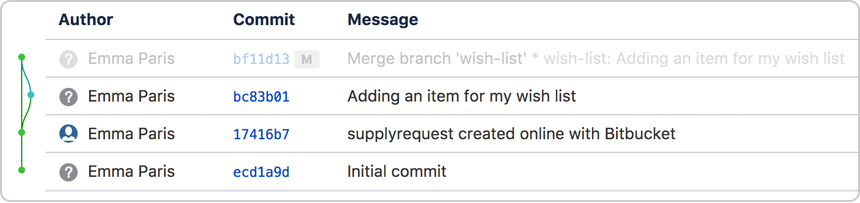
Click Commits and you can see the commit you made on your local system. Notice that the change keeps the same commit code that it had on your local system.
-
Click Source , then click the supplyrequest file. You can see the last change to the file has the commit code you just pushed. -
Click the file history list to see the committed changes for this file, as shown in the following image. 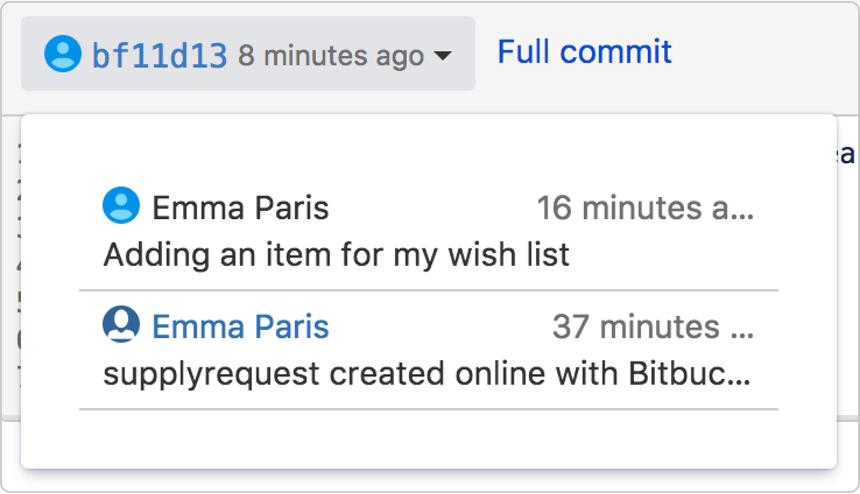
You are done!