The Comet Cache was suddenly found when we were struggling with the WordPress cache. Referring to the WordPress cache plug-in, we may see that WP Super Cache is used more frequently. The difference between the Comet Cache plug-in and the former is that it will directly store the cached files in the directory in the form of HTML. Compared with the PHP cache files generated by WP Super Cache, the effect will be better.Later, I searched the cache history of this company and found that its predecessor was the Zencache Wordpress cache plug-in. Later, it was renamed Comet Cache because of the company name conflict.
1: Installation
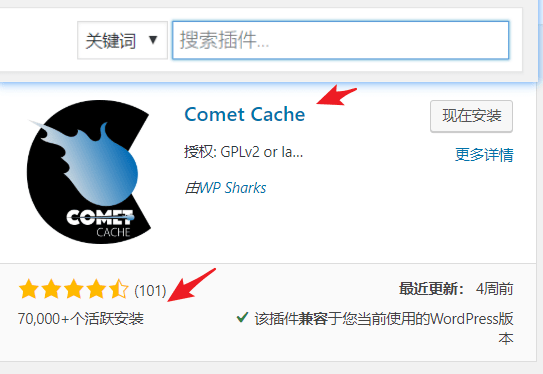
Many people search Comet Cache in the background, and update it frequently: Install and enable it.
After enabling, you will find the powerful Comet Cache function. The way to enable the cache is also very simple. Select "Yes, enable Comet Cache" on the direct plug-in settings page and save to open the cache. Of course, you will also see that there are more than N function options below. In fact, all of them are by default.Let's see the picture: We see that few plug-ins carefully consider the need to cache 404 pages, because if the 404 page of WordPress is CC, your server will basically hang up.Feed cache, you can set delayed output, and anti acquisition is very good.These functions are very considerate. I like this cache a little.However, we still choose according to our own circumstances.Then we can save the settings to enable the cache.
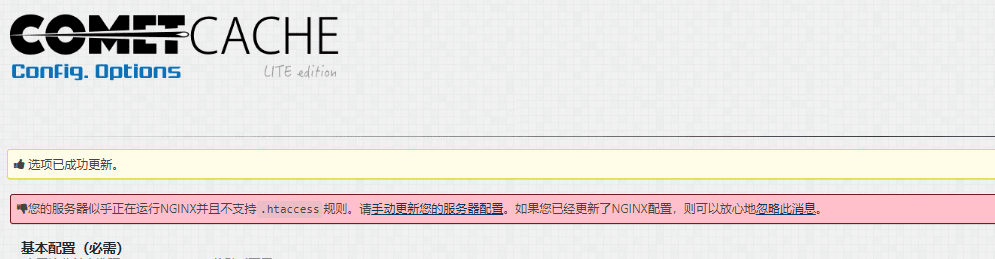
3: Configure Nignx
If your website uses NGINX, you will be prompted. You need to add the following cache script in the server {of the configuration file according to the official requirements. If not, you can skip it: So here comes the play. We need to configure nginx and put the following code:
server{
etag on;
expires 7d;
if_modified_since before;
gzip on;
gzip_vary on;
gzip_comp_levelsix;
gzip_types text/plain text/xml image/svg+xml# text/html in core already.
#The following code official description is optional, telling Comet Cache that you have completed the Nginx configuration.
location ~*\.php${
fastcgi_param WP_NGINX_CONFIG done;
}
}
For the configuration in the pagoda panel, we need to configure the nginx file. See the figure for how to configure it: There are many places that can be adjusted by themselves. It doesn't matter if you default, for example, gzip on;gzip_vary on;The pagodas here are all opened by default, and other things can be adjusted by themselves. In fact, it doesn't matter that the pagodas are opened by default, but they can be used anyway.
4: Test effect
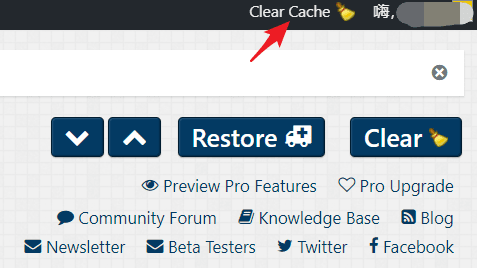
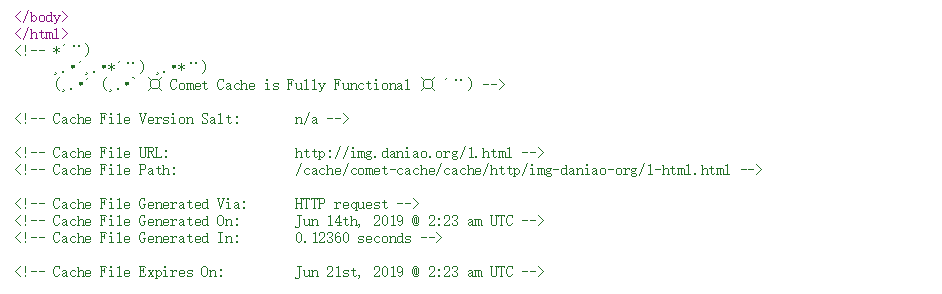
After configuring nginx, we can ignore the prompt. After modifying the configuration file, save it and click Clear CaChe in the upper right corner of WordPress. Now test whether Comet Cache is really enabled: open the browser traceless browsing window, visit your website, check the source code, and pull it to the bottom.If you see the following code, Comet Cache is already working!Let's look at the picture: It works brilliantly and has been tested. If you do not configure nginx, it can also be used. It will also generate static HTML files, which may be less efficient. Therefore, the compatibility of this plug-in is very good.
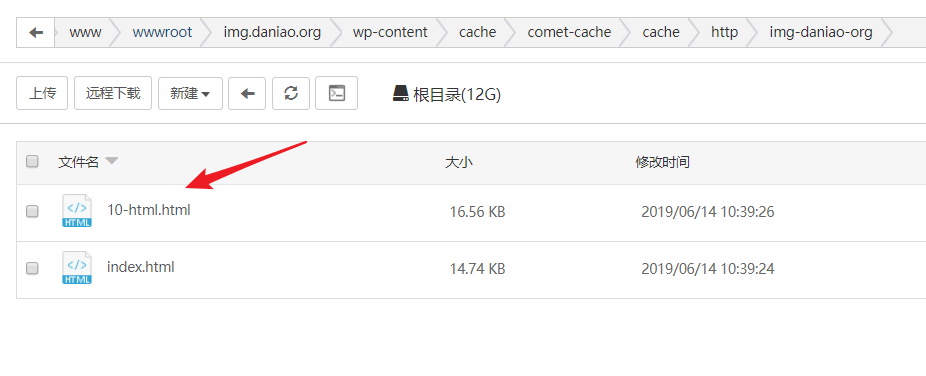
5: Static HTML
It's said that pure static HTML can be generated. Where do we look on the server The default is not to automatically generate HTML files. When we visit a web page, HTML will be automatically generated.Later visits will call purely static HTML pages.
6: Summary
All pages will generate static HTML, and the next classification will also generate HTML. This is very powerful. The server only accesses static pages, so it is highly efficient.Moreover, the threshold of this trouble seems to be very low. Many white people can get started quickly, and virtual machines should also be able to be installed, but they haven't tried.
Comet Cache – WordPress static cache plug-in for generating HTML
459 people have bought
The download price of this resource istwoelementBuy Now(VIP free)upgrade now
Professionally provide WordPress theme installation, in-depth localization, accelerated optimization and other website construction services. Please consult online customer service for details!