AirPods is very familiar to everyone and is often used in life. However, if you want to use it on a computer, some people may not know how to link and are not very familiar with the device. So today, let's introduce whether Airpods can connect to Windows computers? How does Airpods link to Win11? Let's have a look.
Can airpods connect to windows computers
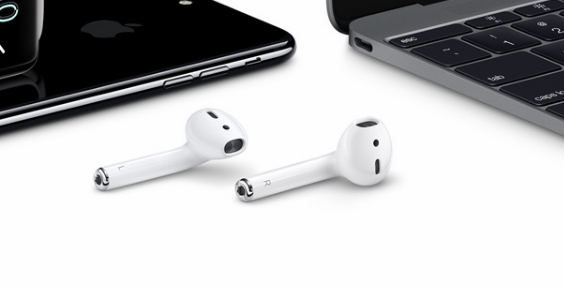
Airpods can be connected to a Windows computer to make it in pairing mode. It can be connected on the Bluetooth interface of a Windows computer. It can also be used with Android devices or other Bluetooth devices.
If you are using AirPods (2nd generation), please ensure that your Mac is installed with macOS Mojave 10.14.4 or higher. AirPods Pro requires macOS Catalina 10.15.1 or higher. AirPods (3rd generation) requires macOS Monterey or higher. If you have set up AirPods to work with iPhone, and your Mac has signed in to iCloud with the same Apple ID, your AirPods may already work with your Mac. Place AirPods in your ear, and then click the Bluetooth menu or volume control in the Mac menu bar. Then, select AirPods from the list. AirPods can be used as Bluetooth headsets with non Apple devices. You can't use Siri, but you can use the listening and speaking function. Set AirPods to be used with Android phones or other non Apple devices.
What if Win11 cannot connect to Airpods
1. Manually connect Airpods again
Before we start repairing, we recommend that you read more about how to reconnect Airpods to Windows 11 after pairing. You may have noticed that Airpods can now be effectively reconnected to Windows 11 when the chassis is opened, but this is only before you connect Airpods to another device. After connection, Airpods will no longer connect to your Windows 11 device even if you open the chassis and try to connect manually.
The trick here is that you need to enter pairing mode on Airpods, and then click "Connect" in the "Settings" application. With the cover open, press and hold the Setup button on the back of the Airpods until you see a flashing white light. This means that you have entered pairing mode and you can now click Connect on your PC.
When reconnecting, you do not have to remove and pair Airpods on your PC every time, but you must enter pairing mode on Airpods to reconnect. In addition, if you do not connect Airpods to other devices, you can enjoy automatic connection by simply opening Bluetooth on your PC and opening the Airpods cover.
2. Re pair your Airpods
To re pair your Airpods, please make sure that you have restarted your PC and that Bluetooth on your PC is turned on. Now open the cover of the Airpods housing and press the "Set" button on the back until the indicator light starts flashing "white". This means that you have entered pairing mode on Airpods, and you can now pair them with your PC using the guide below.
Press the Windows+i keyboard and click Bluetooth and Devices on the left.
Click "Add Device" at the top.
Now click "Bluetooth".
Once they appear in the list, click Airpods.
Click Finish when the pairing process is complete.
Your headset should now pair automatically. If everything is normal, you should now be able to use Airpods on a Windows 11 PC without any problems.
3. Ensure that the correct output and input devices are selected
When you connect AirPods to your PC, let's make sure you select the correct output and input device in Windows 11. This is a simple check, but if you use multiple Bluetooth and audio output devices in the system, this may be a problem for you.
Press the Windows+i keyboard and click Sounds on the right.
Now click and select Headphones under Output.
Similarly, if you have multiple input devices connected to the system, select Airpods under the Input section. If not, Airpods microphone should be selected by default.
Now launch the Start menu, search for Control Panel and launch it from the search results.
Click the drop-down menu in the upper right corner, and then select Large Icon.
Now click "Sound".
Click and choose Airpods, and then click Set Defaults at the bottom of the window.
Switch to the Recording tab at the top by clicking the same.
Select AirPods again, and then click Set Defaults.
Click OK to close the window.
If Airpods is your default device in all these places, you have passed this check and continue to read the guide. However, if Airpods is not selected as the default device, we recommend that you perform the same operation and try to use your Airpods before continuing with the guide.
4. Make sure Airpods appear in the device and printer
Despite Microsoft's efforts, devices and printers are still settings pages for some reason. You can manage all connected devices correctly without any problems. A common problem affecting BT devices in Windows 11 is that the device will appear connected in the Settings application, but not available on the Devices and Printers page. Restarting usually solves this problem, but if your Airpods cannot be displayed indefinitely, you may encounter driver or pairing problems. We recommend that you use the following guidelines to check Airpods.
Launch the Start menu, search the Control Panel, and launch it from the search results.
Click the drop-down menu in the upper right corner of the screen, and then select Large Icon.
Now click Devices and Printers in the list.
Check the Airpods in this list, if found, click and select the same and press Alt+Enter keyboard.
Now switch to the Hardware tab and check for any conflicting drivers. You should see a "?" or danger sign next to each conflicting driver.
If you find any such problems, you must completely delete Airpods from the system and re pair your device.
However, if Airpods does not display any driver conflicts, you can use other fixes in this list to solve your problem. However, we recommend that you try pairing again, as it is well known that it can fix most connection problems on Windows 11.
5. Delete Hidden Entries
We now recommend that you delete all hidden Airpods entries from the Device Manager. This is a known problem in Windows 10 and still seems to exist in Windows 11. Deleting hidden entries should help your operating system default to correctly installed devices, which should help you recover everything and run on the system again. Use the guide below to get you started.
Press the Windows+X keyboard and select Device Manager.
Now click "View" at the top.
Select Show Hidden Devices.
Double click and expand your Bluetooth adapter. In our example, it is simply displayed as "Bluetooth". If you find any gray entries related to Airpods, right-click it.
Click Uninstall Device.
Click again to confirm your selection.
The selected device will now be uninstalled from your system. Repeat the above steps to remove any other grayed out devices related to Airpods from your PC.
As a precaution, look for other Bluetooth devices and adapters on your PC, especially when you use an external Bluetooth adapter. If you find any Airpods related devices installed on your PC, please repeat the above steps.
After deletion, restart the system for good results. You can now try to use/reconnect Airpods again. They should work properly without any problems.
The above information is about the relevant content of airpods, which can be linked to computers. It is also convenient for people. They don't know how to connect it. Please refer to the above method.