This article was published on, the content may be different from the actual situation.If there are errors in the article, please correct them. I will modify or hide the article according to the situation
Since I have only recently become a Mac user, my main password manager on Windows was Enpass.However, the UI on the Mac is somewhat backward, and there are cases of automatic exit after screen shutdown and forced entry of the master password after exit/restart. Therefore, I want to change a password manager.
Note: All experiences in this post are based on Elpass version 1.5.5 (482)
Updated on 3/11: After changing the pkg package version of Enpass, it seems that there is no situation where sleep is automatically killed in the background I don't know whether the AppStore version has also been restored. I'm too lazy to try it again Although the website version cannot be synchronized with iCloud, it can also be synchronized with OneDrive
3/4 Update: Since I have been talking about disadvantages before, here are some advantages of Elpass:
1. Designed for macOS, it is more in line with the style of Mac than the cross platform Enpass
2. Support automatic unlocking when starting up, without entering the master password every time
3. The filling assistant is very convenient. You don't need to copy and paste passwords in some applications that can't be associated
I have taken the following measures to improve the unaccustomed places:
1. Turn off the automatic filling of passwords beyond the convenience level. Instead, right click the password box to call the plug-in to fill in the password, and move the credentials to the convenience level as appropriate to turn on automatic filling
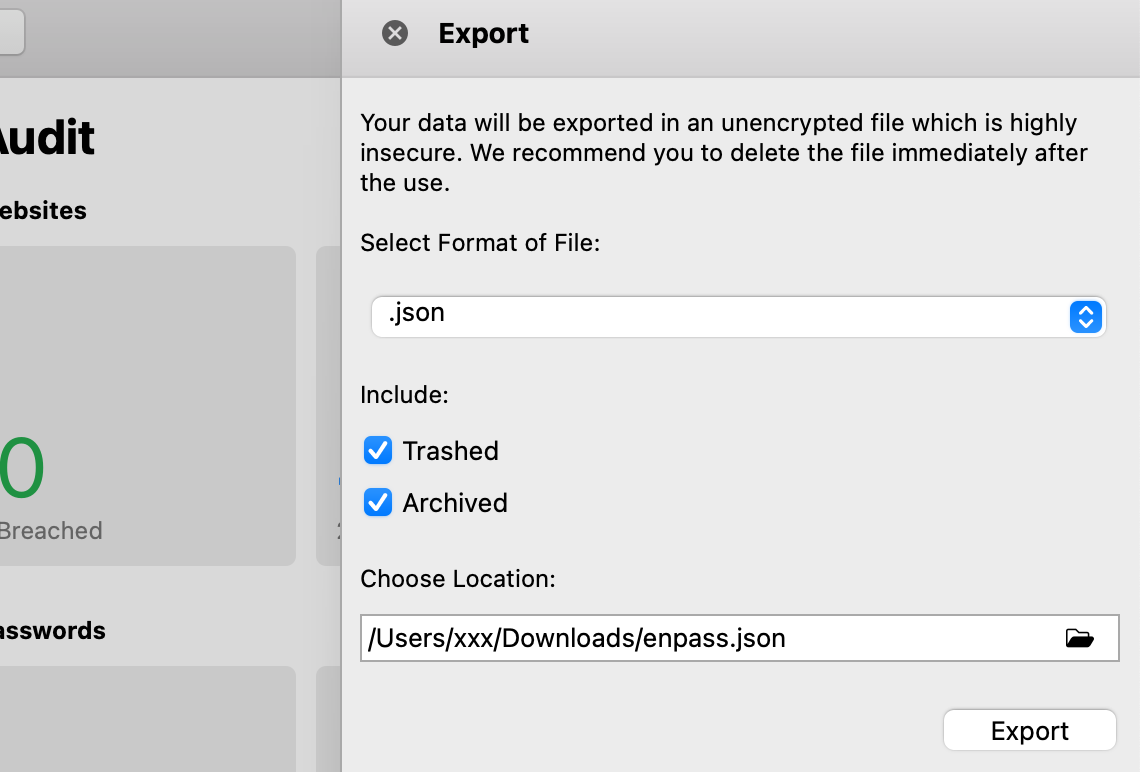
2. Export the password database and use the script to remove the "www." in front of all domain names to improve the matching
3/2 update: Since I have been used to the operation logic of Enpass, I am not very accustomed to the following points so far after the switch:
1. Only the domain name can be used, and the URL cannot be saved, so you cannot directly access the login page by double clicking the login credentials
2. It is convenient to automatically fill in the user name and password when there is only one credential in the same site, but for the scenario where the same site has multiple accounts, you need to manually call out the plug-in to select the desired credentials, adding unnecessary operations (Encass will not automatically fill in the password, but will automatically pop up the selection list when the password bar becomes the focus)
3. Same as above, the saved user name and password are automatically filled in the password box on the website, which causes unnecessary trouble
4. For some sites with user names and passwords in two pages (such as AWS, which even adds a page of verification code between user names and passwords), the adaptation is poor
5. The domain name does not support fuzzy matching (such as listing all credentials under example.com when visiting a.example.com), and the domain name in the credentials needs to be manually modified when multiple secondary domain names share accounts
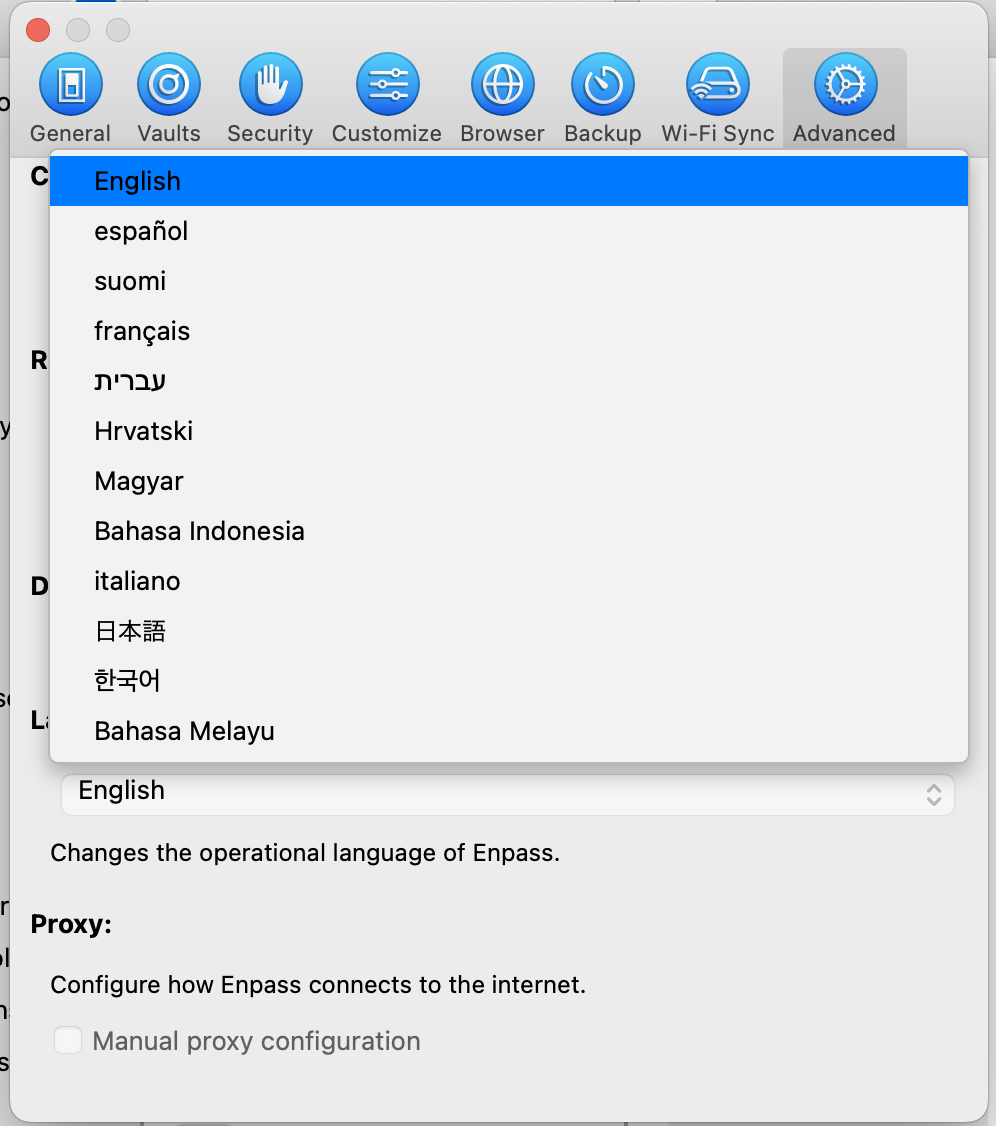
6. The program display language cannot be modified (the same is true for Surge Mac). When using the Japanese system, the interface is forced to become complicated(Update: application language can be specified in system settings)
7. After the site domain name is changed, manually search the old domain name in the list and double click to fill in the password. The new domain name cannot be automatically added to the domain name list
At present, there are 4 days left in the trial period. I will try my best to adapt to Elpass operation during this period, and decide whether to switch to Elpass before the end of the trial period
3/1 update: After a lot of trouble, I found that elpass's own export file elpassexport is in json format... It's easy to do
<script>Var data=JSON.parse ('json exported by enpass is placed here ');var res = [];var urlexp = /^https?:\/\/(.+?)(\/.*)?$/data.items.forEach((login) => {if(login.template_type != 'login.default'){return}let ret = {_type:"login",noAutoFillOTP:false,noAutoFill:false,archived:false,favIdx:0,customFields:[],securityLevel:0,createdAt:login.createdAt,domains:[],title:login.title}for(let num in login.fields){if(login.fields[num].value){switch(login.fields[num].type){case 'username':ret.username = login.fields[num].valuebreak;case 'password':ret.password = login.fields[num].valuebreak;case 'totp':if(login.fields[num].value.indexOf('otpauth://') !== -1){ret.otpURL = login.fields[num].value;}else{ret.otpURL = `otpauth://totp/enpass?secret=${login.fields[num].value}`}break;case 'url':let url = login.fields[num].valuelet urlmatch = url.match(urlexp)let domain = (urlmatch instanceof Object&&1 in urlmatch)?urlmatch[1]:urlret.domains.push(domain)break;default:ret.customFields.push({title:login.fields[num].label,value:login.fields[num].value,sensitive:false})}}}res.push(ret)});document.write('<textarea>')document.write(JSON.stringify(res))document.write('</textarea>')</script>
Then directly save it as html. Double click the generated json in the textarea
===================
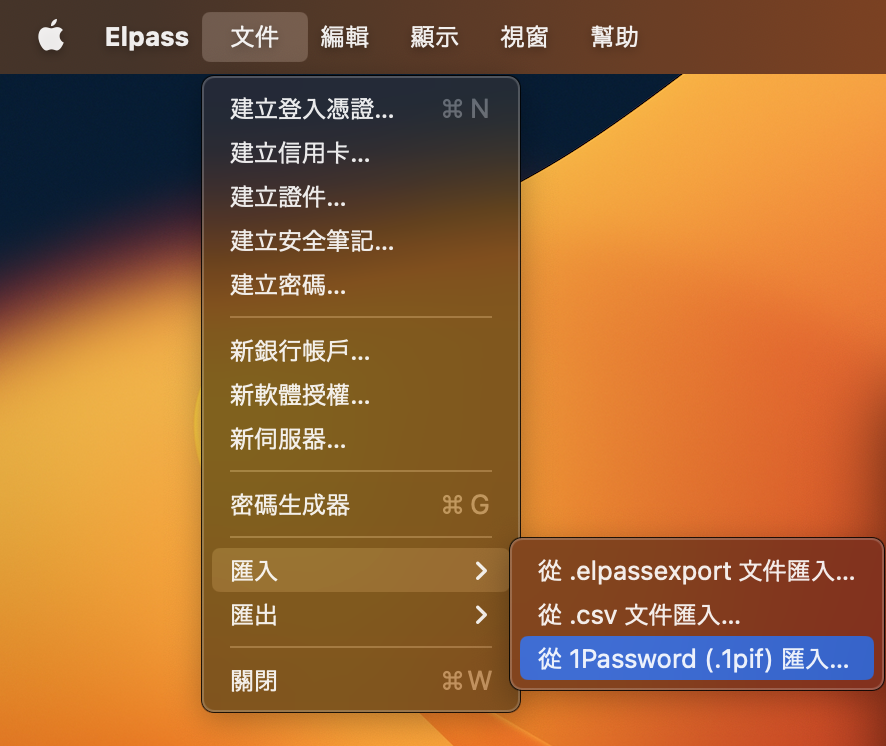
The following is the original text: However, the CSV import method of Elpass does not support the fields of TOTP (only the title, user name, password, URL and domain name), so you can only start from another 1Password format.The specific steps are as follows:
1. Change English to English and restart the app
2. Export the Enpass password library as a JSON file
3. Download "MrC's Convert to 1Password Utility (mrc converter suite)"(Portal)
4. Modify the Enpass parsing code The first three steps are basically OK, but they are stuck here. The exported 1pif file is imported into Elpass, and all TOTPs become text labels Later, I opened Perl and found that the label of json was inconsistent with the script. I don't know whether enpass was updated or the script was incomplete Extract mrc converter suite to the desktop and open Converters/Enpass.pm Find the login part of line 401, and modify it as follows Before modification: