Run laradock through d4m nfs to bid farewell to the tortoise speed virtual machine


LaraDock can help you Docker Fast construction Laravel Application.  
Just like Laravel Homestead, but Docker replaced Vagrant.

introduce

You can see the official Laradock_README.md The usage method is very simple, so we no longer need to use Vagrant.

characteristic

  • The PHP version: 7.0, 5.6.5.5... can be simply switched.
  • You can choose your favorite database engine, such as MySQL, Postgres, MariaDB...
  • You can run your own software portfolio, such as Memcached, HHVM, Beanstalkd
  • All software runs in different containers, such as PHP-FPM, NGINX, PHP-CLI
  • Through simple writing dockerfile Easy to customize any container.
  • All images are inherited from an official base images
  • The Nginx environment of Laravel can be preconfigured
  • Easy to apply the configuration in the container
  • Clean and structured Docker configuration file( dockerfile
  • The latest Docker Compose version( docker-compose
  • All are visual and editable
  • Fast image building
  • There will be updates every week

Through Laradock, we can easily set up the development environment, customize the requirements of our own environment, and share them, for example, the configuration environment of nginx. If the team develops Laradock, it will help us save a lot of work in setting up the environment, and ensure that everyone's environment is the same.

Docker

Docker It is an open source project and a container for automated deployment of application software. It provides an additional abstraction layer and automated Operating system level virtualization For this part, please go to Durian and Google and copy the official profile here.

start

install

1 - Clone LaraDock Warehouse:

A) If you already have a Larravel project, clone the warehouse to Laravel root directory

 git submodule add  https://github.com/LaraDock/laradock.git

If you are not using Git to manage the Larravel project, you can use git clone Instead of git submodule

B) If you don't have a Laravel project, you want Docker to install Laravel and clone the source anywhere on your machine:

 git clone  https://github.com/LaraDock/laradock.git

Here I suggest using method B to install globally

use (Here the mac is used as an example)

The official document states that if you are using Docker Toolbox (VM) The instance created based on VitrulBox is recommended to be updated to Docker Native

1 - Operating container: (Before running the docker compose command, make sure you are in the laradock directory

example: Run NGINX and MySQL:

 docker-compose up -d  nginx mysql

You can select your own container combination from the following list:

nginx hhvm php-fpm mysql redis postgres mariadb neo4j mongo apache2 caddy memcached beanstalkd beanstalkd-console workspace .

explain workspace And php-fpm Will run in most instances, so you do not need to up Add them to the command

2 - Enter the Workspace container and execute commands such as (Artisan, Composer, PHPUnit, Gulp,...)

 docker-compose exec workspace bash

Increase --user=laradock (e.g docker-compose exec --user=laradock workspace bash )Files created as users of your host (You can choose from docker-compose.yml Modify the PUID (User id) and PGID (group id) values

3 - Edit the configuration of Laravel

If you haven't installed the Larravel project, please check How to Install Laravel in a Docker Container .

Open Larave's .env File and configure your mysql Of DB_HOST :

 DB_HOST=mysql

Note that when defining DB_HOST, it must be written as MySQL, otherwise it cannot be linked to the container

4 - Open the browser to access localhost( http://localhost/ ).

It is recommended to modify the host file

 127.0.0.1 www.youresite.com

For the details of Laradock's use tutorial, please refer to the official documents. That's all. But when you are ready, you will find out why you run so slowly. I was also puzzled when I ran for the first time. Later, after consulting many materials on Google, I found that the workspace attached to Laradock was in the built-in soft virtual machine of Docker, which was embarrassing, Fortunately, there is a solution. Let's introduce [d4m nfs]( https://github.com/IFSight/d4m-nfs )

D4m-nfs

D4m nfs is an extension of Docker, through which the Docker's file sharing Mount to local. Because I use a mac, I only introduce the method of mounting the mac here

step 1

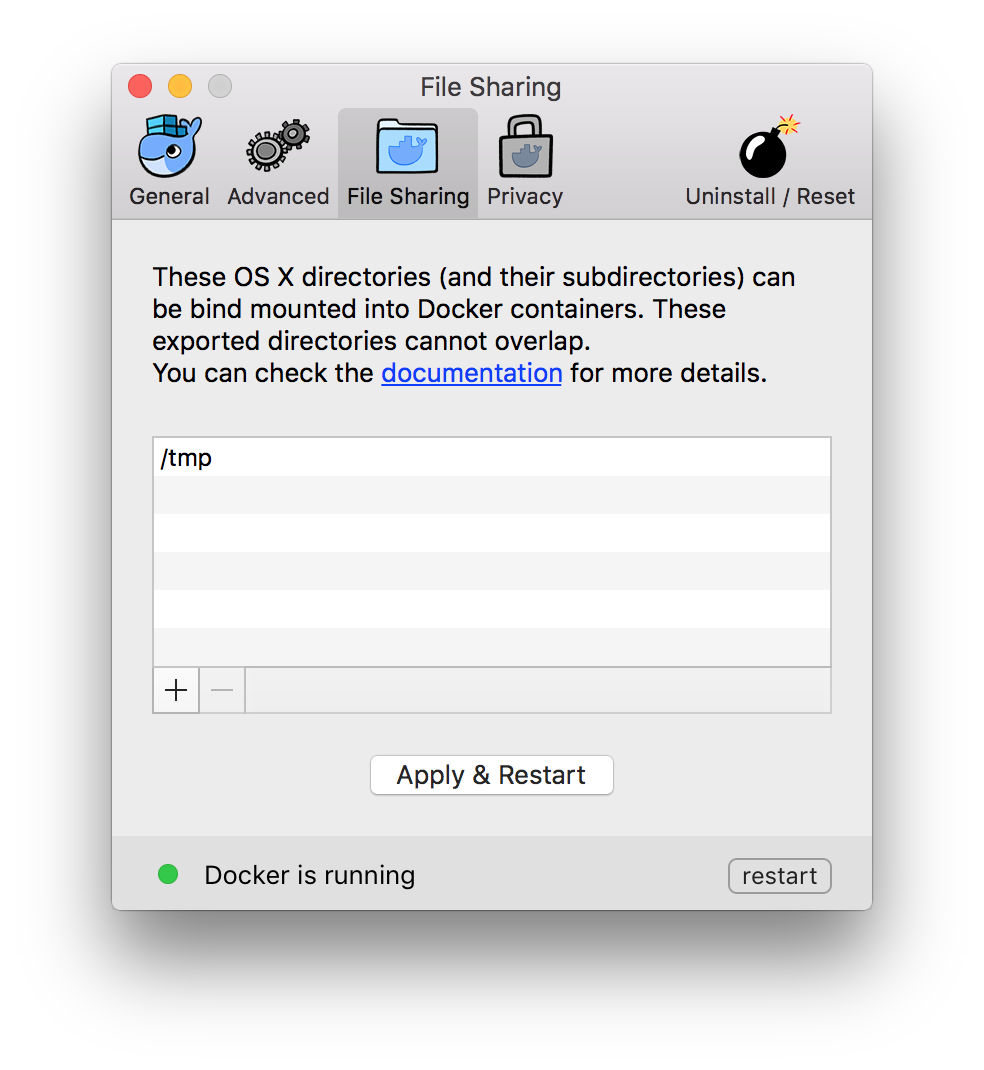
stay Docker Open in Preferences , click File Sharing Delete all other directories and keep them /tmp catalog

 Alt text

step 2

Clone d4m nfs to ~ Contents

 git clone  https://github.com/IFSight/d4m-nfs  ~/d4m-nfs

step 3

Modify after cloning the project ~/d4m-nfs/etc/d4m-nfs-mounts.txt File. If the file does not exist, create one manually

 //Add the following mount directory to the document /Users:/Users /Volumes:/Volumes /private:/private

step 4

Check system files  /etc/exports Whether there is content under, edit the file to empty all contents

 Cat/etc/exports//View/etc/exports # d4m-nfs exports "/Users" -alldirs -mapall=0:0 localhost "/Volumes" -alldirs -mapall=0:0 localhost "/private" -alldirs -mapall=0:0 localhost

step 5

stay ~ Run script in directory

 ~/d4m-nfs/d4m-nfs.sh

After the script runs, the program starts to initialize. At last, the terminal will show the following

 .... Please note: * To connect to the D4M moby linux VM use: screen -r d4m * To disconnect from the D4M moby linux VM tty screen session use Ctrl-a d. * To run d4m-nfs faster and/or offline,  leave the files in d4m-apk-cache and the hello-world image. * If you switch between D4M stable and beta,  you might need to remove files in d4m-apk-cache and the hello-world image. # Use Stable Docker for Mac channel Currently d4m-nfs is known to work on 'Docker version 1.12.3' and does not work on Docker for Mac beta (1.13).   Please use the stable channel of Docker for Mac  https://docs.docker.com/docker-for-mac/ # ionotify for Sublime users If you use Sublime, please checkout the plugin by Yves to help with auto reloads on file changes -  https://github.com/yvess/sublime_d4m

Enter the window of mounting directory through the command

 screen -r d4m

If you see the following mount items, the mount is successful

 192.168.65.1:/Users/Lavekin /mnt nfs nolock,local_lock=all 0 0 192.168.65.1:/Users /Users nfs nolock,local_lock=all 0 0 192.168.65.1:/Volumes /Volumes nfs nolock,local_lock=all 0 0 192.168.65.1:/private /private nfs nolock,local_lock=all 0 0

step 6

go back to laradock Run your container under the directory

 docker-compose up -d nginx redis mysql Creating network "laradock_default" with the default driver Creating laradock_redis_1 Creating laradock_applications_1 Creating laradock_mysql_1 Creating laradock_workspace_1 Creating laradock_php-fpm_1 Creating laradock_nginx_1

See the above running log Congratulations on running the container and mounting it locally

reference material

laradock

d4m-nfs


give the thumbs-up Cancel Like Collection Cancel Collection

<<Previous: Finally! Blog system developed by combining Laravel 5.3+vue 2.1 components

>>Next: Create a wheel: the next generation PHP development framework based on Larravel (API+SPA single page application)