How to create an Android development project

Latest answers Change
Q: What is the position of BOE OM
What is a photo book 2020-06-16
How to design attractive leaflets 2020-07-19
What plus what equals and 2020-06-18
How to set up the sequence of SLR 2019-11-29
Related recommendations

Does Chinese wolfberry fade with cold water
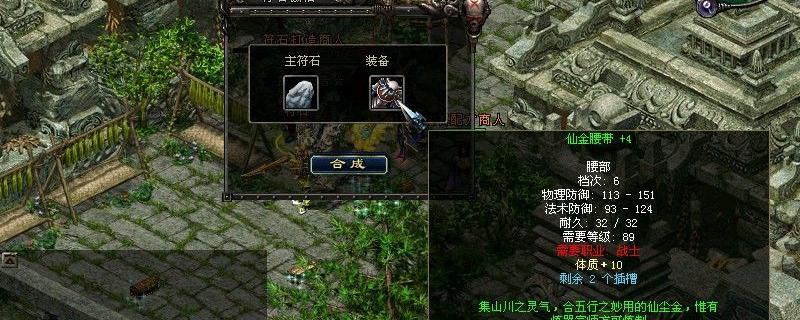
How to obtain world rune stone

Where to find the qq invitation code

Beef ribs

Basic knowledge of focus of ellipse

What kind of goldfish belong to in animals

What's the matter with acne on eyebrows

Do you need fans for SSDs

How many points should a strong country achieve

500m walk for a few minutes

Where is the heroic moment of the Palm Alliance

What are the great projects in ancient China

How normal is the armpit temperature of adult infants