Inherited blog https://blog.shi.wiki/ zh-CN You can directly copy and paste the Linux application installation to keep the blog content available. Wed, 17 Apr 2024 11:13:00 +0800 Wed, 17 Apr 2024 11:13:00 +0800 The server vps hard disk is full. What should I do if I can't find the occupied file https://blog.shi.wiki/archives/57.html https://blog.shi.wiki/archives/57.html Wed, 17 Apr 2024 11:13:00 +0800 Inheritance The server hard disk is full today, but I can't find which file is occupied. After asking the group leader, I found a solution


1. Let's enter the server root path first

 cd /

2. Then enter the following command to find the occupancy of each file under the root path

 du -ah --max-depth=1


3. Files with abnormal occupancy found ./.Recycle_bin , and then we delete him

 rm -rf ./.Recycle_bin

4. After that, our space returned to normal

]]>
one https://blog.shi.wiki/archives/57.html#comments https://blog.shi.wiki/feed/
How to use bitwarden as a second level verification tool https://blog.shi.wiki/archives/56.html https://blog.shi.wiki/archives/56.html Tue, 16 Apr 2024 23:47:00 +0800 Inheritance It has always been said that bitwarden can be used as a second level verifier, but I don't know how to use bitwarden for second level verification. Today I saw the settings of bitwarden and found out how to use it

1. Open the second level verification page of the website we need to set

2. We use the browser plug-in of bitwarden or the mobile client to scan the QR code. ps: If the QR code scanning fails, you can directly copy the information of the second level authentication.


3. After we click Save, we open it again, and a verification code will appear. We fill in the verification code, save it again, and the second level verification will be set. The verification code that needs to be entered after login is the verification code at this location, which changes every 30 seconds.

]]>
one https://blog.shi.wiki/archives/56.html#comments https://blog.shi.wiki/feed/
Computer version WeChat multi opening tutorial https://blog.shi.wiki/archives/53.html https://blog.shi.wiki/archives/53.html Sun, 07 Apr 2024 09:50:00 +0800 Inheritance 1. View WeChat Path
1.1 Right click the WeChat icon and click the property page


1.2 Click the shortcut to copy the content in the shortcut page and the target location. The content we copied is the path of WeChat

 "C:\Program Files (x86)\Tencent\WeChat\WeChat.exe"

2. Create WeChat multi opening initiator
2.1 Create a new text document with the following contents: "C:\Program Files (x86)\Tencent\WeChat\WeChat.exe" And replace it with the WeChat path copied in 1.2. Entering two lines is WeChat double opening, and entering three lines is WeChat triple opening. Enter the number of lines according to your needs, then save and rename it as WeChat Multi Open.bat Notice whether there is a prompt when changing the file name If you change the file extension, the file may become unavailable. If there is this prompt, we can confirm the change directly. So far, we have created WeChat multi starter. If there is no prompt just now, let's go to step 3.

 @echo off start "" "C:\Program Files (x86)\Tencent\WeChat\WeChat.exe" start "" "C:\Program Files (x86)\Tencent\WeChat\WeChat.exe" exit


2.2 What we just created WeChat Multi Open.bat A file is a WeChat multi opening initiator. Double click this file, and multiple WeChat will be opened automatically. Note that you should double click this file when you exit WeChat, otherwise it will be useless.

3. The file extension name is displayed (step is applicable to win10). If step 2 succeeds, this step does not need to be viewed.
Click a folder randomly (such as Recycle Bin, My Computer, Explorer, or other folders created by ourselves), and then we will enter the interface as shown in the figure below, click the view option at the top, and check the file extension name next to it. Then go to step 2.

]]>
two https://blog.shi.wiki/archives/53.html#comments https://blog.shi.wiki/feed/
Build a Linux command query website through docker https://blog.shi.wiki/archives/50.html https://blog.shi.wiki/archives/50.html Mon, 04 Mar 2024 10:48:00 +0800 Inheritance This is a understandable Linux command query website

1. Pull Docker

 docker pull wcjiang/linux-command

2. Deploy Docker

 docker run --name linux-command --rm -d -p 9665:3000 wcjiang/linux-command:latest

3. Reverse proxy, remove docker port number
[post cid="48" /]
4. Completion of construction
I built it. If you don't want to build it yourself, you can use it directly.
Linux command query website

Reference:
jaywcjlove/linux-command

]]>
one https://blog.shi.wiki/archives/50.html#comments https://blog.shi.wiki/feed/
How to add filing information for handhome topic https://blog.shi.wiki/archives/49.html https://blog.shi.wiki/archives/49.html Tue, 27 Feb 2024 15:25:00 +0800 Inheritance 1. Enter background management

2. Click the console, and then click Appearance

3. Click to set appearance

4. Click the developer settings, copy and paste the following code in the information on the left at the bottom of the blog, and change the Beijing ICP backup xxxxxxx number to its own record number

 <a href=" http://beian.miit.gov.cn/ " target="_blank" style="cursor: url(&quot; https://cdn.jsdelivr.net/gh/awslblog/HoerMouse @1.0.0/static/image/star/link.cur&quot;),  pointer; ">JingICP No. xxxxxxx</a>

5. Add Complete

]]>
zero https://blog.shi.wiki/archives/49.html#comments https://blog.shi.wiki/feed/
How to set reverse generation through the pagoda, remove the docker port number, and directly access the service through the secondary domain name https://blog.shi.wiki/archives/48.html https://blog.shi.wiki/archives/48.html Mon, 26 Feb 2024 10:10:00 +0800 Inheritance The way to access docker through ip+port number or domain name+port number is really not beautiful, but because there are many services in vps, it is impossible to directly give ports 80 and 443 to docker, so here we will remove the port through pagoda reverse generation, and directly access it through domain name or secondary domain name. This method can also be used to remove the port number of home NAS and NAS services, However, I don't know whether it is a dynamic IP problem or other reasons. After the settings are successful, they must be reset after a period of time, otherwise they will not be accessible. It is no problem to cancel the port number for the docker inside vps, This tutorial requires 1 vps and 1 domain name.

First, let's make a hypothesis. Let's assume that our domain name is xxx.com, our docker name is aaa, and our docker port is 3000

1. The purpose of creating a new website is to reverse the Docker to the new website

Because Docker is aaa and the domain name is xxx.com, we are going to create a new website called aaa.xxx.com. When creating a new website, php should be set to pure static. After building a new website, we remember to resolve the domain name aaa.xxx.com to our server. Domain name resolution will not be introduced here.

2. Then we open the new website and set the reverse generation

It's OK to name the reverse name casually, as long as you remember it, because we set the local docker, the port number is 3000, so our target url is http://127.0.0.1:3000 The sending domain name is automatically generated, and then it is defaulted in other places. After setting, it can be submitted.

If it is an anti generation NAS and NAS service, the target url will be filled with the DDNS domain name and terminal slogan. The sending domain name is also generated by default. If it is not generated, fill in your DDNS domain name.

Similarly, you can also reverse other websites. The target url is the domain name of other websites. The sending domain name is automatically generated, so you can directly enter your secondary domain name to visit other websites. For example, you do not have ipv6, and your server has ipv6, but you need to visit the website only to allow ipv6 access, so you can use your website to reverse that website, Use your website's ipv6 to access that website.


3. Set ssl, that is, https access (this step can be done or not)

It is recommended to use cf as verification to obtain ssl

 Fill in your information here

If we have our own certificate, we can directly copy the past certificate information
 Just copy it directly and save it
 The mandatory https can be clicked, but not. If clicked, the domain name is entered. The direct access is https. If there is an error, the mandatory https will be turned off

4. After the tutorial, we can directly enter aaa.xxx.com to access the docker.

]]>
zero https://blog.shi.wiki/archives/48.html#comments https://blog.shi.wiki/feed/
Linux Install the Lounge through Docker Tutorial - Configure IRC Online for 24 Hours IRC https://blog.shi.wiki/archives/47.html https://blog.shi.wiki/archives/47.html Sun, 04 Feb 2024 11:12:00 +0800 Inheritance The cloud is an irc chat client. We can configure the cloud on Linux and run it for 7 * 24 hours. Then, if we want to have water irc, we can directly connect to the web ui water irc of the cloud. Because the web ui is used for water irc, we can directly right-click the web page translation

Please refer to the tutorial if it is Qunhui system Qunhui the loose docker - configure IRC to be online for 24 hours
Please click Centos7/debian/linux installation Docker

1. Create a folder for the launch installation

 mkdir -p /home/docker/thelounge

2. Install the loose docker

 docker run -d \ --name thelounge \ -v /home/docker/thelounge:/config \ -p 9000:9000 \ -e PUID=1000 \ -e PGID=1000 \ -e TZ=Asia/Shanghai \ --restart=always \ linuxserver/thelounge

3. Change the cloud to private login mode

 vi /home/docker/thelounge/config.js


At this time, a document will be entered, and then press the keyboard i key to enter editing, and then public:true Change to public:false , click the Esc key on the keyboard after modification, and then enter :wq You will finish saving and exit the document interface.
Then enter the following command to restart the docker

 docker restart thelounge

4. Create the cloud user

 docker exec -it thelounge s6-setuidgid abc thelounge add shi

there shi It is our user name. We can set it according to our preferences, and then the command will appear. Let us set the password. We can set our own password, and then ask whether to write it to the disk. We can enter yes

At this point, our configuration is complete. Then we enter the docker to open our container. Then we enter the ip: 9000 ip+port in the browser, and we can successfully enter the webui. Then we log in to the user password we just created, and go in to configure our own irc. If you don't want to see the port number, you can solve the problem through the reverse generation of pagoda, However, it is not involved here.

]]>
zero https://blog.shi.wiki/archives/47.html#comments https://blog.shi.wiki/feed/
How to use teamspeak (ts3) tutorial https://blog.shi.wiki/archives/46.html https://blog.shi.wiki/archives/46.html Fri, 26 Jan 2024 12:04:00 +0800 Inheritance 1. Download client and Chinese package
click here Download the client, and then click here To download the localization package, install the client first, and then install the localization package after installing the client. The localization package can be installed directly by clicking Install without selecting a path. (The client and the Chinese language package are downloaded directly from the files on the Eudemon Palu server group)

2. Enter the client
After entering the client, we enter the voice server IP, then enter our nickname, click the link, and you can enter directly without entering a password


3. My ts server, the server name is inherited from the voice room without password. Welcome to use it

]]>
zero https://blog.shi.wiki/archives/46.html#comments https://blog.shi.wiki/feed/
Docker Creating Teamspeak (ts3) Tutorial https://blog.shi.wiki/archives/44.html https://blog.shi.wiki/archives/44.html Fri, 26 Jan 2024 00:01:00 +0800 Inheritance Teamspeak is a voice chat software similar to YY and kook, which is usually used for voice calls when the game is online.

1. Create ts3 folder

 mkdir -p /home/docker/teamspeak

2. Install ts3 through Docker

 docker run -d \ --name teamspeak \ -v /home/docker/teamspeak:/var/ts3server \ -p 9987:9987/udp \ -p 10011:10011 \ -p 30033:30033 \ -e TS3SERVER_LICENSE=accept \ --restart=always \ teamspeak


3. View ts3 account password and key
Enter the following command

 docker logs --tail=100 teamspeak

Remember the loginname password、apikey、token, It is better to save it to a document

4. Enter the client profile server
4.1 Click here Download the ts3 client and click here Download the client localization package
4.2 Then input the information as shown in the figure. The input content is the information obtained in step 3.


That's it

5. If you don't want to build your own server, you can use my TS server. The voice room with the server name inherited from the past has no password. Welcome to use it

]]>
zero https://blog.shi.wiki/archives/44.html#comments https://blog.shi.wiki/feed/
How to build a server by Paru https://blog.shi.wiki/archives/43.html https://blog.shi.wiki/archives/43.html Mon, 22 Jan 2024 12:02:00 +0800 Inheritance This tutorial is built on Win10 and is applicable to Win10. The server needs to have a public network IP. It is recommended to use intranet penetration for intranet IP. Intranet penetration is not covered in this tutorial. Please note that the server occupies a high amount of memory. At present, there are 18 people running for one night, occupying about 25G.

1. Download steamcmd
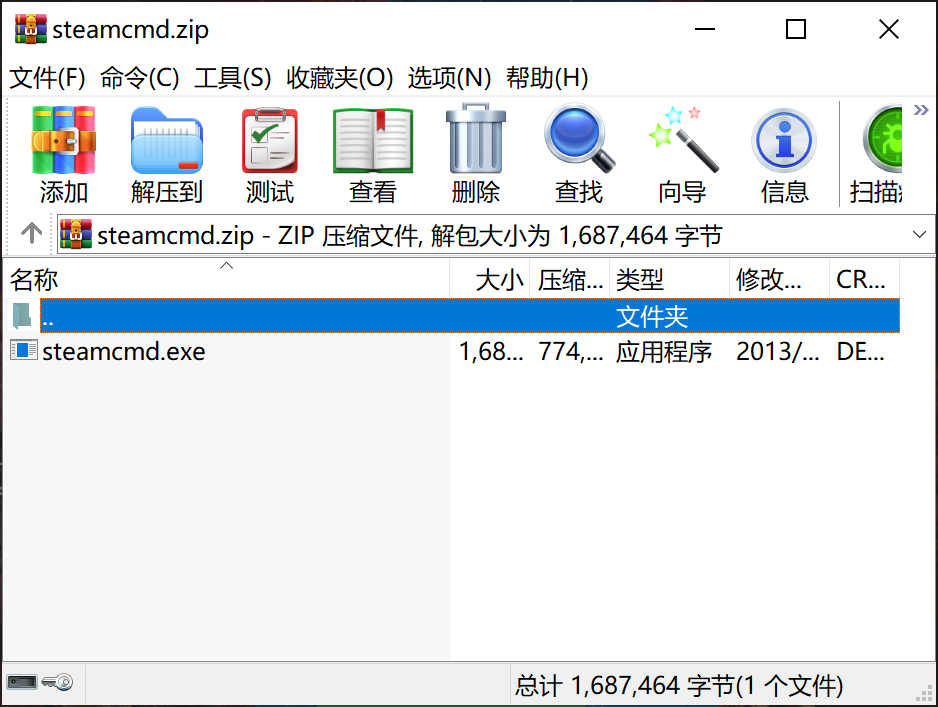
click here Download steamcmd. The zip package is downloaded, and then we unzip it.

2. Install steamcmd
Let's take the steamcmd path installed on disk E as an example
Create a new path of steamcmd on disk E, and then click the extracted steamcmd.exe to install. Select E: teamcmd as the installation path, and wait for the installation to complete

3. Install Eudemon Paru Server
Let's take E: PalServer as an example
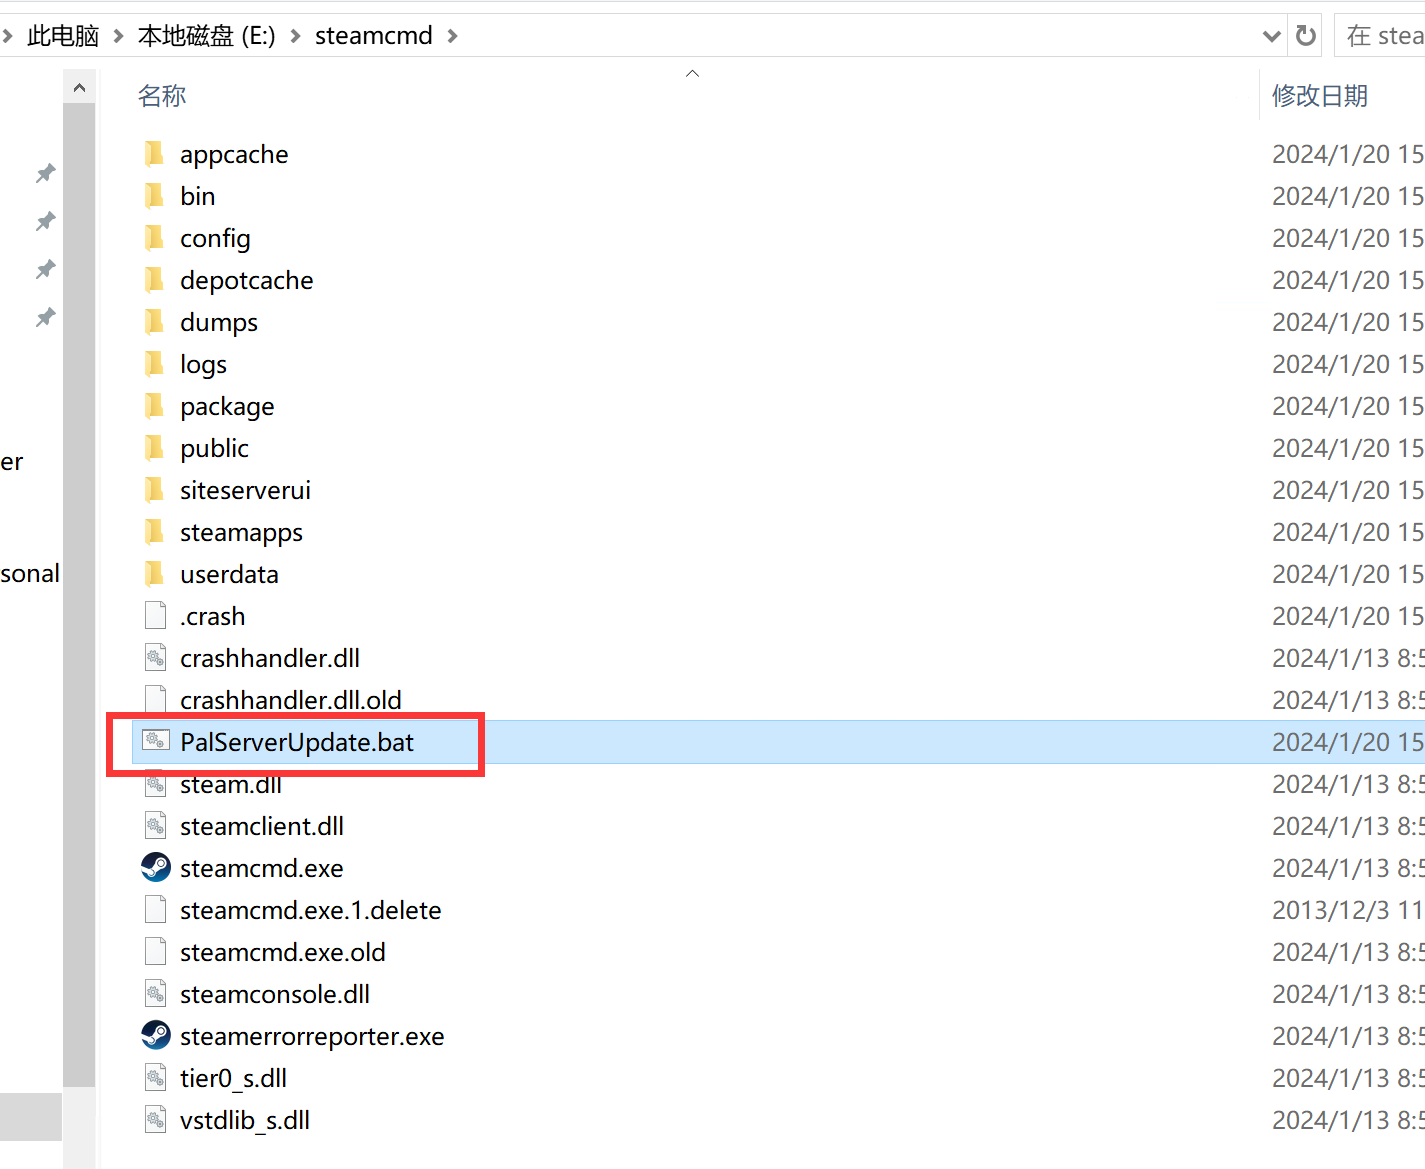
3.1 Under the steamcmd folder, create a text document of PalServerUpdate, and change the txt suffix to bat, PalServerUpdate.bat
The content of the new text document is steamcmd.exe +force_install_dir E:\PalServer +login anonymous +app_update 2394010 validate


3.2 Double click the file PalServerUpdate.bat in steamcmd, and wait for it to download automatically, then the server installation is completed. However, the server cannot be enabled here, and the environment components need to be installed.

4. Install Server Environment Components
4.1 Installing DirectX
click here Download and install DirectX, and then run the installation

4.2 Installing other components
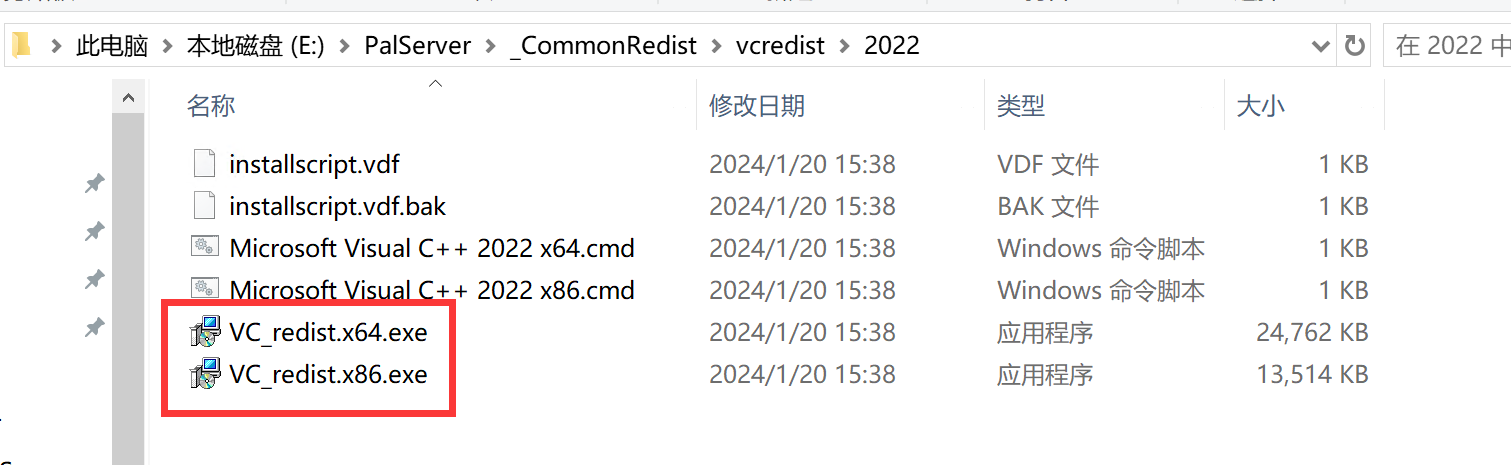
Enter the E: PalServer _CommonRedist vcredist 2022 folder and install all the exe files in it

5. Run Server
Enter the E: PalServer folder and double-click the PalServer.exe file to run it. However, after running, you can only access it on your own computer LAN, and other players cannot access it

6. Internet access
To access the external network, you need to know whether your broadband is a public network IP. If it is not a public network IP, call the customer service phone to apply for a public network IP. Most areas of Unicom and Telecom have a public network IP, while most of Mobile does not. This step will not be detailed. Please refer to other Baidu tutorials.
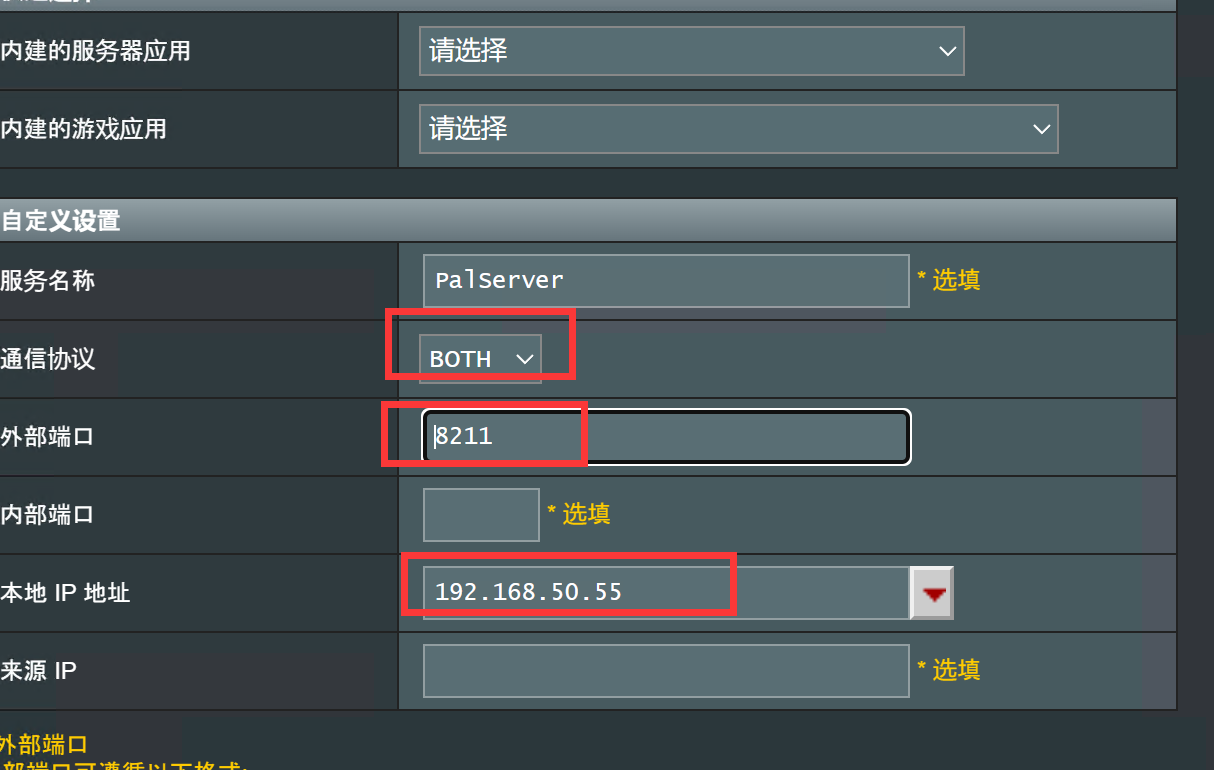
For external network access, we need to forward the port. If the router dials, it will forward the port 8211 to the router. If the optical cat dials, it will forward the port 8211 to the optical cat. For all the forwarding types, I don't know whether it is TCP or udp.

7. How to access the server
We open the game and select the multiplayer server mode. At the bottom, enter your own IP: 8211 to enter the server.

8. Modify server configuration
Under the E: PalServer file, open the DefaultPalWorldSettings.ini file with Notepad, and copy all the contents under [/Script/Pal. PalGameWorldSettings] in the file, including [/Script/Pal. PalGameWorldSettings].
Enter the path E: PalServer Pal Saved Config WindowsServer, open the PalWorldSettings.ini file, and paste the contents into it.
I posted my server configuration on it, which can also be used directly by everyone. The server name is [Unicom] Mengxin Paradise, and the server management password is 123456. The modified content is that it does not take time to incubate pet eggs, death does not fall, and others have not been modified.

 [/Script/Pal.PalGameWorldSettings] OptionSettings=(Difficulty=None, DayTimeSpeedRate=1.000000,NightTimeSpeedRate=1.000000,ExpRate=1.000000,PalCaptureRate=1.000000,PalSpawnNumRate=1.000000,PalDamageRateAttack=1.000000,PalDamageRateDefense=1.000000,PlayerDamageRateAttack=1.000000,PlayerDamageRateDefense=1.000000,PlayerStomachDecreaceRate=1.000000,PlayerStaminaDecreaceRate=1.000000,PlayerAutoHPRegeneRate=1.000000, PlayerAutoHpRegeneRateInSleep=1.000000,PalStomachDecreaceRate=1.000000,PalStaminaDecreaceRate=1.000000,PalAutoHPRegeneRate=1.000000,PalAutoHpRegeneRateInSleep=1.000000,BuildObjectDamageRate=1.000000,BuildObjectDeteriorationDamageRate=1.000000,CollectionDropRate=1.000000,CollectionObjectHpRate=1.000000,CollectionObjectRespawnSpeedRate=1.000000, EnemyDropItemRate=1.000000,DeathPenalty=None,bEnablePlayerToPlayerDamage=False,bEnableFriendlyFire=False,bEnableInvaderEnemy=True,bActiveUNKO=False,bEnableAimAssistPad=True,bEnableAimAssistKeyboard=False,DropItemMaxNum=3000,DropItemMaxNum_UNKO=100,BaseCampMaxNum=128,BaseCampWorkerMaxNum=15,DropItemAliveMaxHours=1.000000, bAutoResetGuildNoOnlinePlayers=False,AutoResetGuildTimeNoOnlinePlayers=72.000000,GuildPlayerMaxNum=20,PalEggDefaultHatchingTime=0.000000,WorkSpeedRate=1.000000,bIsMultiplay=False,bIsPvP=False,bCanPickupOtherGuildDeathPenaltyDrop=False,bEnableNonLoginPenalty=True,bEnableFastTravel=True,bIsStartLocationSelectByMap=True,bExistPlayerAfterLogout=False, BEnableDefenseOtherGuildPlayer=False, CoopPlayerMaxNum=4, ServerPlayerMaxNum=32, ServerName="[Unicom] Mengxin Paradise", ServerDescription="", AdminPassword="123456", ServerPassword="", PublicPort=8211, PublicIP="", RCONEnabled=False, RCONPort=25575, Region="", bUseAuth=True, BanListURL=“ https://api.palworldgame.com/api/banlist.txt ")

Server management instructions

 Log in to the server with administrator password/AdminPassword administrator password Show current players/ShowPlayers Kick out/KickPlayer [UserID]/[SteamID64] BanPlayer [UserID]/[SteamID64] Transfer (transfer to the target player)/TeleportToPlayer {SteamID} Draw people (transfer players to me)/TeleportToMe {SteamID} Archive Notify the server online player that the server will shut down after n seconds/Shutdown {Seconds} {MessageText}

The following is an introduction to the meaning of the configuration document

 Difficulty=None DayTimeSpeedRate=1.000000 (daytime speed multiplier) NightTimeSpeedRate=1.000000 (night speed multiplier) ExpRate=1.000000 (experience multiplier) PalCaptureRate=1.000000 (partner capture ratio) PalSpawnNumRate=1.000000 (multiple of partner generated quantity) PalDamageRateAttack=1.000000 (partner attack damage multiplier) PalDamageRateDefense=1.000000 (partner defense damage multiplier) PlayerDamageRateAttack=1.000000 (player attack damage multiplier) PlayerDamageRateDefense=1.000000 (player defense damage multiplier) PlayerStomachDecreaceRate=1.000000 (player hunger reduction rate) PlayerStaminaDecreaseRate=1.000000 (player's physical strength reduction rate) PlayerAutoHPRegeneRate=1.000000 (player's automatic health recovery rate) PlayerAutoHpRegeneRateInSleep=1.000000 (player's automatic health recovery rate during sleep) PalStomachDecreaceRate=1.000000 (partner hunger reduction rate) PalStaminaDecreaseRate=1.000000 (partner's physical strength reduction rate) PalAutoHPRegeneRate=1.000000 (partner's automatic blood volume recovery rate) PalAutoHpRegeneRateInSleep=1.000000 (partner's automatic blood volume recovery rate during sleep) BuildObjectDamageRate=1.000000 (building damage magnification) BuildObjectDeterminationDamageRate=1.000000 (building deterioration damage ratio) CollectionDropRate=1.000000 (collection drop rate) CollectionObjectHpRate=1.000000 (Collect object health value multiplying rate) CollectionObjectRespawnSpeedRate=1.000000 (Collection object regeneration speed multiplier) EnemyDropItemRate=1.000000 (enemy dropping item rate) DeathPenalty=All BEnablePlayerToPlayerDamage=False (players are allowed to cause damage to players) BEnableFriendlyFire=False (allow friendly damage) BEnableInvaderEnemy=True (allow to invade the enemy) BActiveUNKO=False (unknown) BEnableAimAssistPad=True (Enable Handle Aiming Assist) BEnableAimAssistKeyboard=False (enables keyboard aiming assistance) DropItemMaxNum=3000 (maximum number of dropped items) DropItemMaxNum_UNKO=100 (Maximum number of dropped items _UNKO) BaseCampMaxNum=128 (maximum number of bases) BaseCampWorkerMaxNum=15 (maximum number of base workers) DropItemAliveMaxHours=1.000000 (the longest time for a dropped item to survive (hours) BAutoResetGuildNoOnlinePlayers=False (there are no online players in the auto reset guild) AutoResetGuildTimeNoOnlinePlayers=72.000000 (when there is no online player, the guild time will be automatically reset (hours) GuildPlayerMaxNum=20 (the maximum number of players in the guild) PalEggDefaultHatchingTime=72.000000 (default incubation time of partner eggs (hours) WorkSpeedRate=1.000000 (working speed multiplier) BIsMultiplay=False (multiplayer game) BIsPvP=False (PvP mode) BCanPickupOtherGuildDeathPenaltyDrop=False (you can pick up other guilds' death penalty drops) BEnableNonLoginPenalty=True (enable non login penalty) BEnableFastTravel=True (Enable Fast Travel) BIsStartLocationSelectByMap=True (select the starting position according to the map) BExistPlayerAfterLogout=False (the player still exists after logging out) BEnableDefenseOtherGuildPlayer=False (Enable defense against other guild players) CoopPlayerMaxNum=4 (maximum number of cooperative players) ServerPlayerMaxNum=32 (maximum number of server players) ServerName= ServerDescription="" (server description) AdminPassword="" (administrator password) ServerPassword="" (server password) PublicPort=8211 (public port number) PublicIP="" (public IP address) RCONEnabled=False RCONPort=25575 (RCON port number) Region="" BUseAuth=True (use authentication) BanListURL=" https://api.palworldgame.com/api/banlist.txt "(Forbidden list URL)

reference material:
Palworld tech guide

]]>
two https://blog.shi.wiki/archives/43.html#comments https://blog.shi.wiki/feed/