In fact, I just want to make a summary on these websites.
You can find everything you need here. No nonsense, the tutorial begins
Step 1: add a background to the folder, hard disk and USB flash drive:
design sketch:
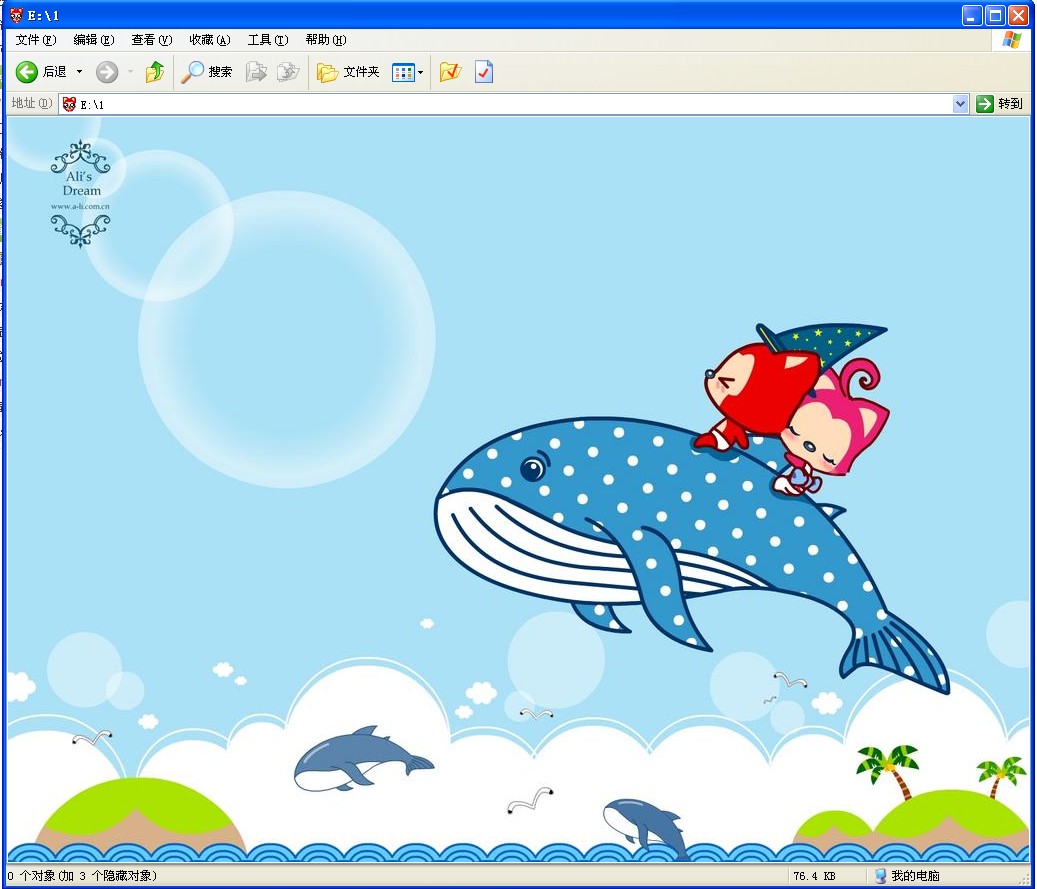
Smart people will surely find that the bottom of the window shows“ 0 objects (plus 3 hidden objects) ”
Q1: What is the hidden object?
A1: One picture icon configuration file (example file name 1. jpg 1. ico desktop. ini)
In fact, the key lies in the desktop.ini configuration file
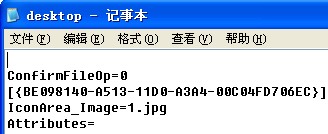
Just put the following text inside to add a background to the folder.
ConfirmFileOp=0
[{BE098140-A513-11D0-A3A4-00C04FD706EC}]
IconArea_Image=(Write the picture name and extension here, such as 1. jpg)
Attributes=
As shown in Figure 1:
Step 2: Add an icon to the folder:
design sketch:
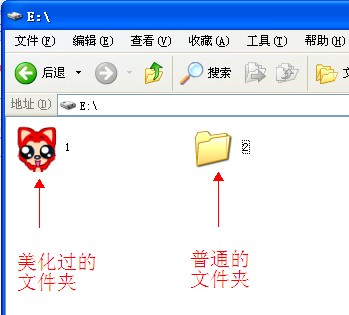
There are two ways to add icons to folders. The first is to use the principle of adding background to folders, which is also to use desktop.ini
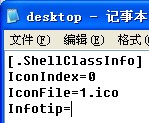
The text is as follows. Follow the text below to get the effect picture
[.ShellClassInfo]
IconIndex=0
IconFile=(write icon name and extension here, such as 1. ico)
Infotip=
As shown in Figure 2:
The second way is to use the settings of the system itself to get the same effect (operate according to the figure)

If you combine the contents of desktop.ini in step 1 and step 2, you can get the folder background and icons. However, the second method of adding icons does not apply to U disks and hard disks. If you want to add icons to U disks and hard disks, please continue to look below.
Step 3 Add icons to the USB flash disk and hard disk
As shown in Figures 3 and 4:


The USB stick will take effect the next time it is inserted into the computer, but the hard disk icon will take effect only after restarting the computer.
Just put the following files into a file named Autorun.inf
[AutoRun]
Icon= (Write the icon name and extension here, such as 1. ico)
As shown in Figure 5:

If the above tutorial is not completed Desktop.ini and Autorun.inf can create its own
To create it, just open Notepad and put the content in it and save it where you want
Remember to save it as all files or it may be saved as Desktop.ini.txt or Autorun.inf.txt
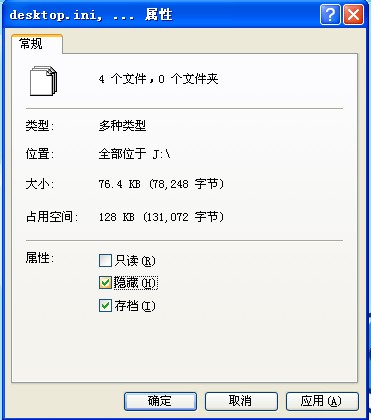
If you don't want to see these files, you can select all the files, right click the properties and tick the hidden ones
As shown in Figure 6:
This article is from Big Cat Huimeng. Please indicate the source and the corresponding link when reprinting.


![[Smile] [Smile]](https://blog.dmyhm.net/content/plugins/diyface/smile/001.gif)
![[Anger] [Anger]](https://blog.dmyhm.net/content/plugins/diyface/smile/031.gif)
![[Ha ha] [Ha ha]](https://blog.dmyhm.net/content/plugins/diyface/smile/032.gif)
![[Heartbreak] [Heartbreak]](https://blog.dmyhm.net/content/plugins/diyface/smile/019.gif)
![[Lifting] [Lifting]](https://blog.dmyhm.net/content/plugins/diyface/smile/005.gif)
![[N] [N]](https://blog.dmyhm.net/content/plugins/diyface/smile/009.gif)
