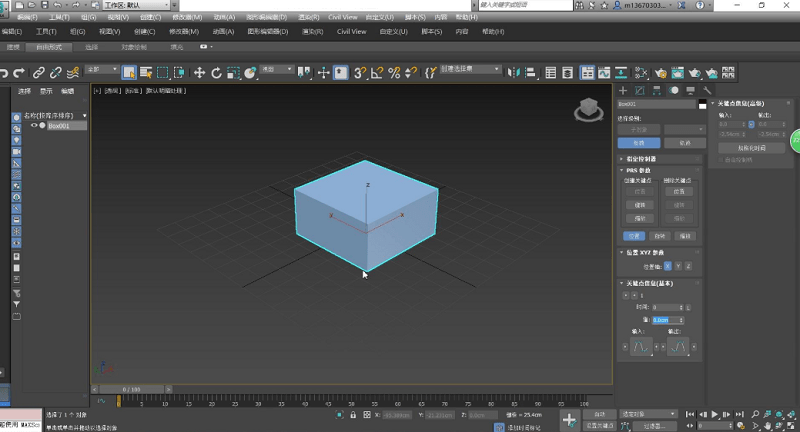
Aurora download station -Build a complete green software home

Aurora download station

Current location: Aurora download station  >  Graphic image  >  3D production class >3dsmax 2018 PC
  • Introduction
  • Download address
  • Boutique recommendation
  • Related software
  • Netizen comments

3dsmax Version 2018 It's a autodesk This is a professional 3D animation rendering and production software developed by the company. Its functions are very powerful and changeable. It is mainly active in various multimedia manufacturing industries such as film and television, industrial design, architectural design, 3D animation, and many new functions and settings have been added to this software. If you feel you need it, please come to the Aurora download station to learn about it!

Introduction to 3dsmax 2018

3D Studio Max, often referred to as 3d Max or 3ds MAX, was developed by Discreet (later developed by Au todesk Company merger) 3D animation rendering and production software based on PC system. Its predecessor is based on DOS operating system 3D Studio series software.

 3dsmax 2018 version

function

1、 3D modeling - Textures and effects

1. Spline workflow

Create and animate geometry in a variety of intuitive ways with new and enhanced spline tools.

2. Open shading language support

From simple mathematical nodes to procedural textures, create OSL maps in the Material Editor.

3. Blending box map

Simplify the process of curved projection of texture maps, distorting visible seams.

4. Chamfer modifier

Create first-class program modeling details to easily handle some very difficult tasks.

5. Hair and Fur modifier

Manipulate hair and fur directly in viewports using selection and design tools, such as tools for cutting. brushing.

6. Data channel modifier

Use vertex, edge and face information to modify the model according to the program.

7. Graph Boolean

Create parametric Boolean operations on two or more splines with a familiar 3D Boolean user interface.

8. Mesh and surface modeling

Parametric and organic objects can be created efficiently through the modeling function based on polygons, subdivision surfaces and splines.

2、 3D Animation and Dynamics

1.3ds Max Fluids

Create realistic liquid behavior directly in 3ds Max.

2. Movement path

Manipulate the animation directly in the viewport and get direct feedback when making adjustments in the scene.

3. Character animation and equipment tools

With the help of CAT Biped and crowd animation tools to create procedural animations and character rigs.

4. General animation tools

Use keyframes and procedural animation tools. View and edit animation tracks directly in viewports.

5. Max Creation Graph Controller

Using a new generation of animation tools to write animation controllers, animation creation, modification, packaging and sharing can be realized.

6. Particle flow effect

Create complex particle effects such as water, fire, spray, and snow.

7. Easily import simulation data

With CFD The CSV or OpenVDB format animates the simulation data.

8. Geodesic voxels and heat map skins

Generate better skin weights quickly and easily.

3、 3D rendering

1. Improve viewport quality

As part of OSL integration, you can use Nitrous viewports to display procedural maps created with OSL at 1:1 quality.

2. Physical camera

Simulate real camera settings, such as shutter speed, aperture, depth of field, exposure and other options.

3. Autodesk Raytracer renderer (ART)

Create an accurate image of the building scene.

4. Scene layout in VR

Edit the scene directly in 3ds Max Interactive VR and view the updates pushed back to 3ds Max in real time.

4、 User interface - Workflows and processes

1.3ds Max Batch

Use 3ds Max as a true command line tool to take full advantage of 3ds Max's automation capabilities.

2. Improved process tool integration

Through expanded and improved python /. NET tool combination to integrate more closely with multiple process tools.

3. Modern user interface and workspace

Create your own custom workspace with a more modern, high DPI ready, responsive user interface.

4. Scene converter

Seamless transition from one renderer to another.

5. CivilView Workflow Update

Vehicles created in CivilView now support 3ds Max physical materials, reducing conversions and simplifying rendering.

Common shortcut keys

[Middle mouse button] translation movement

[Alt+middle mouse button] Rotate the view

Zoom in/out of Alt+ctrl+middle mouse button view

[Ctrl+z] Restore the previous step

[Ctrl+y] Repeat the previous step

[Ctrl+a] Select All [Ctrl+I] Invert Selection

【G】 Grid Switch

【F】 Front view

【T】 Top view

【50】 Left view

【B】 Bottom view

[Alt+W] Maximize the view

[Ctrl+C] Fit the camera to the view

[Alt+Q] Isolates the currently selected object and maximizes the display on the view. Other objects disappear temporarily.

【C】 Converts the selected view to a camera view

【w】 Displacement

【e】 Rotate

【r】 Zoom

【O】 Display degraded adaptation (switch)

【5】 Open the view shortcut key switch menu, and select the view to switch.

[+] Enlarge the coordinate axis

[-] Reduce the coordinate axis

[Ctrl+Atl+z] Fully display all objects in the current view

【z】 Fully display the selected object in the current view

[Shift+left mouse button] Copy one or more selected objects

[Ctrl+left mouse button] to add a selection

[Alt+left mouse button] Decrease selection

【H】 Menu Select Object

【M】 Display Material Editor

【N】 Open animation recording button

[/?] Play animation

[F3] Switch between entity display and wireframe display

[F4] Wireframe display

[F9] Fast rendering

[F10] Display the rendering menu [] Zoom in or out twice the view display

Material M

Selection max z

Full screen ctrl+AlT+z

View mode ctrl+x

Maximize ALT+W

Render Shift+Q=

F9 view switch F3 display degraded adaptation (switch)

【O】 Adapt to perspective grid points

Shift+Ctrl+A

[Alt]+[A] Angle snap (switch)

【A】 Animation mode (switch)

【N】 Change to rear view

【K】 Background lock (switch)

Alt+Ctrl+B Previous Time Unit

[.] Next time unit

[,] Change to Top view

【T】 Change the bottom view

【B】 Change to Camera view

【C】 Change to Front view

【F】 Change to a user view of the same size

【U】 Change to the Right view

【R】 Change to Perspective

【P】 Cycle to change the selection mode

[Ctrl]+[F] Default light (switch)

[Ctrl]+[L] Delete object

[DEL] The current view is temporarily invalid

【D】 Whether the geometry body frame (switch) is displayed

Ctrl+E displays the first toolbar

Alt+1: Expert Mode? Full screen (switch)

[Ctrl]+[X] Hold scene

Alt+Ctrl+H Fetch scenario

Alt+Ctrl+F to freeze the selected object

【6】 Skip to the last frame

[END] Jump to the first frame

[HOME] Show/hide cameras

[Shift]+[C] Show/hide geometry

Shift+O Show/Hide Grids

【G】 Show/hide Helpers objects

[Shift]+[H] Show/hide light sources (Lights)

[Shift]+[L] Show/hide Particle Systems

[Shift]+[P] Show/hide Space Warps objects

[Shift]+[W] Lock the user interface (switch)

[Alt]+[0] Match to Camera View

[Ctrl]+[C] Material Editor

【M】 Maximize

Collection of Common Commands

Alphabetic key

A key: activate the angle snap switch

Key B: switch to the bottom view

C key: switch camera view

D key: the current view is temporarily invalid

E key: rotate

F key: switch to the main view (front view)

G key: toggle the display of the window grid

H key: select an object by name

I: move in the direction of the mouse

J key: switch the selected frame of the object (a display mode)

K key: change to the rear view

L key: switch to the left view

M key: Material Editor

N key: activate the animation recorder (automatically record keys)

O key: whether to display in square when rotating the view

P key: switch to perspective view

Q key: select

R key: zoom

S key: activate snap button

T key: switch to top view

U key: switch to user view

V key: view selection menu

W key: move

X key: display of coordinate handle

Z key: display the selected or unselected objects at the best angle

Number keys

1-6 Switch the sub level of a command only when an editable command is added (this is a command shortcut key)

Key 6: Open PFSource particle setting mask

7 key: display the block face of objects in the scene

8 key: open the environment panel

9 key: Open the rendering surface

Key 0: open the baking surface plate

F key

F1 key: help

F2 key: whether the selected face is displayed in the form of wireframe or face

F3 key: object switch wireframe or entity

F4 key: enhanced display (whether wireframe is displayed around the object)

F5 key: switch to coordinate axis X

F6 key: switch to coordinate axis Y

F7 key: switch to coordinate axis Z

F8 key: switch XY, XZ, YZ coordinate axes

F9 key: rendering

F10 key: render output mask

F11 key: scripting box

F12 key: moved attribute mask

Other separate keys

-Keys: zoom out axis (visual effects)

+Keys: magnifying axes (visual effects)

Delete key: delete the selected object

/Keys: playing animation

<key: next frame

>Key: previous frame

&Key: activate animation recorder (record keys manually)

Home key: switch to the first frame

End key: switch to the last frame

Space: lock the selected object

[key: enlarge the view

]Keys: zooming out

 3dsmax 2018 version (1)
 3dsmax 2018 version (1)

Extraction code: 6a1c

Download address

  • Pc version

3dsmax 2018 PC

Boutique recommendation

  • 3dsmax
 3dsmax

3dsmax More+

3dsmax has a wide audience and is aimed at 3D designers. It is mainly used to participate in the production of film, television and animation. This software not only has a simple interface, but also has very powerful and practical functions. It is liked by many users. It can make different 3D models easily to achieve the desired rendering effect. It is also simple to operate and easy to use!

View all comments+

Netizen comments

net friend
Your comments need to be approved before they can be displayed

Ranking in this category

This category of recommendation

Necessary for installation

Change a batch

Related information