Dragonframe can help users create animations with cameras on the software. It can be connected to high-definition cameras in the software. It can shoot single frame content in the software. It can shoot multi frame content in the software. External devices can be connected to this software to quickly capture scene content. It can also be integrated with the motion control system, including the moco interface Arc in Dragonframe, You can also create action scripts to automate some functions of Dragonframe, and use Dragonframes to calculate the movement of manual cameras through Arc. You can use Dragonframe to trigger external devices, or you can use external devices to notify Dragonframes to shoot, which can be downloaded and used if necessary.
software function
1. Create a beautiful animation one frame at a time.
① Animation mode
Switch directly between real-time viewfinder and captured frames, or switch to automatic switch. Loop to get the feel you want. The playback and stepping functions can be completely customized according to your needs.
② References
Load multiple reference still images or videos and view them with animation. Mix it with opacity, pull out matting (blue screen), or even assign a garbage mask to view only the required part. If you want to pop up the reference video to the sync player, please pop it up.
③ Keyboard control
Using the Dragonframe keypad, you can focus on animation rather than looking around with the mouse. And the hotkeys are fully configurable, so if you really like the functions that are not on the keyboard, you can move them there.
2. Perfect your exposure, focus and composition.
① Camera control
Set camera settings directly from the program, such as shutter speed, ISO, and white balance. Use Canon, Nikon, Olympus or Fujifilm cameras to check and adjust the focus. Before starting, please conduct test shooting and shoot correctly.
② Ingredient Guidelines
Confidently write multiple formats. Create a custom aspect ratio mask. Use the mask in combination with the TV safety guide. Add mesh overlays to help with compositing. Add a push mask to allow post production to push or pan.
③ Image review
View the image at full resolution. Check whether there are areas of overexposure or underexposure with the clipping diagram. Load images from other scenes to compare exposure and composition. Compare the image contrast with a digital densitometer.
3. Add audio and perform character track readings.
① Multi track editing
Import multiple tracks and perform basic editing. Split tracks and drag clips to adjust time in real time. You can even move waveform and character track readings together to keep them synchronized.
② Dialogue track reading
Create characters, scrub audio, and assign words and sounds to all conversations. When animating, view this data in the X table, timeline, or audio HUD. 4. Take your lighting to a new level with Dragonframe's exposure based DMX lighting board.
① Automatic lighting
With our DDMX-512, DMC-16 or DMC +Control up to 512 lighting channels together. You can define the lighting program before shooting, and then watch the Dragonframe control the lighting during shooting, while letting the animator focus on animation.
② Keyframe smoothing
Use keys to define lighting procedures. Use the simplified "Bezier curve" handle to adjust the smoothness in each direction - while maintaining an effective programming interface, it provides you with extensive control.
③ Custom Exposure Lighting
It is easy to create custom lighting procedures for different exposures. You can directly customize the lighting procedure for the exposure, or you can create a new procedure to share one or more exposures.
5. Programming complex camera moves in an intuitive interface.
① Motion control, integrated
Integrated motion control means you can program camera movement and lighting effects within the same system. This means that you can quickly preview the movement using the same camera you want to animate. This means that lighting and motion control will be carried out at the right time and position. Therefore, if the animator needs to readjust several frames, Dragonframe can safely move the equipment back to the correct position each time.
② Mobile test
After you program the movement, you need to test it. Run the mobile test in the Arc workspace and view its appearance. The mobile test only captures video auxiliary frames to speed up the test process. In the long run, you can only re shoot the part you are working on. You will improve this in record time.
③ Hardware integration
You can use a variety of hardware, from Arduino based self-developed DFMoco sketches to off the shelf kits of eMotimo or Slidekamera.
Software features
Dragonframe usually uses two image sources when shooting. In most cases, these two image sources come from the same physical device.
A capture camera for capturing high-quality images. These frames make up your final animation. For example, you can use: support SLR camera, HD camera.
A real-time video source that allows you to enter the real-time view from the cap ted frame, and allows you to access various animation tools of Dragonframe. For example, you can use: Live view on a digital camera.
Red camera or spy camera, through the viewfinder settings of the time when you shoot the camera.
An analog video source connected to a computer through an AV/DV bridge.
Dragonframe can use this program without having to control two sources at the same time. For example, you may want to use Dragonframe as a video
Ssist only frame grabber: preview the animation using a digital camera, but capture a full resolution image using a film camera. Alternatively, you can work without a video source, using to preview frames from your camera.
3D shooting
The most common technique for 3D stereo shooting of freeze frame animation is to use a camera on a special left/right slider. For each frame of the animation, the camera will take an image for the left eye, move to the right eye position, and then take an image at that position. Connect Dragonframe to stereo slider to realize seamless automation of 3D shooting. This chapter describes how to connect and configure sliders, how multi exposure allows you to automatically capture left and right frames, and how to view stereoscopic images in the cinematographic workspace
Set exposure for 3D shooting
Now that you have configured stereo positions, you can assign them to exposures so that the Dragonframe can automatically move the slider. Use the multiple exposure function of Dragonframe to set the left and right "sub frames". In this way, Dragonframe will capture multiple images in each frame. In addition, you can name exposures to identify whether they are left eye images or right eye images, making it easy to process files in post production
Export your capture
There are several ways to access your Dragonframe project. We have designed Dragonframe so that you can directly access your images.
All frame edits are virtual. That is, once you have made any edits, including deletion and indentation, if you want the files on the disk to have a frame sequence number, you need to match your shooting.
On the other hand, if you only intend to use export from the Dragon framework (export movies or image sequences), you do not need to match your shooting. The exported sequence will always be correct. To export your shot, you can perform one of the following operations after editing the match:
• Access your files directly. Dragonframe always saves images directly from your camera (for still cameras). Before accessing an image file, you must match your edits.
• Import the Dragonframe source file as an image sequence into another program, such as AfterEffects. Before importing an image sequence from Dragonframe, it must match your edits.
• Export a movie to import another program, such as Final Cut Pro. You do not need to make consistent edits before exporting a movie.
• Export frame sequences, including Dng file 。 No matching editing is required before exporting a frame sequence
usage method
1. Start Dragonframe, install it on the computer, click INSTALL
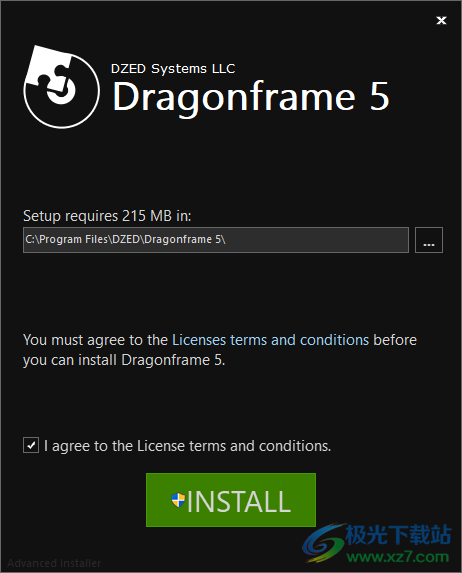
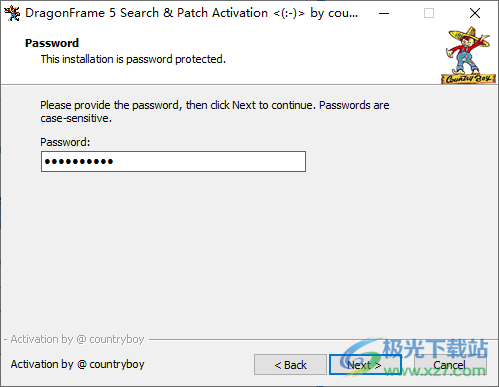
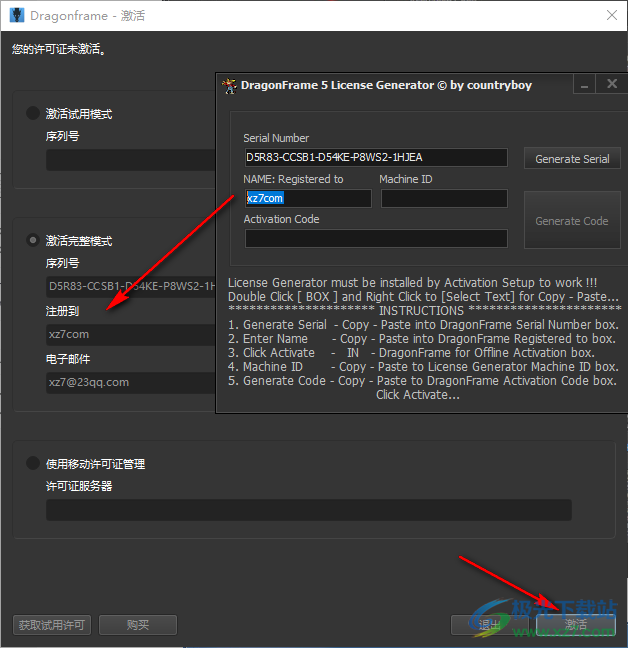
2. Then start the registration machine as an administrator and enter the password countryboy
3. Set the installation address, which is installed together with the main program by default

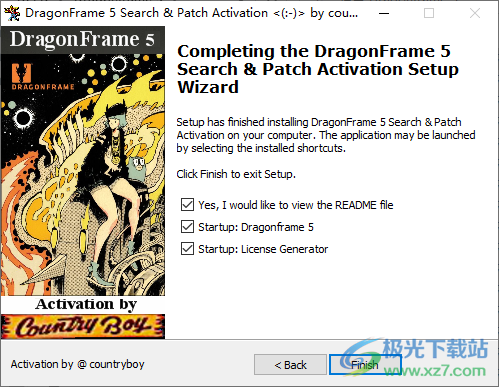
4. After the registration machine is installed, click finish to automatically open the registration machine and Dragonframe software
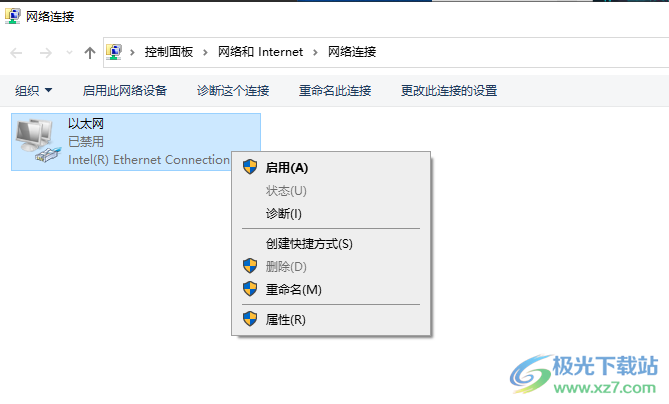
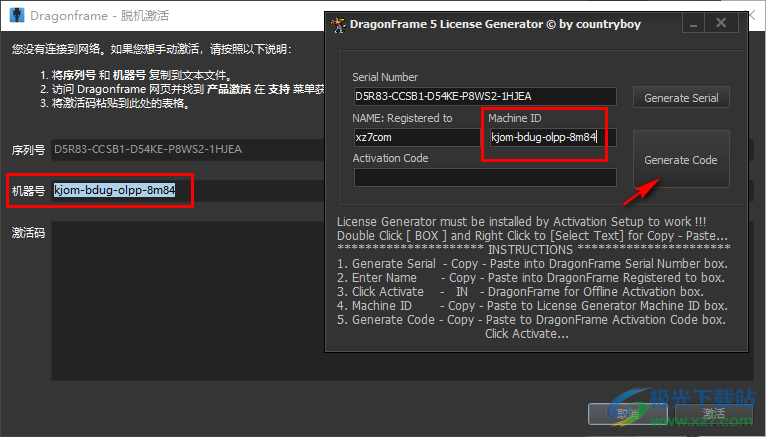
5. The network connection of the computer needs to be closed. It can be activated only when the network is disconnected
6. Enter the name in the registration machine and click Generate Serial to calculate the serial number
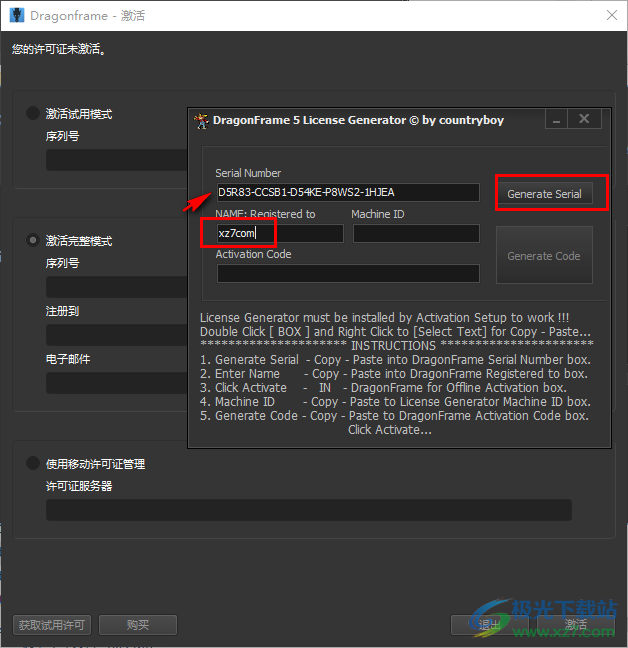
7. Copy the serial number to the activation interface of the main program, enter the name, enter the email address, and click Activate to pop up the offline activation interface
8. Disconnect the network to enter the offline activation interface. The machine number will be displayed and copied to the registration machine. Click Generate Code to get the registration code
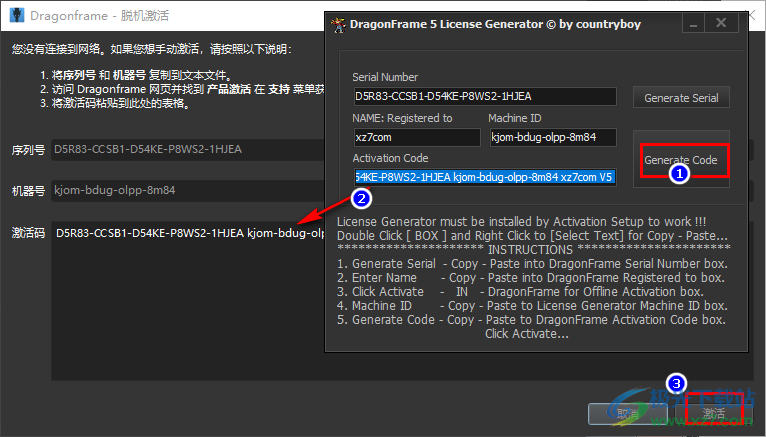
9. Copy the registration code to the offline activation interface and click the activation button
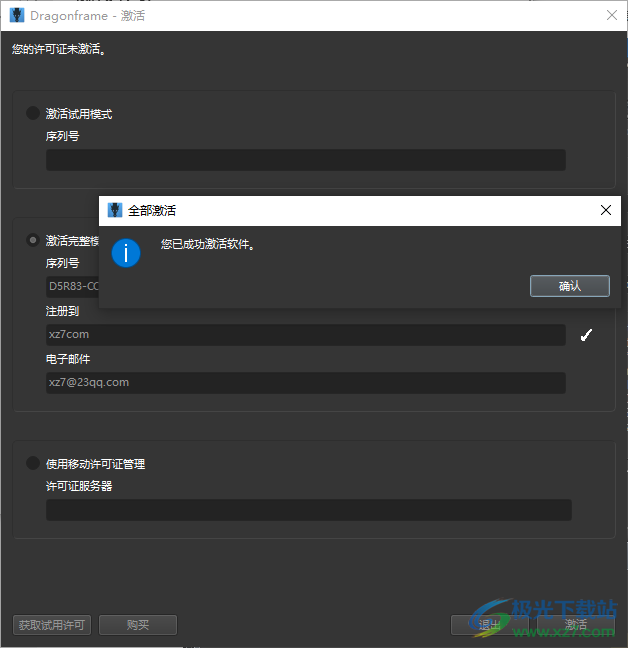
10. Your software has been activated, and Dragonframe software can be used normally
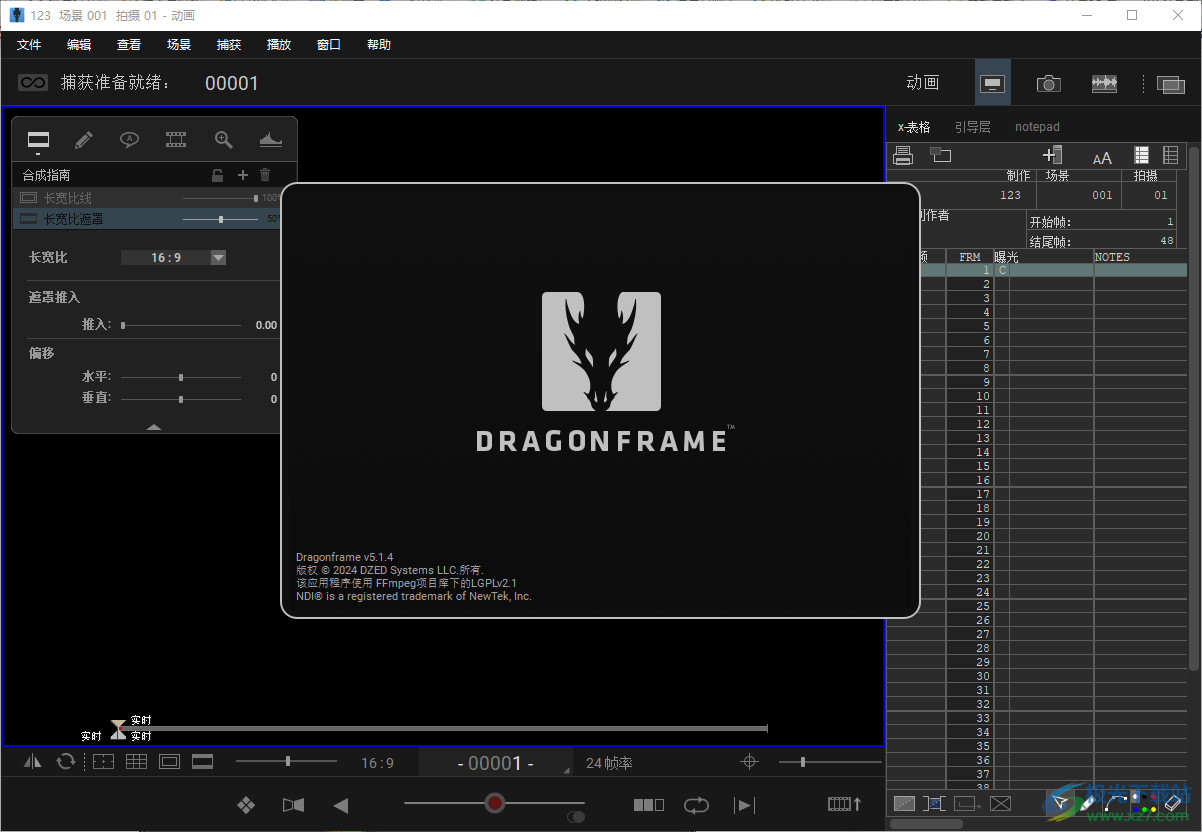
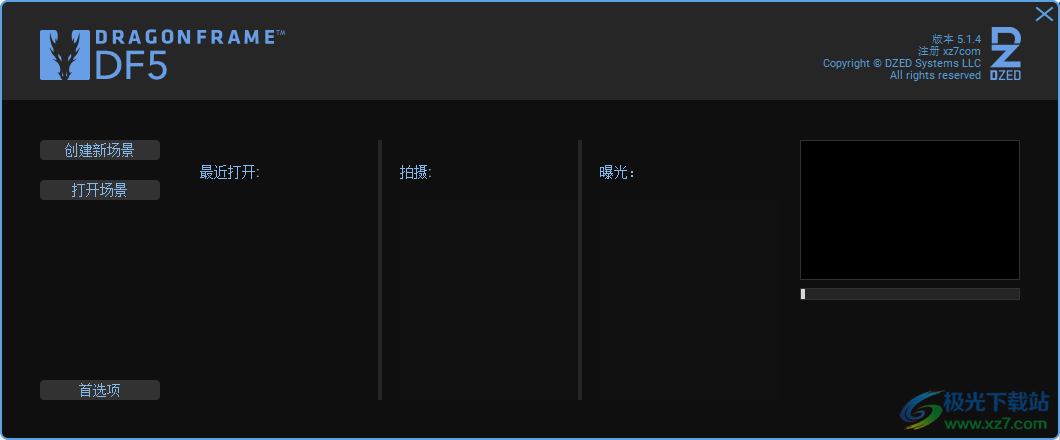
11. The Dragonframe homepage interface is as shown in the figure. You can create new scenes
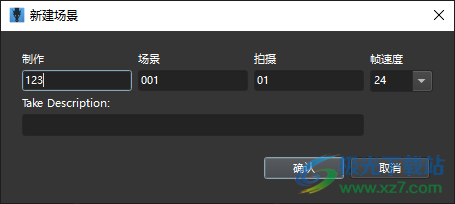
12. New scene setting function, input name and scene information
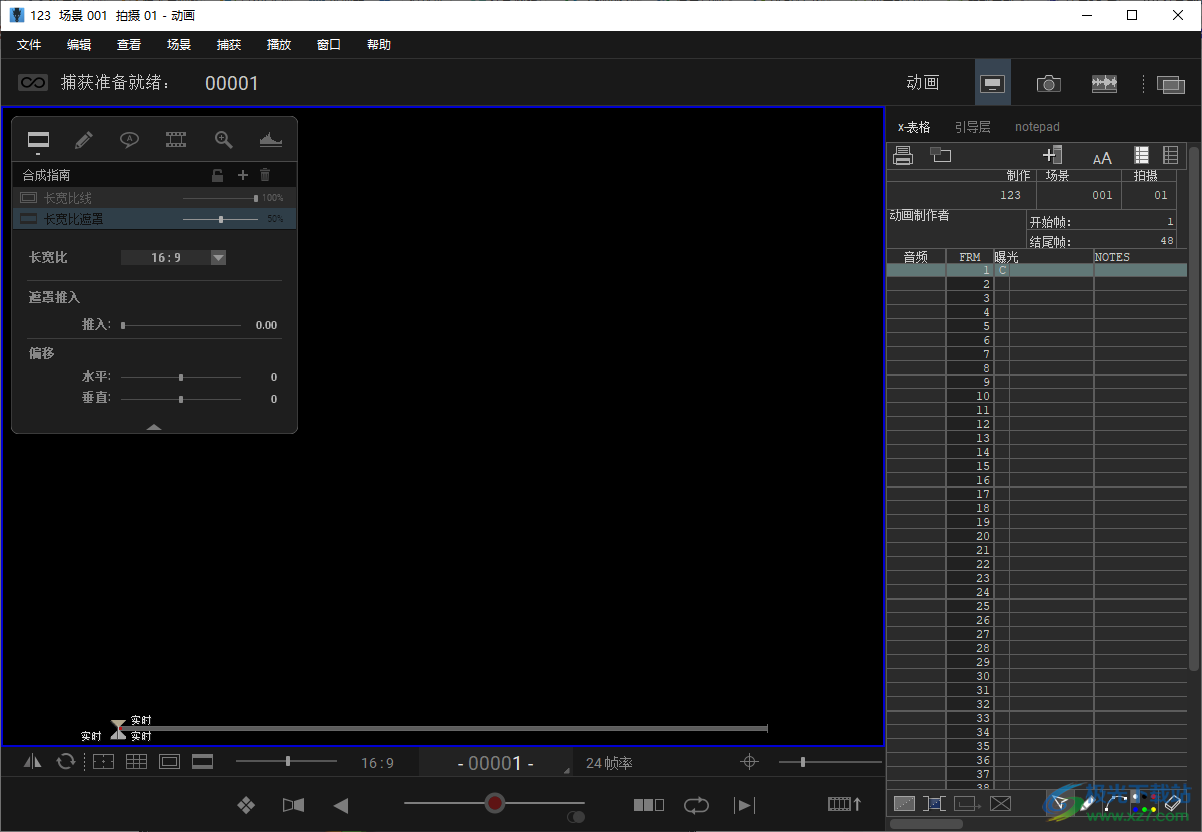
13. Dragonframe interface is as shown in the figure. You can add cameras in the software and edit animation in the software
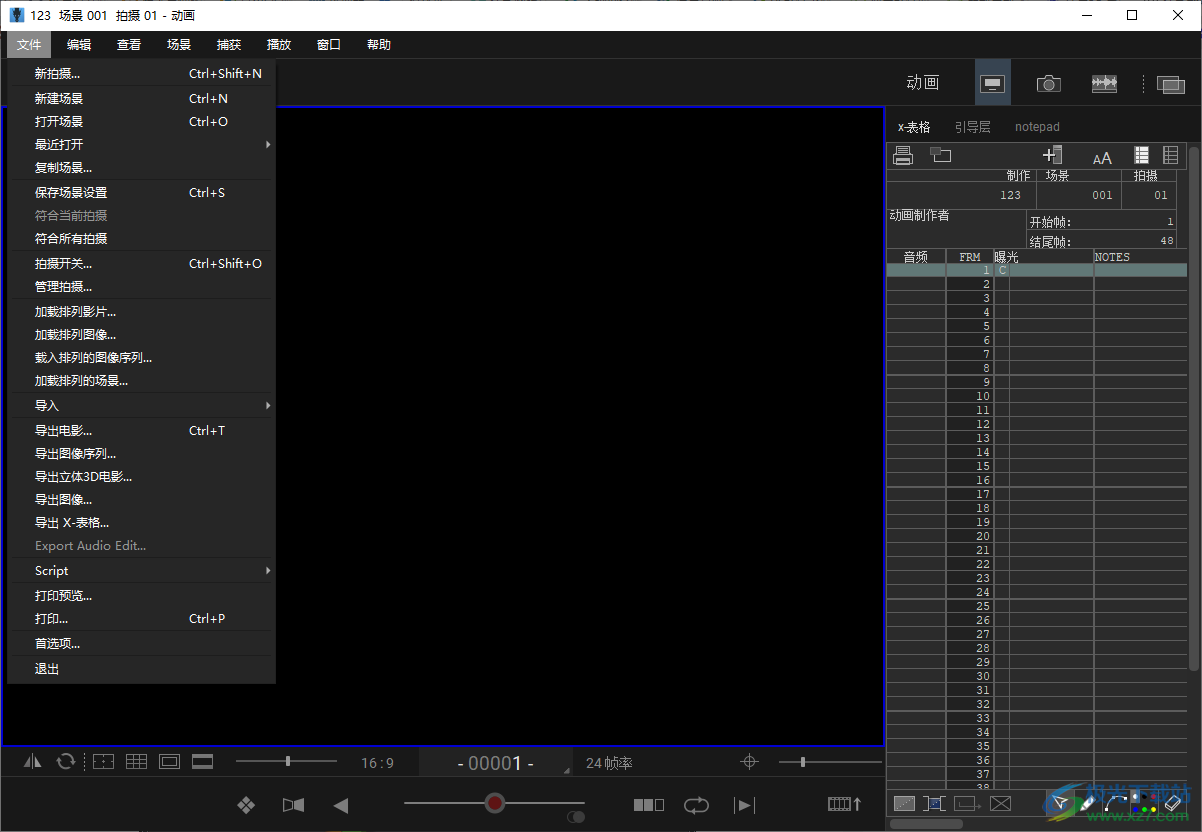
14. Shooting switch, managing shooting, loading arranged movies, loading arranged images, loading arranged image sequences
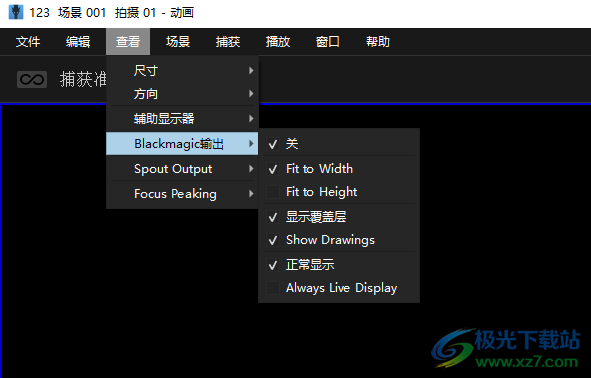
15. Blackmagic output: Fit to Width, Fit to Height, display overlay, Show Drawings
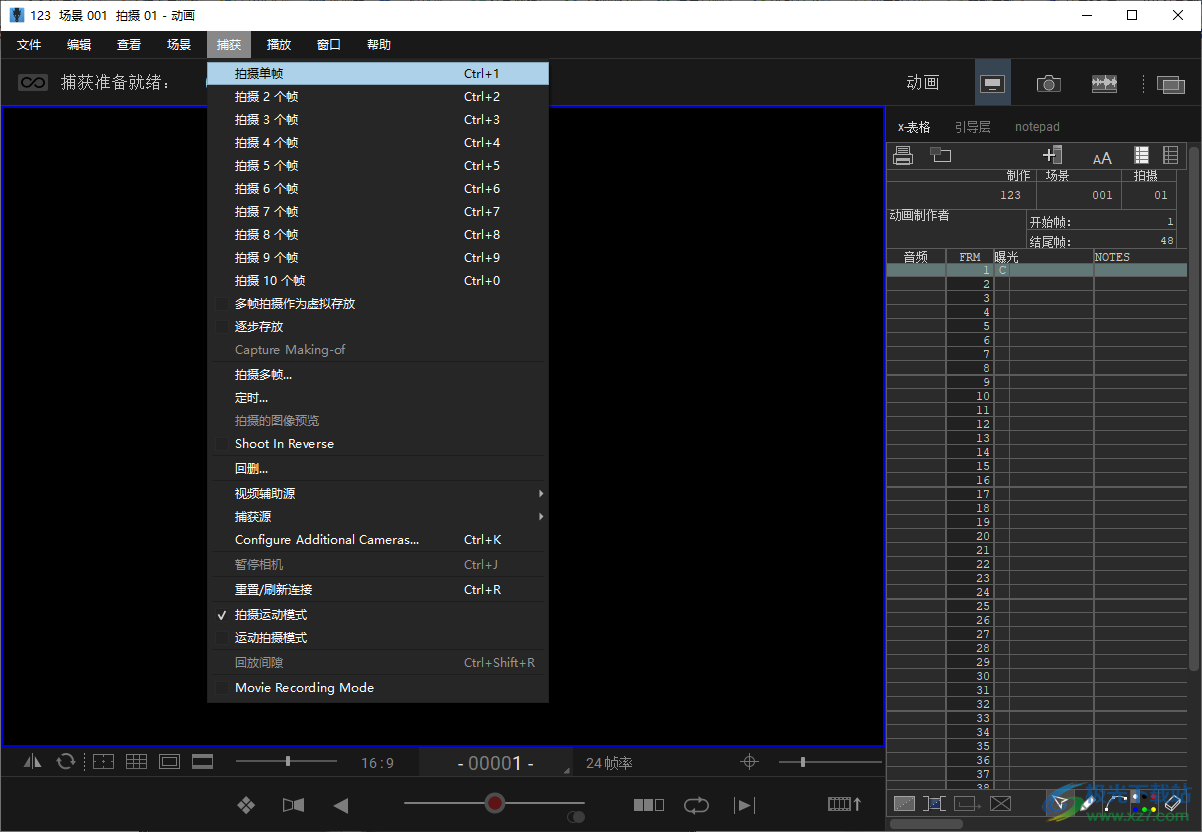
16. Shooting function, you can shoot a single frame in the software, and you can shoot two frames in the software
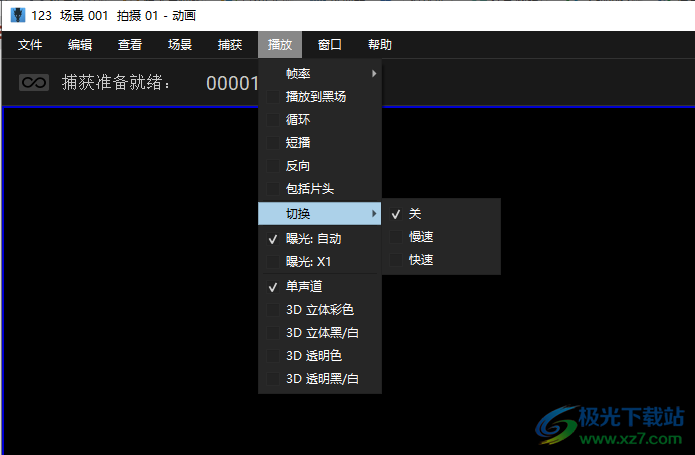
17. Play function, you can set the frame rate, cycle and switching mode in the software
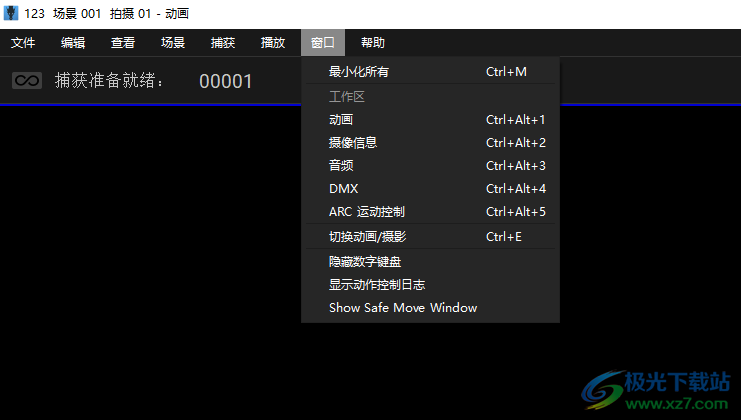
18. Window setting function, which can set animation, camera information, audio, DMX, ARC motion, and switch animation/photography
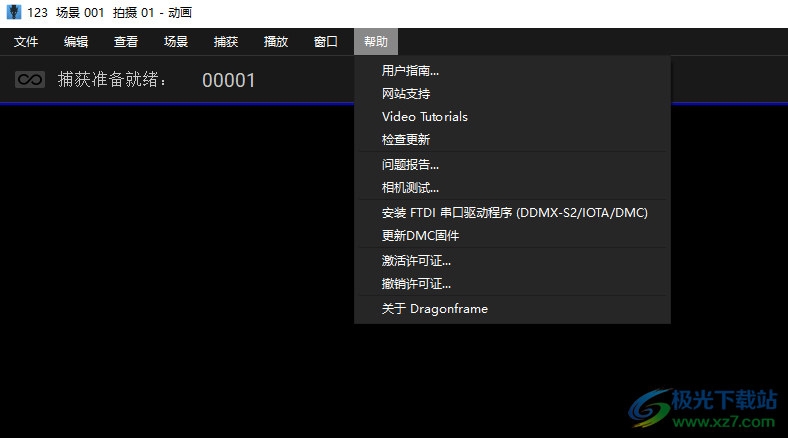
19. Help content, user guide can be opened in the software, and website can be opened
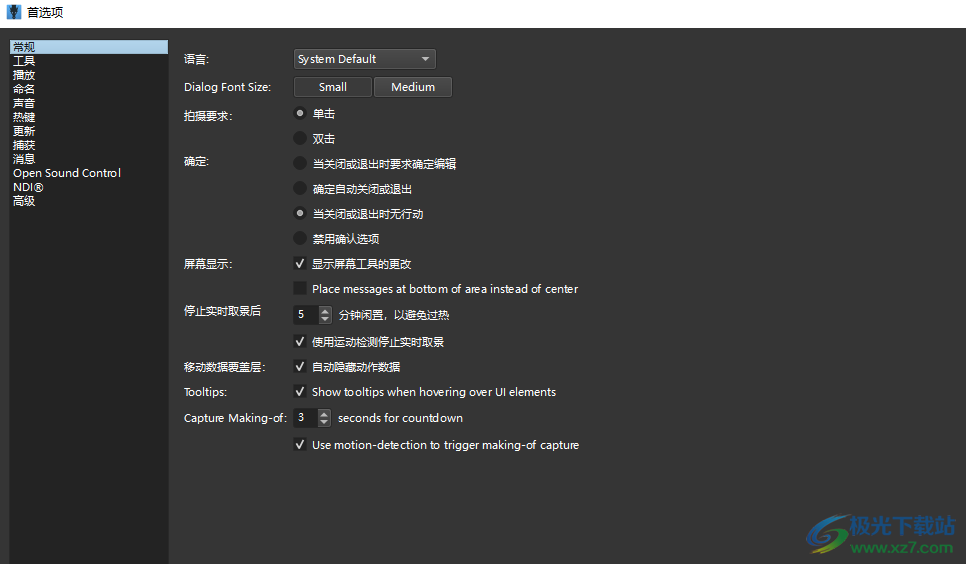
20. General Settings
Ask to confirm editing when closing or exiting
Confirm automatic shutdown or exit
No action when closing or exiting
Disable confirmation options
Change of display screen tool
Place messages at bottom of area instead of center
Minutes idle to avoid overheating
Stop live view using motion detection
Auto hide action data
Show tooltips when hovering over Ul elements
Update log
What's new in this release
Dragonframe 5 combines years of feedback from industry animators, camera technicians, directors and producers.
Version 5.1 changes
All
• Added hardware acceleration function for media layer playback on macOS and Windows.
• Added NDI video output, which can be used in the illusion engine.
• Contour Shuttle integration is added.
• Heif/heic image support is added.
• Use x264 mp4 output for better results and consistent support across all platforms.
animation
• Fixed media players can be selected so that they remain stationary when switching expos
Sures or real-time view zoom in position.
• Hotkeys switch bash lights in the animation workspace.
• The hotkey can switch the grid layer.
• Added "camera as media layer". If you have more than one camera, you can overlay one camera on another.
• A clearer high-resolution proxy for playback.
Camera support
• Support Z-CAM camera.
• Support SIGMA fp and fp L cameras.
Motion control
• Improved UI performance.
• Mobile test/real-time playback of index position
• Real time loop and table tennis play.
• You can choose to automatically start/stop movie recording through real-time playback.
• Redirect to move to the current location (requires virtualization).
• Determine if the movement can be done with a virtual rig.
• Added animator controlled axes and provided recording and playback options in the animation workspace.
DMX
• Supports up to four DMX "universes", each with 512 channels.
• Improved UI performance through multiple channels.
• Added gel selector for ARRI fixture with gel list.
audio frequency
• Restore the track sequence when loading the scene.
• Added lip sync movie export function.
X-Sheet
• Option to pop up to a separate window.
• Added several options for drawing tools