PSCS6 Tutorial - Get to know Photoshop in 3 minutes, and kill all zero base white people
Lesson 1 Get to know Photoshop CS (PS)
1、 Photoshop Introduction and Application Field
Photoshop is a cross platform plane image processing software developed by Adobe, and is the preferred software for professional designers. In February 1990, Adobe launched Photoshop 1.0, the latest version of which was Photoshop CS2 in May 2005, namely Photoshop 9.0.
Photoshop is an image processing software, its advantage is not graphics creation.
Image processing is to edit, process, process and apply some special effects to existing bitmap images; Common image processing software includes Photoshop, Photo Painter, Photo Impact, and Paint Shop Pro.
Graphic creation is based on your own ideas. Common graphic creation software includes Illustrator CorelDraw、Painter。
Application field: mainly used in graphic design, web design, digital darkroom, post processing of architectural renderings and image creativity.
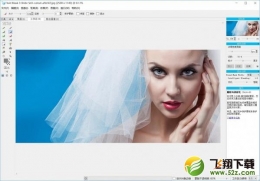
2、 Interface composition
Photoshop's interface consists of menu bar, tool option bar, toolbox, image window, floating palette, status bar, etc
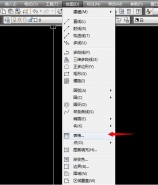
N Menu bar: All Photoshop operations are divided into nine categories, including nine menus. Such as editing, image, layer, filter;
N Tool Options Bar: the settings on the tool options bar will be different with different tools used;
N Toolbox: there are triangle marks under the tool, that is, there are other similar commands under the tool. When you select to use a tool, the tool options bar lists the options of the tool;
Press the shortcut key prompted on the tool to use the tool
Press the shortcut keys prompted on SHIFT+tools to switch between using these tools
Press TAB to show/hide toolboxes, tool palettes, and palettes
Press F to switch screen mode (standard screen mode, full screen mode with menu bar, full screen mode)
N Status bar: consists of four parts: image display scale, file size, floating menu button and tooltip bar;
N Floating palette: various palettes can be displayed in the window menu.
Double click the palette title to minimize or restore the palette
Drag the palette label to separate and place it in the palette
Triangle palette menu on the right of palette
Reset Palette Position Window ->Workspace ->Reset Palette Position
Storage Workspace Window ->Workspace ->Storage Workspace
SHIFT+TAB Show/Hide Palette
N Palette window: You can put commonly used palettes into it.
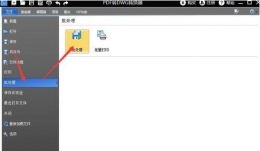
N File browser: professional image browser, which can preview pictures in various formats, and has batch processing and batch renaming functions.
3、 Basic concepts
1. Pixel: It is the most basic unit of an image, and it is a small square color block.
2. Image resolution: the number of pixels per unit area. The higher the resolution, the more pixels, and the greater the amount of information in the image. The unit is PPI (Pixels Per Inch). For example, 300PPI means that the image contains 300 × 300 pixels per square inch.
U The image resolution and image size determine the size and output quality of the file. The higher the resolution, the clearer the image, and the larger the generated file. Image resolution becomes a synonym between image quality and file size;
U If the image is used for printing, its resolution must be greater than or equal to 120 pixels/cm, and the conversion is about 300 pixels/inch.
3. Dot matrix image: also known as pixel image, that is, the image is composed of color squares, which is related to the resolution. The more pixels per unit area, the higher the resolution, the better the image effect. The display is generally 72PPI; It is generally used for printing at least 300PPI.
4. Vector diagram: it is composed of curves described in mathematical way, and its basic components are anchor points and paths. It is drawn by Coreldraw, Illustrator, FreeHand and other software, independent of resolution, and has no distortion after amplification.
5. Device Resolution, also known as output resolution, refers to the number of pixels represented by each inch of various output devices, in DPI (Dots Per Inch). Unlike the image resolution, the image resolution can be changed, but the device resolution cannot be changed. (such as common scanners)
6. Bit Resolution, also called bit depth or color depth, is used to measure the number of color bits stored in each pixel. Determines how much color information is stored in the image. The so-called "bit" actually refers to the square degree of "2"
7. Color mode: a color model used to display and print images. Commonly used are RGB, CMYK, LAB, grayscale, etc.
8. File format: Photoshop's default file format is PSD; PNG, JPEG and GIF are commonly used on web pages; EPS and TIFF are commonly used in printing. Photoshop supports almost all image formats.
9. Basic concept of PS learning: layered design
Using layers can process a pixel without affecting other pixels in the image. Think of the layer as a stack of acetate paper. If there is no image on the layer, you can always see the bottom layer. You can change the composition of the image by changing the order and attributes of the layers.
4、 Simple basic operation
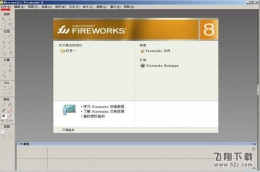
10. Open the software: During the startup of Photoshop, press CTRL+SHIFT+ALT to restore the software to its original state.
11. Preset software: preset the environment of Photoshop software, edit ->preset (CTRL+K).
U Temporary storage disk: It is the virtual memory generated by Photoshop software to improve the speed of Photoshop processing. When the first temporary storage disk is full, you need to delete unnecessary files in the hard disk to free more hard disk space. Photoshop software can set 4 temporary storage disks.
U Image cache: Speed up screen refresh for images.
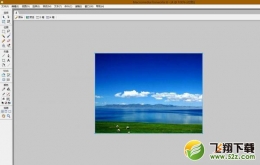
12. Open the picture: use the file browser to open the "Sample" folder in the "Photoshop" folder, or use File ->Open.
Tip: Double click the blank space to open the file.
13. New file: Method 1 - File ->New, Method 2 - CTRL+N, Method 3 - Press CTRL+double-click the blank space.
It includes preset image size, width, height, resolution, color mode, and background content.
14. Browse pictures:
Zoom tool (Z): the minimum zoom range is 1 pixel~1600%;
ALT+Zoom Out
CTRL+Space, And click to temporarily switch to zoom in
ALT+Space, And click the temporary switch to zoom out
Double click the zoom tool or CTRL+ALT+0 actual pixel size (i.e. 100% display scale)
CTRL key drag in the navigator to enlarge the area
CTRL+"+" Zoom in
CTRL+"-" Zoom Out
CTRL+0 Full canvas display
Grab tool:
Double click gripper full canvas display
Under any tool, press SPACE to temporarily switch to the grab tool
15. Foreground color and background color:
Foreground fill ALT+DEL or ALT+BackSpace
Background color fill CTRL+DEL or CTRL+BackSpace
D key restores the default foreground color (black) and background color (white).
X key switches the foreground color and background color
16. Other auxiliary operations:
CTRL+Z One Step Undo
CTRL+ALT+Z Multi step Undo
CTRL+R Show Hide Ruler
CTRL+'Show hidden grid
Under any tool, press CTRL to temporarily switch to the move tool
In any tool, press CTRL+ALT to temporarily switch to the copied layer and selection area
Lesson 2 Creating a Selection Area
What is the most important and indispensable function of Photoshop? In Photoshop, the most important function is to select regions. According to the content to be selected, use the most appropriate selection command to select the content best and fastest. Each selection tool or command has its own advantages and disadvantages. Is the selected area regular or irregular? Is it a more consistent color or multi-color? Is it strongly contrasted with the background, or is it mixed together? Or is it partly strong or partly mixed? Then select the best selection tool and command, or use multiple tools and commands together.
Auxiliary operation
1. Ruler:
Show hidden ruler CTRL+R
Modify Origin Mouse Drag
Restore the origin Double click the upper left corner of the ruler
Set unit Double click ruler setting
2. Grid
Show hidden grid CTRL+'
Align Grid View ->Align ->Grid
3. Reference line
New Guide Drag the guide out of the ruler
Clear Guides Press CTRL and drag the ruler back
Move Guide Press CTRL, drag
Set guide line Press CTRL, double-click
Show hidden guides Press CTRL+;
View ->Align to CTRL+SHIFT+;