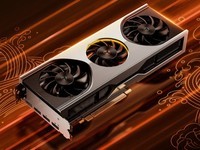
[Zhongguancun Online] Seven Rainbow Z270 evaluation: Although many netizens generally understand the combination of various hardware when installing the machine, they can baffle many people in the jumper link, so today we will demonstrate the chassis and a main board Connection strategy between.
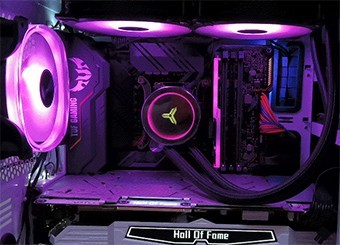
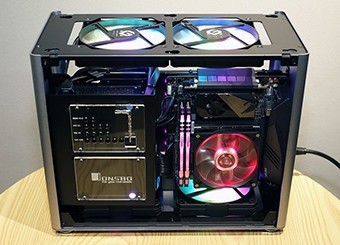
In this video, we use the iGameZ270 Flame Ares U motherboard as an example to demonstrate. The video demonstration is as follows:
We all know that different chassis manufacturers have their own designs, and the interface design and layout of the I/O panel are also different, so there are also some differences in the connection lines. Let's take a look.
The cables in the chassis mainly include Power SW, Power LED, RESET SW, H.D.D LED, F_USB, F_AUDIO
Power means the power switch, which is mainly responsible for controlling the switch of the computer host
Power LED means the power indicator, which is actually the power cord of the power LED
H. D. D LED is the hard disk indicator, that is, the power cord of the hard disk LED.
USB refers to the front USB interface, which mainly provides power supply and data transmission for the front USB
HD AUDIO is the front audio interface, which is the headphone and microphone jack on the chassis panel,
After talking about the chassis, let's take a look at the standards on the motherboard. It corresponds to the wire of the chassis, and the motherboard also has a corresponding slot area, that is, PANEL or F_PANEL
Mainboard PANEL area layout
The power switch has two pins, which may be marked with Power SW, PW, PWR, PWRBTN, POWER, ON/OFF, etc. Short circuiting the two pins without connecting the chassis can also play the role of the power on key.
Mainboard PANEL area layout
The restart switch is also two pins. Possible labels include RESET SW, RESET, RES, RST, etc. Short circuiting the two pins without connecting the chassis can also play the role of the restart key.
The power indicator is mostly marked as PLED or PWR_LED; Hard disk indicators are mostly labeled as HDLED or HD.
Front USB 3.0 interface provided by the motherboard
F_USB refers to the front USB interface, and F stands for front.
Similarly, F_AUDIO refers to the front audio interface, which is the same design as the chassis. The blue 19 pin socket of F_USB 3.0 is the front USB 3.0 interface.
In addition, SPEAKER or SPK refers to the working alarm of the motherboard. IR/CIR represents the infrared interface, J_PRINT is the printer interface, and J_COM is the COM interface.
After introducing the description of plugs and pins, wiring must be very easy for everyone, as long as the corresponding cable is connected to the pins. The pin with black vertical line on the base is positive
It should be noted here that in addition to power on and restart, the positive and negative poles of the cable and the motherboard should be distinguished when wiring. Generally, the positive pole and negative pole will be marked on the cable. The white line is generally the negative pole, and the colored line is the positive pole; Positive pole and negative pole will also be marked on the main board. If there is no mark, it is generally the positive pole with black vertical line on the base.
Well, this installation is here without asking anyone.
This article is an original article. If it is reproduced, please indicate the source: These tips for installing jumpers are common. I won't tell him //diy.zol.com.cn/651/6517384.html
The above is a report on the product evaluation of the Seven Rainbow Z270. Users are welcome to express their personal opinions or @ the author's direct questions under the article. Please follow the report of Zhongguancun Online on the evaluation of the Seven Rainbow Z270 product, including its pictures, application analysis and videos.
//diy.zol.com.cn/651/6517384.html
diy.zol.com.cn
true
Zhongguancun Online
//diy.zol.com.cn/651/6517384.html
report
one thousand nine hundred and eleven
[Zhongguancun Online] Seven Rainbow Z270 evaluation: Although many netizens generally understand the combination of various hardware when installing the machine, they can baffle many people in the jumper link, so today we will demonstrate the wiring strategy between the chassis and the motherboard. In this video, we use the iGameZ270 Flame Ares U motherboard as an example to demonstrate. The video demonstration is as follows: We all know that